If you’ve wondered how to clean and protect your car dashboard without spending an hour or making a greasy mess, this quick, pro-level routine is for you. In about nine minutes, you’ll remove dust and embedded grime, avoid overspray on sensitive electronics, and lay down a durable UV barrier that keeps plastics from cracking, fading, and turning that tired gray. You only need plain water, a quality two-in-one interior cleaner/protectant, a synthetic detailing brush, and three microfiber cloths. Follow the steps below to prep in the shade, load product into the brush (never onto the dash), treat delicate screens correctly, and finish with a proper buff for a factory-fresh, low-gloss look that lasts for months.
Before we jump into the steps, here’s the short list of things you need: a spray bottle of plain water, Chemical Guys Total Interior Cleaner and Protectant (the two-in-one formula I use), a large synthetic detailing brush (I use the Detail Factory synthetic brush), and three clean microfiber cloths (one damp for initial dusting, one with cleaner for application, and a final plush cloth for buffing). That’s it. This method is not sponsored — I just use these products because they work.
Table of Contents
- Step 1: Prep the Area — Work in the Shade 🌤️
- Step 2: Apply Cleaner into the Brush — Never Spray the Dashboard Directly 🧴
- Step 3: Handle Delicate Areas & Screens Carefully 📺
- Step 4: Buffing — The Finishing Touch That Makes the Difference ✨
- Step 5: Maintenance — How Often to Repeat 🔁
- Why This Method Works & Common Mistakes to Avoid 🧠
- FAQ — Your Dashboard Questions Answered ❓
- Conclusion — A Small Effort for Long-Term Protection 🏁
Necessary Product links (Amazon US):
| Product | Link |
|---|---|
| CarPro Dilute Spray Bottle (500 ml) | Check availability on Amazon |
| The Rag Company – The Gauntlet Microfiber Drying Towel | Amazon |
| Chemical Guys Total Interior Cleaner & Protectant (2-in-1) | Amazon |
| Detail Factory Synthetic Detailing Brush | Amazon |
| Chemical Guys Microfiber Towels (16″×16″, 12-pack) | Amazon |
Step 1: Prep the Area — Work in the Shade 🌤️
First things first: do this in the shade. Working in direct sun causes cleaners to evaporate too quickly and increases the risk of streaks and residue. Lightly mist a plush microfiber towel with water and use it to wipe the entire dashboard and vents to remove loose dust and dirt. This removes the grit that can otherwise get pushed into surfaces when you start scrubbing.
“UV rays are slowly destroying it every single day.”
Use the damp towel to reach into nooks and crannies. If you skip this step, you’ll be spreading dust around when you apply the cleaner. A little prep goes a long way — it sets you up for a clean, smooth finish without accidental scratches.
Step 2: Apply Cleaner into the Brush — Never Spray the Dashboard Directly 🧴
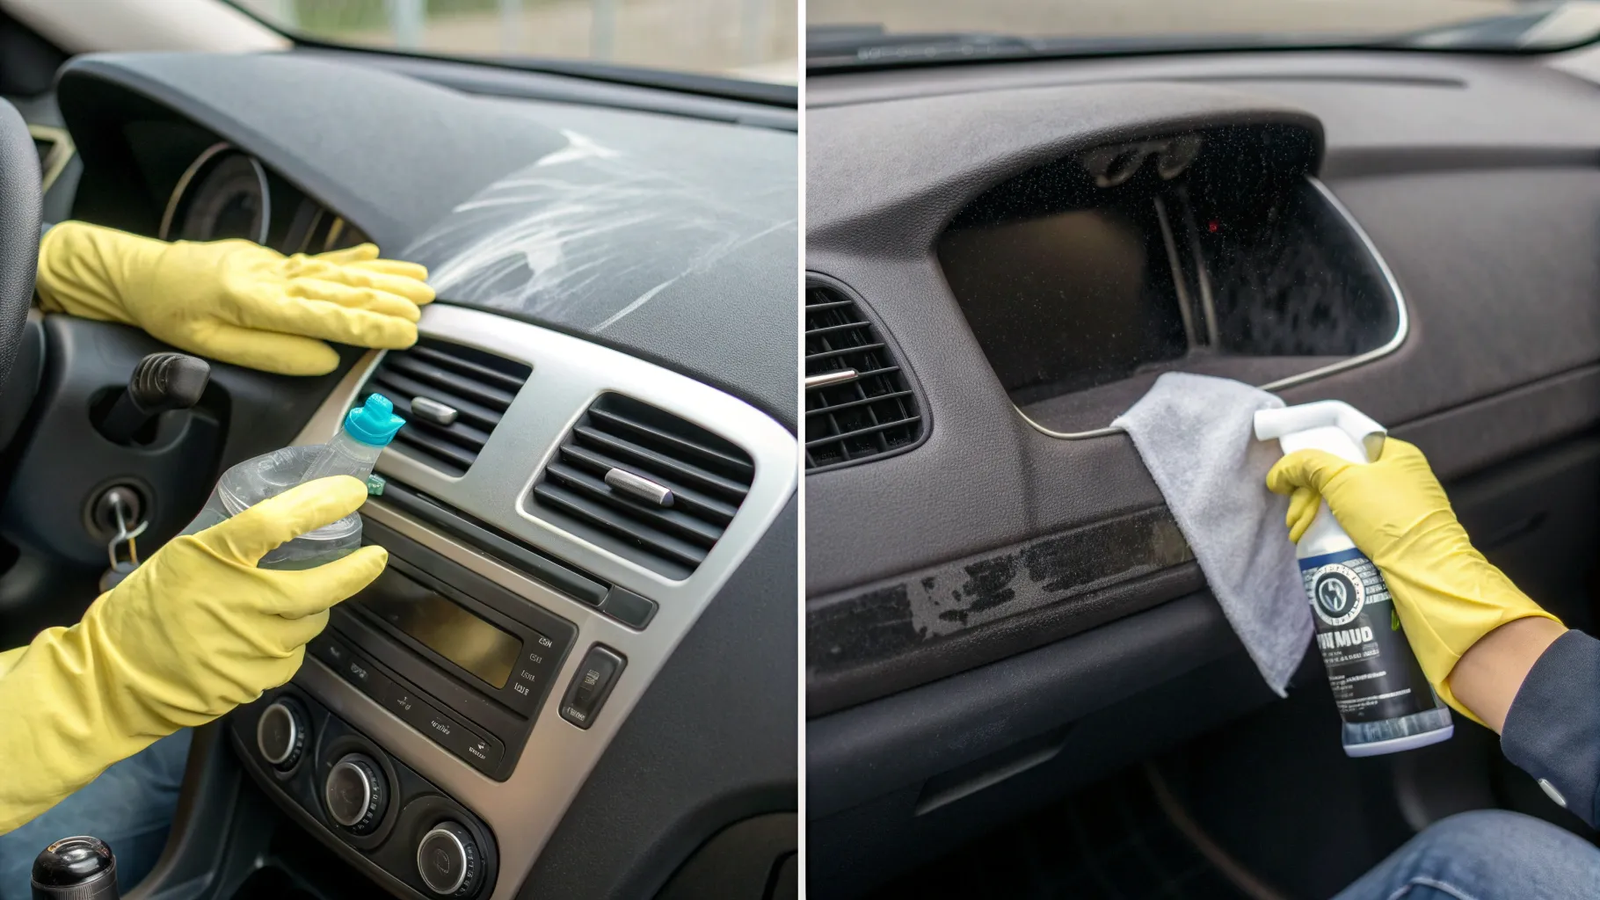
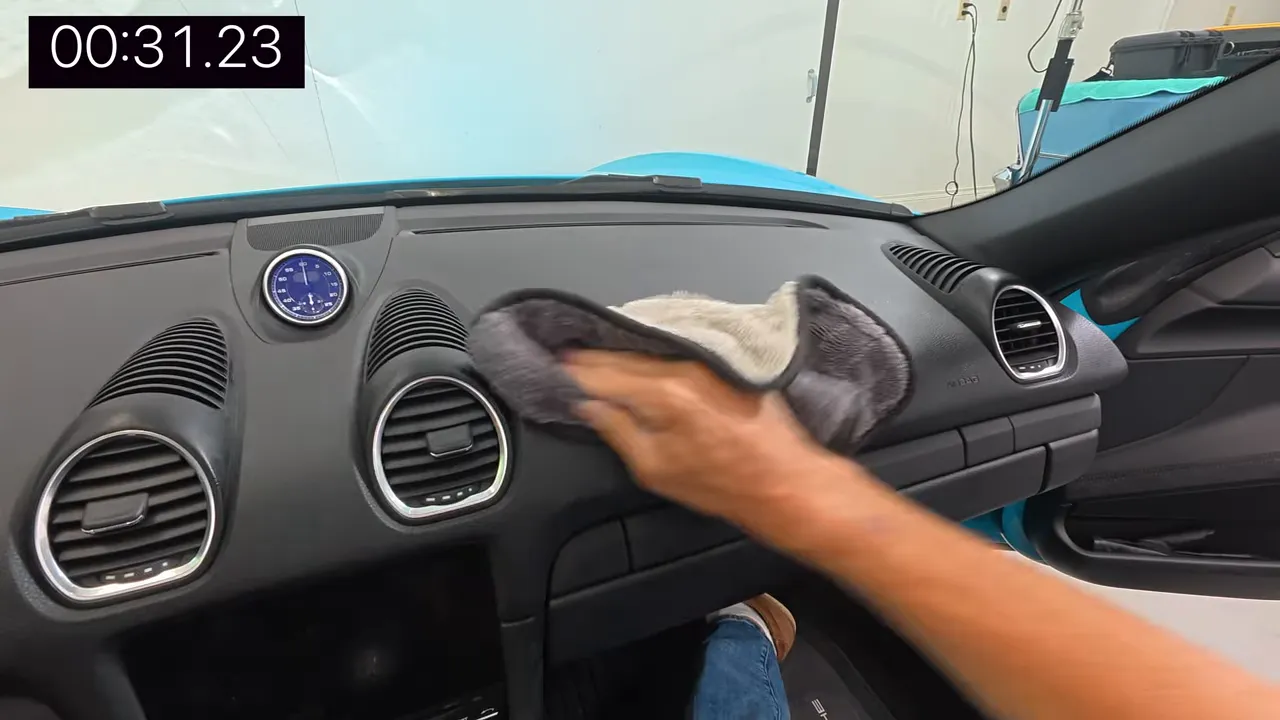
This is the key trick I use: never spray product directly onto the dash. Electronics, sensors, and glass can be damaged by overspray, and product on the windshield produces annoying streaks. Instead, spray the Chemical Guys Total Interior Cleaner and Protectant into the head of your detailing brush (outside the car if possible), then agitate the surface with the brush in a circular motion.
Work section by section: start with the passenger side (it’s easier), then move to the driver’s side. Use the brush to get into textured areas, ridges, valleys, and around vents — these spots trap invisible buildup and dust. You’ll need to reload the brush with cleaner often so it remains effective. The circular brushing motion helps the two-in-one formula lift grime while laying down a protective UV barrier.
The Chemical Guys formula is a two-in-one cleaner and protectant, meaning it cleans plastic, vinyl, leather, cloth, glass, and even piano black panels in one step.
Step 3: Handle Delicate Areas & Screens Carefully 📺
Some surfaces need gentler care. Instrument clusters and pop-up screens can be easily scratched, so for these use only a water-dampened microfiber towel — no cleaner directly. For the GPS or LCD display, lightly spray cleaner onto a separate slightly damp microfiber towel and wipe across the screen in straight lines. Follow immediately with a dry portion of the towel to remove any residue. This prevents streaks and preserves touch sensitivity.
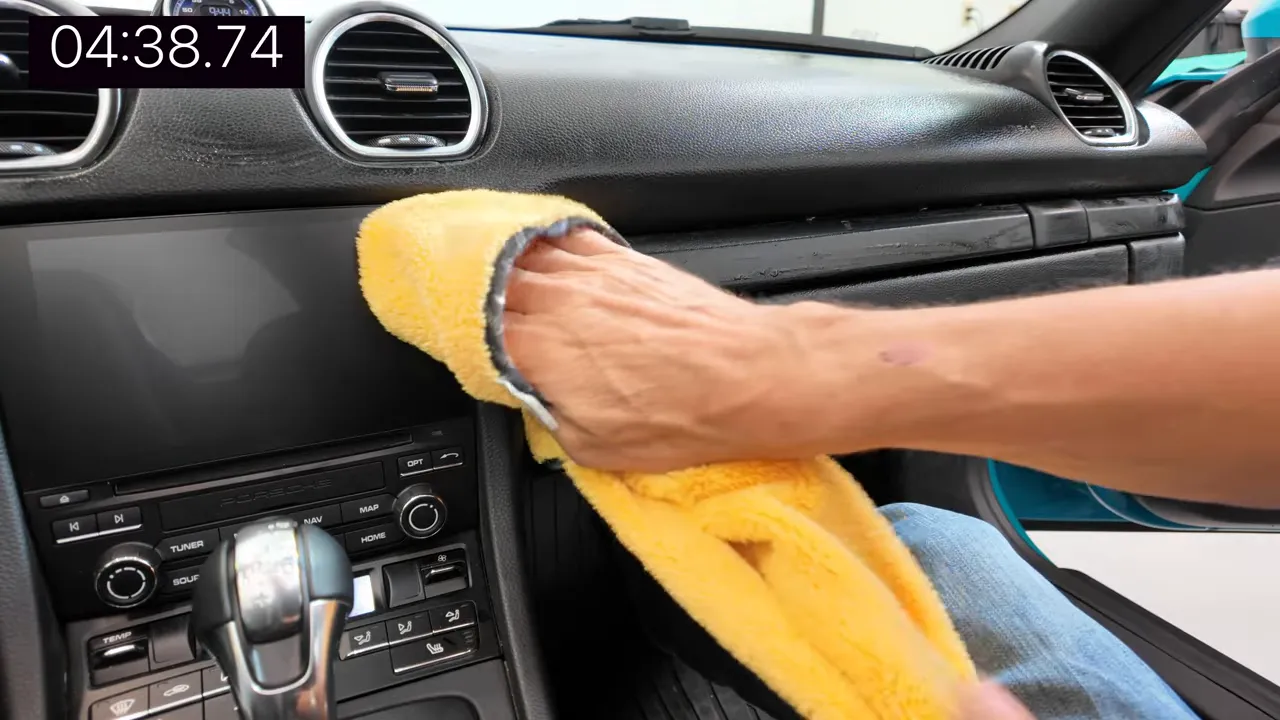
Lower portions of the dash and the front of the glove box deserve attention too. Dirt accumulates there and, if ignored, will make the dashboard look worn even after you clean the top. Work the cleaner on the top, front, and ends of each section so every visible surface gets protected.
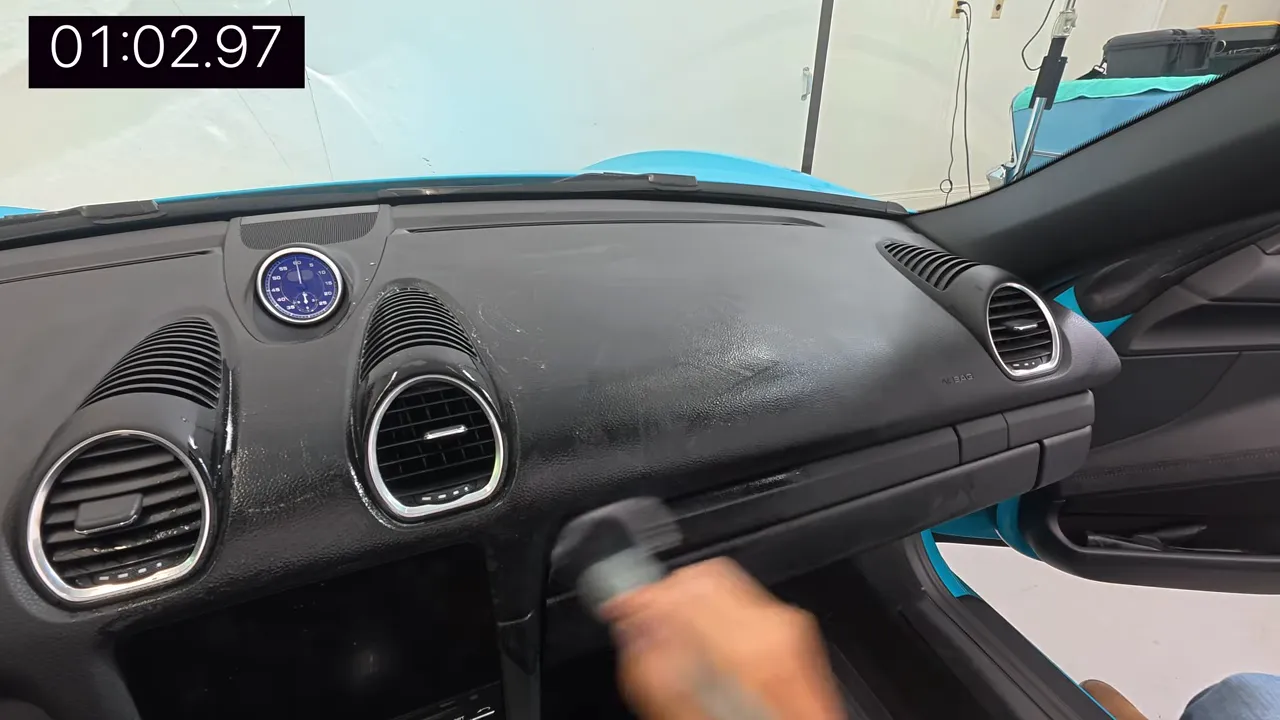
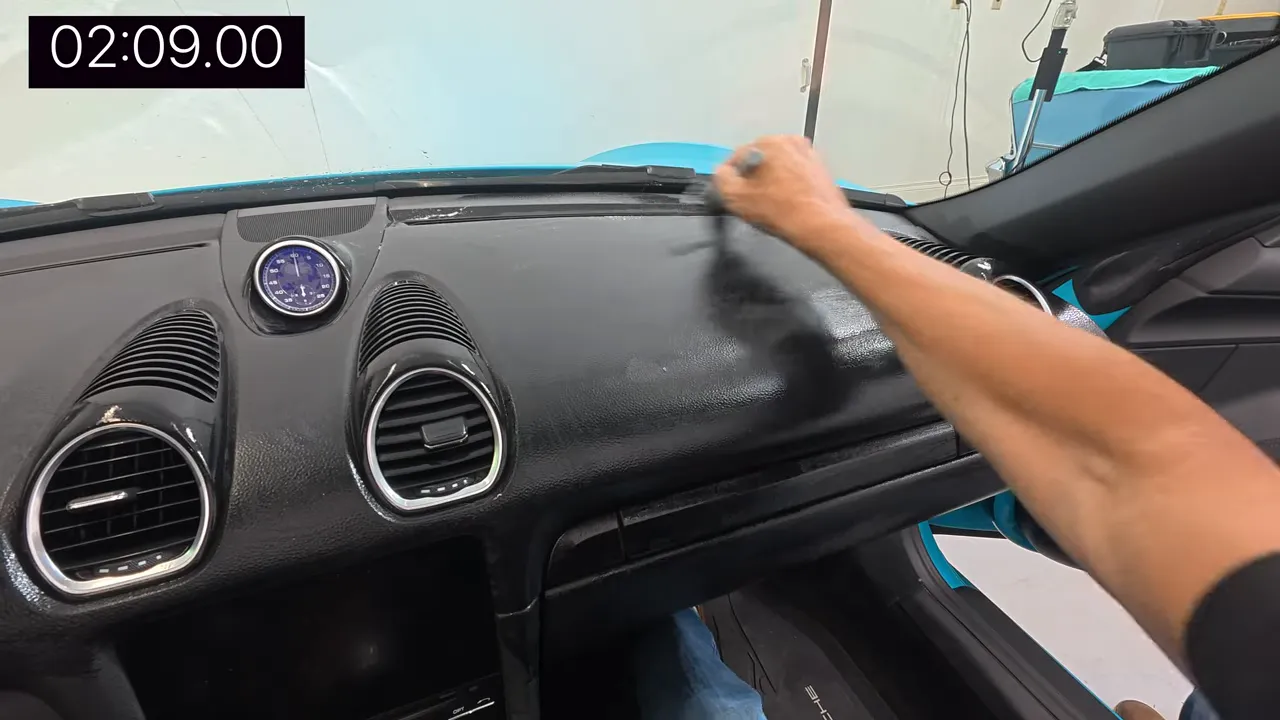
Step 4: Buffing — The Finishing Touch That Makes the Difference ✨
Grab your final, clean plush polishing microfiber and buff the entire dashboard. Use back-and-forth strokes and gentle circular motions — you’re not scrubbing, you’re polishing. This step removes any excess product, evens out the finish, and brings the dash to that factory-fresh look. The buff is what separates “clean” from “amazing.”

Make sure you buff right to the base of the windshield to eliminate build-up that can cause streaks later. Give the driver’s side a final once-over; it’s where wear shows most and where you’ll notice the transformation immediately.
Step 5: Maintenance — How Often to Repeat 🔁
A couple minutes of work now equals months of protection. I recommend reapplying this process every 2–3 months if your car spends a lot of time in the sun, or every 4–6 months for garage-kept vehicles. If you use a cover or park shaded regularly, you can stretch out the interval. The important thing is consistent prevention — it’s far easier than repairing a cracked or faded dash later.
When you reapply, you can skip the heavy brushing if the dash still looks good — simply wipe clean and refresh with the two-in-one. But if you notice texture buildup or stubborn grime, repeat the full brush-and-buff routine.
Why This Method Works & Common Mistakes to Avoid 🧠
Why this works: the Chemical Guys Total Interior Cleaner is formulated to lift invisible buildup while leaving an invisible UV-protective barrier on the surface. The brush helps agitate textured surfaces so the cleaner can reach embedded dirt, and the buff evens out product deposition so you get a consistent, low-gloss, factory look rather than an oily shine.
- Common mistakes:
- Spraying product directly onto the dash (risking electronics and glass contamination).
- Using rough or dirty cloths that can scratch sensitive surfaces.
- Skipping the buff — you’ll be left with streaks or a greasy finish.
- Applying on a hot, sun-soaked surface where the cleaner evaporates too quickly.
Avoid these and you’ll get long-lasting results with minimal effort.
FAQ — Your Dashboard Questions Answered ❓
Is this safe for leather and suede/alcantara?
Yes. The two-in-one formula is safe for leather and cloth when used lightly. For suede or open-pore materials (like alcantara), test an inconspicuous area first and avoid heavy saturation. Use the brush only on plastic/vinyl/textured surfaces; for suede use a soft brush designed for that material.
Can I use this on piano black trim and glossy plastics?
Yes. The formula cleans and protects those surfaces, but be conservative — wipe in the direction of the grain and buff well to avoid streaking. Test small areas first if you’re unsure.
How often should I clean vents?
Include vents in your full-dash routine every 2–3 months. If you notice dust blowing from the vents, clean them immediately. Use the detailing brush to agitate and a vacuum or compressed air (used carefully) to remove loosened dust.
What if my dashboard is already cracked or faded?
If cracking is already present, you can’t fully reverse it with this method. However, cleaning and adding a UV barrier prevents further deterioration and can improve appearance. For severe cracking, consult a professional for repair or replacement and then use the routine to protect the new surface.
Is this video sponsored?
No — this method and the products I recommend are my personal choices. I include product links for convenience, and some may be affiliate links, but the advice is mine and not sponsored.
Can I substitute the Chemical Guys product with something else?
Yes — look for a quality two-in-one interior cleaner & protectant that specifically states UV protection. Avoid products that leave heavy oily residues or those labeled purely as “dressings.” The key is a cleaner that also lays down UV protection without a greasy finish.
Conclusion — A Small Effort for Long-Term Protection 🏁
If you follow these steps — prep with a damp microfiber, apply cleaner to your brush (never spray the dash), gently agitate textured areas, clean screens carefully, and finish with a proper buff — you’ll give your dashboard months of protection in about nine minutes. Prevention is far cheaper and easier than repair. A little regular care will keep your interior looking fresh, keep resale value up, and prevent that painful cracked-and-gray look that ruins a great car.
If you found this guide helpful, please show some love: hit like, subscribe for more easy car care tutorials, and keep an eye out for my quick tips on cleaning the inside of your windshield — it’s another fast win for better visibility and a cleaner cabin.

Product links (Amazon US):
- CarPro Dilute Spray Bottle (500 ml): Check availability on Amazon
- The Rag Company – The Gauntlet Microfiber Drying Towel: Amazon
- Chemical Guys Total Interior Cleaner & Protectant (2-in-1): Amazon
- Detail Factory Synthetic Detailing Brush: Amazon
- Chemical Guys Microfiber Towels (16″×16″, 12-pack): Amazon
