Changing a tire is a fundamental skill that every driver should possess. Whether you find yourself stranded on the side of the road due to a flat tire or simply need to replace a worn-out tire, knowing how to change a tire can save you time, money, and stress. The process may seem daunting at first, especially for those who have never attempted it before, but with the right knowledge and tools, it can be accomplished efficiently and safely.
Understanding the importance of being able to change a tire goes beyond just the act itself; it fosters a sense of independence and confidence in your driving abilities. In addition, it can be a valuable skill in various situations, whether you are on a long road trip, commuting to work, or running errands around town.
By familiarizing yourself with the process and practicing it in a safe environment, you can ensure that you are ready to tackle this task when the need arises.
Key Takeaways
- Changing a tire is a necessary skill for all drivers
- Step 1: Find a safe location to park the vehicle
- Step 2: Gather necessary tools including a jack, lug wrench, and spare tire
- Step 3: Loosen the lug nuts before lifting the vehicle
- Step 4: Lift the vehicle using the jack
- Step 5: Remove the flat tire and install the spare tire
- Step 6: Lower the vehicle and tighten the lug nuts
- Step 7: Lower the jack and remove it from under the vehicle
- Conclusion: Changing a tire is a simple process, but safety is key. Always be cautious and aware of your surroundings.
Step 1: Find a Safe Location
The first step in changing a tire is to find a safe location to perform the task. If you experience a flat tire while driving, it is crucial to remain calm and avoid panicking. Look for a flat, stable surface away from traffic where you can safely pull over.
Ideally, this should be a parking lot or an area with ample space to maneuver. If you are on a highway or busy road, try to exit onto a side street or find an emergency lane where you can stop without endangering yourself or other drivers. Once you have found a suitable location, turn on your hazard lights to alert other drivers of your situation.
This is an essential safety measure that helps prevent accidents while you are working on your vehicle. If possible, set up warning triangles or flares behind your car to provide additional visibility. Ensuring that you are in a safe environment is paramount; it allows you to focus on the task at hand without the added stress of worrying about oncoming traffic.
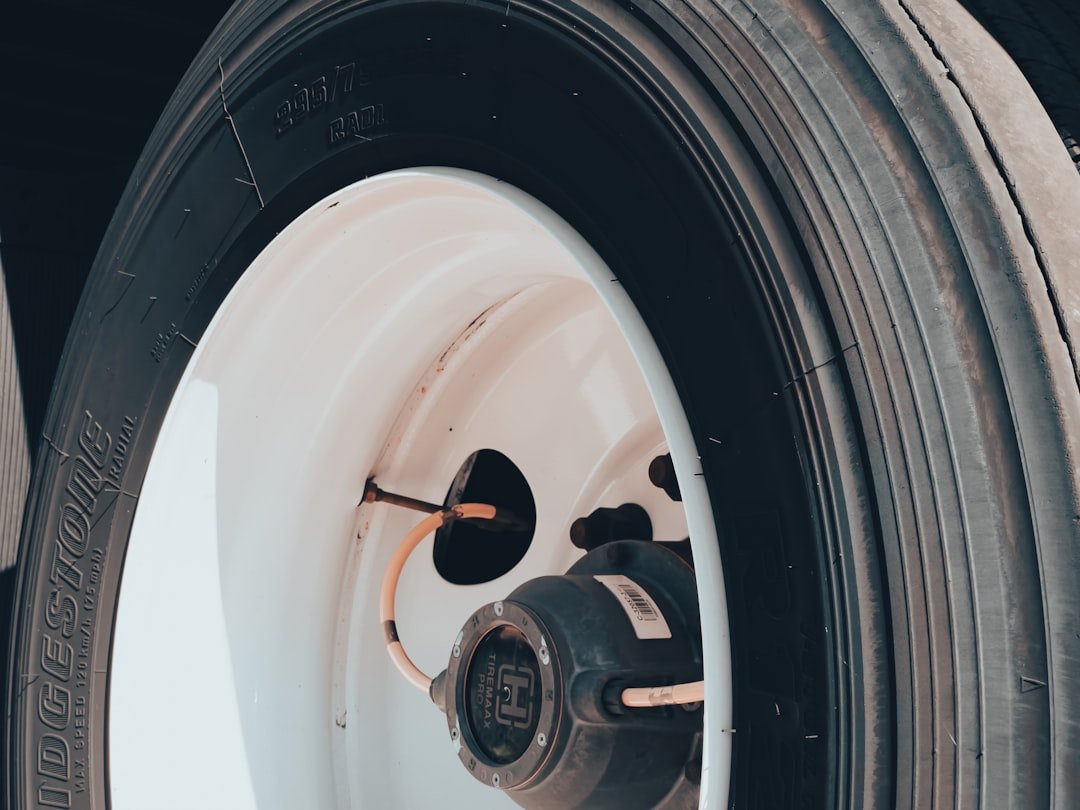
Step 2: Gather Necessary Tools

Before you begin the process of changing your tire, it is essential to gather all the necessary tools and equipment. The basic tools required for this task typically include a spare tire, a jack, and a lug wrench. A spare tire is crucial; it should be properly inflated and in good condition.
Many vehicles come equipped with a temporary spare tire, often referred to as a “donut,” which is lighter and smaller than a full-size tire but is only meant for short distances. The jack is another critical component; it is used to lift the vehicle off the ground so that you can remove the flat tire and install the spare. There are various types of jacks available, including scissor jacks and hydraulic jacks, each with its own advantages.
A lug wrench is necessary for loosening and tightening the lug nuts that secure the tire to the wheel hub. Some vehicles may also come with additional tools such as wheel chocks or gloves, which can enhance safety and ease during the process.
Step 3: Loosen the Lug Nuts
| Step 3: Loosen the Lug Nuts | |
|---|---|
| Time taken | 5 minutes |
| Number of lug nuts | 5 |
| Tools required | Lug wrench |
| Recommended torque | 80 ft-lbs |
Once you have gathered all your tools and ensured that your vehicle is securely parked, the next step is to loosen the lug nuts on the flat tire. Before lifting the vehicle with the jack, it is advisable to loosen the lug nuts while the tire is still on the ground. This prevents the wheel from spinning and allows you to apply more force when loosening them.
Using your lug wrench, turn each lug nut counterclockwise until they are loose but not completely removed. It is important to follow a specific pattern when loosening lug nuts, especially if there are five or more nuts securing the wheel. A common practice is to use a star pattern: loosen one nut slightly, then move to the opposite nut, and continue this pattern until all nuts are loosened.
This method ensures even pressure distribution on the wheel and prevents warping or damage. If any lug nuts are particularly stubborn, applying penetrating oil can help ease their removal.
Step 4: Lift the Vehicle
With the lug nuts loosened, it’s time to lift the vehicle using your jack. Position the jack under the vehicle at the designated lifting point, which is usually indicated in your owner’s manual or marked on the vehicle itself. This point is typically located near the rear or front axle, depending on which tire you are changing.
Once the jack is securely positioned, begin raising the vehicle by turning the jack handle or pressing the hydraulic lever, depending on your jack type. Lift the vehicle until the flat tire is approximately six inches off the ground; this height will provide enough clearance for removing and replacing the tire safely.
As you lift, keep an eye on the stability of the vehicle; if it appears unsteady or wobbly, lower it back down and reposition the jack before continuing.
Step 5: Remove the Flat Tire

Now that your vehicle is elevated and secure, you can proceed to remove the flat tire. Begin by fully unscrewing each of the loosened lug nuts using your lug wrench. It’s advisable to keep them in a safe place where they won’t get lost during this process—placing them in your pocket or in a small container can be effective.
Once all lug nuts are removed, carefully pull the flat tire straight off the wheel hub. When handling the flat tire, be cautious of any sharp objects or debris that may have caused the puncture. Inspecting the tire can provide insight into what went wrong; for instance, if there’s visible damage like a nail or tear, it may be possible to repair it later if it’s not too severe.
However, if you notice significant damage or wear, replacing it with your spare tire is essential for safety.
Step 6: Install the Spare Tire
With the flat tire removed, it’s time to install your spare tire onto the wheel hub. Align the holes in the spare tire with those on the wheel hub and carefully slide it onto place. It’s important to ensure that it fits snugly against the hub; if it doesn’t seem to align properly, double-check that there are no obstructions preventing it from seating correctly.
Once positioned correctly, take your lug nuts and hand-tighten them onto each bolt by turning them clockwise. It’s crucial not to fully tighten them at this stage; just ensure they are secure enough to hold the spare in place while you lower the vehicle back down. Following this step ensures that when you do tighten them fully later on, they will be properly aligned and seated against both the spare tire and wheel hub.
Step 7: Lower the Vehicle
After installing your spare tire and hand-tightening the lug nuts, it’s time to lower your vehicle back down to ground level. Carefully operate your jack in reverse by turning the handle or releasing hydraulic pressure until the vehicle gently rests back on its tires. As you lower it, keep an eye on both stability and alignment; ensure that everything appears secure before fully releasing pressure from the jack.
Once your vehicle is back on solid ground, take a moment to check that everything looks correct before proceeding further. The spare tire should be firmly in place against the wheel hub without any visible gaps or misalignment. This step is crucial because any oversight here could lead to complications when driving away.
Step 8: Tighten the Lug Nuts
With your vehicle safely lowered back onto its tires, it’s time to tighten those lug nuts securely. Using your lug wrench again, follow a star pattern similar to when you loosened them—this ensures even distribution of pressure across all nuts and helps prevent warping of both wheel and brake components over time. Start by tightening one nut firmly before moving across to its opposite counterpart.
Continue this pattern until all lug nuts are tightened adequately; they should be snug but not overly tight as overtightening can lead to damage or make future removal difficult. A good rule of thumb is to apply enough force so that they feel secure without straining yourself excessively—if you’re unsure about how tight they should be, consult your vehicle’s manual for specific torque specifications.
Step 9: Lower the Jack
After ensuring that all lug nuts are tightened properly, it’s time to lower your jack completely and remove it from under your vehicle. This step involves reversing whatever mechanism your jack uses—whether it’s turning a handle or releasing hydraulic pressure—until it’s fully lowered back down onto its base position. Once lowered completely, take one last look around your work area before driving away; ensure that no tools have been left behind and that everything appears secure with your newly installed spare tire.
It’s also wise at this point to check if there’s any visible damage around where you worked—this could include checking for leaks or other issues that might need addressing later.
Conclusion and Safety Tips
Changing a tire may seem like an intimidating task at first glance; however, with practice and knowledge of each step involved in this process, anyone can become proficient at it over time. Remember always to prioritize safety—both yours and others’—by ensuring you’re in a secure location before starting work on your vehicle. Additionally, familiarize yourself with your specific vehicle’s manual regarding recommended procedures for changing tires as well as any unique features related specifically to your model type—this knowledge will serve you well during emergencies!
Regularly check your spare tire’s condition too; ensuring it’s properly inflated and free from damage will make all difference when faced with an unexpected flat while out on roads!
If you’re looking to expand your DIY skills beyond changing a tire, you might want to check out this article on how to sharpen kitchen knives at home. It’s a useful guide for keeping your kitchen tools in top shape. Or, if you’re interested in upcycling and furniture making, you can read about whether a pallet coffee table is worth it. And for those who love to entertain, consider investing in one of the top-rated trivet sets for hot dishes to protect your table while serving meals.
FAQs
What tools do I need to change a tire?
To change a tire, you will need a jack, a lug wrench, a spare tire, and a wheel chock. It’s also a good idea to have gloves and a flashlight on hand.
How do I safely jack up my car to change a tire?
First, make sure your car is on a flat, stable surface. Use the wheel chock to secure the tire opposite the one you are changing. Then, locate the jack point on your car and carefully position the jack under it. Use the jack to lift the car until the tire is off the ground.
How do I remove the lug nuts to change a tire?
Use the lug wrench to loosen the lug nuts by turning them counterclockwise. It may require some force, as the lug nuts are often on very tight.
How do I remove the flat tire and install the spare tire?
Once the lug nuts are loosened, remove them completely and set them aside. Then, carefully remove the flat tire and set it aside. Place the spare tire onto the wheel studs and hand-tighten the lug nuts.
How do I lower the car and tighten the lug nuts to change a tire?
Use the jack to lower the car back to the ground. Once the car is on the ground, use the lug wrench to tighten the lug nuts in a star pattern. This will ensure that the tire is secured evenly.
