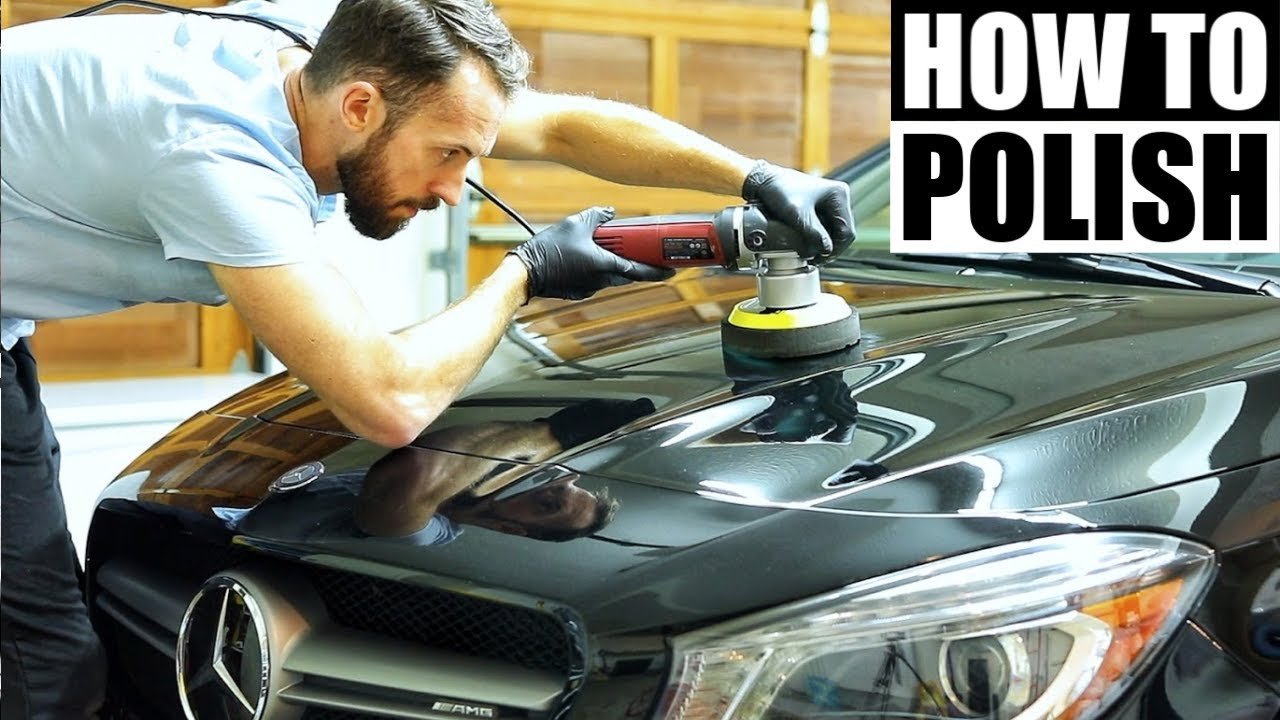
Are you ready to transform your car’s dull, faded paint into a glossy, showroom-worthy finish? You’ve come to the right place.
Polishing your car is not just about looks. It helps restore gloss, reduce light swirl marks, and prepare the paint for wax or sealant protection. With the right tools, clean preparation, and a careful polishing method, you can improve your car’s finish without causing new scratches.
Whether you’re a car enthusiast or a first-time polisher, this guide walks you through each step in simple terms. You will learn how to choose polish, prepare the surface, polish by hand or machine, fix common paint issues, and protect the finish afterward.
Quick Answer
To polish a car, wash and dry it first, remove bonded contaminants with a clay bar if needed, tape off trim, then apply the right polish with a hand applicator or dual-action polisher. Work in small sections, wipe away residue with microfiber towels, inspect the finish, and protect it with wax or sealant.
Key Takeaways
- Always wash and dry the car before polishing so dirt does not scratch the paint.
- Use the least aggressive polish and pad that can correct the problem.
- A dual-action polisher is safer for beginners than a rotary polisher because it lowers the risk of burning paint.
- Polishing removes a tiny amount of clear coat, so you should not do it too often.
- Finish with wax, paint sealant, or ceramic spray to protect the polished surface.
At a Glance
| Time Required | 2 to 5 hours, depending on paint condition and vehicle size |
| Difficulty | Beginner to intermediate |
| Tools Needed | Car shampoo, wash mitt, microfiber towels, clay bar or clay mitt, masking tape, polish, foam pads, hand applicator or dual-action polisher, wax or sealant |
| Cost | Low to moderate if polishing by hand; higher if buying a dual-action polisher |

Credit: www.turtlewax.co.uk
Choosing The Right Tools
Selecting the right tools is essential for polishing a car effectively. The correct equipment helps you correct minor defects, avoid extra scratches, and achieve a smoother shine with less effort.
You do not need professional-level tools for every job. A simple hand-polishing kit can work for light haze or small areas. For larger vehicles, heavy oxidation, or visible swirl marks, a dual-action polisher can save time and improve consistency.
Essential Polishing Equipment
A dual-action polisher is a smart choice for most beginners. It moves in an orbiting pattern, which helps reduce the risk of overheating one spot. Choose one with variable speed settings so you can start slow and increase speed only when needed.
Microfiber towels are essential for wiping away polish residue. Use clean, soft towels only. Dirty or rough towels can create the same swirl marks you are trying to remove.
Foam pads come in different firmness levels. Softer finishing pads work well for light polish and final gloss. Medium polishing pads help remove moderate swirl marks. Firmer cutting pads remove heavier defects but need more care.
- Wash mitt: Use a soft mitt instead of a rough sponge.
- Two buckets: One bucket holds soapy water, and the other rinses dirt from the mitt.
- Microfiber drying towel: This helps reduce water spots and towel marks.
- Masking tape: Tape protects plastic trim, rubber seals, and sharp edges.
- Inspection light: A bright light helps you see swirl marks and missed spots.
Types Of Polish And Compounds
Polishes and compounds vary in abrasiveness. A finishing polish is mild and works best for light haze, faint swirls, and final gloss. A medium polish removes more noticeable imperfections. A heavy compound tackles deeper scratches, oxidation, and severe dullness.
Always start with the least aggressive option that can fix the problem. This approach protects the clear coat and reduces the chance of leaving haze behind. Test your polish and pad combo on a small hidden area before polishing the whole car.
Warning: Do not use household cleaners, dish soap, dirty towels, or unknown abrasive compounds on car paint. These can strip protection, scratch the surface, or leave stains on trim.
Preparing The Car Surface
Preparing your car’s surface is the crucial first step to achieving a showroom-worthy shine. Without a clean and smooth base, polishing can lead to disappointing results, including scratches, streaks, or uneven gloss.
Have you ever wondered why some polished cars look flawless while others still look cloudy? The secret often starts before the polish touches the paint. A clean surface allows the polish to work evenly and safely.
Thorough Washing Techniques
Start by giving your car a complete wash. Use a car-specific shampoo to avoid stripping protective layers more than necessary. Focus on the lower panels, bumpers, mirrors, and areas behind the wheels because these spots collect heavy grime.
The two-bucket method can help prevent swirl marks. One bucket holds the soapy water, and the other is for rinsing your mitt. This keeps grit away from the paint and lowers the chance of dragging dirt across the surface.
Rinse the car thoroughly before touching it with a mitt. Then wash from the top down, because the lower panels usually carry more dirt. Dry with a clean microfiber towel before you move to the next step.
Clay Bar Application
Even after washing, your car’s surface can still hold bonded contaminants. These may include road film, overspray, tree sap mist, brake dust, and industrial fallout. A clay bar or clay mitt helps remove these particles before polishing.
Work in small sections and always use clay lubricant. Glide the clay gently across the paint without heavy pressure. If the clay sticks or drags, add more lubricant.
After claying, the paint should feel smoother when you lightly slide your clean hand over it. Wipe each section dry with microfiber before moving on.
Masking And Protecting Trim
Protecting your car’s trim is often overlooked, but it can save a lot of cleanup time. Use automotive masking tape to cover textured plastic, rubber seals, emblems, and sharp edges. Polish can stain these surfaces and leave chalky residue.
Pay close attention around mirrors, window trim, door handles, badges, headlights, and unpainted bumper areas. If you are using a machine polisher, tape off edges where paint may be thinner.
Pro Tip: Before polishing the whole car, do a small test spot on one panel. This shows whether your polish and pad combination is strong enough without being too aggressive.
Understanding Paint Types
Different paint types require different polishing techniques. Understanding what is on your car helps you avoid damage and choose the right product. The two most common finishes are single-stage paint and base-coat-clear-coat paint.
Single-stage Vs. Clear Coat
Cars usually have either single-stage paint or a clear coat finish. Single-stage paint combines color and gloss in one layer. This finish is more common on older vehicles and some specialty paint jobs.
A clear coat finish has a transparent protective layer over the colored base coat. Most modern vehicles use this system. The clear coat creates gloss and protects the color layer underneath, but it can still scratch, oxidize, or become dull over time.
You can often identify single-stage paint with a simple test. Rub a small hidden spot with a light polish on a clean cloth. If paint color transfers to the cloth, the vehicle may have single-stage paint. If no color appears, you are likely working on clear coat.
Identifying Paint Imperfections
Before you start polishing, inspect the paint in bright light. Look for swirl marks, scratches, oxidation, water spots, and dull patches. Each defect needs a different level of correction.
Swirl marks often appear as fine circular scratches under sunlight or a bright inspection light. They usually come from improper washing or drying. Oxidation can make the paint look faded, chalky, or cloudy.
Deep scratches are different. If your fingernail catches in the scratch, polishing may only reduce its appearance. It may not remove it completely. Deep damage may need touch-up paint, wet sanding, or professional repair.
Note: Polishing removes a very thin layer from the paint or clear coat. Use the mildest method that works, and avoid repeated aggressive polishing.

Credit: www.caranddriver.com
Polishing Techniques
Polishing a car is a careful process that enhances shine and improves the look of minor paint defects. Your technique matters as much as the product you choose. Rushing the job can leave haze, streaks, or new swirl marks.
Work in a shaded, cool area. Avoid polishing hot paint or working in direct sunlight because polish can dry too fast and become difficult to wipe off.
Hand Polishing Vs. Machine Polishing
Hand polishing offers more control and works well for small areas, tight corners, door handles, and minor touch-ups. It is also a good starting point if you are new to paint correction. The downside is that it takes more time and effort.
Machine polishing covers large panels faster and gives more consistent results. A dual-action polisher is safer for beginners than a rotary polisher because it reduces heat buildup. Still, improper use can damage paint, especially on edges and body lines.
If you choose machine polishing, keep the pad flat on the paint and move slowly. Do not hold the polisher in one place. Overlap each pass so the correction looks even.
Correct Pad Selection
Choosing the right pad can make or break your polishing job. Soft foam pads are best for light polishing and finishing. They are gentle on the paint and help reduce the risk of haze.
Medium foam pads can handle moderate swirl marks and light oxidation. Cutting pads are stronger and can remove heavier defects, but they require caution. Always pair aggressive pads with careful technique.
Keep extra pads nearby. A pad loaded with polish, dust, and removed paint residue will not work as well. Clean or change pads often during the job.
Proper Polishing Motions
The way you move across the car’s surface matters. Work one small section at a time, usually about 2 feet by 2 feet. Apply a few small drops of polish to the pad, spread the product at low speed, then polish with slow overlapping passes.
Use light to moderate pressure. Let the polish and pad do the work. Too much pressure can create heat, haze, or uneven correction.
After each section, wipe away residue with a clean microfiber towel. Inspect the paint under good lighting before moving on. If the finish still looks dull, you may need another pass or a slightly stronger polish.
Step-by-Step Car Polishing Process
- Wash the car: Remove loose dirt using car shampoo and the two-bucket method.
- Dry completely: Use a clean microfiber drying towel to prevent water spots.
- Clay the paint if needed: Remove bonded contaminants so the surface feels smooth.
- Tape off trim: Protect rubber, plastic, badges, and delicate edges.
- Choose your test spot: Try a mild polish and pad first on a small area.
- Polish small sections: Work slowly with overlapping passes.
- Wipe residue: Use clean microfiber towels after each section.
- Inspect your work: Check for haze, missed spots, or leftover swirls.
- Protect the paint: Apply wax, sealant, or ceramic spray after polishing.
Addressing Common Issues
Polishing a car can bring back its shine, but common paint issues can affect the final result. Swirl marks, scratches, water spots, and oxidation each need a slightly different approach.
Dealing With Swirl Marks
Swirl marks are tiny scratches that often appear after improper washing or drying. They are easiest to see in direct sunlight or under a strong inspection light.
Use a polish designed for swirl removal with a soft or medium foam pad. Work in small sections and use overlapping passes. Avoid dry buffing because it can create more marks.
Removing Scratches
Scratches can be frustrating, but not all scratches can be polished away. Start by cleaning the area. If the scratch is shallow and does not catch your fingernail, a polish or scratch remover may reduce it.
Apply scratch remover with a clean applicator or microfiber cloth. Rub gently in controlled motions, then wipe clean and inspect. If the scratch remains deep, avoid grinding the paint too aggressively.
Wax or seal the area afterward to protect the finish. Regular washing with safe methods can help prevent new scratches.
Handling Oxidation
Oxidation makes paint look dull, faded, or chalky. It is more common on neglected finishes, older vehicles, and single-stage paint. A clay bar can remove surface contaminants, but oxidation usually needs polishing or compounding.
Start with a medium polish and inspect your results. If the paint remains cloudy, you may need a stronger compound. After correction, apply wax or sealant to slow future oxidation.
Fixing Water Spots And Haze
Water spots can leave mineral deposits on the paint. Wash the area first, then try a light polish if the spots remain. Do not use harsh household acids or abrasive cleaners unless the product is made for automotive paint.
Polishing haze often comes from using the wrong pad, too much product, or not fully wiping residue. Switch to a softer pad and finishing polish if the paint looks cloudy after correction.
Finishing Touches
You’ve washed and polished your car. Now, it’s time for the finishing touches. These steps enhance shine and protect your car’s surface.
Proper finishing makes your car look stunning. It also extends the life of the polish by adding a protective barrier over the cleaned and corrected paint.
Applying Sealant Or Wax
Sealant or wax creates a protective barrier. It guards against dirt, moisture, UV exposure, and road grime. This helps maintain the polished look longer.
You can choose between synthetic sealant and natural wax. Synthetic sealants usually last longer. Natural wax often gives a warm, deep shine.
Apply the product evenly with a foam applicator pad or microfiber applicator. Cover all painted areas for consistent protection. Let the product haze according to its directions, then wipe it away with a clean microfiber towel.
Buffing For Extra Shine
Buffing enhances the shine of your car. Use a soft microfiber towel or a clean finishing pad. Gently buff the surface in controlled motions until the paint looks clear and glossy.
Do not press too hard. Final buffing should remove residue, not cut the paint. Flip your towel often so you are always using a clean side.
Final Inspection
After buffing, inspect the car from different angles. Check the hood, roof, trunk, and side panels in bright but indirect light. Look for missed residue around trim, badges, mirrors, and panel gaps.
If you find streaks, wipe them gently with a clean microfiber towel. If you find missed defects, decide whether another polishing pass is worth it or whether the remaining marks are too deep for safe correction.
Maintenance Tips
Maintaining a polished car involves more than occasional washing. Regular care keeps the shine intact and protects the surface from damage. These maintenance tips help your car stay cleaner and glossier for longer.
Regular Cleaning Routines
Clean your car regularly to remove dirt, dust, pollen, bird droppings, and road film. Dirt can scratch the surface when it is dragged across the paint. Use a soft wash mitt, car shampoo, and clean rinse water.
Rinse thoroughly with clean water. Dry with a microfiber towel to prevent water spots. Avoid abrasive materials that can harm the paint.
Apply wax or sealant every few months, depending on the product and driving conditions. Wax adds a protective layer and enhances shine. Sealant can offer longer-lasting protection.
Protective Measures Against Damage
Park in shaded areas when possible to protect the paint from sun exposure. Use a car cover only when the vehicle is clean, because a dirty cover can rub grit against the paint.
Check for scratches, chips, and stains regularly. Repair minor scratches promptly when possible. Use touch-up paint for small chips to help prevent further damage.
Apply paint sealant as part of your maintenance routine. Sealant offers extra protection and helps keep the car looking fresh after polishing.
How Often Should You Polish A Car?
Most cars do not need polishing every month. For many vehicles, polishing once or twice a year is enough. The right schedule depends on paint condition, washing habits, climate, storage, and how often the car is driven.
If the paint still looks glossy and smooth after washing, you may only need wax or sealant. If you see dullness, swirl marks, or oxidation, polishing may help restore the finish.

Credit: www.jdpower.com
Related Guides
Frequently Asked Questions
What tools do you need to polish a car?
To polish a car, you need car shampoo, a wash mitt, microfiber towels, clay bar or clay mitt, masking tape, car polish, polishing pads, and either a hand applicator or a dual-action polisher. Gloves and eye protection are also useful when working with chemicals or machines.
How often should you polish your car?
Most cars only need polishing once or twice a year. Polish when the paint looks dull, oxidized, or covered with light swirl marks. Avoid polishing too often because each polishing session removes a tiny amount of paint or clear coat.
Can car polishing remove scratches?
Car polishing can remove or reduce light scratches and swirl marks. It usually cannot fully remove deep scratches that catch your fingernail. Deep scratches may need touch-up paint, wet sanding, or professional repair.
What is the difference between waxing and polishing?
Polishing corrects paint by removing light defects, oxidation, haze, and swirl marks. Waxing protects the surface after polishing and adds shine. Polishing is for correction, while waxing is for protection.
Should you wax after polishing a car?
Yes. Polishing leaves the paint clean and corrected, but it does not provide long-term protection by itself. Apply wax, paint sealant, or ceramic spray after polishing to protect the finish.
Can you polish a car by hand?
Yes, you can polish a car by hand. Hand polishing works well for small areas, light haze, and minor defects. A dual-action polisher is faster and more consistent for larger vehicles or heavier swirl marks.
Conclusion
Polishing a car brings out its natural shine and helps restore a cleaner, glossier finish. A careful process also protects your paint from avoidable damage. The best results come from proper washing, surface preparation, correct polish selection, and patient section-by-section work.
Use quality products, clean microfiber towels, and the least aggressive method that gets the job done. Avoid rushing, keep the paint cool, and protect the finish afterward with wax or sealant.
With practice, polishing becomes easier and more rewarding. Soon, you will enjoy the satisfaction of a smooth, reflective car that looks cleaner, brighter, and better cared for on the road.
Sources
- Meguiar’s — car polishing, waxing, and paint-care product guidance
- Turtle Wax — polishing, compounding, waxing, and car-care process guidance
- 3M Automotive — automotive masking, finishing, and paint-care product guidance
- J.D. Power — general car polishing steps and maintenance guidance