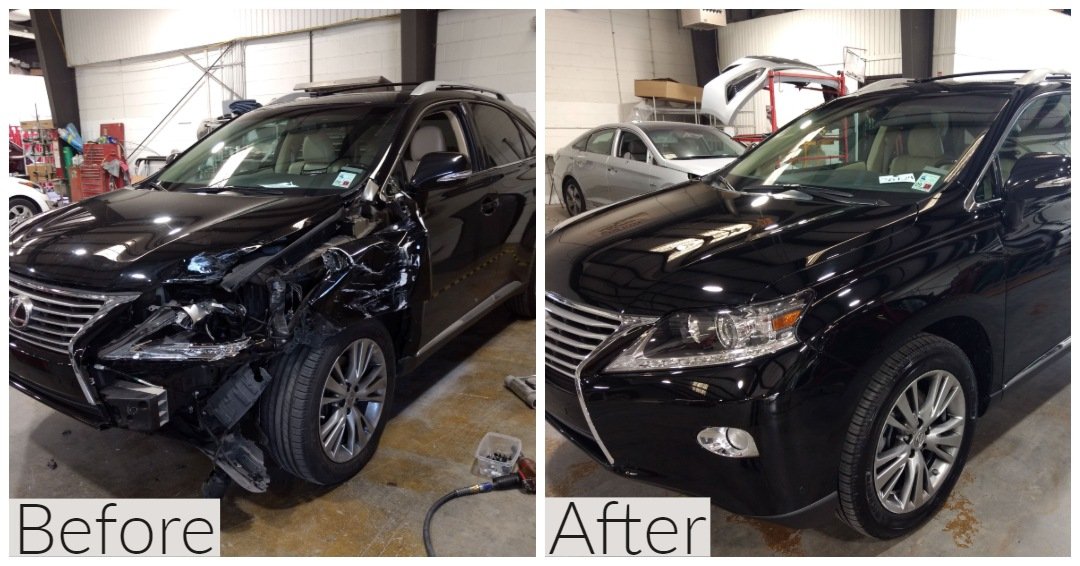
Ever noticed how a car shines after a fresh polish? It’s not just about looks; it’s about restoring and protecting your vehicle after body repair.
Whether you’ve just fixed a scratch or had a larger repair done, polishing your car is the final touch that makes all the difference. Imagine the satisfaction of driving a car that looks brand new, every time you hit the road.
In this guide, you’ll learn how to bring out the best in your car’s appearance. It’s easier than you might think and the results are incredibly rewarding. Stick around to discover the step-by-step process that will transform your vehicle into a stunning masterpiece. Your car deserves to shine, and you deserve to feel proud every time you step into it. Let’s get started!
Preparing The Car Surface
Start by cleaning the car surface thoroughly. Remove any dirt or debris. Use soap and water for effective cleaning. Dry the surface completely before polishing. A clean surface ensures the polish adheres properly. Avoid polishing on a wet surface to prevent streaks.
Preparing your car’s surface is a crucial step to achieve a flawless polish after body repair. It sets the foundation for the polishing process, ensuring the end result is smooth and shiny. Skipping this step can lead to disappointing outcomes, no matter how much effort you put into polishing. Imagine spending hours polishing, only to find imperfections lingering underneath the shine. Let’s dive into how you can properly prepare your car’s surface for the best results.Cleaning The Area
Start by thoroughly cleaning the repaired area. Use a gentle car wash soap and a soft sponge to remove any dust, dirt, or grime. This prevents scratches during polishing. Rinse with clean water and dry with a microfiber towel. Have you ever tried polishing a surface only to find dirt smudges ruining the finish? A clean surface ensures nothing stands between your polish and that perfect shine.Inspecting For Imperfections
Once the area is clean, inspect it for any imperfections. Look for scratches, dents, or uneven surfaces that might need attention. Use a flashlight at an angle to spot flaws that are not visible in normal light. Is there a small scratch that needs filling? Addressing these issues now will save you from frustration later. If you find imperfections, consider using a light abrasive or filler to even out the surface. This ensures that when you polish, you’re working with a smooth canvas.Choosing The Right Polishing Products
Selecting the right polishing products ensures a smooth, shiny finish after car body repair. Use high-quality compounds for effective results. Opt for products designed specifically for automotive surfaces to avoid damage.
Choosing the right polishing products is crucial after a body repair job. The wrong product can dull your car’s finish or even damage the new paintwork. It’s worth taking a moment to understand what works best for your vehicle’s needs. When I first learned to polish my car, I made a few mistakes. But with the right knowledge and tools, you can achieve a showroom finish without the guesswork.Selecting The Correct Polishing Compound
The polishing compound you choose can make a world of difference in the final appearance of your car. Polishing compounds vary in abrasiveness, so it’s essential to select one that matches the extent of the scratches or blemishes. – Light scratches: Use a fine compound to gently buff away imperfections without removing too much paint. – Moderate scratches: A medium compound might be necessary to smooth out deeper marks. – Deep scratches: More aggressive compounds may be required, but use caution to avoid further damage. Have you ever noticed that some scratches seem to disappear while others remain stubbornly visible? That’s often due to using the wrong compound. Always test a small area first to ensure you’ve chosen the correct level of abrasiveness.Understanding Different Types Of Pads
Equally important as the compound is the pad you use. Different pads can affect how the compound interacts with the car’s surface. Choosing the right pad enhances the effectiveness of the compound, ensuring a smooth, even finish. – Foam pads: Great for applying compounds and offer varying levels of softness for different finishes. – Wool pads: More aggressive, used primarily for cutting through heavier oxidation or deeper scratches. – Microfiber pads: Excellent for finishing and achieving a high-gloss shine. Why not experiment with different pads to see which gives the best result for your car’s paint type? I once discovered that a simple change from a foam pad to a microfiber pad made my car’s finish noticeably shinier. Remember, the goal is to enhance the appearance of your car without causing harm. Choosing the right products and tools is your first step to a beautifully polished vehicle.Tools Required For Polishing
Car polishing after body repair requires specific tools. Essential items include a dual-action polisher, polishing pads, and quality car polish. These tools help restore shine and remove minor imperfections, ensuring a smooth finish.
Polishing your car after a body repair can make all the difference in its appearance. Whether you’re aiming for that showroom shine or simply want to protect your paint job, having the right tools is crucial. The process is not just about aesthetics; it’s about extending the life of your vehicle’s finish. Let’s dive into the essential items you’ll need to achieve a professional polish.Essential Polishing Equipment
Before starting, gather all necessary equipment. A quality electric polisher is a must-have. It’s efficient and saves time, unlike manual labor which can be tiring. Select a range of polishing pads. These come in different textures and serve different purposes. For instance, a coarse pad is great for removing scratches, while a soft pad provides a smooth finish. Polishing compound is another essential. It helps in leveling the paint surface, removing minor scratches, and restoring the gloss. Make sure to choose one that suits your car’s paint type.Safety Gear And Precautions
Safety should never take a backseat. Always wear goggles to protect your eyes from splatters. It’s easy to ignore this, but tiny particles can cause irritation. Don a mask to avoid inhaling any dust or compound residues. This might seem unnecessary, but breathing in these particles can be harmful over time. Gloves are also recommended. They keep your hands clean and protected from harsh chemicals. You wouldn’t want your skin to absorb these substances. Consider the environment. Make sure you’re working in a well-ventilated area. Fresh air is not just refreshing but keeps you safe from fumes. What tools do you already have in your garage, and what might you need to add? Gathering the right equipment doesn’t have to be a daunting task. Think of it as an investment in maintaining the beauty of your car.
Credit: www.cleanfleetautobody.com
Step-by-step Polishing Process
After body repair, polishing your car enhances its shine. This process restores the vehicle’s appearance. It also protects the paintwork. Follow these steps to achieve a flawless finish.
Applying The Compound
Start by choosing a good quality polishing compound. Apply a small amount to the car’s surface. Spread it evenly using a soft cloth. Work in small sections for better results. Ensure the compound is well-distributed. This step prepares the surface for buffing.
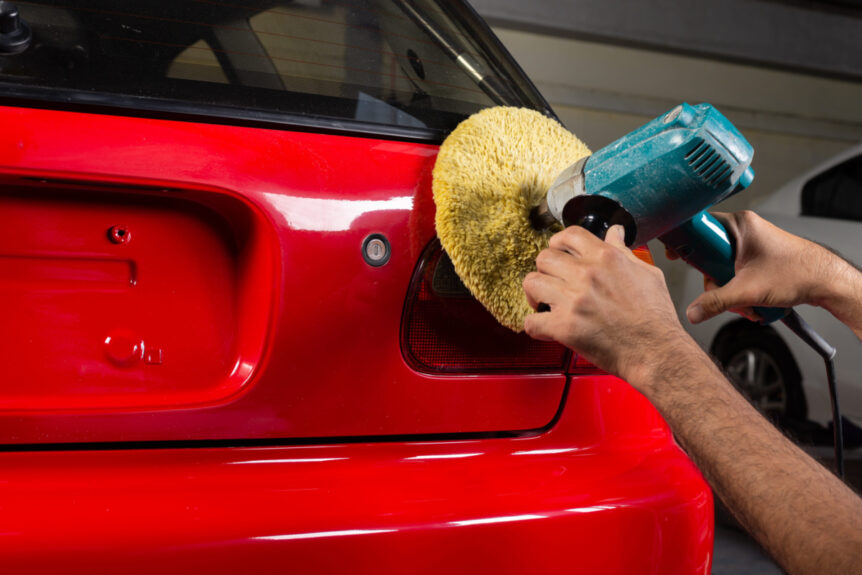
Using A Buffer Or Polisher
Next, use a buffer or electric polisher. Set it to a low speed to begin. Gently move the buffer over the surface. Use circular motions for even coverage. Maintain a consistent pressure. Avoid staying too long in one spot. This prevents damage to the paint.
Polishing By Hand Techniques
For those without a buffer, hand polishing is an option. Use a clean, soft microfiber cloth. Apply firm, steady strokes in circular patterns. Focus on one small area at a time. Repeat until you achieve the desired shine. Keep the cloth clean by switching sides.
Finishing Touches
The art of polishing a car goes beyond mere shine. The real magic happens in the finishing touches. These final steps protect your car and enhance its allure. After body repair, these touches are crucial. They ensure the car looks its best. Let’s delve into the essential steps.
Applying A Protective Wax
Waxing shields your car from harsh elements. It forms a protective layer. This layer guards the paint against dirt and UV rays. Start by choosing the right wax. Liquid waxes are easy for beginners. Apply a small amount to a clean cloth. Work in small sections. Use circular motions for even coverage. Let it sit for a few minutes. This allows the wax to bond with the paint.
Buffing For A Shine
Buffing brings out the car’s natural shine. It removes any excess wax. Use a microfiber cloth for best results. Gently rub the surface in circular motions. This technique enhances the car’s gloss. Be patient and thorough. Buffing also smooths out any minor imperfections. It gives your car a showroom finish. Take your time. Enjoy the process. Your car will thank you.
Common Mistakes To Avoid
Avoid polishing in direct sunlight to prevent streaks. Use clean, soft cloths to avoid scratches. Choose the right polish for the paint type to ensure a smooth finish.
Polishing a car after body repair can restore its shine and make it look brand new. However, achieving that perfect finish isn’t always straightforward. Many people unknowingly make common mistakes that can compromise the final result. Avoiding these pitfalls can save you time and money, ensuring your car looks its best. Let’s dive into some mistakes you should steer clear of.Over-polishing Risks
Over-polishing might seem like a way to achieve the best shine, but it can actually cause more harm than good. Excessive polishing can wear down the car’s clear coat, which is the protective layer on top of the paint. Once this layer is compromised, your car becomes more susceptible to scratches and environmental damage. I’ve seen this firsthand when I got a bit carried away with my own car. The result was a dull finish, and I had to spend extra to get it fixed. It’s essential to strike a balance. Use a gentle hand and the right products to maintain the integrity of your car’s surface.Inadequate Surface Preparation
Surface preparation is crucial before you even think about polishing. Skipping this step can lead to uneven results and a lackluster finish. Proper cleaning and drying ensure that no dirt or debris gets trapped, which could scratch the paint during polishing. Think about it: would you paint a wall without cleaning it first? The same principle applies to your car. Ensure all contaminants are removed to achieve a smooth and polished surface. Failing to prepare means preparing to fail. Addressing these common mistakes can make all the difference. Which other mistakes have you encountered or heard about? Share your thoughts and let’s learn together!Maintaining The Car’s Shine
After body repair, your car deserves a lasting shine. A polished car not only looks good but also protects the paint. Regular care is key to keeping it glossy. Simple methods can help maintain that pristine look.
Regular Cleaning Tips
Wash your car every week. Use a gentle car shampoo. Avoid household cleaners; they can damage the paint. Rinse thoroughly to remove soap residue. Dry with a soft microfiber cloth. It prevents water spots and scratches.
Inspect your car for dirt or bird droppings. Remove these immediately. They can harm the paint’s surface. A quick wipe with a damp cloth can save the day.
Reapplying Wax As Needed
Waxing protects the car’s finish. Apply wax every three months. Choose a high-quality car wax. Follow the instructions on the label. A clean applicator pad works best.
Use gentle, circular motions to apply. Let it dry before buffing with a microfiber cloth. The wax adds a protective layer. It keeps the car looking fresh and shiny.
Credit: grandcity.com

Credit: www.amazon.com
Frequently Asked Questions
How Do You Polish A Car At Home?
To polish a car at home, first, wash and dry the car thoroughly. Then, apply a small amount of polish to a soft cloth or foam applicator. Work the polish into the surface using circular motions. Finally, buff the area with a clean microfiber towel until it shines.
What Tools Are Needed For Car Polishing?
For car polishing, you’ll need a good quality car polish, a foam applicator or soft cloth, and a microfiber towel. If you prefer machine polishing, invest in a dual-action polisher. These tools help achieve a professional finish, enhancing the car’s appearance post-repair.
How Often Should You Polish Your Car?
Polishing your car every 3 to 6 months is recommended. This frequency maintains the car’s shine and protects the paintwork. Regular polishing removes minor scratches and imperfections, keeping your car looking new. However, avoid over-polishing, as it can wear down the clear coat.
Can Polishing Remove Scratches From A Car?
Polishing can remove minor surface scratches and swirl marks from a car. It works by gently smoothing the top layer of paint. However, deeper scratches may require more intensive repair methods. Always test a small area first to ensure the polish is suitable for your car’s finish.
Conclusion
Polishing your car after body repair is essential. It restores the shine. Protects the paint. Enhances the vehicle’s appearance. Follow the steps for best results. Start with a clean surface. Use quality polishing products. Apply polish in circular motions. Buff carefully to avoid scratches.
Regular maintenance keeps your car looking fresh. Your vehicle deserves care and attention. Enjoy the satisfaction of a polished finish. With patience, your car will look great. Your efforts will pay off in the end. Keep polishing for a lasting shine.
