[VERIFY: add real author/byline] · Reviewed against current 3M and PPG refinishing guidance · Last updated September 2026
To polish a car after body repair safely, first confirm that the repaired area has a standard glossy finish and that the body shop or paint-system instructions allow polishing. Wash and inspect the panel, start with the least aggressive polish and pad that can correct the defect, work in small controlled sections, and stop once the finish is clear and even.
Polishing and paint protection are separate steps. Some professional refinishing systems allow compounding or polishing on fresh paint, while wax, sealant, or coating may need to wait until the refinishing system has hardened enough for protection. Ask the repair shop two separate questions: when the repaired panel may be polished, and when wax, sealant, or coating may be applied.
This guide applies to conventional glossy automotive paint and clear coat. Do not use ordinary compound, polish, wax, or a mechanical polisher on matte or low-gloss paint unless the coating manufacturer specifically approves it. PPG warns that abrasive products and polishing can permanently create shiny areas on matte finishes.
Quick Answer
To polish a car after body repair, verify that the repaired paint is a polishable glossy finish and follow the repair shop’s timing instructions. Wash and dry the panel, inspect the defects, mask sensitive trim and edges, test the least aggressive suitable polish and pad, then work in small sections with controlled pressure. Wipe and inspect after each section. Apply wax, sealant, or coating only when the specific refinishing system is approved for protection.
Key Takeaways
- Confirm polishing timing and protection-product timing separately with the repair shop or paint-system instructions.
- This procedure is for glossy paint; ordinary polishing can permanently alter matte or low-gloss finishes.
- Start with a clean, dry surface and the least aggressive compound or polish that can correct the defect.
- Keep the pad moving, use controlled pressure, and use extra caution around edges and body lines.
- Stop and return to the repairer if you find runs, exposed primer or basecoat, severe texture problems, questionable adhesion, or damage that polishing cannot safely correct.
At a Glance
| Time Required | Varies by repair size, paint condition, tool, and whether one-step or multi-stage correction is needed |
| Difficulty | Beginner to moderate for light glossy-paint correction; advanced defects should go back to the repairer |
| Tools Needed | Car wash soap, microfiber towels, suitable polish or compound, polishing pads, optional dual-action polisher, masking tape, and protection only when approved for the repaired paint |
| Best Starting Point | Test the mildest suitable pad-and-polish combination on a small area and inspect before increasing aggressiveness |
Can You Polish Fresh Paint After Body Repair?
Sometimes, but the correct timing depends on the exact refinishing system and how it was cured. There is no single waiting period that safely applies to every repaint. Some professional systems are specifically designed for polishing fresh automotive paint, while other systems require additional hardening before particular products or processes are used.
For example, 3M’s automotive paint-finishing guidance includes systems intended for post-refinish defect removal and polishing. That does not mean every compound, polish, pad, or freshly painted panel can be treated the same way.
Waxing, sealing, and coating are separate decisions. PPG identifies applying wax polish before a paint film has fully hardened as a cause of wax incorporation. Follow the body shop’s written aftercare instructions or the technical data for the actual paint system used on your repair.
Matte-paint warning: Do not follow this polishing procedure on matte or low-gloss paint. PPG’s matte-finish care guidance says not to use ordinary wax, polish, rubbing compound, or mechanical polishers because they can burnish the surface and create permanent shiny areas.
Check the Repair Before You Start
| What You See | Best First Action |
|---|---|
| Recently repainted glossy panel | Confirm separately when polishing and when wax/sealant/coating are allowed. |
| Light haze or faint swirl marks on approved glossy paint | Test a finishing polish with a mild pad. |
| Moderate polishing haze or fine sanding marks | Use a compatible correction product only if the paint system and product instructions allow it, then refine with a finishing polish if needed. |
| Matte or low-gloss finish | Do not polish with ordinary abrasive detailing products. Follow matte-finish care instructions. |
| Paint run, severe orange peel, exposed primer/basecoat, deep gouge, lifting paint, or questionable repair edge | Stop and return to the body shop or a qualified refinisher. Polishing alone may not safely correct the defect. |
Preparing The Car Surface
Clean the repaired area and the surrounding panels before any polishing begins. Dirt, sanding residue, dried compound, and loose debris can become trapped under the pad and create new marks. Use automotive car wash soap and clean water, rinse thoroughly, then dry the surface with clean microfiber towels.
Work on a cool panel in a clean, shaded area. Good lighting is also important because you need to see whether a defect is actually improving before making another polishing pass.
Cleaning The Area
Use a gentle automotive wash soap, a clean wash mitt, and plenty of water. Rinse thoroughly and dry without dragging a contaminated towel across the panel.
If the surface still feels rough after washing, determine whether the roughness is bonded contamination, overspray, or a paint defect. On newly refinished paint, use a clay bar, clay mitt, solvent, or another decontamination method only when the repair shop or paint-system instructions permit it. Mechanical decontamination can itself mar a delicate finish.
Note: Ask the repair shop two separate questions: “When may this panel be polished?” and “When may wax, sealant, ceramic coating, or another protection product be applied?” Do not assume the answers are the same.
Inspecting For Imperfections
Inspect the repair under bright, angled light. Look for swirl marks, sanding haze, light scratches, dust nibs, uneven gloss, polishing trails, or a repaired area that does not blend visually with the surrounding paint.
Light surface defects may respond to a fine polish. More significant defects may require a dedicated paint-finishing process. Runs, severe orange peel, deep sanding defects, exposed primer or basecoat, peeling, lifting, or questionable adhesion should go back to the repairer rather than being chased with increasingly aggressive DIY polishing.
Masking Sensitive Areas
Before polishing, protect nearby textured plastic, rubber seals, badges, and sharp panel edges with painter’s tape or detailing tape. Compound can collect in crevices and stain porous trim.
Use extra caution around panel edges and raised body lines. Do not repeatedly work a machine over a narrow edge in an attempt to remove a stubborn defect. Keep the pad moving and stop if you cannot correct the area safely with a mild approach.
Choosing The Right Polishing Products
Match the product and pad to the defect instead of automatically starting with an aggressive compound. Professional paint-finishing systems use progressively appropriate abrasives, compounds, pads, and polishes according to the defect being corrected. The same principle is useful for DIY work: use the least aggressive combination that produces the needed result.
Selecting The Correct Polishing Compound
- Light haze or faint swirl marks: Start with a finishing polish or other mild correction product approved for the paint.
- Moderate correction: A compatible compound may be required, followed by a finishing polish if compounding leaves haze.
- Deep scratch or damaged color layer: Stop. Polishing removes or refines surface material; it cannot rebuild missing clear coat, basecoat, or primer.
Test a small area first, wipe the residue away, and inspect the result under good lighting. If a mild combination solves the problem, there is no benefit in moving to a more aggressive one.
Warning: Do not use a fingernail test as the only diagnosis for scratch depth. If a scratch is clearly deep, exposes a different color layer, or does not improve with a mild test spot, stop rather than repeatedly removing more clear coat.
Understanding Different Types Of Pads
The pad changes how strongly a polish or compound works. Always use a pad that the product manufacturer recommends for the correction stage.
- Foam pads: Common for polishing and finishing, with different firmness and cutting levels.
- Wool pads: Often used for more aggressive professional correction and require more experience.
- Microfiber pads: Can be used for correction or refinement depending on their design and the paired liquid product.
For a beginner working on ordinary glossy paint, a mild foam polishing pad and compatible polish are a sensible test combination. Increase aggressiveness only when the test spot shows that more correction is actually required.
Compound vs. Polish vs. Wax or Sealant
Compound is an abrasive correction product used for more noticeable defects. Polish refines lighter defects or haze and improves clarity and gloss. Wax and sealant are protection products; they do not replace paint correction.
A finishing polish may be all that a lightly hazed repaired panel needs. A more aggressive compound should not be treated as the automatic first step. Protection comes only after correction is complete and the refinish system is approved for that product.
Tools Required For Polishing
Gather the tools before starting so you can keep towels, pads, and working surfaces clean. For small light defects you may work by hand; larger or more consistent correction is often easier with a compatible dual-action or random-orbital polisher.
Essential Polishing Equipment
A dual-action or random-orbital polisher is generally more forgiving for a beginner than a traditional rotary machine, but it can still damage paint if used with the wrong product, dirty pads, excessive pressure, or poor technique. Follow the tool and polish manufacturer’s instructions rather than copying a universal speed setting.
- Automotive car wash soap
- Microfiber wash mitt
- Clean microfiber towels
- Masking or detailing tape
- Paint-system-compatible polishing compound or finishing polish
- Suitable foam, wool, or microfiber polishing pads
- Dual-action polisher or hand applicator pad
- Wax or sealant only when the repaired paint is approved for protection
Safety Gear And Precautions
Read the product label and Safety Data Sheet where available. Wear appropriate eye protection and gloves, maintain adequate ventilation, and use any additional respiratory protection specified for the product and working conditions.
Keep the work area clean and avoid open flames, excessive heat, and direct sunlight. A cool panel gives the polish a more predictable working cycle and makes residue easier to inspect and remove.

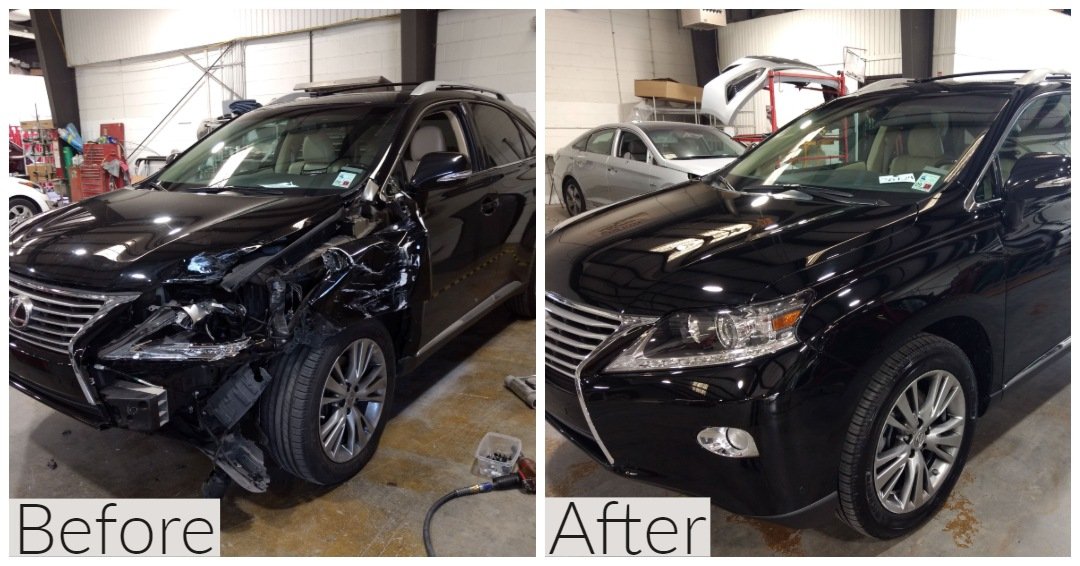
Credit: www.cleanfleetautobody.com
How to Polish a Car After Body Repair Safely
Once you have confirmed that the repaired glossy paint can be polished, use a test-first process. The objective is to remove only enough surface material to correct the defect, not to make repeated passes simply because more polishing seems better.
Step 1: Wash And Dry The Car
Wash the repaired area and surrounding panels with automotive car shampoo, rinse completely, and dry with clean microfiber towels. Do not polish over dust, dried compound, loose sanding residue, or road film.
Step 2: Tape Trim And Edges
Mask plastic trim, rubber seals, emblems, and vulnerable edges. This reduces staining and keeps polishing residue out of crevices while reminding you to use extra care near thin or raised areas.
Step 3: Test The Mildest Suitable Product
Apply a small amount of the selected polish or compound to the appropriate pad. Test it on a small section first. Follow the liquid and pad manufacturer’s instructions for priming, working time, machine setting, pressure, and removal.
After the test section, wipe it clean and inspect. If the defect is corrected without new haze or marring, continue with the same combination. If not, reassess before increasing aggressiveness.
Step 4: Using A Buffer Or Polisher
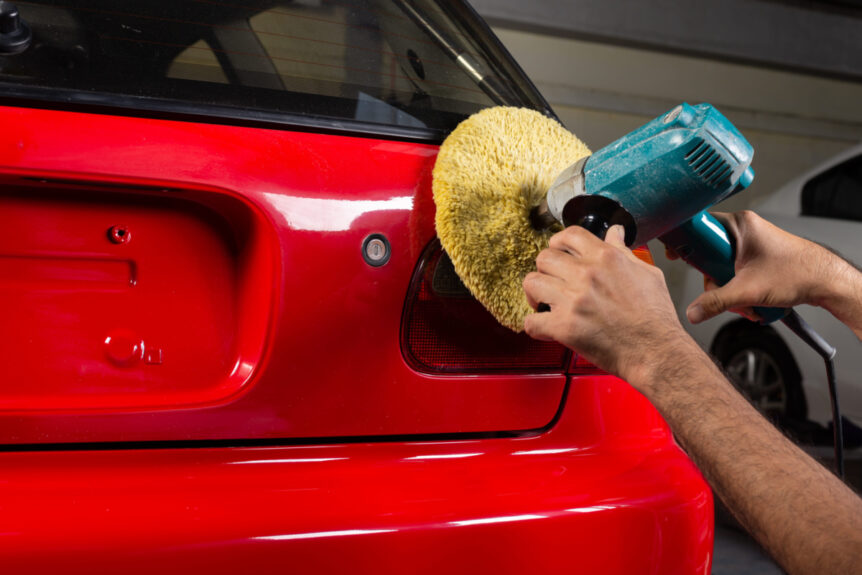
Place the pad flat on the surface before starting the machine. Spread and work the product according to its instructions, using slow overlapping passes and controlled pressure. Keep the machine moving rather than dwelling on one point.
Do not copy an arbitrary machine speed from another polish or polisher. Different machines, pad diameters, paint systems, and compounds use different operating instructions.
Pro Tip: Clean the pad frequently and change to a fresh pad when it becomes saturated. 3M’s polishing-system instructions likewise call for regular pad cleaning for consistent performance.
Step 5: Polishing By Hand Techniques
Hand polishing can work for a small repaired area with light defects. Use a clean foam applicator or another applicator approved for the product. Work a small section with controlled overlapping passes rather than aggressive scrubbing.
Wipe the residue with a clean microfiber towel and inspect before repeating. Hand polishing is slower, but the limited correction can be useful where only a light refinement is required.
Step 6: Wipe And Inspect The Finish
After each section, wipe away residue with a clean microfiber towel and inspect the paint under bright angled light. Look for remaining haze, polishing trails, swirl marks, or a mismatch in gloss.
If the finish is clear and even, stop polishing. If the same defect remains after a reasonable mild correction attempt, reassess the defect rather than making repeated aggressive passes.
Finishing Touches
After polishing, remove residue from the paint, trim edges, and badges. Protection is optional at this exact moment: whether you should apply wax, sealant, or coating depends on the refinish system’s aftercare requirements.
Applying A Protective Wax
If the repaired paint is approved for protection, choose an automotive wax or sealant compatible with the finish and follow its application instructions. Apply only as much product as the label recommends and remove it with clean microfiber towels.
Do not assume that permission to polish fresh paint also means permission to wax or seal it. PPG’s refinishing guidance specifically identifies premature waxing before a paint film has fully hardened as a potential cause of finish problems.
Buffing For A Shine
After polishing or an approved wax/sealant application, use a clean microfiber towel to remove remaining residue. Use light pressure and keep switching to a clean side of the towel so dried product is not dragged across the paint.
Final Inspection Under Different Lighting
Inspect the repaired area under a bright inspection light and, when practical, in outdoor light. Different lighting angles can reveal haze, holograms, residue, or a gloss mismatch that was difficult to see in the work area.
Remove dried residue around trim or badges gently with a clean microfiber towel or appropriate soft detailing tool. Do not use a hard or sharp object against newly repaired paint.
Common Mistakes To Avoid
The main DIY risks are polishing the wrong type of paint, starting too aggressively, working on a contaminated panel, using dirty pads or towels, ignoring product instructions, and continuing after a defect has stopped improving.
Over-polishing Risks
Polishing removes or refines a small amount of the upper paint surface. Repeated aggressive correction can reduce clear-coat thickness and eventually expose or damage the layers underneath.
Use a test spot, inspect frequently, and stop as soon as the defect is corrected to an acceptable level. If the defect requires sanding or heavy correction, consider returning the vehicle to the body shop instead of experimenting on a recent repair.
Inadequate Surface Preparation
Polishing over grit, sanding dust, or dried body-shop residue can create fresh scratches. Wash, dry, inspect, and use only paint-system-approved decontamination methods before correction begins.
Using Too Much Product
Excess compound or polish can clog the pad, create residue, increase sling, and make inspection difficult. Use the amount specified by the product manufacturer and add more only when the working cycle requires it.
Using Dirty Towels Or Pads
Dust, dried compound, and trapped particles in towels or pads can mark the surface. Use clean microfiber towels, clean the polishing pad regularly, and switch to a fresh pad or towel when the current one becomes loaded.
Maintaining The Car’s Shine
Once the repaired finish has been polished and any permitted protection has been applied, gentle maintenance is more useful than frequent abrasive polishing. Correct the paint again only when there is a defect that actually requires correction.
Regular Cleaning Tips
Wash the car with an automotive shampoo and clean wash media. Rinse thoroughly and dry with clean microfiber towels rather than allowing contaminated towels to drag across the finish.
Remove bird droppings, tree sap, bug residue, and other contamination promptly using a method and product that are compatible with the paint. Newly refinished panels should continue to follow the body shop’s aftercare instructions during the curing period.
Reapplying Wax As Needed
Once the refinished paint is approved for wax or sealant, reapply protection according to that product’s instructions and actual performance rather than using a universal calendar interval.
Avoiding Harsh Conditions After Polishing
Avoid automatic brush washes if you are trying to preserve a swirl-free finish. Keep wash mitts, towels, and drying media clean, and do not use abrasive household cleaners on automotive paint.
When practical, reduce unnecessary exposure to contaminants such as tree sap and bird droppings. Prompt, paint-safe cleaning helps preserve the finish without repeated polishing.
Credit: grandcity.com

Credit: www.amazon.com
Related Guides
Frequently Asked Questions
How do you polish a car after body repair?
First confirm that the repaired area has a conventional glossy finish and that the repair shop or paint system allows polishing. Wash and dry the panel, inspect the defect, mask sensitive trim and edges, test the least aggressive suitable polish and pad, then work in small controlled sections. Wipe and inspect after each section and stop when the finish is clear and even.
Can you polish a freshly painted car after body repair?
Sometimes. Polishing timing depends on the specific refinishing system, cure process, and polishing products. Some professional systems are designed for fresh paint. Follow the repair shop or paint manufacturer’s instructions rather than a universal waiting period.
How long after repainting can you wax or seal a car?
There is no single waiting period that applies to every refinishing system. Ask the body shop when the exact paint used on your vehicle can accept wax, sealant, ceramic coating, or another protection product. Do not assume that permission to polish also means the paint is ready to be sealed.
What tools are needed for car polishing?
Typical tools include automotive car wash soap, clean microfiber towels, masking tape, a paint-compatible polish or compound, and the matching polishing pad. A dual-action polisher can make correction faster and more consistent, while light defects on a small area may be polished by hand.
Should you use compound before polish?
Not automatically. Start with the least aggressive product that can correct the defect. Light haze may need only a finishing polish. More noticeable defects may require a compatible compound followed by polish, while deep paint damage may need professional refinishing instead.
Can polishing remove scratches from a car?
Polishing can reduce or remove defects that are confined to the polishable upper paint surface. It cannot rebuild missing clear coat, basecoat, or primer. If a scratch exposes a deeper layer or does not respond to a mild test spot, stop and have the damage assessed.
Is a dual-action polisher better than hand polishing?
A dual-action or random-orbital polisher can produce faster and more consistent correction over a larger area and is generally more forgiving than a traditional rotary tool. Hand polishing is useful for small areas and light defects. Either method still requires clean pads, suitable products, and correct technique.
Can you polish matte or low-gloss automotive paint?
Do not use ordinary polish, compound, wax, or a mechanical polisher on matte or low-gloss paint unless the coating manufacturer specifically approves the process. Abrasive polishing can burnish a matte finish and create permanent shiny or uneven areas.
Conclusion
Polishing after body repair can restore clarity and help a glossy repaired panel blend visually with the rest of the vehicle, but the safest process starts with identifying the finish and confirming what the repair shop allows.
Clean and inspect the panel, protect trim and vulnerable edges, and test the least aggressive suitable polish-and-pad combination first. Increase correction only when the defect actually requires it, and stop rather than chasing paint runs, exposed layers, severe texture problems, or other defects that belong back in a body shop.
Most importantly, treat polishing and protection as separate milestones. A refinishing system may permit fresh-paint polishing before it permits wax, sealant, or coating. Follow the instructions for the actual paint system used on the repair, then maintain the finished panel with gentle washing instead of unnecessary repeated polishing.