
Changing a tire is a practical roadside skill every driver should know before an emergency happens. A flat tire can leave you stressed, delayed, and unsure of what to do next, but a clear step-by-step process makes the job safer and easier.
With the right tools, a stable parking spot, and a calm approach, you can replace a flat tire with a spare and get your vehicle ready for a short drive to a repair shop. This guide walks you through each step so you can handle a roadside tire change with more confidence.
Quick Answer
To change a tire, park on a flat, safe surface, turn on your hazards, set the parking brake, loosen the lug nuts, jack up the vehicle, remove the flat tire, install the spare, lower the vehicle, and tighten the lug nuts in a star pattern.
Key Takeaways
- Changing a tire is a necessary skill for all drivers.
- Always move to a safe, flat location before starting the tire change.
- Gather your jack, lug wrench, wheel chock, spare tire, gloves, and flashlight before working.
- Loosen the lug nuts before lifting the vehicle so the wheel does not spin.
- Use the correct jack point listed in your owner’s manual.
- Install the spare tire carefully and hand-tighten the lug nuts first.
- Tighten the lug nuts in a star pattern after the vehicle is back on the ground.
- Drive slowly on a temporary spare and get the flat tire repaired or replaced as soon as possible.
- Safety is key. Use your parking brake, stay aware of traffic, and stop if the vehicle feels unstable.
At a Glance
| Time Required | About 20 to 40 minutes, depending on experience and conditions |
| Difficulty | Beginner, but safety steps matter |
| Tools Needed | Spare tire, jack, lug wrench, wheel chock, gloves, flashlight, and owner’s manual |
| Cost | Usually no cost if your vehicle already has the tools and spare tire |
Understanding how to change a tire goes beyond the repair itself. It gives you more independence and helps you respond calmly during a roadside problem. This skill can help during a long road trip, a daily commute, or a quick errand around town.
By familiarizing yourself with the process and practicing in a safe environment, you can be ready when the need arises. You should also check your spare tire, jack, and lug wrench during routine vehicle maintenance so they are ready before a flat tire happens.
Warning: Never change a tire in an active traffic lane, on a soft shoulder, or under a vehicle supported only by an unstable jack. If you cannot reach a safe location, call roadside assistance.
Step 1: Find a Safe Location
The first step in changing a tire is to find a safe location to perform the task. If you experience a flat tire while driving, stay calm and avoid sudden steering or braking. Slow down gradually, turn on your hazard lights, and look for a flat, stable surface away from traffic.
Ideally, stop in a parking lot, driveway, wide shoulder, or another area with enough space to move safely around the vehicle. If you are on a highway or busy road, try to exit onto a side street or pull into an emergency lane where you can stop without endangering yourself or other drivers.
Once you have found a suitable location, turn on your hazard lights to alert other drivers. This safety measure helps prevent accidents while you are working near your vehicle. If you have warning triangles or flares, place them behind your car where other drivers can see them.
Ensuring that you are in a safe environment is essential. It lets you focus on the task without worrying as much about oncoming traffic, uneven ground, or poor visibility.
Step 2: Gather Necessary Tools

Before you begin changing your tire, gather all the necessary tools and equipment. The basic tools usually include a spare tire, a jack, and a lug wrench. Your spare tire should be properly inflated and in good condition, because a damaged or underinflated spare may not be safe to use.
Many vehicles come equipped with a temporary spare tire, often called a “donut.” This type of spare is lighter and smaller than a full-size tire. It is designed for temporary use, not long-distance driving or normal highway speeds.
The jack is another critical tool. It lifts the vehicle off the ground so you can remove the flat tire and install the spare. Common jack types include scissor jacks and hydraulic jacks, and each one operates differently. Always follow your owner’s manual for your vehicle’s correct lifting points and jack instructions.
A lug wrench is necessary for loosening and tightening the lug nuts that secure the wheel to the hub. Some vehicles may also include wheel chocks, gloves, or a small tool kit. A flashlight can help if you need to work at night, and a reflective vest can make you more visible near traffic.
For added safety, set your parking brake and chock the wheels opposite the flat tire before you begin. This helps reduce the chance of the vehicle rolling while you work.
Note: If your vehicle does not have a spare tire, it may include a tire inflator kit instead. Follow the kit instructions, then visit a tire shop as soon as possible.
[Amazon Products Picked for You]

【Car Jack Capacity】Maximum lifting weight 2 Ton (4409 lbs),This Jack for Car Lifting Range from 4.33" (11cm) to 15.75"(40cm). The scissor lift jack provides a wider range to reach under low chassis sedans or elevate high-body SUVs effortlessly.

CAR JACK SPECIFICATION: This small car jack has a maximum weight capacity of 2 tons. The adjustable height range is 4.33 inches (11 cm) to 15.75 inches (40 cm). The wider range of adjustment allows you to easily raise your vehicle to any height you need, meeting your vehicle maintenance needs

[ 5 IN 1 Electric Hydraulic Jack ] : The 5 in 1 electric hydraulic jack kit includes electric hydraulic jack,impact wrench,air pump,warning light and major LED light,which meets all your tire replacement needs in one time.The jack is easy to lift 5 ton car,about 2 min reach max height(lifting height range:6.1~17.7 inch)
Step 3: Loosen the Lug Nuts
| Step 3: Loosen the Lug Nuts | Details |
|---|---|
| Time taken | About 5 minutes |
| Number of lug nuts | Often 4, 5, 6, or more, depending on the vehicle |
| Tools required | Lug wrench |
| Recommended torque | Follow your vehicle owner’s manual; use a torque wrench for final tightening. |
Once you have gathered your tools and secured the vehicle, loosen the lug nuts on the flat tire. Do this before lifting the vehicle with the jack. The tire stays on the ground at this stage, which keeps the wheel from spinning and lets you apply steady force.
Using your lug wrench, turn each lug nut counterclockwise until it breaks loose. Do not remove the lug nuts completely yet. Loosen them just enough so they can be removed after the vehicle is raised.
Use a star pattern when loosening lug nuts, especially if your wheel has five or more nuts. Loosen one nut slightly, move to the opposite nut, and continue across the wheel. This pattern helps reduce uneven pressure on the wheel.
If a lug nut feels stuck, keep firm pressure on the wrench and avoid jerky movements that could make you lose balance. Penetrating oil may help, but give it time to work. If the lug nut is damaged, seized, or unsafe to remove, roadside assistance may be the safest option.
Pro Tip: Keep the lug wrench level while applying pressure. If it slips, stop and reposition it fully on the lug nut before trying again.
[Amazon Products Picked for You]

Durable Construction: Made from forged heat treated carbon steel for long-lasting performance and reliability

Durability: Made from Forged heat treated carbon steel

【Heavy Duty Forged Carbon Steel】Ultra-strong construction resists bending, breaking, and rust; built for maximum torque and lifetime durability in roadside emergencies and daily tire maintenance.
Step 4: Lift the Vehicle
With the lug nuts loosened, it is time to lift the vehicle using your jack. Position the jack under the designated lifting point. This point is usually listed in your owner’s manual and may also be marked on the vehicle frame near the wheel.
Place the jack only at the approved jack point. Using the wrong area can damage the vehicle or cause it to slip while lifted.
Once the jack is securely positioned, raise the vehicle by turning the jack handle or pressing the hydraulic lever, depending on your jack type. Lift the vehicle until the flat tire is high enough off the ground to remove it and install the spare safely.
As you lift, watch the vehicle’s stability. If it appears unsteady, wobbly, or angled, lower it back down and reposition the jack before continuing. Never place any part of your body under the vehicle during a roadside tire change.
[Amazon Products Picked for You]

PINCH WELD PROTECTION: The slotted cross-groove design helps align the pad with vehicle pinch welds, reducing the risk of bending, scratching or damaging the frame rail during lifting

MUST-HAVE TESLA ACCESSORIES: Edulnke floor Jack pad designed for 2016 2017 2018 2019 2020 2021 2022 2023 2024 2025 2026 Tesla Model 3, Model Y, Model S, Model X , and Model Y Juniper. Due to the battery location on Tesla vehicles, the car should not be lifted without these jack pucks. One slip off the jack and there could be some costly damages. These will help you avoid that when lifting your Tesla with a floor jack or 2-post lift.

2-IN-1 SET: Includes 2 jack stand pads and 2 height-adding pinch weld adapters, providing two lifting accessories in one convenient set
Step 5: Remove the Flat Tire
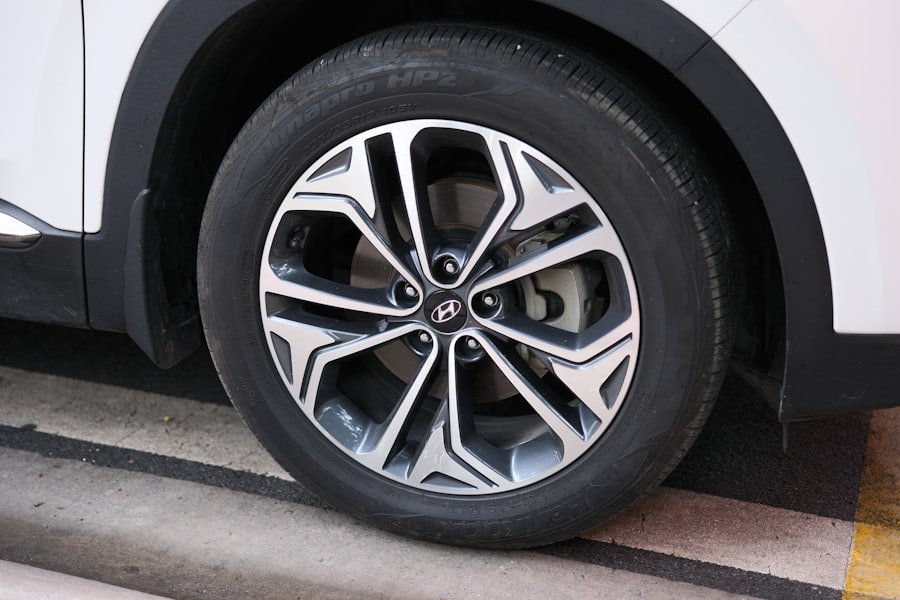
Now that your vehicle is elevated and secure, remove the flat tire. Start by fully unscrewing each loosened lug nut with your lug wrench or by hand. Keep the lug nuts in a safe place where they will not roll away. A pocket, small container, or clean spot inside the wheel cover can work well.
Once all lug nuts are removed, carefully pull the flat tire straight off the wheel hub. Tires can be heavier than they look, so use both hands and keep your feet clear. If the tire feels stuck, pull it evenly from both sides instead of twisting hard.
When handling the flat tire, watch for sharp objects or debris that may have caused the puncture. A nail, screw, sidewall cut, or worn tread can give you clues about what went wrong. Some punctures may be repairable later, but major sidewall damage or severe wear usually means the tire needs replacement.
Set the flat tire flat on the ground and away from traffic. Do not leave it leaning against the vehicle where it could fall or roll.
Step 6: Install the Spare Tire
With the flat tire removed, install the spare tire onto the wheel hub. Align the holes in the spare tire with the wheel studs and carefully slide the spare into place. Make sure it sits evenly against the hub.
If the spare does not align properly, stop and check for obstructions, rust buildup, or a mismatch between the spare and the wheel studs. Do not force the spare into place if it does not fit correctly.
Once the spare is positioned correctly, take the lug nuts and hand-tighten them onto each stud by turning them clockwise. Do not fully tighten them while the vehicle is still lifted. Hand-tightening holds the spare in place and helps keep the wheel centered before final tightening.
After all lug nuts are hand-tightened, gently push the spare tire to check that it sits flush against the hub. A visible gap or wobble means you should stop and realign it before lowering the vehicle.
Step 7: Lower the Vehicle
After installing the spare tire and hand-tightening the lug nuts, lower your vehicle back toward the ground. Carefully operate the jack in reverse by turning the handle or releasing hydraulic pressure, depending on the jack type.
Lower the vehicle slowly until the spare tire touches the ground and supports the vehicle’s weight. At this point, the tire should have enough contact with the ground to stay still while you tighten the lug nuts.
Before removing the jack completely, check that the spare tire looks straight and seated correctly. The tire should sit firmly against the wheel hub without visible gaps or misalignment.
This step matters because a poorly seated spare can create vibration, looseness, or unsafe handling once you begin driving.
Step 8: Tighten the Lug Nuts
With your vehicle safely lowered onto its tires, tighten the lug nuts securely. Use your lug wrench and follow a star pattern, just as you did when loosening them. Tighten one lug nut, move to the opposite nut, and continue across the wheel.
This pattern helps apply even pressure across the wheel. Even tightening can reduce the risk of wheel vibration, uneven seating, or damage to wheel and brake components.
The lug nuts should be snug and secure, but you should not jump on the wrench or use extreme force. Overtightening can damage threads, warp components, or make the lug nuts difficult to remove later.
If you have a torque wrench, use your vehicle owner’s manual to find the correct torque specification and finish tightening to that value. If you do not have one during the roadside change, tighten the lug nuts carefully and have them checked by a repair shop as soon as possible.
Step 9: Lower the Jack
After the lug nuts are tightened properly, lower the jack completely and remove it from under your vehicle. Reverse the jack mechanism until it rests fully on its base position.
Once the jack is removed, take one last look around your work area. Make sure no tools, lug nuts, wheel chocks, gloves, or other items have been left behind. Also check that the flat tire is secured in your trunk, cargo area, or spare tire storage location.
It is also wise to check for visible damage around the wheel area. Look for leaks, hanging parts, or anything that seems unusual. If something does not look right, do not drive away until you understand the issue or get help.
After Changing the Tire: What to Do Next
After the spare tire is installed, drive with extra care. A temporary spare tire is not designed to perform like a regular tire. It may affect braking, steering, cornering, and traction, especially in rain or at higher speeds.
Check your owner’s manual for your spare tire’s exact speed and distance limits. Many temporary spare tires are intended for short-distance use only, often at reduced speeds. Your goal is to reach a tire repair shop, not continue normal driving for days.
As soon as possible, have the flat tire inspected by a qualified tire professional. The tire may need a repair, replacement, or pressure check. You should also ask the shop to torque the lug nuts to the correct specification.
Warning: Do not ignore vibration, pulling, grinding, or wobbling after installing a spare tire. Pull over safely and get help if the vehicle does not feel normal.
Common Mistakes to Avoid
One common mistake is lifting the vehicle before loosening the lug nuts. When the tire is off the ground, it can spin while you try to loosen the nuts. Loosening them first makes the job easier and safer.
Another mistake is placing the jack in the wrong spot. A jack placed under weak body panels, trim, or the wrong frame area can slip or damage the vehicle. Always use the correct jack point from your owner’s manual.
Drivers also sometimes forget to set the parking brake or chock the opposite wheel. These small steps help keep the vehicle stable. They matter even more if the road has a slight slope.
Finally, avoid driving too far on a temporary spare. A spare tire is meant to help you reach service, not replace a normal tire for regular use.
Conclusion and Safety Tips
Changing a tire may seem intimidating at first, but a calm process makes it much more manageable. Start by choosing a safe location, setting the parking brake, gathering your tools, and loosening the lug nuts before lifting the vehicle.
Always prioritize your safety and the safety of others. Stay away from active traffic, use hazard lights, and stop if the vehicle feels unstable. If the location, weather, traffic, or tools make the job unsafe, call roadside assistance instead of taking unnecessary risks.
Regularly check your spare tire’s condition as part of your vehicle maintenance. Make sure it is properly inflated, free from damage, and stored with the correct jack and lug wrench. For temporary “donut” spares, drive only a short distance to a repair shop and follow your owner’s manual for speed and distance limits.
If you’re looking to expand your DIY skills beyond changing a tire, you might want to check out this article on how to sharpen kitchen knives at home. It’s a useful guide for keeping your kitchen tools in top shape. Or, if you’re interested in upcycling and furniture making, you can read about whether a pallet coffee table is worth it. And for those who love to entertain, consider investing in one of the top-rated trivet sets for hot dishes to protect your table while serving meals.
Frequently Asked Questions
What tools do I need to change a tire?
To change a tire, you need a jack, lug wrench, spare tire, and wheel chock. It is also helpful to keep gloves, a flashlight, a reflective vest, and your vehicle owner’s manual in your car.
How do I safely jack up my car to change a tire?
Park on a flat, stable surface, set the parking brake, and chock the wheel opposite the flat tire. Then locate the approved jack point in your owner’s manual, position the jack correctly, and lift the car only high enough to remove and replace the tire.
How do I remove the lug nuts to change a tire?
Use the lug wrench to loosen the lug nuts by turning them counterclockwise while the tire is still on the ground. Loosen them in a star pattern, but do not remove them completely until the vehicle is lifted.
How do I remove the flat tire and install the spare tire?
After the vehicle is lifted, remove the loosened lug nuts and pull the flat tire straight off the wheel hub. Align the spare tire with the wheel studs, slide it onto the hub, and hand-tighten the lug nuts before lowering the vehicle.
How do I lower the car and tighten the lug nuts to change a tire?
Lower the car slowly until the spare tire rests on the ground. Then tighten the lug nuts in a star pattern with the lug wrench. Use a torque wrench and your owner’s manual torque specification when possible.
Can I drive normally after putting on a spare tire?
No. If your spare is a temporary “donut” tire, drive slowly, avoid long distances, and go to a tire shop as soon as possible. Check your owner’s manual for the exact limits for your vehicle’s spare tire.
Sources
- National Highway Traffic Safety Administration: Tires — supports tire safety, maintenance, and safe driving reminders.
- NHTSA TireWise — supports tire care, pressure, tread, and general tire safety guidance.
- AAA Tire Safety and Maintenance — supports spare tire, roadside safety, and tire maintenance best practices.
