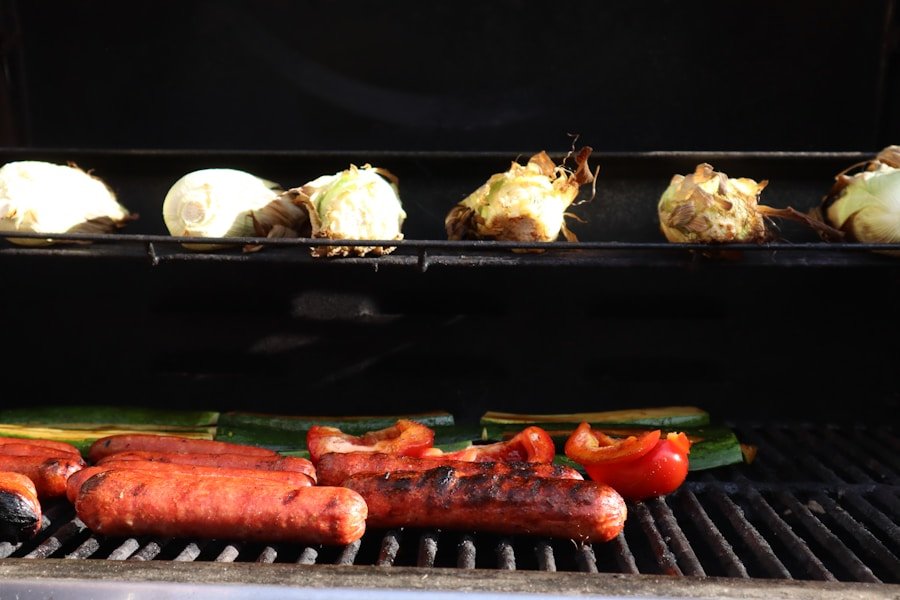
Gas grilling gives you fast heat, easy temperature control, and a cleaner setup than many charcoal cookouts. You can turn a knob, preheat the grill, and start cooking in minutes. To get better results, you need to understand heat zones, safe setup, preheating, flipping, flare-up control, smoke flavor, and food-safe cooking temperatures.
Quick Answer
To use a gas grill effectively, clean the grates, check for gas leaks, preheat with the lid closed for 10-15 minutes, and cook with the right heat zone. Use direct heat for quick foods, indirect heat for larger cuts, and a food thermometer to confirm safe doneness.
Key Takeaways
- Gas grilling uses propane or natural gas to create controlled heat for outdoor cooking.
- Cleaning the grates, checking hoses, and preheating the grill help improve safety and performance.
- Direct heat works best for burgers, hot dogs, thin steaks, vegetables, and other quick-cooking foods.
- Indirect heat works better for whole chickens, roasts, ribs, and thicker cuts that need slower cooking.
- Wood chips can add smoke flavor to a gas grill when you use a smoker box or foil pouch.
- A food thermometer is the safest way to confirm meat, poultry, and seafood are fully cooked.
At a Glance
| Time Required | 10-15 minutes to preheat, plus cooking time based on the food |
| Difficulty | Beginner-friendly with basic safety checks |
| Tools Needed | Grill brush, long-handled tongs, spatula, food thermometer, clean platter, and optional smoker box |
| Cost | Low if you already own a grill; optional accessories may add cost |
Gas grilling has become a popular method for outdoor cooking because it offers convenience, control, and steady heat. A gas grill uses propane or natural gas, which ignites to produce a flame that cooks food on the grates. The simple controls make gas grilling easy for beginners while still giving experienced grillers enough flexibility for searing, roasting, smoking, and slow cooking.
Unlike charcoal grills, which need more time to light and can leave more ash behind, gas grills provide fast heat and easier cleanup. This convenience has helped make gas grills common in backyards, patios, and outdoor kitchens. Still, good grilling is not just about turning the burners on. You need to know how to prepare the grill, choose the right heat, move food between zones, and control flare-ups.
Most gas grills include burners, a cooking grate, heat diffusers, a lid, and a control panel. The burners create heat, the grate holds the food, and the diffusers help spread heat while reducing direct grease contact with the flame. When you understand these parts, you can troubleshoot problems faster and get more consistent results. Regular cleaning also helps the grill last longer and cook more evenly.
Preparing the Grill for Optimal Performance
Before grilling, prepare your gas grill so it heats evenly and works safely. Start by cleaning the grates to remove leftover food, carbon buildup, and grease from previous cookouts. A clean grill helps reduce sticking, limits flare-ups, and keeps old burnt residue from affecting the flavor of fresh food.
Use a grill brush or scraper that is safe for your grate material. After brushing, wipe the grates with a damp cloth or paper towel held with long tongs. You can also use a mild vinegar-and-water solution on cooled surfaces. Avoid harsh cleaners on cooking surfaces unless your grill manual says they are safe.
Next, inspect the burners and heat diffusers. Grease, insects, or food debris can block burner ports and cause uneven flames. If the flame looks weak, yellow, or uneven, turn off the gas and clean the burner area once the grill is cool. Good airflow helps your grill heat properly and prevents frustrating hot and cold spots.
Check the fuel supply before lighting the grill. If you use propane, make sure the tank has enough fuel and is connected securely. If you use natural gas, inspect the hose for cracks, wear, or loose fittings. A simple leak test can help you spot problems before they become dangerous.
Warning: If you smell gas, hear hissing, or see bubbles during a leak test, turn off the gas immediately. Do not light the grill until the connection is fixed and the area is well ventilated.
To check for leaks, apply a soap-and-water solution to the hose connections while the gas is on but the burners are off. If bubbles form, gas may be escaping. Tighten the connection if safe to do so, then test again. If bubbles continue, replace the hose, regulator, or faulty part before grilling.
After confirming that everything is connected safely, preheat the grill with the lid closed for about 10-15 minutes. Preheating burns off light residue and helps the grates reach a steady cooking temperature. It also gives you a better sear and reduces sticking when food first touches the grate.
Choosing the Right Heat Setting for Different Foods

Selecting the right heat setting is one of the most important gas grilling skills. Most gas grills offer low, medium, and high heat, but the exact temperature depends on the grill, outdoor weather, lid position, and burner output. Instead of guessing, use the built-in thermometer as a rough guide and consider using a grill surface thermometer for more accuracy.
Low heat works best for delicate foods that can dry out or burn quickly. Fish, thin vegetables, fruit, and some marinaded foods often benefit from gentler heat. Medium heat works well for chicken pieces, sausages, pork chops, and vegetables that need time to soften without scorching. High heat is useful for searing steaks, burgers, and other quick-cooking foods that need browning.
Different foods react to heat in different ways. For example, chicken breasts can dry out if you cook them over high heat from start to finish. A better method is to sear them briefly, then move them to a cooler zone so the center cooks through more gently. Burgers, on the other hand, usually do well over medium-high heat because you want browning on the outside while keeping the inside juicy.
Thicker cuts need more control. A steak, pork chop, or bone-in chicken piece can look done on the outside before the center reaches a safe temperature. That is why a food thermometer matters. Color alone does not always tell you whether food is safe to eat.
Use grill temperature to control browning, but use internal temperature to confirm doneness.
Using Direct and Indirect Heat for Perfect Grilling
| Grilling Method | Temperature Range | Cooking Time |
|---|---|---|
| Direct Heat | 350°F – 450°F | Shorter |
| Indirect Heat | 250°F – 350°F | Longer |
Direct and indirect heat are two core gas grilling methods. Direct heat means placing food directly over the flame or active burner. This method works best for quick-cooking items such as burgers, hot dogs, shrimp, thin steaks, sliced vegetables, and boneless chicken pieces. It creates fast browning and the grill marks many people expect from outdoor cooking.
Direct heat needs close attention because food can burn quickly. Sugary marinades, fatty meats, and thin cuts can scorch if the grill is too hot. Keep long-handled tongs nearby and stay close to the grill when cooking over direct heat.
Indirect heat means placing food away from the active flame so it cooks more slowly. This method works well for larger cuts such as whole chickens, roasts, thick pork chops, ribs, and foods that need more time without burning on the outside. Indirect heat turns your gas grill into an outdoor oven.
To set up indirect heat on a gas grill, turn on one or more burners and leave another burner off. Place the food over the unlit area, close the lid, and adjust the active burners to control the temperature. This creates a hot zone and a cooler zone. You can sear food first over direct heat, then move it to indirect heat to finish cooking.
Note: Keep the lid closed when using indirect heat. Opening the lid too often releases heat and can make larger foods cook unevenly.
Mastering the Art of Flipping and Turning Food on the Grill
Flipping and turning food may seem simple, but timing makes a big difference. If you flip too early, food may stick to the grates or tear. If you wait too long, the outside may overcook before the inside is ready. Let the food develop a crust before moving it.
A good clue is resistance. If meat sticks firmly, give it more time. Once a seared crust forms, it usually releases more easily from clean, preheated grates. You may also see juices pooling on the surface of burgers, steaks, or chicken before the first flip.
Use the right tools for the food. Long-handled tongs work well for steaks, chicken pieces, sausages, and vegetables. A sturdy spatula works better for burgers and delicate foods. For fish fillets, a wide fish spatula supports the full piece and reduces breakage.
Avoid pressing down on burgers, steaks, or chicken with a spatula. Pressing forces juices out of the food and can cause flare-ups when fat hits the flame. Turn food gently and only as often as needed. For many items, one or two flips are enough.
Pro Tip: Oil the food, not the flame. A light coat of oil on vegetables, fish, or lean meats helps reduce sticking without creating excess flare-ups.
Adding Flavor with Wood Chips and Smoke

Wood chips can add a smoky flavor to food cooked on a gas grill. While gas grills are known for speed and convenience, smoke gives meats, vegetables, and even fruit a deeper outdoor-cooked taste. You can use a smoker box, a built-in smoke tray, or a foil pouch with small holes poked in the top.
Soaking wood chips in water for about 30 minutes can help them smolder instead of burning too quickly. Some grillers use dry chips for stronger smoke, but dry chips can burn faster. Start with a small amount until you know how much smoke flavor you prefer.
Different woods create different flavors. Hickory has a bold smoky taste that pairs well with beef and pork. Applewood is milder and slightly sweet, making it a good match for chicken, pork, and vegetables. Mesquite can taste intense, so use it carefully with quick-cooking foods.
To use wood chips, place them in a smoker box or foil pouch over an active burner. Turn that burner to medium-high until smoke begins to appear. Then adjust the heat as needed and place the food away from direct flames. This setup lets the smoke move around the food while reducing the risk of burning.
Perfecting the Art of Grilling Different Types of Food
Gas grilling is not limited to burgers and steaks. You can grill vegetables, seafood, poultry, pork, fruit, and even bread. The key is matching the food to the right heat level and cooking method.
Vegetables work especially well on a gas grill because they develop charred edges and a sweeter flavor. Bell peppers, zucchini, asparagus, onions, mushrooms, and corn on the cob are popular choices. Toss them with oil, salt, pepper, and simple seasonings before grilling. Cut pieces evenly so they cook at the same speed.
Seafood needs gentle handling. Fish fillets can stick or fall apart, so start with clean, hot grates and oil the fish lightly. Grilling fish skin-side down first can help protect the flesh. Shrimp cook quickly and are easier to manage when threaded onto skewers or placed in a grill basket.
Chicken benefits from a two-zone setup. Start pieces over direct heat for browning, then move them to indirect heat until they reach a safe internal temperature. Bone-in pieces take longer than boneless cuts. Keep the lid closed during the indirect stage to help the heat circulate.
Fruit can also be grilled. Peaches, pineapple, watermelon, and bananas caramelize nicely over direct heat. Serve grilled fruit with yogurt, ice cream, or a light drizzle of honey for a simple dessert.
Safe Internal Temperatures for Grilled Food
Food safety is a major part of successful grilling. A browned outside does not always mean the center is fully cooked. Use an instant-read thermometer and insert it into the thickest part of the food, away from bone, fat, or the grill grate.
| Food | Minimum Internal Temperature |
|---|---|
| Whole cuts of beef, pork, veal, and lamb | 145°F with a 3-minute rest |
| Ground beef, pork, veal, and lamb | 160°F |
| Poultry, including chicken and turkey | 165°F |
| Fish and seafood | 145°F or until flesh is opaque and separates easily |
Move cooked food to a clean plate, not the same plate that held raw meat. Wash hands, utensils, and cutting boards after they touch raw meat or poultry. Keep cold foods chilled until they go on the grill, especially during warm weather.
Preventing Flare-Ups and Uneven Cooking
Flare-ups happen when fat or marinade drips onto flames or hot diffusers. Small flare-ups are common, but large flames can burn food and create a bitter taste. Trim excess fat from meats before grilling and avoid pouring oily marinades directly over the grates.
Keep part of the grill set up as a cooler zone. If flames jump up, move the food away from direct heat and close the lid briefly to limit oxygen. Do not spray water into a gas grill because it can spread grease, damage parts, and create steam burns.
Uneven cooking often comes from dirty burners, blocked ports, overloaded grates, or constant lid opening. Leave enough space between foods so heat can circulate. If your grill has known hot spots, rotate food as needed and use the cooler side to finish thicker pieces.
Safety Tips for Gas Grilling Success
Safety should always come first when using a gas grill. Before lighting the grill, inspect hoses, fittings, burners, and the fuel connection. This helps reduce the risk of gas leaks, flare-ups, and fire hazards. Always follow the manufacturer’s lighting instructions for your specific grill.
Use your gas grill outdoors in a well-ventilated area. Never use it inside a garage, enclosed porch, tent, or indoor space. Gas grills create heat, smoke, and combustion gases that need open airflow. Keep the grill away from siding, deck rails, dry leaves, paper towels, and other flammable materials.
Open the lid before lighting the grill. If the lid is closed while gas builds up, ignition can cause a dangerous burst of flame. If the grill does not light right away, turn off the burners and gas supply, keep the lid open, and wait several minutes before trying again.
Never leave a lit grill unattended. Flare-ups can happen quickly, especially when cooking fatty meats. Keep children and pets away from the cooking area, and use long-handled tools to protect your hands and arms from heat.
Keep a fire extinguisher nearby and know how to use it. For small grease flare-ups, moving food to a cooler zone and closing the lid may help. For a serious fire, turn off the gas only if you can do it safely, move away, and call emergency services.
If you’re looking to enhance your outdoor cooking experience, you may also be interested in learning about the 5 Best Smart Dishwashers with Notifications. Just like mastering the art of using a gas grill effectively, having a smart dishwasher with notifications can make your life easier and more efficient. Check out this article to find the perfect smart dishwasher for your kitchen.
Related Guides
Frequently Asked Questions
What are the benefits of using a gas grill?
A gas grill offers quick ignition, easier temperature control, and less ash cleanup than charcoal grilling. It also makes weeknight grilling easier because you can preheat quickly and adjust burner settings as food cooks.
How do I effectively preheat a gas grill?
Open the lid, light the grill according to the manufacturer’s directions, then close the lid and preheat for about 10-15 minutes. Preheating helps clean the grates, stabilizes the cooking temperature, and improves searing.
What are some tips for maintaining even heat distribution on a gas grill?
Clean the burners, grates, and heat diffusers regularly. Avoid overcrowding the grill, keep the lid closed when possible, and rotate food if your grill has hot spots. Replace damaged heat tents, lava rocks, or diffusers when needed.
How can I prevent flare-ups on a gas grill?
Trim excess fat, keep the grill clean, avoid heavy oil drips, and use a cooler zone when flames rise. Move food away from sudden flames instead of pressing it down or spraying water into the grill.
What are some safety tips for using a gas grill?
Check for gas leaks, grill only in a well-ventilated outdoor area, open the lid before lighting, keep flammable items away, and never leave a lit grill unattended. Follow the manufacturer’s instructions for setup, ignition, cleaning, and maintenance.
Should I grill with the lid open or closed?
Use an open lid for quick searing when you need close control. Use a closed lid for thicker foods, indirect cooking, and steady heat. Closing the lid helps the grill act more like an oven.
Can I add smoke flavor on a gas grill?
Yes. Place wood chips in a smoker box or foil pouch over an active burner. Once the chips begin to smoke, cook the food with the lid closed so the smoke can circulate around it.
Sources
- USDA Food Safety and Inspection Service Safe Minimum Internal Temperature Chart — supports safe cooking temperatures for meat, poultry, and seafood.
- National Fire Protection Association Grilling Safety — supports outdoor grilling safety, placement, and fire-prevention guidance.
- U.S. Consumer Product Safety Commission Outdoor Grilling Safety — supports gas leak checks and safe grill operation.


1 thought on “Mastering the Gas Grill: Effective Techniques”