The best material for the joint where a shower wall or tile surround meets a bathtub is usually 100% silicone kitchen-and-bath sealant. That joint can move as the tub fills, empties, flexes, and responds to temperature changes, so a flexible sealant works better than rigid grout. For the longest-lasting repair, remove failed material, clean and dry the joint thoroughly, use backer rod when the selected sealant requires it, and follow the product’s exact water-ready and cure instructions.
Quick Answer
Use a flexible, waterproof 100% silicone bathroom sealant where the shower wall or tile meets the tub. Do not use grout in this change-of-plane joint. If the gap is deep or wide, use a compatible backer rod as directed by the sealant manufacturer rather than filling the entire cavity with silicone.
Key Takeaways
- Use flexible bathroom sealant, usually 100% silicone, where the tub meets tile, a shower wall, or another material that can move independently.
- Do not substitute grout just because the joint is narrow; the type of joint matters more than a simple width cutoff.
- For deep or wide gaps, follow the selected sealant’s instructions for backer rod, joint depth, and maximum width.
- Remove failed caulk, soap film, moisture, and loose grout before resealing.
- Choose a product labeled for tubs, showers, constant moisture, and mold/mildew resistance, and verify compatibility with the tub and wall materials.
- Do not rely on the surface caulk bead as a substitute for proper waterproofing behind a tiled shower assembly.
At a Glance
| Time Required | About 30–60 minutes of active work, plus the sealant manufacturer’s specified water-ready and cure time |
| Difficulty | Easy to moderate DIY repair |
| Tools Needed | 100% silicone bathroom sealant, caulk gun if required, scraper or sealant-removal tool, cleaner, isopropyl alcohol if permitted by the surface manufacturer, painter’s tape, gloves, tooling tool, and backer rod when required |
| Cost | Low for a normal recaulk job; typically one sealant cartridge plus cleaning and masking supplies, with backer rod added if the joint requires it |
What Goes Between Shower Wall and Tub?
The joint between a bathtub and the wall above it is a change of plane and often a transition between two different materials. Both conditions can create movement. That is why tile-industry guidance and manufacturers use flexible caulk or sealant in these locations rather than rigid grout.
CUSTOM Building Products specifically describes caulk as appropriate for transition joints such as where tile meets a tub. MAPEI likewise recommends caulking at changes of plane where movement can occur.
At the tub-to-wall seam, flexibility matters more than hardness: grout is designed for rigid tile joints, while an appropriate sealant can stretch and compress as the assembly moves.
For most tiled tub surrounds, a 100% silicone kitchen-and-bath sealant is the practical choice because it remains flexible, adheres to many common bathroom surfaces, and can provide a waterproof surface seal when correctly installed.
Note: The visible silicone bead is only one part of moisture management. Tile and grout are not inherently waterproof. A tiled shower or tub surround should also have an appropriate waterproofing or moisture-management system behind the finish according to the installation system being used.
Schluter Systems explains that tile and grout alone do not form the waterproofing layer. The underlying waterproofing should therefore be correct even if the finished caulk bead later needs maintenance.
Why Silicone Caulk Is the Best Choice
Silicone is well suited to tub and shower transitions because it combines flexibility, water resistance, and adhesion. Those characteristics let the bead accommodate normal movement without behaving like a rigid cement-based joint.
Choose a formulation specifically labeled for kitchens, baths, tubs, showers, or continuously damp areas. Mold- and mildew-resistance claims vary by product, so check the label instead of assuming every silicone formulation provides the same protection.
[Amazon Products Picked for You]

Waterproof sealant: This white caulk seals out air, water, and moisture with 100% silicone as cured

NO CAULK GUN REQUIRED: Built-in trigger and dial deliver controlled application and a smooth silicone bead with no separate caulk gun needed for sealing projects

100% Silicone Caulk Protection: This silicone caulk clear provides ultimate waterproof protection, ensuring a reliable seal against water damage. Ideal for areas with consistent exposure, keeping your surfaces safeguarded and pristine under any weather condition.
Silicone Seals Movement
The tub and wall can move slightly relative to one another as the tub is loaded, unloaded, heated, cooled, or as the building settles. A flexible elastomeric sealant is designed to tolerate this movement.
| Property | 100% Silicone Bathroom Sealant | Grout |
|---|---|---|
| Flexibility | High | Low |
| Best location | Changes of plane and dissimilar-material transitions | Stable joints between tiles on the same plane |
| Movement tolerance | Designed to stretch/compress within the product’s rating | Rigid and prone to cracking if the joint moves |
| Wet-area suitability | Excellent when specifically rated for bathrooms | Suitable between tiles when used as part of a properly waterproofed installation |
For example, CUSTOM Commercial 100% Silicone Sealant is specifically intended for corners, coves, changes of plane, expansion joints, tubs, showers, and other wet applications. Products that meet ASTM C920 also provide a documented movement classification rather than relying on a vague claim of flexibility.
Waterproof Gap Protection
Once properly applied and cured according to its label, bathroom silicone creates a surface seal that helps stop splash water from entering the joint between the tub and finished wall surface.
That does not mean every silicone has the same joint dimensions, adhesion requirements, exposure time, or movement rating. Before applying it, confirm that the product is compatible with the actual surfaces involved, such as ceramic tile, porcelain, fiberglass, acrylic, glass, natural stone, painted material, or metal.
Do not use the old article’s “40+ years” figure as an expected service life. A sealant bead’s real lifespan depends on adhesion, joint movement, cleaning chemicals, standing water, installation quality, substrate condition, and the product itself. Inspect the joint periodically and replace it when it cracks, pulls away, hardens, or develops persistent contamination.
Mold Resistant Finish
Many kitchen-and-bath silicone products are formulated or treated to resist mold and mildew growth on the cured sealant. That is useful in a damp bathroom, but it does not make the joint maintenance-free or permanently mold-proof.
| Feature | Practical Benefit |
|---|---|
| Flexible | Accommodates movement between the tub and wall |
| Waterproof when properly cured | Helps block water at the finished joint |
| Bathroom-rated mold resistance | Helps slow staining and growth on the cured bead |
| Good adhesion | Helps the bead remain attached to both sides of the joint |
| Available in multiple colors | Can match tile, grout, or fixtures more closely |
Ventilation, routine cleaning, and keeping the joint free of soap residue still matter because mold can grow on surface contamination even when the sealant itself includes mold-resistant technology.
When Grout Works on Shower Gaps
Grout is appropriate mainly for joints between tiles on the same stable plane. It fills the regular spacing between adjacent tiles and creates the continuous tiled finish.
It should not be selected for the tub-to-wall seam simply because that seam is narrow. Where tile meets the tub, shower base, another wall plane, or another material that can move independently, use the flexible sealant required by the tile or fixture system.
Epoxy grout can offer excellent stain, chemical, and water resistance in suitable tile joints, but it is still not a substitute for an elastomeric movement-joint sealant at the tub edge.
Likewise, sealing cementitious grout can make it easier to maintain or reduce absorption depending on the product, but it does not turn the grout layer into the shower’s primary waterproofing system.
How to Fill a Wide Shower Gap
A wider or deeper joint needs more attention than simply squeezing in a larger quantity of silicone. The selected sealant must remain within its manufacturer’s permitted joint dimensions and should be installed with the correct depth and bond configuration.
A closed-cell backer rod is commonly used where the manufacturer’s instructions call for one. It occupies excess depth, supports the sealant bead, and helps keep the sealant bonded to the two sides of the joint rather than unnecessarily adhering to the back of a deep cavity.
Caulk for Flexibility
Use an appropriate flexible silicone sealant over the prepared joint rather than trying to make the entire cavity a solid block of sealant. The finished bead should contact clean, compatible surfaces on both sides and be tooled so it forms continuous contact without pinholes or gaps.
Follow the selected product’s instructions for allowable width and depth. For example, some bathroom silicone manufacturers specifically direct users to add backer rod once the gap exceeds a stated size. Those limits are product-specific rather than a universal “1/8-inch” or “1/4-inch” rule.
Warning: If the joint is unusually large, the tile edge is loose, the tub flange or wall system is exposed incorrectly, the wall feels soft, or water damage is visible, do not hide the problem under a very large bead of caulk. Repair the underlying assembly or have it evaluated before resealing.
Grout for Narrow Joints
Narrow joints between adjacent tiles on the same stable surface are normally grout joints. A narrow joint at the tub edge, however, is still a movement/change-of-material joint and should receive the appropriate flexible sealant.
| Joint Condition | Preferred Approach | Why |
|---|---|---|
| Tile-to-tile joint on one stable plane | Compatible grout | The joint is intended to be rigid |
| Tile or wall meets tub/shower base | Flexible bathroom sealant | The surfaces can move independently |
| Deep or wide movement joint within sealant limits | Backer rod or bond-breaker system plus compatible sealant when specified | Controls depth and allows the sealant to move correctly |
| Gap beyond the product’s allowed size or with damaged substrate | Repair, trim, or rebuild the joint before sealing | A huge bead alone may sag, detach, or hide an installation problem |
Best Caulk Types for Shower Seams
For a continuously wet tub or shower transition, 100% silicone kitchen-and-bath sealant is generally the strongest all-around option. Look for a product rated for the actual substrates, wet-area exposure, and amount of movement expected.
MAPEI Mapesil T Plus, for example, is a 100% silicone sealant designed for expansion and movement joints and wet installations. GE Supreme Silicone Kitchen & Bath is another bathroom-rated 100% silicone product and advertises ASTM C920 Class 50 performance.
Siliconized acrylic or latex products can be easier to apply, clean, and paint, but they do not automatically offer the same movement and continuous-wet-area performance as 100% silicone. Use them only where their label specifically permits the application.
Also check compatibility when sealing natural stone, metal, acrylic, fiberglass, or specialty finishes. Some installations call for a particular cure chemistry, primer, or manufacturer-approved sealant.
Fast “water-ready” formulations can reduce downtime, but water-ready time is not the same as full cure. A product may permit water exposure after a short period while continuing to cure afterward. Always follow the current instructions printed on the cartridge or technical data sheet.
[Amazon Products Picked for You]

100% Silicone Caulk Protection: This silicone caulk white provides ultimate waterproof protection, ensuring a reliable seal against water damage. Ideal for areas with consistent exposure, keeping your surfaces safeguarded and pristine under any weather condition.

100% Silicone Caulk Protection: This silicone caulk white provides ultimate waterproof protection, ensuring a reliable seal against water damage. Ideal for areas with consistent exposure, keeping your surfaces safeguarded and pristine under any weather condition.

100% Silicone Caulk Protection: This silicone caulk clear provides ultimate waterproof protection, ensuring a reliable seal against water damage. Ideal for areas with consistent exposure, keeping your surfaces safeguarded and pristine under any weather condition.
How to Seal the Shower-to-Tub Joint
For a durable shower-to-tub joint, remove failing material instead of covering it, confirm the substrate is sound, establish the correct joint depth, and apply a continuous silicone bead to clean, dry surfaces.
Tools and Materials
- 100% silicone kitchen-and-bath sealant compatible with both surfaces
- Caulk gun if using a standard cartridge
- Plastic scraper or sealant-removal tool
- Utility knife used carefully where appropriate
- Bathroom cleaner suitable for the surfaces
- Isopropyl alcohol only if permitted by the surface and sealant manufacturers
- Clean lint-free cloths or paper towels
- Painter’s tape
- Disposable gloves
- Caulk-smoothing/tooling tool
- Closed-cell backer rod if required for the joint dimensions
Step-by-Step Method
- Inspect the joint. Look for loose tile, a moving wall panel, soft substrate, rot, staining, or evidence that water is entering from somewhere other than the surface seam. Repair those problems before caulking.
- Remove failed caulk. Cut and scrape away the old bead without damaging the tub, tile, or wall panel. Remove loose grout from the actual movement joint rather than trapping it beneath a new bead.
- Clean away contamination. Remove soap film, body oils, residue, dirt, and old sealant fragments. Rinse when appropriate and let the area dry completely.
- Prepare the final bonding surfaces. If the sealant manufacturer recommends an alcohol wipe or primer for the substrate, follow those instructions and allow the surface to dry.
- Check joint depth and width. If the joint is deep or large enough that the product calls for backer rod, install the correct rod without puncturing or damaging it. If the opening exceeds the product’s maximum dimensions, repair the gap instead of trying to bridge it with an oversized bead.
- Mask the edges. Apply painter’s tape along the tub and wall if you want a crisp, consistent finish.
- Apply a continuous bead. Cut the nozzle only large enough for the required bead and maintain steady pressure as you move along the joint.
- Tool the bead immediately. Smooth the fresh silicone with a suitable caulk tool or gloved finger as permitted by the product instructions. The goal is firm contact with both joint faces and a smooth profile without voids.
- Remove tape while the sealant is fresh. Peel the tape away carefully before a skin forms that could tear the finished edge.
- Respect the product’s exposure time. Do not assume every bathroom silicone needs 24 hours or that every fast-cure product is fully cured in 30 minutes. Use the water-ready and full-cure instructions for the exact sealant you installed.
- Inspect after curing. Look for skipped areas, holes, pulled edges, or spots where the bead did not adhere before putting the joint back into normal service.
Pro Tip: Some flexible fiberglass or acrylic tubs move noticeably when filled. GE’s bathtub-sealing guidance notes that filling certain tubs with water before applying sealant can account for this loaded position. Use this technique only when it is compatible with the tub and sealant manufacturer’s instructions.
| Step | Purpose | Result |
|---|---|---|
| Remove old material | Expose sound bonding surfaces | Reduces adhesion failures |
| Clean and dry | Remove soap, grease, debris, and moisture | Improves adhesion |
| Control joint depth | Use backer rod when required | Better sealant movement and less wasted material |
| Apply and tool silicone | Create continuous contact | Flexible surface seal |
| Observe water-ready/cure time | Avoid disturbing fresh material | Lower risk of premature failure |
Common Shower Caulking Mistakes to Avoid
Most premature failures come from incorrect material selection, poor preparation, improper joint design, or exposing the bead too soon.
- Using grout at a moving transition: grout is rigid and can crack where the tub and wall move independently.
- Applying new silicone over failed silicone: old loose or contaminated material can prevent a dependable bond.
- Caulking a wet joint: trapped moisture and wet surfaces can interfere with adhesion.
- Ignoring soap film or oils: even an apparently clean tub edge may have residue that reduces bonding.
- Filling a deep cavity entirely with sealant: use the joint design and backer material required by the sealant manufacturer.
- Using an oversized bead to hide an installation defect: repair excessive or structurally unsupported gaps first.
- Assuming all silicone is suitable: verify wet-area rating and compatibility with both surfaces.
- Confusing water-ready time with full cure: follow the exact label rather than a generic 30-minute or 24-hour rule.
- Expecting mold-resistant caulk to prevent all mold: ventilation, cleaning, and keeping the seam free of residue still matter.
Warning: Use cutting tools carefully when removing old caulk. Ventilate the bathroom while using cleaners or sealants, follow product safety directions, and never mix household cleaning chemicals such as bleach and ammonia.
Choose the Right Caulk for Your Shower
The best product is not simply the tube that says “caulk.” Match the sealant to the location, surfaces, movement, and moisture exposure.
For a tub-to-tile or shower-base transition, look first for a 100% silicone kitchen-and-bath sealant that lists the surfaces in your installation and is intended for wet areas. ASTM C920 compliance is useful when you want a sealant with documented movement performance.
If the tub or surround is acrylic, fiberglass, natural stone, coated metal, or another specialty finish, check the fixture and sealant instructions for compatibility. Certain materials can require a neutral-cure silicone, primer, or another approved product.
Mildew-resistant formulations can help keep the exposed bead cleaner, but maintenance still matters. Drying the bathroom, running the exhaust fan, cleaning soap residue, and repairing loose edges promptly can extend the useful life of the joint.
Do not choose based solely on a fast water-ready claim. Adhesion, movement capability, substrate compatibility, joint dimensions, and correct preparation are more important than reopening the shower a few hours sooner.
[Amazon Products Picked for You]
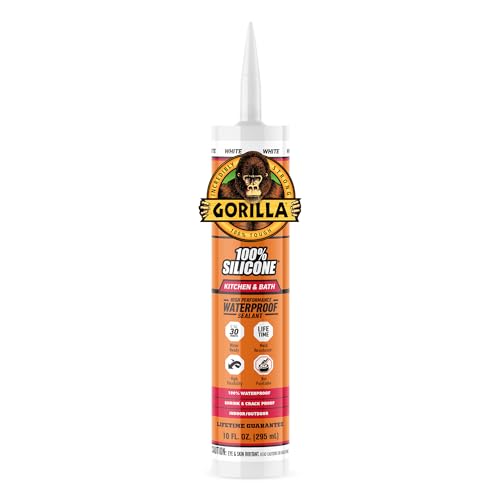
Kitchen & Bath Ready – Premium white silicone caulk formulated for kitchens and bathrooms, delivering a durable, long-lasting seal in wet, humid environments

Waterproof sealant: This clear caulk seals out air, water, and moisture with 100% silicone as cured

Kitchen & Bath Ready – Premium clear silicone caulk formulated for kitchens and bathrooms, delivering a durable, long-lasting seal in wet, humid environments
When Caulking Is Not Enough
A fresh bead cannot repair every shower problem. Stop and investigate before resealing if you find:
- Soft drywall, backer board, trim, or flooring
- Loose or bulging tile
- A wall panel that moves excessively
- Persistent moisture behind the old bead
- Rot, swelling, or significant mold behind the joint
- A gap larger than the selected sealant is rated to handle
- A missing or incorrectly positioned tub flange or waterproofing detail
- Water entering from plumbing, a shower door, fixtures, or another location
In these cases, repairing the underlying problem is more important than making the surface seam look finished.
Troubleshooting a Failing Tub Caulk Joint
| Problem | Likely Cause | What to Do |
|---|---|---|
| Caulk pulls away from tile or tub | Dirty, wet, incompatible, or poorly prepared surface | Remove the failed bead, clean and dry completely, then verify product compatibility |
| Bead splits through the middle | Excess movement, poor joint geometry, or gap beyond product capability | Check joint size, backer rod requirements, tub movement, and underlying installation |
| Mildew keeps returning | Persistent moisture, surface residue, ventilation problems, or contaminated old sealant | Replace contaminated sealant if necessary and improve cleaning and ventilation |
| Water still appears outside the tub | Leak may come from plumbing, shower door, overflow, wall penetration, or waterproofing failure | Trace the actual water source rather than repeatedly adding caulk |
Frequently Asked Questions
What can I use to fill the gap between my shower and the wall?
Where a shower base, bathtub, or wall panel meets another surface and movement can occur, use a compatible flexible wet-area sealant, usually 100% silicone. For a deep or wide joint, add backer rod if required by that sealant’s installation instructions.
How can I fill a large gap between my tile and bathtub?
First measure and inspect the gap. If it is within the chosen silicone’s permitted dimensions, use the backer rod or bond-breaking material specified by the manufacturer to control depth, then apply silicone over it. If the gap exceeds the product’s limits or lacks a sound edge, repair or trim the opening before sealing.
How do I fill a gap between a shower tray and the floor?
If the joint is a transition between the shower tray and finished floor, use the flexible sealant specified by the tray, flooring, or waterproofing-system manufacturer. Clean and dry both surfaces first, use backer rod when required, and allow the sealant to become water-ready before exposing it to moisture.
What is the best filler for gaps between tiles?
For ordinary joints between tiles on the same stable plane, use the grout specified for the tile installation. Use flexible silicone or another approved movement-joint sealant at corners, changes of plane, expansion joints, and transitions such as tile-to-tub.
Should I use grout or caulk where tile meets a bathtub?
Use flexible caulk or sealant rather than grout. The tub-to-tile seam is a transition where the two surfaces can move independently, so a rigid grout joint is more likely to crack.
How long should shower silicone cure before getting wet?
Follow the exact instructions on the sealant you use. Some modern formulas advertise short water-ready times, while others require many hours before water exposure. Water-ready time and complete cure are not necessarily the same thing.
Conclusion
Where a shower wall or tile meets a bathtub, use a flexible wet-area sealant—usually 100% silicone—rather than grout. The key is not an arbitrary gap-width rule but the fact that this is a movement and material-transition joint. Remove failed material, clean and dry the surfaces, use backer rod when the chosen product requires it, tool the bead properly, and respect its water-ready and cure instructions. If the opening is unusually large or shows water or structural damage, repair the underlying problem instead of hiding it beneath extra caulk.
Sources
- Tile Council of North America — Movement Joint Placement — explains why tile installations need accommodation for expansion and contraction.
- CUSTOM Building Products — Frequently Asked Questions — identifies caulk as appropriate for transition/change-of-plane joints such as tile meeting a tub.
- CUSTOM Commercial 100% Silicone Sealant — documents silicone use in corners, changes of plane, expansion joints, tubs, showers, and wet areas.
- MAPEI Mapesil T Plus — manufacturer specifications for a 100% silicone movement-joint sealant used in wet tile installations.
- Schluter Systems — Shower Waterproofing — explains why tile and grout alone are not the shower’s waterproofing system.
- GE Supreme Silicone Kitchen & Bath Sealant — current manufacturer information on waterproofing, movement capability, mold protection, and water-ready time.
