
Transferring files between your iPhone and MacBook is one of the fastest ways to move photos, videos, documents, links, and other files without a cable. AirDrop works best when both devices are nearby, awake, unlocked, and set to the right visibility option. Once Bluetooth, Wi-Fi, and AirDrop settings are ready, you can send a file from your iPhone to your MacBook in just a few taps.
Quick Answer
To AirDrop from iPhone to MacBook, turn on Wi-Fi and Bluetooth on both devices, set AirDrop visibility to Contacts Only or Everyone, open the file on your iPhone, tap the Share icon, choose AirDrop, select your MacBook, and accept the transfer if prompted.
Key Takeaways
- AirDrop needs both Wi-Fi and Bluetooth turned on, but your devices do not need to be connected to the same Wi-Fi network.
- Keep your iPhone and MacBook close together, awake, and unlocked for the smoothest transfer.
- Use Contacts Only for regular sharing, or Everyone / Everyone for 10 Minutes when your MacBook does not appear.
- Most AirDrop issues can be fixed by checking visibility, turning off Personal Hotspot, restarting both devices, or signing in with the right Apple Account.
At a Glance
| Time Required | 1 to 3 minutes after setup |
| Difficulty | Easy |
| Tools Needed | iPhone, MacBook, Wi-Fi, Bluetooth, and the file you want to share |
| Cost | Free |
Preparing Your Devices for AirDrop
Before you use AirDrop to share files between your iPhone and MacBook, make sure both devices are properly set up. The devices should be close to each other, powered on, awake, and not blocked by AirDrop visibility settings.
First, verify that Bluetooth and Wi-Fi are enabled on both devices. On your iPhone, swipe down from the top-right corner to open Control Center, then check the Wi-Fi and Bluetooth icons. For your MacBook, click Control Center in the menu bar and confirm that Wi-Fi and Bluetooth are active.
Next, adjust your AirDrop settings. On your iPhone, go to Settings > General > AirDrop and choose Contacts Only or Everyone for 10 Minutes, depending on your iOS version. You can also press and hold the network settings card in Control Center, tap AirDrop, and choose your visibility option.
On your MacBook, open Finder, click AirDrop in the sidebar, and select Allow me to be discovered by: Contacts Only or Everyone. In newer macOS versions, you can also open Control Center, click AirDrop, and choose the visibility setting from there.
If you choose Contacts Only, make sure both devices are signed in to Apple services and that the sender’s email address or phone number is saved in Contacts. If your MacBook does not appear, temporarily switch both devices to Everyone or Everyone for 10 Minutes, then switch back after the transfer.
Note: AirDrop uses Bluetooth to discover nearby devices and Wi-Fi to transfer files. You do not need the same Wi-Fi network, but Wi-Fi must be turned on.
You’re now ready to share freely between your iPhone and MacBook.
[Amazon Products Picked for You]

More protective for your MacBook: every anti-dust plug is specially molded, manufactured to the quality available. Flexible, easy to apply and remove for cleaning or disinfecting. Prevent your laptop from splashing liquid, dust, and other contaminants affecting the ports of laptop

【MACBOOK PORT COVERS】 -Specially Designed for 2023-2026 MacBook Air 15.3 inch M2 M3 M4 M5 A2941 A3114 A3241 A3448, 2026-2019 MacBook Pro 16 inch M5 M4 M3 M2 M1 Pro/Max A3428 A3429 A3403 A3186 A2991 A2780 A2485 A2141, 2021-2026 MacBook Pro 14 inch M5 M4 M3 M2 M1 Pro/Max A3426 A3427 A3434 A3112 A3401 A3185 A2918 A2992 A2442 A2779, 2018-2026 MacBook Air 13 inch M5 A3449 / M4 A3240 / M3 A3113 / M2 A2681 / M1 A2337 A2179 A1932, 2023-2016 Apple MacBook Pro 13" 15" Model A2338 M1 M2/A2289/A2251/A2159/A1989/A1706/A1708/A1990/A1707 and MacBook 12 Inch with Retina Model A1534.

【USB Accessories for MacBook Pro】USB C Adapter for MacBook Pro/Air 13''/15''/16''(2016-2022).The USB C Multiport Adapter expands your MacBook’s 2 USB-C ports into 1 Thunderbolt 3 port, 3 USB-A ports, 1 SD card slot, and 1 microSD card slot—all from one ultra-compact hub. Greatly improve your work efficiency.
Sending Files From Your iPhone
Once AirDrop is ready, sending files from your iPhone to your MacBook is simple. You can AirDrop photos, videos, PDFs, documents, web pages, map locations, contacts, notes, and other shareable items from supported apps.
First, open the file or item you want to share. This could be a photo in Photos, a PDF in Files, a website in Safari, or a document inside another app. Tap the Share icon, which looks like a square with an upward arrow.
To share a file, open it on your iPhone, tap the Share icon, choose AirDrop, and select your MacBook from the nearby devices list.
From the sharing options, select AirDrop. Your MacBook should appear in the list of available devices. Tap your MacBook’s name to start the transfer.
If your iPhone shows more than one Mac, look for the MacBook name, profile image, or device label that matches your computer. You can check your MacBook name by opening System Settings > General > About.
You’ll see a confirmation prompt on your MacBook if the file is coming from a device that is not signed in to the same Apple Account. Click Accept, and the file will download to your MacBook.
Pro Tip: For several photos or videos, select them all in the Photos app first, then tap Share and AirDrop once. This is faster than sending each file separately.
[Amazon Products Picked for You]

GREAT REPLACEMENT FOR YOUR CRACKED ADAPTER: This AC wall adapter plug keeps you from buying a completely new unit, just swap the old cracked adapter, your power adapter can works well as before.Compatible with all US mac, macbook, adapter, duckhead, apple, power adapters Charger.

[Lightning EarPods Adapter]: Mxcudu USB-C to Lightning Headphone Audio Adapter allows you using your Lightning EarPods to connect your USB-C device such as iPhone 17/16/15, iPad Pro, MacBook for audio. No bother to prepare another pair of USB C earphone. In addition, this audio adapter also support wire control function such as volume up/down, playback and pause. Please Note: Only for Audio, Not for Charging and Data Transfer

The USB-C VGA Multiport Adapter lets you connect your USB-C or Thunderbolt 3 (USB-C)–enabled Mac and iPad Pro to a VGA display, while also connecting a standard USB device and a USB-C charging cable.
Receiving Files on Your MacBook
Receiving files on your MacBook through AirDrop is just as straightforward as sending them. Here’s how you can prepare your MacBook to receive those files:
- Enable Wi-Fi and Bluetooth: Make sure both are turned on for AirDrop to work.
- Open Finder: Click on the Finder icon in your Dock to access AirDrop settings.
- Select AirDrop: In the Finder sidebar, click on “AirDrop” to open the AirDrop window.
- Choose Your Visibility: Set your AirDrop visibility to “Everyone” or “Contacts Only” based on whom you want to receive files from.
Once you’ve done this, you’re ready to receive files seamlessly from your iPhone. Files sent to your MacBook usually appear in the Downloads folder. Some items, such as photos or links, may also open in the app that best matches the file type.
If you send a file between devices signed in to the same Apple Account, the transfer may accept automatically. If the devices use different accounts, your MacBook will ask you to accept or decline the incoming file.
Warning: Avoid leaving AirDrop set to Everyone when you are done, especially in public places. Switch back to Contacts Only or Receiving Off to reduce unwanted file requests.
Where AirDrop Files Go on MacBook
Most files you receive through AirDrop land in your MacBook’s Downloads folder. To find them, open Finder and click Downloads in the sidebar. If you recently received the file, it may appear near the top of the folder.
Some AirDrop items behave differently. A website link may open in your browser, a location may open in Maps, and a contact card may open in Contacts. Photos and videos usually save as files unless you choose to open or import them into another app.
If you cannot find the file, use Spotlight Search by pressing Command + Space, then type the file name or file type. You can also sort your Downloads folder by Date Added to see the latest AirDrop transfer first.
AirDrop Not Working? Quick Fixes
If your iPhone cannot find your MacBook, or the transfer gets stuck, start with the basics. AirDrop depends on short-range wireless discovery, so small setting conflicts can stop the devices from seeing each other.
- Move the devices closer: Keep your iPhone and MacBook within the same room and away from thick walls or heavy interference.
- Wake and unlock both devices: Your MacBook should not be asleep, and your iPhone should be unlocked.
- Check AirDrop visibility: Try Everyone or Everyone for 10 Minutes if Contacts Only does not show the other device.
- Turn Wi-Fi and Bluetooth off and on: Toggle both settings on your iPhone and MacBook, then try again.
- Turn off Personal Hotspot: Personal Hotspot can interfere with AirDrop on some devices.
- Check Focus or firewall settings: If your MacBook blocks incoming connections, AirDrop may not work as expected.
- Restart both devices: A restart often clears temporary wireless or sharing glitches.
- Update iOS and macOS: Software updates can fix compatibility and transfer issues.
After each change, reopen the Share menu on your iPhone and wait a few seconds for your MacBook to appear. Nearby AirDrop devices do not always show up instantly.
[Amazon Products Picked for You]

𝐔𝐒𝐁 𝐁𝐥𝐮𝐞𝐭𝐨𝐨𝐭𝐡 𝐖𝐢𝐅𝐢 𝐀𝐝𝐚𝐩𝐭𝐞𝐫 - Archer TX10UB Nano features the combination of the functionality between Bluetooth adapter and WiFi adapter.

Wifi 6 High-speed Transmission: The WiFi adapter supports the new generation of WiFi6 technology with transmission speeds of up to 600 Mbps on 5 GHz + 287 Mbps on 2.4 GHz, enabling lightning-fast transmission of video at ultra-high speed and low latency
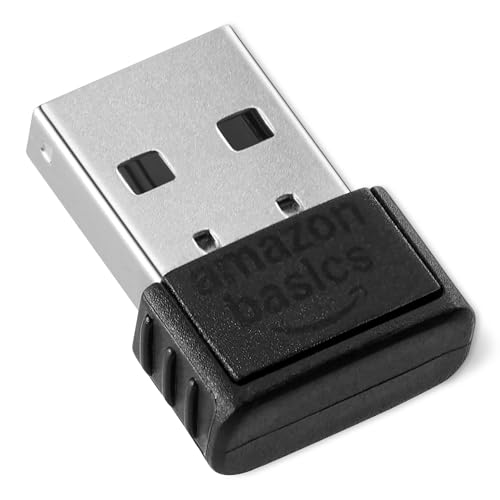
INSTANT BLUETOOTH ACCESS: Bluetooth dongle adapter receiver for PCs converts non-Bluetooth devices into Bluetooth-capable with simple USB connection
AirDrop Privacy and Safety Tips
AirDrop is convenient, but you should still use it carefully. When your device is discoverable, nearby Apple devices may be able to see your AirDrop name and send requests based on your visibility setting.
For daily use, Contacts Only is the safest choice because it limits discovery to people saved in your Contacts. Use Everyone or Everyone for 10 Minutes only when you need to receive a file from someone who is not in your Contacts.
You can also set AirDrop to Receiving Off when you are not using it. This prevents nearby people from sending AirDrop requests to your iPhone or MacBook.
Frequently Asked Questions
What types of files can I send via AirDrop?
You can send photos, videos, documents, PDFs, websites, map locations, contact cards, notes, and many other shareable items via AirDrop. If an app shows the Share icon, it usually supports AirDrop sharing.
Do I need Wi-Fi for AirDrop to work?
Yes, Wi-Fi must be turned on for AirDrop to work. However, you do not need to join the same Wi-Fi network or have internet access. AirDrop uses Bluetooth to find nearby devices and Wi-Fi to move the file.
Can I AirDrop files to non-Apple devices?
No. You can’t AirDrop files to non-Apple devices because AirDrop is built for Apple devices. To share with Android, Windows, or other platforms, use email, cloud storage, messaging apps, USB transfer, or another file-sharing service.
How far can I be from my MacBook to use AirDrop?
AirDrop works best when your iPhone and MacBook are close together, ideally within the same room. If the MacBook does not appear, move the devices closer, unlock both screens, and check that Wi-Fi, Bluetooth, and AirDrop visibility are turned on.
What should I do if AirDrop isn’t working?
If AirDrop isn’t working, turn Wi-Fi and Bluetooth off and back on, make sure both devices are awake and unlocked, check AirDrop visibility, turn off Personal Hotspot, move the devices closer, and restart both devices if needed.
Why does my MacBook not show up in AirDrop?
Your MacBook may not show up if AirDrop is set to Receiving Off, the Mac is asleep, Bluetooth or Wi-Fi is off, Contacts Only cannot verify your contact details, or Personal Hotspot is active. Try switching AirDrop visibility to Everyone temporarily.
Where do AirDrop files save on a MacBook?
Most AirDrop files save to the Downloads folder on your MacBook. Some shared items, such as web links, map locations, or contacts, may open in the matching app instead of saving as a normal file.
Conclusion
Now that you know how to effortlessly transfer files from your iPhone to your MacBook using AirDrop, you can move photos, documents, videos, links, and more without cables or extra apps. Start by turning on Wi-Fi and Bluetooth, choose the right AirDrop visibility setting, then use the Share icon on your iPhone to send the file.
For the best experience, keep both devices nearby, awake, and unlocked. If your MacBook does not appear, switch visibility to Everyone or Everyone for 10 Minutes, restart Wi-Fi and Bluetooth, and check the Downloads folder after the transfer finishes. AirDrop is quick, private, and simple once your settings are ready.
Sources
- Apple Support: How to use AirDrop on your iPhone or iPad — supports AirDrop setup, sharing steps, and visibility options.
- Apple macOS User Guide: Use AirDrop to send files to devices nearby — supports Mac AirDrop setup and receiving steps.
- Apple iPhone User Guide: Use AirDrop to send items — supports iPhone sharing steps and AirDrop behavior.
