
If your laptop feels slow when opening files, launching apps, or starting Windows, your hard disk drive may have scattered file fragments that make the drive work harder than necessary. Defragmenting an HDD can reorganize that data so Windows reads files more efficiently. Before you begin, check whether your laptop uses an HDD or SSD because SSDs should be optimized with Windows tools, not manually defragmented like older hard drives.
Quick Answer
To defragment a laptop hard drive, open Windows “Defragment and Optimize Drives,” select your HDD, click “Analyze,” then choose “Optimize” if fragmentation is high. Do not manually defragment an SSD. Windows optimizes SSDs with maintenance tasks such as TRIM instead.
Key Takeaways
- Defragmentation is useful for traditional hard disk drives because it groups scattered file pieces together.
- SSDs should not be manually defragmented because extra write activity can add unnecessary wear.
- Windows includes a built-in tool called “Defragment and Optimize Drives” for checking and optimizing drives.
- Analyze the drive first, then optimize it if Windows reports enough fragmentation to justify the process.
- Keep 15-20% free space when possible so Windows has room to organize files and run maintenance smoothly.
At a Glance
| Time Required | A few minutes for analysis; optimization can take several minutes to a few hours depending on drive size, speed, free space, and fragmentation level. |
| Difficulty | Easy |
| Tools Needed | Windows “Defragment and Optimize Drives” tool; optional Command Prompt for advanced users. |
| Cost | Free |
Understanding the Need for Defragmentation
When your laptop’s hard drive gets cluttered with fragmented data, it can slow down file access and make everyday tasks feel sluggish.
To optimize a traditional hard disk drive (HDD), you need to understand defragmentation. As you add, delete, and modify files, parts of those files can end up stored in different areas of the drive. The drive then has to work harder to collect all the pieces when you open a file.
Regularly defragmenting your HDD helps consolidate these fragments, which can improve file access speed on mechanical drives. You do not need to defragment every day. For many users, Windows scheduled optimization is enough, but you can manually check the drive when performance feels unusually slow.
Keep an eye on fragmentation levels. If Windows reports a noticeable amount of fragmentation, especially above 10%, it may be time to optimize the drive. By staying on top of this process, you maintain system efficiency, support smoother boot times, and reduce delays when opening files or launching applications.
Take control of your laptop’s performance by checking the drive type first, analyzing the drive, and only optimizing the drives that actually need it.
Warning: Do not manually defragment a solid-state drive. SSDs do not benefit from traditional defragmentation, and unnecessary write activity can add wear. Use Windows “Optimize” for SSD maintenance instead.
Accessing the Defragmentation Tool
To access the defragmentation tool, click the Search bar on your taskbar and type “defrag.”
Select “Defragment and Optimize Drives” from the results to open the optimization window.
Here, you’ll see all connected drives, their media types, and their current optimization status. This is the safest place to confirm whether a drive is an HDD or SSD before you take action.
Search for Defrag Tool
Accessing the Defragmentation Tool is straightforward. Open the search bar on your taskbar and type “defrag.”
This action will display the “Defragment and Optimize Drives” option in the search results. Click that option to launch the tool where you can manage drive optimization effectively.
- You’ll see a list of all your drives along with their current optimization status.
- Regularly check the last analysis or optimization date to understand your drive’s maintenance history.
- Select a drive, then choose either the “Analyze” or “Optimize” button depending on what Windows shows.
Open Optimize Drives Window
How do you access the Optimize Drives window? Start by locating the Search bar on your taskbar. Type “defrag” and select “Defragment and Optimize Drives” from the results. This action opens the Optimize Drives window, which shows the drives connected to your laptop along with their optimization statuses.
Alternatively, you can open File Explorer, right-click the drive you want to optimize, and select “Properties.” Navigate to the “Tools” tab and click “Optimize” to reach the same window.
Here, you can analyze specific drives by clicking the “Analyze” button to check their fragmentation levels. For SSDs, Windows handles optimization differently, often through TRIM-related maintenance. For HDDs, Windows may show the percentage of fragmentation that needs attention.
Selecting the Drive for Defragmentation
Wondering which drive to select for defragmentation? Start by searching for “defrag” in your taskbar’s search bar to open the “Defragment and Optimize Drives” tool.
You’ll see a list of available drives, including their media types. Select only a hard disk drive (HDD) for traditional defragmentation, as SSDs don’t require that process.
Only select hard disk drives (HDDs) for traditional defragmentation. Solid-state drives (SSDs) should be optimized through Windows maintenance, not manually defragmented.
- Click the HDD you want to defragment to highlight it.
- Click “Analyze” to check the fragmentation level before making changes.
- Click “Optimize” to start the defragmentation process if Windows shows the drive needs it.
Regularly selecting the correct drive and analyzing its status can help maintain steady performance and prevent slowdowns caused by fragmentation.
Analyzing Drive Fragmentation
Once you’ve selected the appropriate HDD for defragmentation, the next step is analyzing its fragmentation status. To check fragmentation, use the built-in Windows tool “Defragment and Optimize Drives.” Follow these steps:
- Open the tool.
- Select your HDD.
- Click “Analyze.”
This process reveals the fragmentation percentage. A level above 10% commonly suggests that your drive may benefit from optimization. Here’s a quick summary:
| Fragmentation Level | Action Required |
|---|---|
| 0-10% | No immediate action needed |
| 11-20% | Consider defragmenting |
| 21-30% | Defragmentation recommended |
| 31% and above | Optimize as soon as practical |
Regularly analyzing drive fragmentation helps maintain better system performance by keeping data organized for faster access on mechanical drives.
Note: If the “Analyze” button is unavailable for a drive, Windows may identify it as an SSD or another drive type that does not use traditional fragmentation checks.
Initiating the Defragmentation Process
Before you start the defragmentation process, access the Search bar on your taskbar and type “defrag” to locate the “Defragment and Optimize Drives” option.
- In the Optimize Drives window, select the hard drive you want to defrag, avoiding any SSDs because they don’t need traditional defragmentation.
- Click the “Analyze” button to check the fragmentation level. If it’s high enough to justify maintenance, click “Optimize” to begin defragmentation.
- For a detailed report, advanced users can open Command Prompt and type
defrag C: /U /V, adjustingC:to match the correct drive letter.
Try not to interrupt the process once it starts. You can continue light work on the laptop, but performance may feel slower while the drive is being optimized.
Regularly review your scheduling settings in Optimize Drives to make sure your hard drive is optimized on a practical schedule for peak performance.
Monitoring the Defragmentation Progress
As the defragmentation process runs, it’s important to keep an eye on its progress to make sure everything is functioning smoothly.
Use the built-in “Defragment and Optimize Drives” tool in Windows for real-time monitoring. This tool shows you the percentage of fragmentation before and after optimization.
If you prefer using the Command Prompt, run the defragmentation command with the /U switch to display the progress percentage in the command window.
Pay attention to how long the process takes. Longer times may point to a large drive, limited free space, heavy fragmentation, or slower hardware.
After completion, a report summarizes the results, including the space optimized and your drive’s new fragmentation level.
Staying informed during this process helps you understand whether drive fragmentation was likely contributing to slower performance.
Pro Tip: Plug in your laptop before starting a long optimization. A low battery or unexpected shutdown can interrupt maintenance and force you to restart the process later.
Reviewing Defragmentation Results
After defragmentation, check the summary report to see the percentage of fragmentation before and after the process.
This information helps you understand how effective the operation was and whether further action is needed.
Keep an eye on the fragmentation levels over time to determine how often you should defragment for better performance.
Understanding Optimization Reports
Understanding optimization reports is essential for evaluating your laptop’s defragmentation results.
After completing the optimization process on your hard disk drive (HDD), take a close look at the report to gauge its effectiveness.
- Check the percentage of fragmentation reduced; this indicates how much better organized your drive should be.
- Note the total time taken for defragmentation to assess efficiency and plan future maintenance.
- Review the number of files processed, which shows the activity level on your drive.
If the drive still shows high fragmentation after optimization, restart the laptop and run the tool again. If performance remains poor, the issue may involve low free space, failing hardware, malware, too many startup apps, or insufficient memory rather than fragmentation alone.
Frequency of Defragmentation
To keep your laptop’s hard drive running smoothly, regularly reviewing the frequency of defragmentation is essential. For typical users, monthly checks are usually enough. Heavy users who move large files often may benefit from checking weekly.
Check your fragmentation levels. If it’s over 10%, it’s time to consider optimization. After defragmentation, use the “Defragment and Optimize Drives” tool to review results, comparing fragmentation percentages before and after.
Windows can automatically schedule regular optimization, but you can adjust this to daily, weekly, or monthly in the settings. Keep an eye on the last run time and fragmentation percentage to decide when the next defragmentation should occur, ensuring your HDD remains efficient and responsive.
Scheduling Regular Maintenance
While it’s easy to overlook routine maintenance, scheduling regular optimization for your laptop’s hard drive is vital for maintaining its performance.
Here’s how to set it up:
- Type “defrag” in your taskbar search bar.
- Select “Defragment and Optimize Drives.”
- Click “Change Settings” under “Scheduled optimization.”
You can choose to optimize daily, weekly, or monthly. For many regular users, defragmenting or checking once a month is enough, while power users can consider weekly optimization.
To make sure you never miss an optimization, use the option that automatically runs scheduled maintenance if three consecutive optimizations are missed. This keeps your hard drive healthy and ready for action.
Scheduled maintenance is especially helpful if you often download large files, edit videos, install and remove software, or keep many documents on the same HDD.
[Amazon Products Picked for You]
The Data Recovery Stick requires no technical skills — simply plug it into your Windows computer, click Start, and the software automatically begins scanning and recovering lost files within minutes. Compatible with Windows Vista, 7, 8, 10, & 11, it's designed to be a reliable first step when accidental deletion occurs.
Massive capacity, up to 18TB capacity (1 1TB = one trillion bytes. Actual user capacity may be less depending on operating environment.).Specific uses: Business, personal

POWERFUL, LIGHTNING-FAST ANTIVIRUS: Protects your computer from viruses and malware through the cloud; Webroot scans faster, uses fewer system resources and safeguards your devices in real-time by identifying and blocking new threats
Tips for Optimizing Your Drive
To optimize your drive, start by identifying whether you’re using a traditional hard drive or an SSD.
Regularly schedule maintenance by setting automatic optimization in your Windows settings, ideally on a weekly or monthly basis depending on your usage.
Remember to keep at least 15-20% of your drive free to enhance performance and reduce fragmentation.
Regular Maintenance Schedule
Regularly maintaining your laptop’s hard drive is essential for ideal performance.
To keep your system running smoothly, set a maintenance schedule that suits your usage. For regular users, check or defrag your hard drive once a month; power users should consider weekly checks.
- Use the built-in “Defragment and Optimize Drives” tool for automatic defragmentation and optimization.
- Access the “Change Settings” option to adjust the optimization frequency based on your usage patterns.
- Regularly check your drive’s fragmentation level with the “Analyze” feature before defragmenting.
Drive Type Identification
Identifying your drive type is the first step in optimizing its performance. To do this, search for “defrag” in the Windows taskbar and open “Defragment and Optimize Drives.”
Check the media type column. It will show whether you have a Solid State Drive (SSD) or a hard disk drive (HDD). Remember, SSDs don’t need traditional defragmentation; they use other optimization methods, which Windows usually handles automatically.
If you have an HDD, monitor the fragmentation level. A result over 10% signals that defragmentation may help. Schedule defragmentation only for HDDs, as running traditional defragmentation on SSDs can add unnecessary wear.
Finally, aim to keep 15-20% free space to minimize fragmentation and support overall performance.
Before You Defragment
Before you optimize a laptop hard drive, take a few simple steps to avoid interruptions and get better results.
- Save your work and close large programs before starting.
- Plug in your laptop so the process does not stop because of a low battery.
- Delete unnecessary files or move large files to external storage if your drive is nearly full.
- Run Windows Update if your system has been waiting for important updates.
- Check that you are optimizing the correct drive, especially if you use external drives.
You do not need special software for normal Windows drive optimization. The built-in tool is enough for most users and reduces the risk of installing unnecessary third-party utilities.
What to Do if Defragmentation Does Not Help
Defragmentation can help an HDD, but it will not fix every slow laptop. If your system still feels sluggish after optimization, check for other common causes.
- Low free space: Remove temporary files, uninstall unused apps, or move large videos and downloads elsewhere.
- Too many startup programs: Disable unnecessary startup apps in Task Manager to reduce boot delays.
- Malware or unwanted software: Run a full security scan if performance suddenly drops.
- Old hardware: An aging HDD may be failing, especially if you hear clicking sounds or see frequent errors.
- Not enough memory: If your laptop runs many apps at once, limited RAM can cause slowdowns.
If the drive makes unusual noises, disappears from Windows, or reports errors, back up your important files as soon as possible. Defragmentation is not a repair tool for a failing drive.
[Amazon Products Picked for You]

Feature - BENFEI Type-C/Type-A 2.5 inch Hard Drive Enclosure easily hook up your 2.5 inch SATA I/II/III hard drive to transfer files from one PC to another PC, laptop, PS4 or as a USB external hard drive.
External Hard Drive Enclosure: This 3.5" hard drive enclosure easily connects your 3.5 /2.5 inch hard drive to a PC, laptop, and other devices for massive data transfers and support HDD up to 20TB
6Gbps High-Speed SSD Enclosure: UGREEN hard drive reader supports 6Gbps max transfer speed and UASP accelerated transmission protocol, 70% Faster than traditional USB 3.0. The USB-C port is standard USB 3.1 Gen 2 which supports 10Gbps and (7+15)Pin SATA III supports max 6Gbps. (USB-C to USB-C Cable included)
Special Considerations for SSDs
Although it might seem logical to defragment your laptop’s hard drive, you shouldn’t apply this practice to Solid State Drives (SSDs). The architecture of SSDs allows for fast access across the drive, making traditional fragmentation much less relevant.
Defragmenting an SSD can reduce its lifespan by using extra write cycles. Instead, focus on the TRIM command and Windows drive optimization, which help the SSD manage unused data blocks more efficiently.
- Trust modern operating systems to handle SSD optimization automatically.
- Avoid manual defragmentation because it can lead to increased wear.
- Regularly check SSD firmware updates through your laptop or drive manufacturer when available.
In the “Defragment and Optimize Drives” window, Windows may still show an “Optimize” option for SSDs. That does not mean it will run traditional HDD defragmentation in the same way. It means Windows will use the maintenance method appropriate for that drive type.
[Amazon Products Picked for You]

RUGGED DESIGN: Engineered and tested to protect your data against water, dust (IP651,2) and accidental drops (up to 3m/9.8ft)3
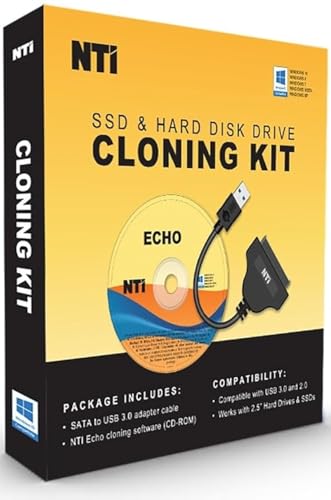
NEW NTI ECHO 7 WITH 4K-SECTOR SUPPORT: Clone between legacy 512-byte-sector drives and newer 4K-sector drives in either direction. NEW: Improved File/Folder Exclusion helps you migrate to a smaller drive when the selected data will fit and makes efficient use of the target drive’s available capacity. NOTE: Most issues reported in user reviews, while definitely solvable had these users contacted our Tech Support, are related to old versions, *not* the new V7.

NEW NTI ECHO 7 WITH 4K-SECTOR SUPPORT: Clone between legacy 512-byte-sector drives and newer 4K-sector drives in either direction. NEW: Improved File/Folder Exclusion helps you migrate to a smaller SSD when the selected data will fit, while making efficient use of the new drive’s available capacity. NOTE: Most issues reported in user reviews, while definitely solvable had these users contacted our Tech Support, are related to old versions, *not* the new V7.
Frequently Asked Questions
How do you defragment a laptop hard drive?
Search “defrag” in the Windows taskbar, open “Defragment and Optimize Drives,” select your HDD, click “Analyze,” then click “Optimize” if Windows shows that the drive needs it. Do not manually defragment an SSD.
How do you defrag Windows 10 step by step?
To defrag Windows 10, search for “defrag” in the taskbar, select “Defragment and Optimize Drives,” choose your HDD, click “Analyze,” then click “Optimize” if needed. Regular checks help keep a mechanical drive organized, especially if you often add, remove, or edit large files.
How many steps does defrag have?
Defragmentation usually involves five basic steps: analysis, planning, execution, verification, and reporting. Windows first checks fragmentation, decides how to reorganize data, moves file fragments, confirms the result, and then shows the updated drive status.
What are the steps of disk defragmentation?
Open the “Defragment and Optimize Drives” tool, select your hard disk drive, click “Analyze” to check fragmentation, then click “Optimize” if Windows recommends it. After the process finishes, review the result and keep scheduled optimization enabled.
Should you defragment an SSD?
No, you should not manually defragment an SSD like a traditional hard drive. SSDs use different storage technology and do not benefit from classic defragmentation. Let Windows handle SSD optimization automatically through its built-in maintenance tools.
Can defragmenting delete files?
Defragmenting is designed to reorganize files, not delete them. Still, it is smart to keep a current backup of important files before any major maintenance, especially if your drive is old, almost full, or showing errors.
Sources
- Microsoft Support — Windows guidance for defragmenting and optimizing a Windows PC.
- Microsoft Learn — command-line reference for the Windows defrag command and switches.
- Microsoft Learn — background on Windows disk behavior and system power settings that can affect storage maintenance.
Conclusion
Defragmenting your laptop hard drive can help maintain performance and speed when your laptop uses a traditional HDD. While some users may think it’s unnecessary or too time-consuming, regular defragmentation can reduce file scattering and help prevent sluggish file access.
The key is choosing the right drive. Defragment HDDs when Windows shows they need it, but avoid manual defragmentation on SSDs. By following these organized steps, checking your drive type, reviewing fragmentation levels, and keeping scheduled optimization enabled, you’ll help your laptop run more smoothly and efficiently.
If you frequently access large files, install and remove programs, or run demanding applications from an HDD, monthly or weekly checks can make a noticeable difference. Don’t skip this critical maintenance task when your laptop has a mechanical hard drive because your system will run better when the drive stays organized.

1 thought on “Defragment a Laptop Hard Drive in 10 Organized Steps”