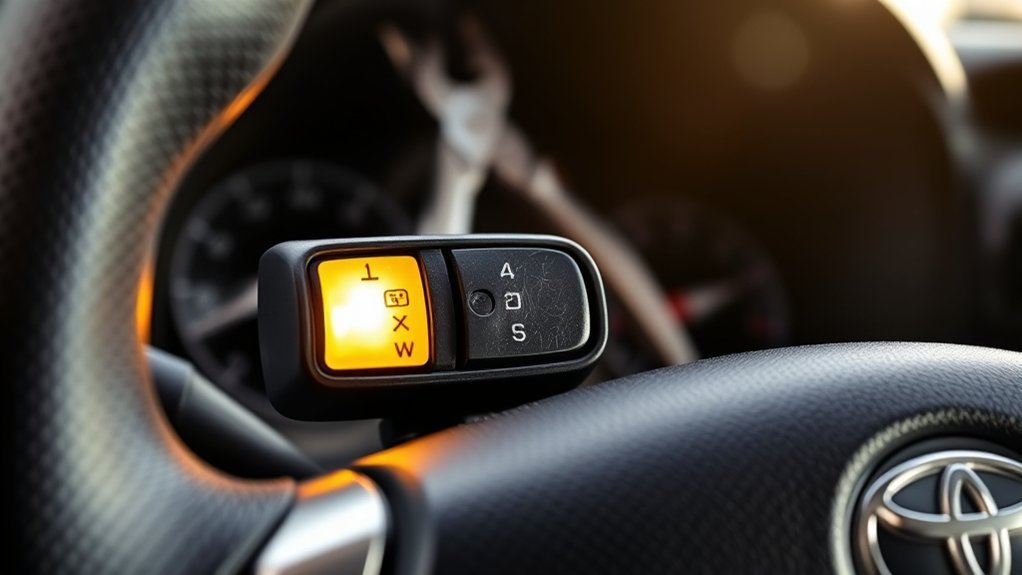
Intermittent headlights, a loose lighting stalk, or beams that fail in certain switch positions can point to a faulty Toyota RAV4 headlight switch. However, the switch is only one possible cause. Before replacing it, you should confirm your RAV4’s model year, inspect the rest of the lighting circuit, and obtain the correct replacement assembly by VIN.
The exact removal procedure varies across RAV4 generations. On many models, the headlight and turn-signal controls form part of a combination switch mounted on the steering column. Work carefully because this area is close to the steering-wheel airbag and other sensitive electrical components.
Quick Answer
To replace a Toyota RAV4 headlight switch, first verify the switch is faulty and match the replacement by VIN. Turn the vehicle off, disconnect the 12-volt negative terminal, wait at least 90 seconds, remove the specified steering-column trim, unplug and replace the switch, then test every lighting function.
Key Takeaways
- Flickering or failed headlights do not automatically prove that the headlight switch is defective.
- Confirm the year, trim, connector, fog-light controls, and automatic-light functions before ordering a replacement.
- Disconnect the 12-volt negative terminal and wait at least 90 seconds before disturbing steering-column trim.
- Fastener locations and switch-retention methods vary, so do not assume every RAV4 uses two screws.
- Test low beams, high beams, turn signals, fog lights, AUTO mode, DRLs, indicators, and the separate hazard switch after installation.
At a Glance
| Time Required | About 45 to 90 minutes after diagnosis and part verification. Unfamiliar trim or electrical faults can add time. |
| Difficulty | Intermediate. The work involves electrical diagnosis, fragile trim, and components near the SRS system. |
| Tools Needed | Plastic trim tool, model-appropriate screwdrivers or driver bits, socket or wrench for the 12-volt terminal, flashlight, and optional digital multimeter. |
| Cost | Varies by model year, switch design, market, and OEM or aftermarket choice. Confirm fit and current pricing with the VIN. |
Warning: This repair takes place near the steering-wheel airbag. Turn the vehicle completely off, disconnect the 12-volt negative terminal, and wait at least 90 seconds before removing column trim. Follow any longer interval in your model-specific Toyota repair procedure. Never touch orange high-voltage cables or components on a hybrid, RAV4 Prime, or RAV4 Plug-in Hybrid.
Identify Symptoms of a Failing Headlight Switch
A failing headlight switch can interrupt one or more lighting commands. The strongest clues involve problems that change when you move, twist, or lightly hold the lighting stalk in a certain position.
Possible switch-related symptoms include:
- Low beams or parking lights work only in certain switch positions.
- The lights flicker when the stalk or rotating collar is moved.
- The stalk feels unusually loose, stiff, gritty, or damaged.
- The high-beam or flash-to-pass function does not respond consistently.
- Turn signals, fog-light controls, or other functions integrated into the same assembly also fail.
- The connector or switch housing shows heat damage, discoloration, or a burnt odor.
A problem that changes when you move the lighting stalk makes the switch or its connector more suspicious, but it still does not confirm the diagnosis by itself.
Symptoms that affect only one headlamp usually point elsewhere. Check the affected bulb or LED unit, local connector, wiring, and ground before replacing a switch that commands both sides.
Confirm Your RAV4 and Replacement Part
Toyota has used several RAV4 generations, switch designs, connectors, and lighting configurations. Before disassembly, record the model year, trim, powertrain, market, and 17-character VIN.
Check whether your switch includes any of the following:
- Automatic headlight mode
- Daytime running light controls
- Front fog-light control
- Automatic High Beam activation
- Lane-change turn-signal functions
- Additional stalk or steering-column functions
Toyota’s recent RAV4 guide identifies a combined headlight, turn-signal, and fog-light control, while the emergency flasher remains a separate switch. Earlier generations may use different housings and connectors. Review the correct Toyota owner’s manual for the operating layout and the model-specific Toyota Technical Information System procedure for removal, wiring, and installation details.
Pro Tip: Compare the old and new switches before installation. Confirm the connector shape, terminal count, stalk markings, mounting points, and every included function. Similar-looking Toyota switches are not necessarily interchangeable.
Check your VIN through the official NHTSA recall lookup before buying a part. A recall search can identify an open safety campaign that should be handled according to the manufacturer’s instructions.
[Amazon Products Picked for You]

[Vehicle Fitment]: Compatible with Toyota Avalon 2013-2018, Corolla 2014-2016 (with Daytime Running Lights (drl); USA Built), Highlander 2014-2019, fit for RAV4 2013-2018 (USA Built), Tacoma 2016-2023 --- with Fog Lights; with Automatic Headlights

[Vehicle Fitment]: Compatible with Toyota Corolla 2007 (Built in the U.S.or Japan), Corolla 2008-2011, Corolla 2012-2013 (Built In USA), Highlander 2008-2011 (Built In Japan), Matrix 2009-2010, Prius 2004-2015, Prius V 2012-2014, RAV4 2006-2008, RAV4 2009-2010 (Built In Japan), RAV4 2011-2012, Tacoma 2005-2013, Tundra 2007-2017/2019, Yaris 2012-2019; Fit For Scion iQ 2012-2015, tC 2012-2016, xB 2008-2012; Fit For Pontiac Vibe 2009-2010 --- without Fog Light and Auto Headlight Control

[Vehicle Fitment]: Compatible with Scion XA 2004-2006 L4 1.5L, XB 2004-2006 L4 1.5L; Compatible with Toyota Corolla 2003-2005, Echo 2003-2005 L4 1.5L, RAV4 2001-2005 --- Without Fog Lights
Diagnose the Lighting System Before Replacement
Replacing the switch without testing the circuit can waste time and leave the original problem unresolved. Start with the symptom pattern and the easiest checks.
| Symptom | Check First | Switch Suspicion |
|---|---|---|
| Only one headlamp is out | Bulb or LED unit, local connector, wiring, and ground | Usually lower |
| Both low beams fail but high beams work | Relevant fuses, relay or control circuit, switch command, wiring diagram | Possible |
| Lights flicker when the stalk moves | Switch connector, terminal fit, switch contacts, damaged wiring | Higher |
| AUTO mode fails but manual lights work | AUTO setting, ambient-light sensor, related wiring, body-control diagnostics | Possible but not proven |
| Several stalk functions fail together | Combination-switch connector, power supply, shared ground, switch assembly | Higher |
Inspect all relevant fuses using the diagram for your model year. Do not judge a fuse only by looking through the plastic. A continuity check with the circuit powered down can reveal a break that is difficult to see.
Next, inspect accessible lamp connectors and grounds. Look for moisture, corrosion, loose terminals, melted plastic, damaged insulation, or previous repairs. If the vehicle uses LED headlamp assemblies, diagnosis may require the Toyota wiring diagram and a capable scan tool.
Note: Do not probe SRS connectors, yellow airbag wiring, orange high-voltage wiring, or an unknown control-module circuit with a test light. Use the specified diagnostic method and connector terminals in the correct Toyota wiring diagram.
Stay Safe: Precautions Before You Start
Park on a level surface, select Park, apply the parking brake, and turn every electrical accessory off. Remove a conventional key from the ignition. With a smart key, keep the key away from the vehicle so the system cannot wake or start unexpectedly.
- Wear safety glasses when working near the battery or under trim panels.
- Use gloves when handling sharp plastic or metal edges.
- Keep metal tools away from the positive battery terminal and nearby grounded parts.
- Do not use excessive force on steering-column covers or electrical locks.
- Do not remove the steering wheel unless the model-specific procedure explicitly requires it.
- Do not rotate or disturb the spiral cable if it becomes exposed.
- Keep all screws and clips organized by location.
Move power seats, lower a window, and unlock any required doors before disconnecting the battery. Power controls may not operate after the 12-volt supply is disconnected.
Tools You’ll Need for Headlight Switch Replacement
The required driver and socket sizes vary. Inspect the visible fasteners or check the Toyota repair procedure before selecting tools.
[Amazon Products Picked for You]

Nylon Material: Made of impacted resistant nylon fiber material with high level craftsmanship, it’s non-toxic, durable and not like brittle material which is prone to bent or crack

Non-Scratch Pry Tools: Made from durable nylon, this auto trim removal tool kit protects your car’s surfaces from scratches while offering strong leverage for trims, panels, and dashboards
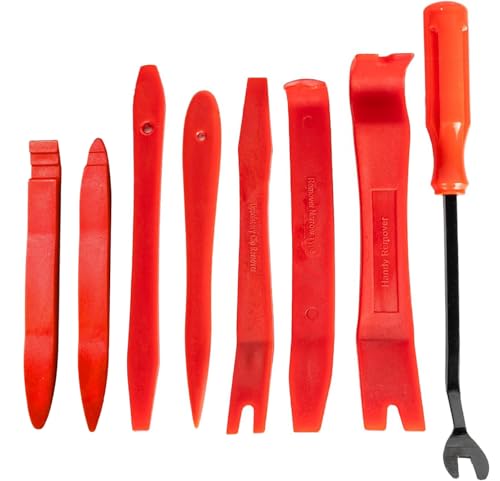
8 Piece Auto Trim Removal Kit. Made Of High Quality Nylon Fiber That Will Not Break Or Bend Easily Like Abs Plastic Under Pressure.
Essential Hand Tools Required
- Plastic trim-removal tool
- Phillips, flat-blade, Torx, or other model-appropriate driver bits
- Small ratchet and socket set
- Wrench or socket for the 12-volt negative terminal
- Flashlight or work light
- Magnetic parts tray or labeled containers
A plastic trim tool is safer than using a bare screwdriver against visible dashboard or steering-column surfaces. If you must use a small flat-blade tool to release a connector lock, protect nearby trim and apply very little force.
Electrical Testing Equipment Needed
A digital multimeter can help with fuse continuity, ground checks, and model-specific switch testing. Follow the correct wiring diagram and never force probes into a connector because oversized probes can spread the terminals.
| Tool | Purpose | Important Note |
|---|---|---|
| Digital multimeter | Continuity and model-specific circuit tests | Use only on identified non-SRS circuits |
| Plastic trim tool | Release clips without marking visible trim | Work close to each clip |
| Driver and socket set | Remove model-specific fasteners | Do not assume one size fits every year |
| Terminal inspection light | Reveal corrosion, heat damage, or bent terminals | Do not pull on the wires |
Wire strippers are not standard equipment for this replacement. The switch should connect through its factory plug. If wiring or terminals are damaged, use the specified terminal-repair procedure or have a qualified technician repair the harness.
Safety Gear Recommendations
- Safety glasses: Protect your eyes from battery debris and falling trim particles.
- Work gloves: Reduce cuts from sharp edges while preserving enough feel for connector locks.
- Knee protection: Helps when working around the driver’s footwell.
- Stable lighting: Makes hidden clips and connector locks easier to identify.
A dust mask and hearing protection are normally unnecessary for a hand-tool switch replacement. Avoid power tools around steering-column trim because they can over-tighten screws or damage plastic housings.
Step-by-Step Guide to Accessing the Headlight Switch
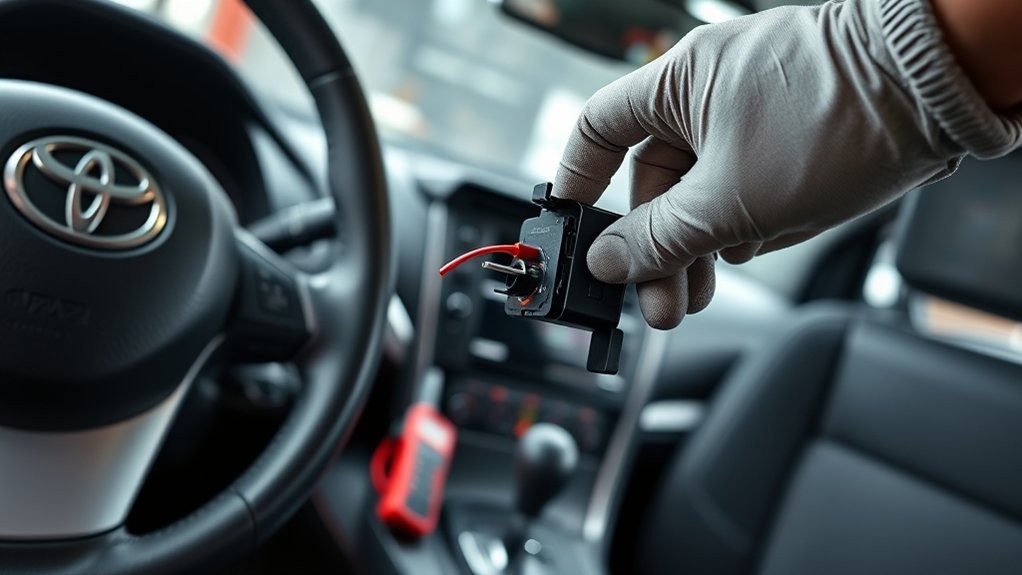
Use these steps as a general sequence. The exact panels, clips, fasteners, and switch-retention method must come from the repair information for your RAV4’s year and equipment.
- Center the front wheels. Park the vehicle with the steering wheel straight ahead.
- Confirm the vehicle is fully off. The READY indicator must be off on hybrid and plug-in-hybrid models.
- Disconnect the 12-volt negative terminal. Isolate the cable so it cannot spring back onto the terminal.
- Wait at least 90 seconds. Follow a longer waiting period if the applicable Toyota procedure specifies one.
- Locate the specified trim fasteners. They may be beneath or beside the steering column and may require the wheel to be turned before battery disconnection to expose them. Confirm this before beginning.
- Separate the steering-column covers carefully. Release each clip close to its mounting point instead of bending the entire panel.
- Identify the switch and connectors. Take a clear photograph before unplugging anything.
Many RAV4s allow switch access without steering-wheel removal. If your procedure requires airbag, steering-wheel, or spiral-cable removal, stop unless you have the correct service information, tools, and training.
Disconnecting the Battery: Why It’s Essential
Disconnecting the 12-volt battery helps prevent a short circuit and reduces the chance of waking an electronic system while a connector is unplugged. It does not make every vehicle system harmless immediately.
Use this sequence:
- Turn off the ignition or power switch.
- Confirm the instrument cluster and READY indicator are off.
- Keep the smart key away from the vehicle.
- Loosen the 12-volt negative cable using the correct wrench or socket.
- Lift the cable from the terminal without touching the positive terminal.
- Position or insulate the cable so it cannot reconnect accidentally.
- Wait at least 90 seconds before working near steering-column trim.
Toyota notes that reconnecting a battery can affect certain stored settings or initialization procedures. The exact effects vary by year. After the repair, check the clock, power windows, steering-related warning lights, and other features described in your owner’s manual.
How to Remove the Old Headlight Switch
Once the correct column covers or access panels are removed, inspect the switch assembly before disconnecting it. Confirm that the replacement part has the same functions and connector layout.
Verify the Fastener and Connector Layout
Do not assume the switch is always held by two screws. Depending on the generation, it may use screws, molded locking tabs, a bracket, or a larger combination-switch housing.
- Find every visible fastener before pulling the assembly.
- Check whether another component overlaps the switch.
- Identify connector locks and secondary retainers.
- Photograph the wiring route and connector position.
- Check for signs of overheating before moving the harness.
Disconnecting Battery Negative Terminal
Confirm once more that the negative cable remains isolated and the waiting period has passed. Do not reconnect the battery to test a partly disassembled steering-column area unless the model-specific procedure instructs you to do so.
Removing the Steering-Column Cover Panel
Remove the specified screws, then use a plastic trim tool to release the upper and lower column-cover clips. Support each panel while separating it so you do not pull on any attached wiring.
When the switch connector is accessible:
- Press the connector lock at the plug body.
- Pull the connector straight from the switch.
- Never pull on the individual wires.
- Release any secondary lock before applying more force.
- Inspect the plug for bent terminals, corrosion, looseness, or melted plastic.
- Remove the switch fasteners or release tabs in the specified order.
- Slide the switch from its mounting position without twisting nearby components.
A melted connector or burnt terminal indicates a circuit problem that may damage the new switch. Replace or professionally repair the affected connector and diagnose the cause before reassembly.
Install Your New Headlight Switch
Compare the old and new parts on a clean surface. The connector, terminal positions, stalk markings, mounting tabs, and included controls should match.
- Position the replacement switch. Align it with the housing without forcing the locating tabs.
- Install the retainers. Tighten screws to the model-specific specification. Do not over-tighten screws threaded into plastic.
- Reconnect the factory plug. Push on the connector body until its lock clicks or seats fully.
- Check the harness route. Keep wiring clear of moving steering-column parts and sharp edges.
- Reinstall the column covers. Align clips before pressing the panels together.
- Install each fastener in its original location. A long screw installed in the wrong hole can damage hidden components.
- Inspect the steering column. Confirm that trim gaps are even and the tilt or telescoping mechanism moves normally.
Reconnect the 12-volt negative terminal only after all connectors and covers are secure. Tighten the terminal enough that it cannot rotate by hand, using the applicable Toyota specification when available.
Test Your New Headlight Switch
Perform the first test while parked in a safe area. Do not begin driving until you have confirmed that the required exterior lights work consistently.
- Parking lights
- Low beams
- High beams
- Flash-to-pass function
- Left and right turn signals
- Lane-change signal function, if equipped
- Front fog lights, if equipped
- AUTO headlight mode, if equipped
- Daytime running light operation under the conditions listed in the owner’s manual
- Headlight and high-beam indicators in the instrument cluster
Test the hazard lights separately. The emergency flasher uses its own control on recent RAV4s and is not proof that the headlight switch is working correctly.
Move the steering wheel through its normal tilt and telescoping range while parked. Watch for flickering lights, a pinched harness, unusual resistance, or trim interference.
Start the vehicle and watch the warning lights. If the SRS warning light remains illuminated, flashes abnormally, or fails its normal bulb check, turn the vehicle off and have the system diagnosed. Do not attempt to clear an SRS fault by repeatedly disconnecting the battery.
Troubleshooting Common Issues After Replacement
| Problem | What to Check |
|---|---|
| No switch functions work | 12-volt connection, switch plug, relevant fuses, wrong part, unseated connector, or missing shared power or ground |
| Only one headlamp remains out | Bulb or LED assembly, local connector, branch wiring, and ground |
| Low beams work but high beams do not | Switch command, high-beam circuit, fuses, relay or control output, connector terminals, and wiring diagram |
| Turn signals fail after replacement | Correct combination-switch version, connector seating, bent terminals, relevant fuse, and body-control faults |
| AUTO mode does not work | Correct switch version, AUTO setting, ambient-light sensor, vehicle configuration, and body-control diagnostic codes |
| Lights flicker over bumps | Loose terminal fit, damaged connector lock, pinched harness, poor ground, or unresolved lamp-side fault |
| SRS warning light stays on | Stop DIY work and obtain an SRS-capable diagnostic scan from a qualified technician |
If the original symptoms remain unchanged, do not continue replacing parts based on guesses. Use the model-specific wiring diagram to test the circuit and read relevant diagnostic trouble codes.
[Amazon Products Picked for You]

[Vehicle Fitment]: Compatible with Toyota Camry 2001-2006, Corolla 2002-2007, Highlander 2001-2007, Compatible with RAV4 2004-2005

FITMENT CONFIRMATION: Fit for Toyota Corolla 2007-2013 (Built In USA). Fit for Toyota Highlander 2008-2011 (Built In Japan). Fit for Toyota Matrix 2009-2010. Fit for Toyota Prius 2004-2015. Fit for Toyota Prius V 2012-2014. Fit for Toyota RAV4 2006-2012. Fit for Toyota Tacoma 2005-2013. Fit for Toyota Tundra 2007-2017 & 2019. Fit for Toyota Yaris 2012-2019. Fit for Scion iQ 2012-2015. Fit for Scion tC 2012-2016. Fit for Scion xB 2008-2012. Fit for Pontiac Vibe 2009-2010. IMPORTANT: This switch fits models WITHOUT foglamp, auto headlamp control, daytime running lamp, or HID headlamp systems ONLY.

Package Contents: 1x Turn Signal Headlight Switch
When to Stop and Get Professional Help
Use a qualified Toyota technician or experienced automotive electrician when:
- The steering wheel or airbag must be removed.
- An SRS warning appears before or after the repair.
- You find yellow SRS connectors or damaged SRS wiring.
- You find orange high-voltage components near the work area.
- The switch connector is melted, burnt, or missing terminal tension.
- The replacement switch requires coding, calibration, or vehicle configuration.
- The headlights fail despite confirmed bulbs, fuses, connections, and a correct switch.
- You do not have the correct wiring diagram or safe test points.
Do not drive at night, in rain, in fog, or under other low-visibility conditions when the headlights operate intermittently. Arrange repair before normal road use.
Frequently Asked Questions
Can I replace the Toyota RAV4 headlight switch without professional help?
You may be able to replace it if the model-specific procedure only requires column-cover removal and a plug-in switch exchange. The job is not suitable for a beginner when airbag, steering-wheel, spiral-cable, damaged-wiring, coding, or advanced diagnostic work is required.
How much does a new RAV4 headlight switch cost?
The cost varies by model year, switch functions, market, manufacturer, and whether the vehicle needs a single stalk or a larger combination-switch assembly. Use the VIN to identify the correct part before comparing current OEM and aftermarket prices.
What tools are absolutely necessary?
You normally need a plastic trim tool, the correct screwdriver or driver bits, a socket or wrench for the 12-volt negative terminal, and good lighting. A digital multimeter is useful for diagnosis. Wire strippers are not required for an undamaged factory connector.
Is it safe to drive with a faulty headlight switch?
No. Intermittent or unavailable headlights can leave you without adequate visibility and prevent other drivers from seeing you. Avoid driving at night or in poor weather until the fault has been diagnosed and repaired.
How long does the replacement process take?
Plan for roughly 45 to 90 minutes once you have confirmed the diagnosis, obtained the correct part, and reviewed the procedure. Diagnosis, unfamiliar trim, damaged connectors, or required programming can make the repair take longer.
Do I need to remove the steering wheel?
Many RAV4 switch procedures can be completed through the steering-column covers, but the answer depends on the generation and switch assembly. Do not remove the steering wheel or airbag unless the exact Toyota procedure requires it and you are trained to work with SRS components.
Will disconnecting the battery erase vehicle settings?
It may reset the clock, stored settings, or initialization for certain systems. The effects differ by model year. Follow the owner’s manual after reconnection and investigate any warning light that does not clear through the specified initialization procedure.
Does the RAV4 headlight switch control the hazard lights?
The hazard lights use a separate emergency-flasher control on recent RAV4 models. You should test the hazards after the repair as a general safety check, but working hazards do not confirm that the headlight switch is functioning correctly.
Conclusion
A Toyota RAV4 headlight switch can be replaced successfully when the diagnosis, part selection, and safety steps are handled first. Do not treat flickering lights as proof of a failed switch or assume every model uses the same covers and fasteners.
Match the replacement by VIN, disconnect the 12-volt negative terminal, wait at least 90 seconds, avoid SRS and high-voltage components, and follow the correct Toyota repair procedure. After installation, test every lighting function before returning the vehicle to normal road use.
Sources
- Toyota Manuals and Warranties — model-specific operating instructions and owner information.
- Toyota Technical Information System — repair manuals, wiring diagrams, service bulletins, and diagnostic information.
- 2024 Toyota RAV4 Quick Reference Guide — headlight, turn-signal, fog-light, DRL, and emergency-flasher control layout.
- Toyota Emergency Response Guide — SRS backup-power and vehicle-disabling precautions.
- NHTSA Recall Lookup — VIN-based open safety recall searches.
- Toyota Parts Center Online — vehicle-specific Toyota parts identification.
