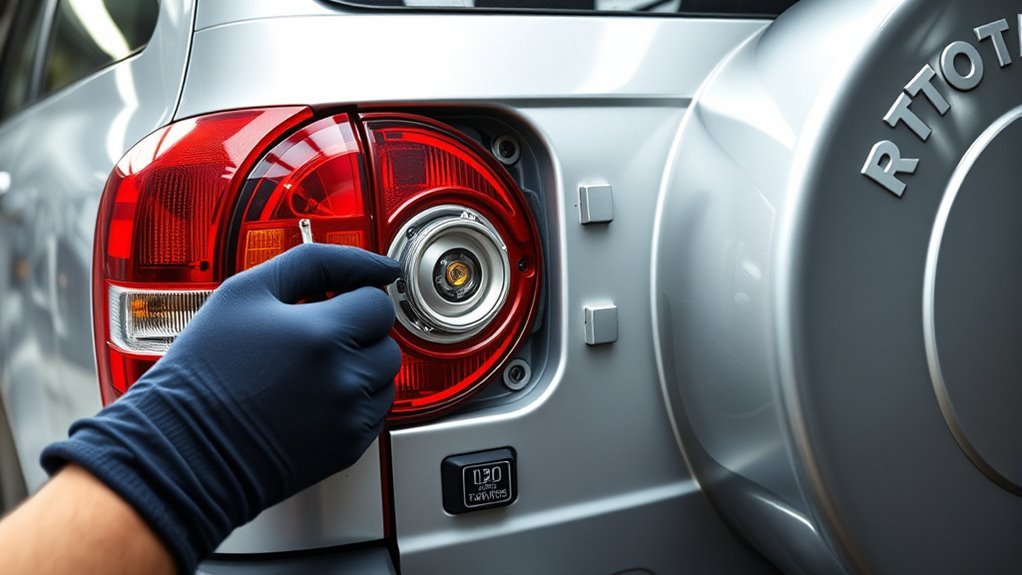
The 2005 RAV4 reverse bulb removal process is a manageable DIY job when you know where to access the socket. You need a 921 replacement bulb and access to the rear lamp housing through the cargo-area side panel. The key is to twist the socket out, pull the old bulb straight out, and test the replacement before closing the panel.
Quick Answer
To remove the reverse bulb from a 2005 Toyota RAV4, open the rear cargo door and remove the access panel behind the affected tail light. Locate the middle bulb socket, turn it counterclockwise, and pull it out. Remove the old 921 bulb, push in the replacement, turn the socket clockwise to lock it, and test the light.
At a Glance
| Difficulty | Beginner-friendly |
| Replacement Bulb | 921, 16W wedge-base bulb |
| Tools Needed | Replacement bulb, gloves, flashlight, and optional trim tool |
2005 RAV4 Reverse Bulb Size and Type
)
The 2005 Toyota RAV4 uses a 921 reverse light bulb rated at 16 watts. Toyota identifies it as a wedge-base bulb in the US-market owner’s manual.
The specification appears in the Toyota 2005 RAV4 owner’s manual, page 304, under the back-up light entry.
A standard 921 incandescent bulb restores the original lighting arrangement. Compatible 921 LED replacements are also available, although their fit, light distribution, and electrical characteristics vary.
Do not confuse the reverse bulb with the other rear bulbs. Toyota lists 7440 for the rear turn signals and high-mounted stoplight, while the combined stop/tail light uses 7443.
These numbers identify different bulb applications. A 7440 should not be substituted for the specified 921 reverse bulb.
For additional identification, OSRAM identifies the 921 as a W16W bulb with a wedge base.
If your RAV4 was imported from another market or has an aftermarket rear lamp assembly, compare the existing bulb and socket before purchasing a replacement.
Tools and Bulbs You’ll Need
You need a correct replacement bulb, clean gloves, and enough light to see behind the rear trim panel. A trim tool or flathead screwdriver can help if the access cover is difficult to release.
A multimeter is optional. It becomes useful when a new bulb does not illuminate and you need to check whether the socket receives electrical power.
| Item | Purpose | Notes |
|---|---|---|
| Flathead screwdriver | Trim access | Protect the tip with a cloth if needed |
| Safety gloves | Bulb protection | Help prevent contamination |
| 921 bulb | Replacement part | Original specification: 16W incandescent |
| Flashlight | Visibility | Helps identify the correct socket |
| Multimeter | Electrical diagnosis | Optional for checking circuit power and continuity |
Keep removed trim pieces in a clean location. Before starting, switch off the ignition and exterior lights, and allow the bulb to cool.
How to Access the Reverse Light Housing
The 2005 RAV4 reverse light socket is accessible from inside the rear cargo area. You normally do not need to remove the complete exterior tail light assembly for a routine bulb replacement.
Unlike newer RAV4 models with lift-up tailgates, the 2005 RAV4 has a side-opening rear cargo door. Open it fully and locate the interior access cover behind the affected rear light assembly.
- Park on level ground, apply the parking brake, and switch off the ignition.
- Open the rear cargo door to expose the interior side trim.
- Locate the removable access panel behind the affected tail light.
- Release the panel’s retaining tabs carefully and remove the cover.
- Use a flashlight to identify the bulb sockets inside the opening.
Toyota’s original diagram identifies three rear bulb positions:
- Upper socket: Stop/tail and rear side marker light.
- Middle socket: Reverse light.
- Lower socket: Rear turn signal.
The reverse socket is marked “b” in Toyota’s illustration on page 309.
A small access opening is enough to perform the replacement. Avoid pulling unnecessarily on the wiring or forcing the plastic trim.
How to Remove the Old Reverse Bulb
Once you have identified the middle socket, turn the socket counterclockwise to release it from the lamp housing. The bulb itself is a push-in wedge type, so it pulls straight out of the socket.
- Grip the plastic socket rather than pulling on the wires.
- Turn the socket counterclockwise until its locking tabs disengage.
- Carefully withdraw the socket and bulb from the housing.
- Hold the bulb near its base and pull it straight out.
- Inspect the socket terminals for corrosion, discoloration, or looseness.
If the bulb feels stuck, use a gentle rocking motion while pulling. Do not crush the glass or use excessive force.
A clean, undamaged socket should hold the replacement firmly. If the contacts appear burned or badly corroded, address that problem rather than repeatedly installing new bulbs.
How to Install the New Reverse Bulb
Push the new 921 bulb straight into the socket until it sits securely. Then align the socket tabs with the housing opening and turn the socket clockwise to lock it.
- Confirm that the replacement bulb matches the original 921 size.
- Hold the bulb with clean gloves or a clean cloth.
- Align its wedge base with the socket opening.
- Push the bulb straight into the socket without forcing it.
- Insert the socket into the rear lamp housing.
- Turn the socket clockwise until the locking tabs engage.
- Check that the socket is seated evenly and does not feel loose.
Do not twist the glass bulb into the socket. The bulb pushes straight in; only the socket twists into the housing.
Forcing the bulb can bend its contacts or damage the plastic holder. If it does not fit easily, stop and compare it with the original.
Warning: Do not work on the bulb while it is hot or while the reverse light circuit is energized. Keep the ignition and exterior lights off during removal and installation. A damaged socket or exposed wiring should be repaired before the light is used again.
Test the Reverse Lights Before Reassembly
Test the replacement before closing the access panel. This confirms that the bulb is seated correctly and helps you catch an electrical problem without repeating the removal process.
Use a helper whenever possible so one person can operate the vehicle controls while the other observes the rear lamps.
Test Bulb Function
Keep the vehicle stationary on level ground with the parking brake applied. The driver should remain in the seat and hold the service brake while selecting reverse.
- Make sure the area around the vehicle is clear.
- Switch the ignition to the ON position without starting the engine, if the vehicle allows this test.
- Hold the brake pedal and select reverse.
- Have a helper stand safely to the side of the vehicle and observe the reverse lamps.
- Return the transmission to Park, switch off the ignition, and confirm the light has turned off.
If both lamps illuminate steadily, the electrical test has passed.
Confirm Proper Fit
After testing, inspect the socket and bulb again with the ignition switched off. The socket should be fully locked, and the bulb should not wobble inside it.
If you installed an LED and it remains dark, check its installation instructions. Some LED bulbs require a particular polarity, while others work in either orientation.
Confirm that the replacement does not press against the lens or prevent the socket from locking properly.
Both reverse lights should provide consistent illumination. A large difference may indicate mismatched bulbs, poor contacts, or a failing lamp.
Reassemble After Check
Once the light works correctly, reinstall the interior access cover. Align its retaining tabs and press it into place without forcing the plastic.
Inspect the surrounding trim and make sure no wiring is trapped behind the cover.
Perform one final lighting check after reassembly. If both reverse lights illuminate normally, the replacement is complete.
Why LED Reverse Bulbs Need Polarity Checks?
Some LED reverse bulbs are polarity-sensitive, meaning they illuminate only when electrical current flows through them in the intended direction. Others include circuitry that allows them to work in either orientation.
This distinction matters because a new LED can appear defective even when the vehicle’s wiring is working correctly.
If a polarity-sensitive wedge-base LED remains dark, switch off the ignition, remove the bulb, rotate it 180 degrees, and reinstall it. Then repeat the lighting test.
However, polarity adjustment is not necessary for every LED. For example, the SYLVANIA 921 WHITE ZEVO LED uses a non-polarity design.
A bulb with built-in resistors or other electrical components may still have specific installation requirements. Follow the instructions for the particular replacement rather than assuming every LED works the same way.
If an LED fails in both orientations, inspect the socket contacts and verify that the bulb is electrically compatible with the vehicle.
Common Problems After Replacement
If the reverse light remains dark after replacement, begin with the bulb and socket. A seating problem is easier to correct than a wiring fault and should be ruled out first.
Use the following checks to narrow down the problem.
| Problem | Possible Cause | What to Check |
|---|---|---|
| New bulb does not illuminate | Loose bulb or incorrect LED polarity | Reseat the bulb and check its orientation if applicable |
| One reverse light works | Failed bulb or individual socket problem | Compare the bulb and socket on the affected side |
| Both reverse lights fail | Fuse, circuit, switch, or wiring fault | Inspect the relevant fuse and test circuit power |
| Bulb flickers | Loose or corroded electrical contact | Inspect socket terminals and connections |
| Light appears unusually dim | Incorrect bulb, poor contact, or cloudy lens | Verify bulb specification and inspect the lens |
| LED works outside the housing but not when installed | Poor contact or installation interference | Check seating, socket alignment, and bulb dimensions |
If both lamps stop working, the fuse is a useful next check. Toyota’s 2005 RAV4 manual identifies the GAUGE 10A fuse as serving the back-up lights along with several other electrical systems.
Use the fuse identification information for your vehicle and replace a blown fuse only with the specified amperage.
Do not install a higher-rated fuse or bypass it with wire. A fuse that blows again indicates an electrical problem requiring diagnosis.
If the fuse is intact, a multimeter can help establish whether power reaches the socket when reverse is selected. Depending on the result, further checks may involve the wiring, ground connection, or reverse-light switch.
Note: If wiring is damaged, the socket has melted, or the replacement fuse repeatedly blows, have a qualified automotive technician diagnose the circuit. Replacing bulbs alone will not correct an underlying electrical fault.
Best Brighter Reverse Bulb Upgrades
A compatible 921 LED can provide a different light color and potentially improve rearward visibility. Actual performance depends on the bulb’s output, beam pattern, and how its LEDs work with the original reflector.
More advertised brightness does not automatically mean better useful illumination behind the vehicle.
When comparing replacement bulbs, consider these factors:
- Correct size: The replacement must fit the original 921 socket.
- White output: Choose a bulb intended for reverse-light use.
- Beam distribution: The bulb should illuminate the area behind the vehicle rather than concentrating light in an unsuitable direction.
- Electrical compatibility: Check polarity requirements and whether the bulb works correctly with the existing circuit.
- Physical clearance: Larger LED housings and heat sinks must fit without touching the lens.
- Thermal management: Excessive heat can reduce LED reliability or damage nearby components.
SilverStar Ultra and zXe bulbs are associated with SYLVANIA’s headlight product range. They should not be treated as direct replacements for the RAV4’s 921 reverse bulb simply because they offer different headlight performance characteristics.
For a reverse-light upgrade, select an actual 921 replacement designed for that application.
A suitable reverse-light upgrade should provide useful rearward illumination, secure fitment, and reliable electrical operation.
Also consider lighting compliance. The National Highway Traffic Safety Administration’s interpretation of FMVSS No. 108 explains that LED back-up lighting is not inherently prohibited, provided the applicable lighting requirements are met.
That does not mean every aftermarket LED bulb is suitable for every original lamp housing. Check the product’s stated application and applicable local requirements.
Should You Replace Both Reverse Bulbs?
Replacing both reverse bulbs together is sensible when they are the same age or you want consistent light color and brightness. It is not necessary to replace a working bulb simply because the other has failed.
However, paired replacement can offer practical benefits:
- Matching light color and brightness on both sides.
- Less chance of needing another replacement soon afterward.
- An opportunity to inspect both sockets for corrosion or damage.
- Consistent performance when changing from incandescent bulbs to LEDs.
For an LED upgrade, using two matching products is especially useful because different LED designs can produce noticeably different light patterns.
Whether you replace one bulb or both, confirm that each lamp works before driving.
Frequently Asked Questions
What Is the Class Action Lawsuit Against the Toyota RAV4?
There is no single lawsuit that covers every Toyota RAV4 model year. Some legal claims have concerned excessive engine oil consumption and related repair costs. Toyota also issued a warranty enhancement program addressing excessive oil consumption in certain 2006–2008 RAV4 vehicles. That program is separate from reverse-light maintenance and does not establish that every RAV4 has the same defect.
How Do I Replace the Reverse Light Bulb in a 2018 Toyota RAV4?
The 2018 RAV4 uses a different rear-light arrangement from the 2005 model. Access the reverse-light socket from behind the lamp assembly, turn the socket counterclockwise, and pull the old bulb straight out. Install the correct replacement and turn the socket clockwise to lock it. Consult the appropriate 2018 owner’s manual for the exact access route and precautions for your vehicle.
How Many Reverse Lights Are on a Toyota?
The 2005 Toyota RAV4 has two reverse lights, one on each side of the rear vehicle body. Other Toyota models may use different lamp arrangements. Check both reverse lamps during maintenance and use bulbs with the correct specification for the particular vehicle and model year.
What Year to Stay Away From RAV4?
No RAV4 model year should be judged solely by its age. Certain 2006–2008 models were included in Toyota’s excessive oil-consumption warranty program. When comparing a 2001–2003, 2005, 2006–2008, 2009–2012, or 2013–2018 RAV4, examine its maintenance history, transmission operation, engine condition, and applicable recalls. A professional pre-purchase inspection is more useful than relying only on a model-year recommendation.
Conclusion
The 2005 RAV4 reverse bulb removal procedure is straightforward once you locate the correct socket behind the rear cargo access panel. Use a 921, 16W replacement bulb, pull the old bulb straight out, and lock the socket securely after installation.
If you choose an LED upgrade, confirm its compatibility and polarity requirements. Test both reverse lights before closing the panel so you can complete the repair without unnecessary repeated disassembly.
Rights Reserved.
Sources
- Toyota 2005 RAV4 Owner’s Manual: Bulb specifications, rear lamp access diagrams, removal procedure, and fuse identification.
- OSRAM 921/W16W Specifications: Bulb identification, base type, and electrical specifications.
- SYLVANIA 921 WHITE ZEVO LED: LED replacement characteristics, non-polarity design, and reverse-light application.
- NHTSA Lighting Interpretation: Federal lighting requirements relevant to LED back-up lamps.
- Toyota Warranty Enhancement Program ZE7: Excessive oil-consumption coverage for specified Toyota models, including certain 2006–2008 RAV4 vehicles.
- Toyota 2018 RAV4 Manuals and Warranties: Model-specific owner’s manual reference for the separate 2018 replacement procedure.
