You can clear a Toyota Tacoma check engine light with an OBD-II code reader, but you should erase codes only after you record them and correct the cause. A code points to the system that detected a fault; it does not automatically prove which part failed. This guide applies to OBD-II-equipped U.S.-market Tacomas, generally model year 1996 and newer.
Last updated: September 19, 2026 — code-clearing steps, permanent-code behavior, readiness-monitor cautions, and source links were rechecked.
Quick Answer
Plug a compatible OBD-II scanner into the Tacoma’s diagnostic port, use ignition-on, engine-off mode, read and save every stored, pending, and permanent code the tool reports, repair the cause, and choose Clear or Erase Codes. Turn the ignition off, disconnect the scanner, restart the truck, and recheck for returning codes.
Key Takeaways
- Read and save the diagnostic trouble codes and freeze-frame data before clearing anything.
- Treat a code as a diagnostic starting point, not proof that a named sensor or part has failed.
- A flashing check engine light can signal a catalyst-damaging misfire and needs prompt attention.
- Erasing codes resets emissions readiness monitors, which can delay or cause failure of an inspection.
- Use the owner’s manual and a year-compatible scanner because procedures and available data can vary by Tacoma model year.
At a Glance
| Time Required | About 10 to 20 minutes to scan and clear codes; diagnosis and repair time varies. |
| Difficulty | Beginner for reading or erasing codes; intermediate to advanced for diagnosis and repair. |
| Tools Needed | A compatible OBD-II code reader or scan tool and a phone or notepad for recording codes. |
| Cost | No added cost if you already own or can borrow a scanner; tool and diagnostic-shop fees vary. |
Warning: Do not erase codes just to hide the light or pass an emissions test. Clearing memory removes useful diagnostic information and resets readiness monitors. If the light is flashing or the engine is shaking, losing power, overheating, or making abnormal noises, reduce load, pull over safely, and arrange professional diagnosis.
Before You Clear the Tacoma Check Engine Light
Start by noting whether the check engine light is steady or flashing. A steady light usually means the truck has detected an emissions-related fault that needs diagnosis soon. A flashing light can indicate an active misfire that may overheat and damage the catalytic converter, so avoid hard acceleration, towing, or continued driving under heavy load.
Check simple items before you scan. Make sure the fuel cap is installed correctly, the truck has enough fuel, and no obvious hose or electrical connector was left loose after recent service. Do not assume the fuel cap caused the light unless the retrieved code and inspection support that conclusion.
Next, connect a compatible OBD-II reader and retrieve all available stored, pending, and permanent diagnostic trouble codes. Save the exact code numbers, code descriptions, freeze-frame data, and readiness-monitor status before you erase anything.
A diagnostic trouble code identifies the system and condition that triggered the warning. It does not, by itself, prove that the part named in the description is defective.
Diagnose and repair the cause before clearing the light. After the repair, you can erase the codes with the scanner or allow the vehicle to turn the light off after it completes enough successful self-tests. If the light returns, rescan the truck and continue diagnosis instead of repeatedly resetting it.
Check Engine Light vs. Maintenance Required Light
The check engine light and Toyota’s maintenance reminder do not mean the same thing. The check engine light relates to an OBD-detected malfunction, while the maintenance reminder usually tracks scheduled service intervals. An OBD-II scanner clears diagnostic codes, but it may not reset a maintenance reminder.
Use your year-specific Toyota owner’s manual to identify the exact symbol and reset procedure for your Tacoma.
Common Fault Categories to Check Before Clearing Codes
A Tacoma check engine light can come from many systems. Common categories include evaporative-emissions leaks, ignition misfires, fuel-trim problems, oxygen-sensor circuit faults, catalytic-converter efficiency faults, airflow-sensor problems, and wiring or connector issues.
The code should guide your tests, but it should not become a parts-replacement order. For example, an oxygen-sensor code can result from a damaged wire, an exhaust leak, a vacuum leak, a fuel-delivery problem, or another fault that changes the sensor’s reading.
Loose Gas Cap
A loose, missing, damaged, or incorrectly sealed fuel cap can allow fuel vapor to escape and may trigger an evaporative-emissions code. Remove the cap, inspect its seal for cracks or debris, reinstall it securely, and make sure the filler neck is not damaged.
The check engine light may not turn off immediately after you secure the cap because the vehicle must rerun the evaporative-system monitor under the right conditions. Scan the Tacoma first if the light remains on, since a leaking hose, purge valve, vent valve, or other EVAP component can produce similar codes.
| Condition | Possible Effect | First Check |
|---|---|---|
| Loose or missing fuel cap | EVAP leak code and steady check engine light | Reinstall the correct cap securely |
| Cracked cap seal | Fuel-vapor leak | Inspect the seal and replace the cap if damaged |
| Cap is secure but code returns | Another EVAP fault may be present | Read the code and test the EVAP system |
Faulty Oxygen Sensor
Oxygen and air-fuel-ratio sensors help the engine computer evaluate combustion and catalytic-converter operation. A failed sensor or sensor circuit can affect fuel control, emissions, and fuel economy, but symptoms and code meanings vary by model year and engine.
Do not replace an oxygen sensor only because its name appears in a code description. Inspect the connector and wiring, check for intake or exhaust leaks, review fuel-trim and sensor data when available, and follow the diagnostic procedure for the exact code.
After you correct the fault, clear the code or let the Tacoma complete its self-tests. Replace a sensor only when testing confirms that the sensor or its circuit is defective.
How to Use an OBD2 Scanner Effectively
A basic code reader can retrieve and erase generic powertrain codes. A more capable scan tool may also show live data, freeze-frame information, manufacturer-specific codes, and access to other modules. Confirm the tool supports your Tacoma’s model year and the systems you want to diagnose.
[Amazon Products Picked for You]
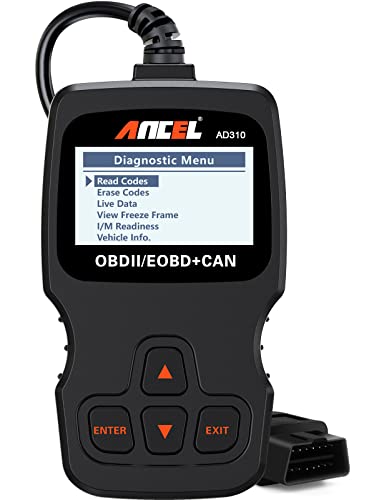
CEL Doctor: The ANCEL AD310 is one of the best-selling OBD II scanners on the market and is recommended by Scotty Kilmer, a YouTuber and auto mechanic. It can easily determine the cause of the check engine light coming on. After repairing the vehicle's problems, it can quickly read and clear diagnostic trouble codes of emission system, read live data & hard memory data, view freeze frame, I/M monitor readiness and collect vehicle information

【Diagnose Check Engine Light in Seconds – No Mechanic Needed】The FOXWELL NT301 OBD2 scanner instantly reads & clears engine fault codes (DTCs) with one click. Simply plug into the 16-pin DLC port, turn ignition on, and get accurate results within seconds—No prior car knowledge required. Save hundreds on dealership fees by knowing exactly what’s wrong before you visit a shop. The #1 choice car scanner for DIYers and car owners who want to take control of their vehicle’s health

Understand Your Check Engine Light – The ANCEL AD410 OBD2 scanner helps everyday drivers quickly read and clear engine-related fault codes, view code definitions, and understand why the check engine light is on before visiting a repair shop. With 42,000+ built-in DTC lookups, this car code reader helps reduce guesswork and makes basic vehicle diagnostics easier for beginners and DIY users
Connecting the Scanner Properly
Park on a level surface, set the parking brake, switch off accessories, and turn the ignition off. Find the 16-pin diagnostic link connector under the driver’s side of the dashboard and inspect it for damage or an aftermarket device already plugged into it.
Insert the scanner straight into the connector without forcing it. Place the truck in ignition-on, engine-off mode unless your scanner’s instructions call for a different state. On push-button-start Tacomas, follow the scanner and model-year owner’s-manual instructions for entering that mode without starting the engine. Many readers draw power from the diagnostic connector and start automatically.
| Step | Action |
|---|---|
| 1. Locate the port | Look under the driver’s side of the dashboard for the 16-pin connector. |
| 2. Connect the scanner | With the ignition off, plug the tool in firmly without bending the pins. |
| 3. Power the system | Use ignition-on, engine-off mode unless the tool requests another state; follow the model-year instructions on push-button-start trucks. |
Reading Diagnostic Codes
Select OBD-II, Diagnostics, or Read Codes on the scanner. Retrieve every category the tool offers, including stored or confirmed codes, pending codes, and permanent codes. Also save freeze-frame data, which records operating conditions from when the computer detected the fault.
Write down the exact five-character code, such as P0xxx or P1xxx, rather than relying only on the short description. Generic P0 codes follow standardized definitions, while manufacturer-specific codes and diagnostic steps can vary.
Research the code in the correct Toyota service information for your model year, engine, and drivetrain. Check related codes together because one root problem can trigger several secondary codes.
Permanent-code note: A permanent diagnostic trouble code is not erased by a normal scan-tool clear command or by disconnecting the battery. After the underlying fault is repaired, the vehicle’s OBD system clears that permanent code only after the applicable monitor reruns and confirms the problem is gone. See the California Bureau of Automotive Repair OBD test reference.
Pro Tip: Photograph the scanner screens before clearing codes. Include freeze-frame values and readiness status, not just the code number. That record can save time if the fault returns or you need help from a technician.
Clearing Error Codes Safely
Clear codes only after you have saved the diagnostic information and completed the repair or inspection. With the ignition on and engine off, choose Clear Codes, Erase Codes, or a similar command and confirm the warning shown by the scanner.
- Read and record all codes, freeze-frame data, and readiness-monitor status.
- Diagnose the fault and complete the needed repair.
- Place the truck in ignition-on, engine-off mode.
- Select the scanner’s Clear or Erase Codes function and confirm.
- Turn the ignition off before unplugging the scanner.
- Restart the Tacoma, check the dash, and scan again for returning or pending codes.
Erasing codes may also clear freeze-frame data and reset emissions readiness monitors. A permanent DTC, when supported, is different: a scan-tool erase command or battery disconnect will not remove it. The OBD system clears the permanent code only after the related monitor runs again and confirms the fault is no longer present.
How to Clear a Tacoma Check Engine Light With a Code Reader
Use this complete sequence when the Tacoma runs normally, the check engine light is steady, and you have already addressed the cause. If the engine runs poorly or the light flashes, skip the reset and arrange diagnosis first.
| Step | Action | Why It Matters |
|---|---|---|
| 1 | Verify the light and symptoms | A flashing light or severe symptoms change the safe response. |
| 2 | Connect the OBD-II reader with the ignition off | This reduces the chance of a poor connection or bent pin. |
| 3 | Use ignition-on, engine-off mode | The scanner and vehicle modules can communicate. |
| 4 | Read and save codes and freeze-frame data | You preserve evidence needed for accurate diagnosis. |
| 5 | Repair or verify the underlying cause | Clearing alone does not fix the malfunction. |
| 6 | Erase the codes | This turns off the commanded light if no active fault remains. |
| 7 | Turn the ignition off and disconnect the reader | You finish the scan session safely. |
| 8 | Restart, drive normally, and rescan | The truck must rerun monitors to confirm the repair. |
[Amazon Products Picked for You]
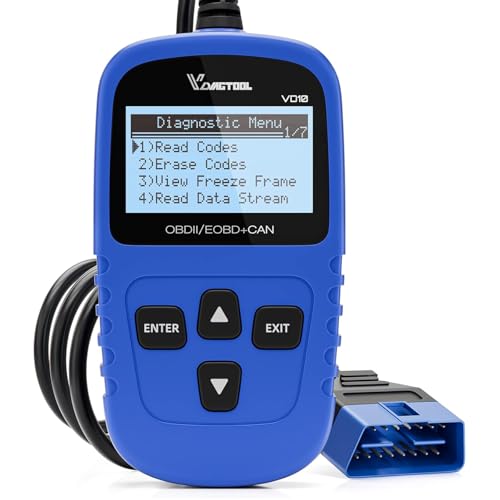
【A MUST-HAVE TOOL FOR DIYERS】 - VDIAGTOOL VD10 car code reader is an incredibly useful obd scanner for each car owner or hobbyist, even for those with little to no experience when it comes to vehicle mechanics! Similar to a fixd car diagnostic tool, using this car diagnostic scanner is extremely easy. All you have to do is attach it to your car OBDII port and you can diagnose car problems in seconds! Read Codes (DTCs); Clear Codes; Live Data; View Freeze Frame; I/M Readiness; Vehicle Information.

Multi-Functions - Practical Multi-Functions OBD2 code reader features built-in OBD2 DTC lookup library, which help you to determine the cause of the engine light, read code, erase code, view freeze frame, I/M ready, vehicle information, data flow, real-time curve, get vehicle speed information, calculate load value, engine coolant temperature, get engine speed.
What Clearing Codes Erases
Depending on the Tacoma and scanner, an erase command can remove confirmed and pending emissions codes, turn off the commanded check engine light, clear freeze-frame information, and reset readiness-monitor results. It does not erase the physical defect that caused the code.
Disconnecting the battery can also reset learned values and readiness information, and it may affect clock, radio, window, or other settings on some model years. A scanner gives you more control and lets you save the diagnostic data first, so battery disconnection should not be your default reset method.
Readiness Monitors and Emissions Testing
Readiness monitors show whether the OBD system has completed its self-checks since memory was cleared. After you erase codes or disconnect the battery, several monitors may show Not Ready or Incomplete until the Tacoma experiences the required operating conditions.
Do not clear codes shortly before an emissions inspection. In areas that use OBD testing, too many incomplete monitors can prevent the vehicle from passing even when the check engine light is off. Normal mixed driving may set the monitors, but the exact drive pattern depends on model year, temperature, fuel level, and the monitor involved.
The California Air Resources Board’s OBD II fact sheet explains how cleared memory and battery disconnection affect readiness indicators. For Tacoma-specific monitor troubleshooting, see Toyota Tacoma OBD-II Readiness Monitors Explained.
Note: A successful reset means the light is off at that moment. A successful repair means the relevant monitor runs again without detecting the fault.
Troubleshooting Tips for Persistent Check Engine Light Issues
If the light returns after a reset, the Tacoma has detected the fault again or found a related problem. Return timing can help narrow the next test, but it is not a diagnosis by itself. A code that returns immediately may indicate a fault the computer can detect at once, while a code that returns after several trips may depend on a non-continuous monitor completing under specific conditions.
- Rescan before changing parts: Compare the new codes with the original codes and review pending codes.
- Check repair basics: Look for loose connectors, pin damage, vacuum leaks, exhaust leaks, incorrect parts, or hoses left disconnected.
- Review live data: When your tool supports it, compare sensor readings, fuel trims, coolant temperature, and misfire data with service specifications.
- Keep records: Save dates, mileage, codes, symptoms, repairs, and the conditions under which the light returned.
- Escalate when needed: Use a qualified technician when testing requires wiring diagrams, a smoke machine, a scope, bidirectional controls, or Toyota-specific software.
[Amazon Products Picked for You]

【Save on Maintenance Costs】Meet the All-New LAUNCH Creader Elite X500, engineered specifically for Toyota & Lexus owners, DIYers, and small shop pros. No more guesswork. No more expensive dealer trips. This Bidirectional scan tool puts professional-grade diagnostics in your hands-with an easy-to-use interface that makes complex repairs feel simple.

Turn your iPhone, Android device, or Windows PC into a professional grade diagnostic scan tool.

[Easy to Use—Work Out of the Box] + [FOXWELL 2026 New Version] FOXWELL NT604 Elite scan tool is the 2026 new version from FOXWELL, designed for car owners who want to figure out the cause of issues before fixing car problems by scanning common systems like ABS, SRS, engine, and transmission. The NT604 Elite obd2 scanner diagnostic tool comes with the latest software—no need to waste time downloading software first. Plug the scanner into the OBDII port with OBDII cable to start the diagnosis.
What to Do if the Scanner Will Not Connect
Confirm that the ignition is in the required position and the connector is fully seated. Try another known-compatible scanner if possible. A damaged diagnostic connector, low battery voltage, a blown fuse that powers the port, wiring trouble, or an incompatible device can prevent communication.
Do not probe or jump connector terminals unless you have the correct wiring information and test procedure. An incorrect connection can damage a vehicle module or the scan tool.
What if the Scanner Shows No Codes?
Make sure you selected the correct menu and checked stored, pending, and permanent emissions codes. A basic reader may not access every manufacturer-specific module or non-emissions warning system. Confirm that the symbol is the check engine light and not a maintenance, traction-control, ABS, airbag, or other warning light.
If the check engine light remains on but a compatible reader reports no emissions codes, try a better scan tool or have a technician inspect the truck. Do not erase other modules or reset the battery as a substitute for finding the communication problem.
Why You Should Fix the Issues Behind Your Check Engine Light
The OBD system monitors components that can affect emissions and stores information that helps a technician locate the fault. Delaying repair can increase emissions and may reduce fuel economy, drivability, or performance. Some faults can also damage other components if you continue driving.
Inspection rules vary by location, but an illuminated check engine light or incomplete readiness monitors can cause an OBD-based emissions inspection failure. Repairing the cause protects the diagnostic record and gives the monitors a fair chance to confirm that the truck is operating correctly.
| If You Ignore the Light | If You Diagnose and Repair It | Helpful Habit |
|---|---|---|
| A small fault can develop into a larger repair | You reduce the risk of secondary damage | Scan and record codes promptly |
| Fuel economy or drivability may worsen | You restore normal operation when the fault caused the change | Track symptoms and mileage |
| The truck may fail an OBD-based inspection | The system can rerun and complete its monitors | Avoid clearing codes before testing |
Best Practices for Keeping Your Tacoma Engine Running Smoothly
Follow the maintenance schedule for your exact model year, engine, drivetrain, and operating conditions. Use the specified engine oil, filters, fluids, spark plugs, and fuel grade rather than assuming a more expensive product will prevent a check engine light.
- Secure the fuel cap after refueling and inspect it if an EVAP code appears.
- Address misfires, rough running, hard starts, fuel odors, or sudden fuel-economy changes promptly.
- Inspect wiring and connectors carefully after repairs, off-road use, rodent damage, or accessory installation.
- Use quality replacement parts that match the Tacoma’s application and emissions requirements.
- Do not replace oxygen sensors, spark plugs, or other components early without a maintenance requirement or a confirmed fault.
- Keep a service log with codes, freeze-frame data, repairs, and readiness status.
Frequent resets without diagnosis can hide patterns and make the final repair harder. If the same code returns, stop clearing it and test the circuit or system named by the diagnostic procedure.
When to Seek Professional Help for CEL Problems?
Professional help makes sense when the light flashes, the truck runs poorly, the scanner cannot communicate, or the repair requires tools or tests you do not have. You should also seek help when the same code returns after a verified repair or several unrelated codes appear at once.
A properly equipped independent shop can diagnose OBD-II faults, and a Toyota dealer may be useful for warranty work, software updates, recalls, or model-specific technical information. Check your warranty and service-campaign status before paying for a repair.
Flashing CEL Signals Urgency
A flashing check engine light can indicate a severe misfire that may damage the catalytic converter. Ease off the throttle, stop towing or climbing under heavy load, and move to a safe location. If the engine shakes, lacks power, overheats, smells strongly of fuel, or makes abnormal noises, shut it off and arrange a tow.
- Reduce engine load: Avoid hard acceleration and high speed.
- Pull over safely: Choose a location away from traffic.
- Check for severe symptoms: Note shaking, smoke, overheating, odors, or unusual sounds.
- Scan only when safe: A code can help, but it does not replace urgent mechanical assessment.
- Arrange service: Do not keep resetting a flashing light and continuing to drive.
Persistent Light After Reset
When the check engine light returns, the system has detected the fault again. Rescan it and compare the code, status, freeze-frame conditions, and mileage with your earlier record. A returning code does not always mean the new part failed; the original diagnosis may have missed wiring, leaks, mechanical problems, or a related fault.
Consult a technician when the diagnostic path calls for fuel-pressure testing, smoke testing, compression or leak-down testing, oscilloscope checks, programming, or Toyota-specific bidirectional controls. Prompt diagnosis can prevent extra cost and reduce the chance of getting stranded.
Engaging With the Tacoma Community for Support
Tacoma forums and owner groups can help you learn where a connector sits, which scan tools other owners use, or whether a symptom appears on a particular model year. Include the model year, engine, drivetrain, mileage, exact codes, freeze-frame data, recent work, and symptoms when you ask for help.
Use community advice as a lead, not as proof. Compare suggestions with your owner’s manual, Toyota service information, official emissions guidance, and test results before buying parts or changing wiring.
- Search by exact code and model year: Similar code descriptions can have different diagnostic paths.
- Share complete details: Include all codes rather than only the one that seems most important.
- Ask what testing confirmed the repair: Parts lists without test results can be misleading.
- Protect personal information: Do not post your full VIN, home address, or registration documents publicly.
Additional Resources for Tacoma Owners
Start with official information for your exact Tacoma. Toyota provides owner manuals, warning-light guidance, warranty details, and service access. Government OBD resources explain what the system monitors and how readiness affects emissions testing.
Some parts stores or repair shops may offer code reading, but availability, tool coverage, and service terms vary. A free code read is not the same as a complete diagnosis, so ask what data was retrieved and whether the person performed any testing.
- Toyota Manuals and Warranties for model-specific instructions and maintenance information.
- Toyota Warning Lights for official indicator guidance.
- California Air Resources Board OBD Program for an overview of how OBD systems monitor emissions-related components.
- California Bureau of Automotive Repair Smog Check for current inspection information in California.
Related Guides
Frequently Asked Questions
How do you clear the check engine light on a Tacoma?
Connect a compatible OBD-II scanner, turn the ignition to ON with the engine off, read and save all codes and freeze-frame data, repair the cause, and select Clear or Erase Codes. Turn the ignition off before disconnecting the scanner, then restart and rescan the truck.
How do you clear an engine light with a code reader?
Use the reader’s OBD-II menu to retrieve the codes first. After diagnosis and repair, choose the erase command with the ignition on and engine off. The command clears diagnostic information and resets readiness monitors, but it does not repair the fault.
How do you reset a Toyota check engine light without disconnecting the battery?
Use an OBD-II scanner to read and erase the emissions codes after repairing the cause. This method lets you save the codes and freeze-frame data before the reset and avoids unnecessarily disconnecting the battery.
Can you clear engine codes yourself?
Yes, you can read and clear generic OBD-II powertrain codes with a compatible scanner. Safe diagnosis may require more skill and equipment, so get professional help for flashing lights, severe symptoms, wiring faults, repeated codes, or tests beyond your experience.
Will tightening the gas cap turn the light off immediately?
Not always. The EVAP monitor must run again under suitable conditions before the computer can confirm that the leak is gone. Scan the truck if the light stays on because another EVAP fault can produce a similar code.
Can you clear a permanent check engine code with a scanner?
No. A permanent diagnostic trouble code is designed to remain after a normal scan-tool clear command or battery disconnect. Repair the underlying fault, then allow the vehicle to rerun the applicable monitor; the OBD system clears the permanent code after it verifies that the problem is no longer present.
Can you clear codes before an emissions test?
You should not clear codes shortly before testing. Erasing memory resets readiness monitors, and too many incomplete monitors can prevent an OBD-based inspection from passing even when the check engine light is off.
Why did the check engine light return after you erased it?
The computer detected the same fault again or found a related problem after rerunning its tests. Read the new code status and freeze-frame data, inspect the repair, and continue diagnosis instead of clearing the light again.
Conclusion
You can clear a Tacoma check engine light safely with a compatible OBD-II scanner when you follow the right order: record the diagnostic information, identify and repair the cause, erase the codes, and verify the result after the truck reruns its monitors. The reset itself takes only a few minutes, but accurate diagnosis may take longer.
Do not treat an erased light as proof of repair. If the light flashes, the truck runs poorly, the scanner cannot communicate, or the same code returns, stop resetting it and seek qualified help. Use Toyota’s year-specific manual and official OBD guidance to keep the process safe and accurate.
Sources
- Toyota Manuals and Warranties — model-specific owner manuals, maintenance, and warranty information.
- Toyota Warning Lights — official guidance for identifying Toyota dashboard indicators.
- California Air Resources Board OBD Program — how OBD systems monitor emissions-related components and store fault information.
- CARB OBD II Systems Fact Sheet — warning-light urgency, OBD-II coverage, readiness indicators, and emissions inspections.
- California Bureau of Automotive Repair Smog Check — current California inspection requirements and consumer guidance.
- California Bureau of Automotive Repair OBD Test Reference — permanent DTC behavior and OBD inspection reference information.
