
The Snell knot attaches fishing line or leader around a hook shank so the pull stays closely aligned with the hook. It is useful with many eyed hooks and is especially popular with straight-shank flipping hooks, circle hooks, octopus hooks, and some tandem rigs. A basic Easy Snell usually starts with five to seven neat wraps, although the best wrap count depends on the line, hook, and knot variation. The key is clean wraps, controlled tightening, and testing the finished connection before fishing.
Quick Answer
To tie an Easy Snell, pass the line through the hook eye toward the hook point, form a loop along the shank, make about five to seven neat wraps around the shank and line, pass the tag end through the loop, moisten the knot, and tighten it evenly. Inspect and pull-test it before fishing.
Key Takeaways
- A Snell keeps the line pull closely aligned with the hook shank and can be a strong, compact terminal connection.
- Five to seven wraps are a common starting point for an Easy Snell, but line diameter and material can change what works best.
- For heavy-cover bass fishing, the Snell is most closely associated with straight-shank flipping or punching hooks rather than circle hooks.
- There is no universal 10-pound minimum; commercially tied snells are available on much lighter line.
- Circle hooks can be snelled, but they normally require steady pressure rather than a hard traditional hookset.
- Always inspect the wraps and test the knot before casting.
At a Glance
| Time Required | About 2–5 minutes while learning; usually under a minute with practice |
| Difficulty | Easy to moderate |
| Tools Needed | Hook, fishing line or leader, and line cutters or scissors |
| Cost | No special equipment is required beyond the hook and line already being used |
Warning: Hooks are extremely sharp. Keep the hook point directed away from your hands while tightening or pull-testing a Snell. Also check local fishing rules before using circle hooks or multi-hook rigs because hook-type and hook-number requirements vary by fishery.
Why the Snell Knot Works So Well
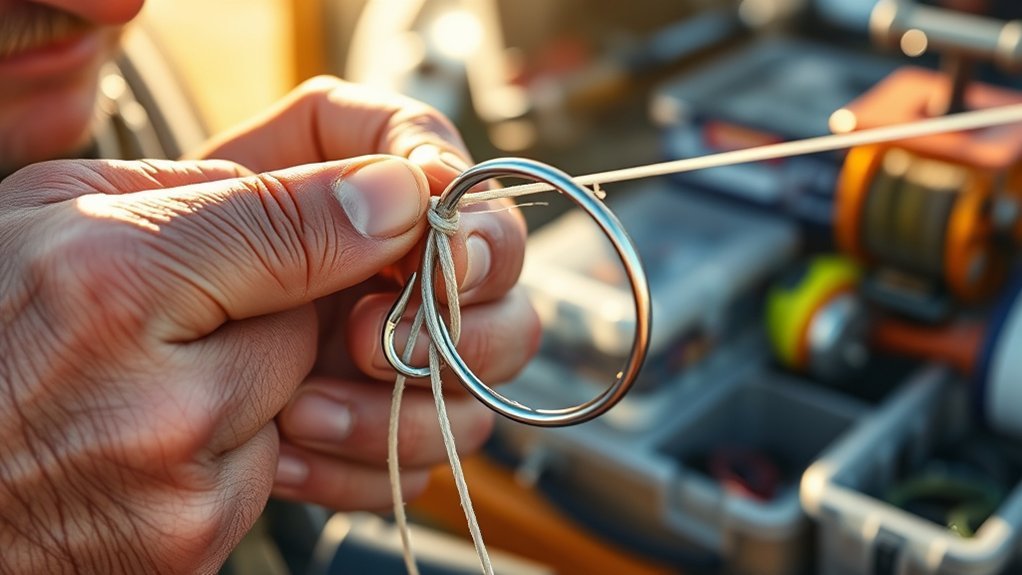
The main mechanical advantage of a Snell knot is alignment. Instead of concentrating the connection only at the eye, the wraps grip the hook shank so the line pulls closely in line with the hook. Mustad describes snelling as producing a direct inline pull and recommends it for several hook styles, including circle and octopus hooks.
That does not mean every Snell retains 100% of a line’s rated breaking strength. Actual knot strength changes with line material, diameter, knot variation, wrap quality, damage, and the way the knot is tightened. Treat the Snell as a strong connection rather than a guaranteed percentage.
In bass fishing, the Snell has a more specialized role. With a straight-shank flipping hook and a heavy Texas- or punch-style weight, line tension can make the hook rotate as the weight contacts the eye. That is one reason anglers use the knot when flipping or punching thick vegetation.
The same idea should not be applied to every hook or presentation. A Snell on a circle hook, for example, serves a different purpose and requires a different hook-setting technique.
There is no universal 10-pound-test minimum for a Snell. Hook size, fish size, cover, line type, drag setting, and abrasion risk should determine line strength.
Choose the Right Hook and Line
Treat the hook and line as one system. The best combination depends on whether you are flipping bass, fishing bait with circle or octopus hooks, building a tandem rig, or tying a light freshwater leader.
For bass in heavy vegetation, use a straight-shank flipping or worm hook whose eye and keeper are designed to tolerate the intended line. Gamakatsu, for example, describes its Heavy Cover Worm Hook as having a welded eye suitable for tying a Snell with braid.
Circle and octopus hooks can also be snelled, particularly in bait-fishing applications. However, hook size should match the bait and target species rather than following a universal 1/0-to-4/0 rule.
Monofilament, fluorocarbon, and braided line can all be used with a Snell. The correct strength depends on the application. Light line is not automatically unsuitable: Gamakatsu currently sells walleye snells tied with 8-pound monofilament, and other commercial snells are offered on even lighter line.
In abrasive cover, choose enough line strength and abrasion resistance for the fish and structure. In open water, lighter leaders may be completely appropriate. Always stay within the line and lure ratings of the rod and reel being used.
[Amazon Products Picked for You]

Exquisite Small Hooks: Small fishing hook tie-in 18in high-strength degree nylon line
Exquisite Small Hooks: Small fishing hook tie-in 18in high-strength degree nylon line

Perfect Design: Fishing hook tie-in 45cm/17.7inch nylon line. The line high strength degree, high abrasion degree and great elasticity degree
Tie a Basic Snell Knot Step by Step
The following method is the common Easy Snell. It closely follows the sequence published by Take Me Fishing.
- Pass the tag end through the hook eye from the hook-point side so the line exits behind the hook.
- Lay several inches of line alongside the hook shank and form a small loop.
- Pinch the loop and line against the shank so they cannot move.
- Wrap the tag end around both the hook shank and the line. Five to seven neat wraps are a useful starting point for this version.
- Keep each wrap beside the previous wrap rather than crossing or stacking the coils.
- Pass the tag end through the loop near the hook eye.
- Moisten the line, hold the wraps in place, and pull steadily until the Snell seats firmly.
- Inspect the wraps, test the knot with a firm pull, and trim the tag end.
Pro Tip: Before trimming, pull the standing line firmly while watching the wraps. If a coil crosses another coil, the knot creeps, or the tag begins to slip, cut the knot off and retie it.
Add More Wraps for Light Line
Thin line can behave differently from heavier line, so the ideal wrap count is not fixed. For an Easy Snell, five to seven wraps are a common starting point, while some hook-and-line combinations may benefit from additional turns.
With monofilament and fluorocarbon, concentrate first on neat, parallel wraps and smooth tightening. Adding wraps will not compensate for crossed coils, damaged line, or a poorly seated knot.
After tying, test the connection. If the knot slips before the line reaches a reasonable working load, add a wrap or retie using a Snell variation better suited to that line. The goal is reliable holding power, not simply the highest possible wrap count.
Also inspect the line for whitening, flattening, nicks, or heat damage after cinching. Any visible damage is a reason to retie.
[Amazon Products Picked for You]

Suitable size. The length of the line tie hook is 3.94 inches and the weight is 10g. It is small and convenient, easy to carry, making it an ideal addition to your fishing tools or fly fishing gear.
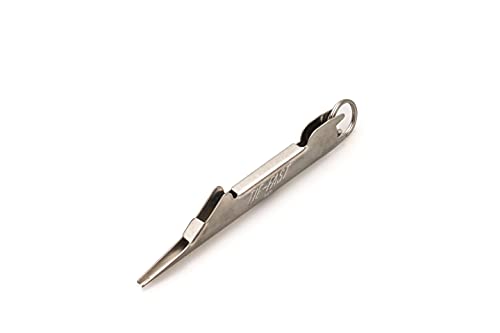
Easy Fast Safe Sure

Tie nail knots, Snell trailing hooks or two lines together
Adjust a Snell Knot for Braid
Braided line has very little stretch and can be comparatively slick, so a Snell tied with braid needs careful wrap control and a hook eye that will not damage or allow the line to escape.
Start with the normal tying sequence and use enough wraps to prevent movement on the specific braid and hook. Some anglers use additional wraps with braid, but there is no single number that works for every diameter and coating.
Keep every coil parallel and under light tension as you form it. Overlapping wraps can create uneven pressure and make the finished knot harder to inspect.
Moisten the connection and tighten it progressively rather than snapping it tight. Once seated, pull-test the knot before trimming the tag.
For heavy-cover applications, also inspect the hook eye. A welded or fully closed eye is preferable when the line will be exposed to hard pulling and repeated contact with vegetation.
Note: Wrap count is a starting adjustment, not a substitute for testing. Braid construction, coating, diameter, hook-eye shape, and the exact Snell variation can all change how securely the knot holds.
[Amazon Products Picked for You]

Fishing Line Clippers: The fishing snips feature a sharp serrated blade that easily cuts through braided, fluoro, and mono lines without fraying or slipping.

STRONG: Engineered from ultra high molecular weight polyethylene, one of the strongest woven fibers on earth; this 4 strand braid stands up to the most demanding fishing conditions

STRONG: Engineered from ultra high molecular weight polyethylene, one of the strongest woven fibers on earth; this 4 strand braid stands up to the most demanding fishing conditions
Use a Snell Knot for Texas Rigs
A Snell is most useful on a Texas-style presentation when the rig uses a straight-shank flipping hook, particularly for flipping or punching heavy vegetation. This is different from saying every Texas rig should be snelled.
| Factor | Effect | Practical note |
|---|---|---|
| Entry direction | Line enters the hook eye from the hook-point side | Helps preserve the intended hook orientation |
| Hook style | Straight-shank flipping/worm hook | Common choice for snelled punch and heavy-cover rigs |
| Wrap quality | Parallel, snug coils | Reduces slipping and makes the knot easier to inspect |
| Line type | Mono, fluorocarbon, or braid | Match material and strength to cover and hook design |
On a punch rig, a pegged or heavy sinker can contact the hook eye during a hookset. With a properly tied Snell on a suitable straight-shank hook, that interaction can encourage the hook to rotate. Bassmaster specifically describes the Snell as a heavy-cover technique associated with braided line and straight-shank flipping hooks.
An ordinary offset EWG Texas rig does not automatically need a Snell. A Palomar, improved clinch, or another appropriate terminal knot may be simpler depending on line type, hook design, and fishing style.
Fish Heavy Cover With a Snell Knot
Heavy cover is one of the best-known bass applications for a Snell knot. Manufacturers such as Mustad and Gamakatsu offer flipping hooks intended for vegetation, brush, and similar cover, and some models specifically accommodate snelled braid.
The rod, reel, hook, line, and sinker should all be matched to the cover. Avoid relying on a universal recommendation such as a 6.5- to 7-foot medium-action rod. Thick mats and heavy flipping often require substantially more power than open-water Texas-rig fishing.
Line strength should likewise be chosen for the actual cover and tackle. There is no general 10-pound minimum or one-size-fits-all maximum.
Heavy Cover Hooksets
With a straight-shank flipping hook, a Snell can be useful when pitching, flipping, or punching dense vegetation. The wraps hold the line against the shank while the weight-and-eye interaction can influence hook rotation.
Use a rod with enough power to drive the chosen hook and move a fish away from the cover, while staying within the rod manufacturer’s line and lure ratings. The required setup for sparse grass may be very different from the one needed for a thick matted canopy.
Do not transfer this aggressive hook-setting advice to circle hooks. Circle hooks work differently. The Florida Fish and Wildlife Conservation Commission advises anglers not to make a conventional hard hookset with a circle hook; instead, reel and maintain steady tension so the hook can move toward the corner of the mouth. See the agency’s circle-hook guidance.
Snell Setup Tips
A reliable heavy-cover Snell system begins with components that suit the actual technique.
| Element | Recommendation |
|---|---|
| Rod | Choose power and action for the cover, hook gauge, sinker weight, and line being used |
| Line | Match strength and abrasion resistance to the fish and cover; no universal 10-lb minimum applies |
| Hook | Straight-shank flipping or heavy-cover hook for punch-style bass rigs |
| Hook eye | Use a smooth, fully closed eye; welded eyes are especially useful with braid |
Lubricate the knot before final tightening and inspect every wrap afterward. Check the line near the hook frequently because vegetation, wood, rocks, sinkers, and fish can abrade the leader even when the knot itself remains secure.
Avoid Snell Knot Mistakes That Cost Fish
Most Snell failures come from poor tying or damaged line rather than from the basic design of the knot. Crossed wraps, an incorrectly oriented line, a partially open hook eye, friction damage, and inadequate tightening can all create weak points.
Retie whenever the knot looks uneven or the line directly above it becomes nicked, flattened, frayed, or discolored.
Prevent Wrap Overlap
Every coil should sit neatly beside the next one. Overlapping wraps make load distribution less predictable and can hide damaged or loose sections of line.
| Factor | Effect |
|---|---|
| Neat wraps | Create a uniform, easy-to-inspect connection |
| Crossed wraps | Can create uneven pressure and hidden weak points |
| Lubrication | Helps the knot seat with less friction while tightening |
| Post-tie pull test | Reveals slipping before the rig is cast |
| Line-specific adjustment | Lets the angler change wrap count when a particular line requires it |
Before tightening, look at the full series of coils. If one wrap crosses another, unwind it if possible or start again. A few extra seconds spent tying is preferable to fishing a connection that already looks questionable.
Tighten And Trim Properly
Once the wraps are aligned, tightening and trimming finish the Snell knot.
- Moisten the line before final tightening.
- Hold the coils in place and confirm that none have crossed.
- Pull steadily on the standing line and tag end until the knot seats firmly against the hook shank.
- Inspect the line for abrasion, whitening, flattening, or fraying.
- Pull-test the knot before trimming.
- Trim the tag end without cutting into the knot itself.
A finished Snell should look compact and orderly. If the wraps move during the test, the hook eye damages the line, or the knot appears distorted, retie it rather than trying to repair it.
Know When Not to Use a Snell Knot
A Snell knot is useful, but it is not automatically the best connection for every hook or fishing style.
For sharp-toothed species such as pike or muskellunge, the main issue is not simply whether the hook is snelled. Mono or fluorocarbon close to the fish’s mouth can be vulnerable to teeth, so use an appropriate bite leader when the species and local rules call for one.
Walleye should not be placed in the same category automatically. Snelled walleye rigs are common, and Gamakatsu currently sells dedicated walleye snells using 8-pound monofilament and octopus hooks.
A Snell may also be unnecessary when using a lure or hook whose shape does not benefit from the line wrapping the shank. In those situations, a Palomar, improved clinch, loop knot, or another line-appropriate terminal knot may be quicker and simpler.
Snags alone are not a reason to reject a Snell, either. Heavy cover is actually one of its best-known uses. Instead, choose the knot by considering hook style, leader material, abrasion risk, presentation, and how often the terminal tackle needs to be changed.
Note: Some fisheries require particular hook types, including non-offset circle hooks in certain saltwater fisheries. NOAA Fisheries recommends checking current regulations before fishing because requirements vary by location and species.
Frequently Asked Questions
What Is an Easy Way to Snell a Fish Hook?
Use the Easy Snell: pass the line through the eye toward the hook point, form a loop along the shank, make about five to seven neat wraps, pass the tag end through the loop, moisten the line, tighten steadily, inspect the coils, and pull-test the knot.
When Should You Snell a Hook?
A Snell is useful when you want the line pull closely aligned with the shank. Common applications include straight-shank flipping hooks for heavy-cover bass fishing, circle and octopus hooks for bait fishing, and certain tandem or multi-hook rigs.
How Do You Snell a Hook With Heavy Mono?
Use the same basic sequence, but leave enough tag end to form smooth wraps without forcing stiff mono into tight bends. Five to seven wraps are a reasonable starting point for an Easy Snell. Moisten the line, tighten gradually, inspect it for flattening or abrasion, and test it before trimming.
How Do You Tie a 2-Hook Snell?
Snell the first hook to the leader, position the second hook at the distance required for the bait and rig, and snell it in the same way while keeping both hooks oriented correctly. Do not rely on a universal spacing such as 18 or 24 inches; spacing varies by bait, species, rig style, and local rules governing multiple hooks.
How Many Wraps Should a Snell Knot Have With Braid?
There is no universal braid wrap count. Start with the recommended sequence for the Snell variation you are tying, keep the wraps parallel, and pull-test the finished knot. If the braid slips, additional wraps or a different Snell variation may be appropriate.
Can You Snell a Circle Hook?
Yes. Circle hooks are commonly snelled, especially for bait fishing. However, do not use the hard hookset associated with a bass flipping hook. With a circle hook, reel and apply steady pressure so the hook can move toward the corner of the fish’s mouth.
Conclusion
The Snell knot is simple once the wrap sequence becomes familiar, but reliability comes from matching the knot to the hook and fishing method. Keep the wraps neat, tighten the connection smoothly, inspect it for damage, and test it before casting.
For heavy-cover bass fishing, a Snell is most useful with an appropriate straight-shank flipping hook. For circle hooks, the knot can also work well, but the hook-setting technique is different. Most importantly, avoid arbitrary rules about line strength or wrap count. Choose the line, hook, and knot configuration for the fish, cover, bait, and tackle actually being used.
Sources
- Take Me Fishing — How to Tie a Snell Knot — basic Easy Snell sequence, common wraps, compatible line types, and sharp-tooth limitation.
- Mustad — How to Snell a Hook — inline pull, eyed-hook use, circle hooks, octopus hooks, and tandem rigs.
- Gamakatsu — Heavy Cover Worm Hook — welded-eye heavy-cover hook designed to accommodate a braid Snell.
- Gamakatsu — Walleye Snell With Glowbead — current example of a commercial Snell using 8-pound monofilament.
- Florida Fish and Wildlife Conservation Commission — Fishing Lines Field Guide — circle-hook operation and hook-setting guidance.
- NOAA Fisheries — Catch and Release Fishing Best Practices — circle hooks, tackle selection, fish handling, and regulation reminder.
