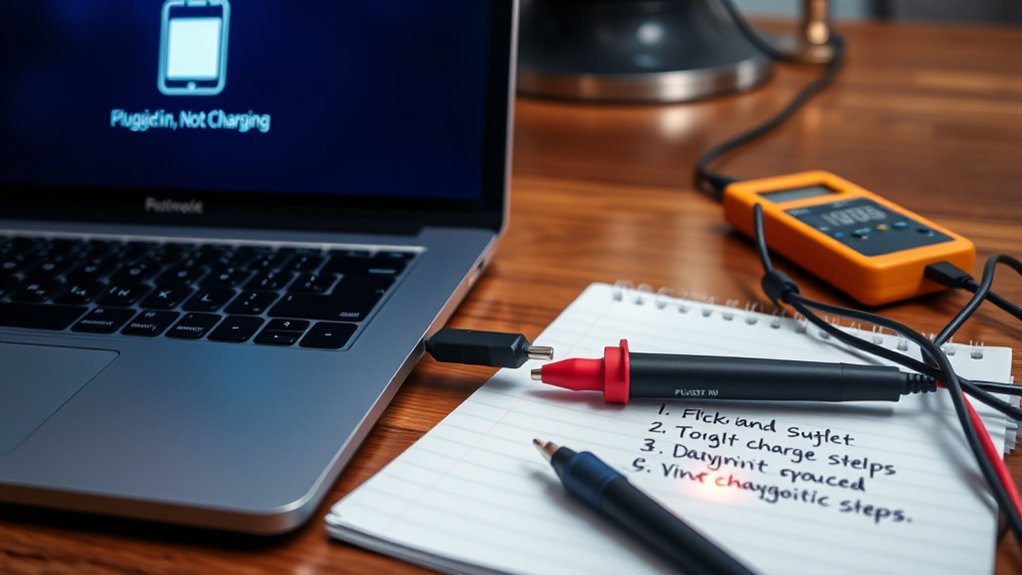
You plug in your laptop, but the battery icon still shows “not charging.” It’s a frustrating situation many encounter. Before you panic, there are systematic steps you can take to troubleshoot this issue. From checking the power source to evaluating your battery health, each step is essential in identifying the root cause. Let’s explore these diagnostic steps to get your device back on track.
Check the Power Source
Before diving into more complex solutions, start by checking your power source. Verify the outlet you’re using is functional by testing it with another device. If that device works, move on to the next step. Sometimes, power strips or surge protectors fail, so try plugging your charger directly into the wall. If you’re using a laptop, check if it’s in sleep mode or turned off; it might not charge while inactive. Look for any signs of damage to the outlet or the charger itself. If there’s no power, it could be an electrical issue. By confirming your power source is reliable, you can eliminate one potential problem and focus on more intricate solutions to get your device charging again.
Inspect the Charging Cable
Next, you should inspect the charging cable for any signs of physical damage. Look for frays, kinks, or exposed wires that could interfere with charging. Additionally, make sure the cable is compatible with your device and functioning properly by testing it with a different power source.
Check for Physical Damage
Inspecting the charging cable is essential when you encounter the “Plugged In, Not Charging” issue. Start by examining the entire length of the cable for any visible signs of wear, fraying, or cuts. Pay close attention to both ends, where connections often wear out first. If you see any damage, it’s likely the cause of your charging problem. Next, check the connectors for dirt or corrosion, which can hinder proper contact with your device. If you’ve identified any damage, consider replacing the cable with a new one. A faulty cable can prevent your device from charging efficiently, so ensuring it’s in good condition is vital to regain that freedom and keep your device powered up.
Verify Power Source Functionality
To guarantee your device charges properly, verify that the power source is functioning. Start by inspecting the charging cable for any visible damage. Look for frays, cuts, or bent connectors that might hinder power flow. If everything seems intact, try using a different power outlet. Sometimes, the outlet may be the culprit, so switching it up can make a difference. You should also test your cable with another device to confirm if it works correctly. If the cable fails to charge a different device, it’s time for a replacement. By ensuring your charging cable and power source are in good condition, you’ll liberate your device from the “plugged in, not charging” trap.
Examine the Charger
A thorough examination of your charger is essential when your device shows “Plugged In, Not Charging.” Start by checking the power source; make sure the outlet is functioning properly. Next, inspect the charging cable for any visible damage such as frays or kinks. If you see any wear, it might be time for a replacement. Then, examine the charger itself for any signs of overheating or a burnt smell. If the charger feels hot, unplug it and let it cool down. Finally, if possible, test your charger with another device to see if it works. If none of these steps resolve the issue, you may need to contemplate replacing the charger to regain that much-needed battery power.
Clean the Charging Port
To fix the “Plugged In, Not Charging” issue, start by cleaning the charging port. Inspect it for any debris that might be blocking the connection, and use compressed air to remove any buildup. Finally, make certain the connector is properly aligned for a secure fit.
Inspect for Debris
While it might seem minor, debris in the charging port can prevent your device from charging properly. Start by inspecting the port with a bright light. Look for lint, dust, or any obstructions that could block the connection. If you spot anything, it’s essential to remove it carefully. Using a toothpick or a small brush can help dislodge stubborn particles without causing damage. Avoid using anything metal, as that could risk short-circuiting your device. Once you’ve cleared the port, try plugging in your charger again. If it still doesn’t charge, you may need to explore deeper issues, but a clean port is a critical first step to ensuring your device gets the power it needs.
Use Compressed Air
After clearing debris from the charging port, it’s a good idea to use compressed air to guarantee there’s no hidden dust or particles causing issues. This simple step can restore your device’s functionality and give you the freedom to charge without interruptions. Follow these steps:
- Get a can of compressed air. Make sure it’s specifically designed for electronics.
- Hold the can upright. This prevents moisture from escaping, which could damage your device.
- Spray short bursts into the charging port. This effectively dislodges any stubborn particles.
- Inspect the port again. Check for any remaining debris before reconnecting your charger.
Taking this action can liberate your device from charging woes, putting you back in control.
Check Connector Alignment
Check the connector alignment to guarantee your charging port is clean and functioning properly. Misalignment can prevent your device from charging, so it’s essential to inspect it closely. Begin by ensuring the connector fits snugly in the port. If you notice debris or lint, use a soft, dry brush or compressed air to clean it out.
| Issue | Solution |
|---|---|
| Connector misalignment | Adjust or reposition the connector |
| Dirt in charging port | Clean with a soft brush |
| Damaged connector | Replace the charging cable |
After cleaning, reconnect and monitor if the charging indicator activates. This step can often resolve the “Plugged In, Not Charging” issue efficiently. Take charge of your device!
Restart Your Device
If your device shows “Plugged In, Not Charging,” restarting it can often resolve the issue. Sometimes, a simple reboot clears temporary glitches, giving your device a fresh start. Follow these steps to restart your device effectively:
Restarting your device can often fix the “Plugged In, Not Charging” issue, refreshing its performance and restoring functionality.
- Disconnect the charger – Unplugging can help reset the power connection.
- Hold the power button – Press and hold until the device shuts down completely.
- Wait a moment – Give it a few seconds before turning it back on.
- Reattach the charger – Plug it back in and check if the charging indicator changes.
This quick process might just liberate you from the frustration of a non-charging device, breathing new life into your tech and restoring your productivity.
Update Device Drivers
Updating your device drivers can resolve the “Plugged In, Not Charging” issue, as outdated or incompatible drivers may interfere with the charging process. To do this, start by accessing the Device Manager on your computer. Right-click the Start menu and select Device Manager from the list. Look for “Batteries,” then expand the section and right-click on each item under it. Choose “Update driver,” and follow the prompts to check for updates automatically. You can also visit the manufacturer’s website to manually download the latest drivers. After updating, restart your device to apply the changes. This simple step can help establish a stable connection between your hardware and software, ensuring your device charges properly.
Check Battery Health
To troubleshoot your charging issue, start by checking your battery’s health. Consider the age of the battery, as older batteries tend to lose capacity over time. Evaluating its health status can help you determine if it needs replacement or if there’s another underlying problem.
Battery Age Considerations
As your device ages, its battery health greatly impacts charging performance. A deteriorating battery can lead to frustration, but understanding its age can empower you to make informed decisions. Here are four key considerations:
- Capacity Decline: Over time, batteries lose their ability to hold a charge, affecting daily use.
- Cycle Count: Each charge cycle adds wear; knowing your battery’s cycle count helps gauge its lifespan.
- Temperature Sensitivity: Older batteries may react poorly to heat or cold, impacting performance.
- Replacement Needs: Recognizing when it’s time to replace can restore your device’s freedom and functionality.
Stay aware of these factors to guarantee your device remains a reliable companion, enabling you to stay connected and liberated.
Health Status Check
Checking your battery health is crucial for maintaining device performance. To start, access your device’s battery settings. Look for a section labeled “Battery Health” or “Battery Information.” Here, you’ll find critical data, including the maximum capacity and any performance management features. If your battery’s maximum capacity is markedly below 100%, it might be time for a replacement.
You should also check for any warning messages regarding battery performance. If the health status indicates issues, take action! Consider recalibrating your battery by fully charging and then discharging it. If problems persist, consult a professional or your device manufacturer. Staying proactive about battery health guarantees your device remains reliable and empowers you to make informed decisions about its maintenance.
Try a Different Outlet
If your device is plugged in but not charging, trying a different outlet can often resolve the issue. Sometimes, the outlet you’re using may be faulty, and switching to another can provide that much-needed power. Here’s what to contemplate:
- Check for damage: Inspect the outlet for any visible wear or damage.
- Test another device: Plug in a different device to see if it charges.
- Use a different room: Sometimes, outlets in other rooms can be more reliable.
- Avoid extension cords: They can sometimes reduce power flow.
Perform a Hard Reset
A hard reset can often fix charging issues when your device shows it’s plugged in but not charging. To perform a hard reset, first, unplug your device from the power source. Then, press and hold the power button for about 10 seconds, or until the screen goes black. If your device has a removable battery, take it out and wait for a minute before reinserting it. Next, plug your device back in and turn it on. This process clears temporary glitches that might be preventing your device from charging properly. After rebooting, check if the charging status has changed. If your device still doesn’t charge, you may need to explore further troubleshooting options.
Seek Professional Help
When you’ve tried all the troubleshooting steps and your device still shows it’s plugged in but not charging, seeking professional help might be your best option. A technician can quickly diagnose underlying issues that you may not see. Here are a few reasons to contemplate professional assistance:
- Expertise: They possess the knowledge to tackle complex issues efficiently.
- Tools: Professionals use specialized tools that can identify problems faster.
- Warranty Protection: Avoid voiding your device’s warranty by attempting risky repairs.
- Peace of Mind: Knowing your device is in capable hands can alleviate stress.
Don’t let a charging issue hold you back; seeking help can restore your device and liberate your productivity.
Frequently Asked Questions
Can a Software Issue Cause Charging Problems?
Yes, a software issue can cause charging problems. You should check for updates, restart your device, or reset settings. These steps often resolve software-related charging issues and help guarantee your device functions properly.
How Do I Know if My Battery Needs Replacement?
If your device’s battery drains quickly or won’t hold a charge, it’s time to face the music. Check for swelling, overheating, or age—usually over two years means it’s ripe for replacement.
Is It Safe to Use Third-Party Chargers?
Using third-party chargers can be risky. They might not meet your device’s specifications, leading to overheating or damage. Stick with reputable brands to guarantee safety and maintain your device’s longevity. Always prioritize quality over cost.
What if My Device Gets Hot While Charging?
If your device gets hot while charging, unplug it immediately. Check for faulty chargers or cases that trap heat. Let it cool down before using again, ensuring peak performance and safety. Stay aware of overheating issues.
Does Using My Device While Charging Affect Performance?
Yes, using your device while charging can affect performance. It may slow down charging speed and generate heat, risking overheating. For best results, consider limiting usage during charging sessions to enhance efficiency and battery health.
Conclusion
In the end, it’s ironic how something as simple as a charging port can turn your device from a lifeline into a paperweight. By following these diagnostic steps, you can often resolve the “plugged in, not charging” issue yourself. However, if your device still refuses to cooperate, seeking professional help might just be your last resort. After all, isn’t it amusing how we rely on technology that sometimes seems to have a mind of its own?
