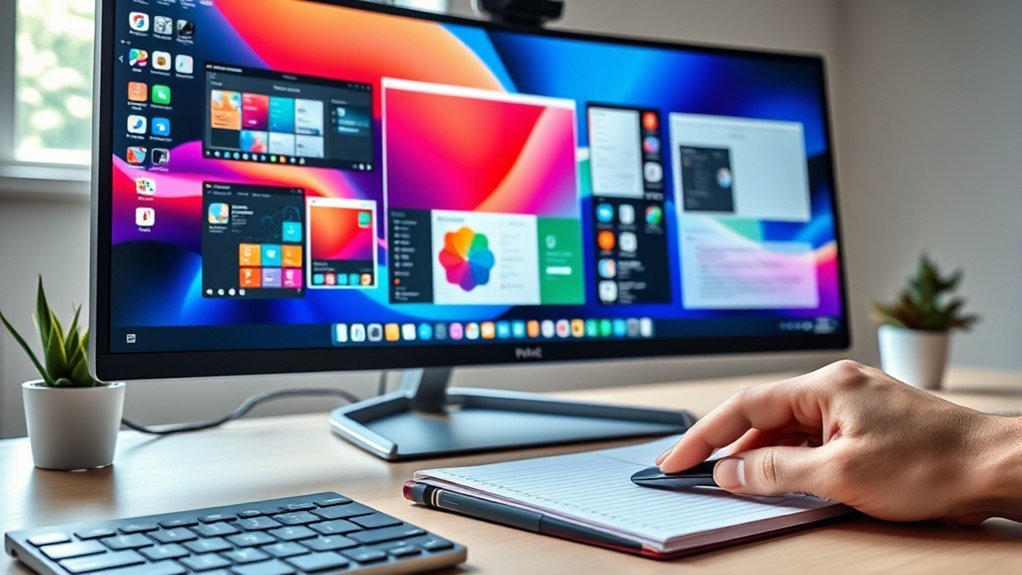
Mastering virtual desktops on Windows 11 can help you separate work, personal tasks, research, meetings, and entertainment into cleaner workspaces. Instead of stacking every window on one screen, you can create focused desktops, switch between them quickly, and move apps where they belong. With the right setup, virtual desktops become a simple way to reduce clutter and stay organized throughout the day.
Quick Answer
To use virtual desktops in Windows 11, open Task View with Windows + Tab, select New desktop, then organize apps by task. Use Windows + Ctrl + Left/Right Arrow to switch desktops, Windows + Ctrl + D to create one, and Windows + Ctrl + F4 to close the current desktop.
Key Takeaways
- Virtual desktops help you separate tasks into focused workspaces instead of crowding one desktop with every app.
- Task View is the main control center for creating, naming, rearranging, closing, and switching desktops.
- Keyboard shortcuts make virtual desktops much faster to use during daily work.
- You can personalize each desktop with different backgrounds and organize apps by project, role, or activity.
- Virtual desktops work best when you keep each workspace simple and review your layout regularly.
At a Glance
| Time Required | 5 to 15 minutes for setup; faster once you learn the shortcuts |
| Difficulty | Easy |
| Tools Needed | Windows 11 PC, keyboard, mouse or touchpad |
| Cost | Free, built into Windows 11 |
Understanding Virtual Desktops in Windows 11
Have you ever wished you could streamline your workflow by separating tasks into different environments?
Virtual desktops in Windows 11 give you that option. You can create multiple workspaces and use each one for a different project, activity, or part of your day. For example, you might keep email and documents on one desktop, research tabs on another, and personal apps on a third.
Each virtual desktop gives you a separate view of open windows, so your main workspace feels less crowded. This separation helps reduce distractions, especially when you switch between focused work, communication, and personal tasks.
Virtual desktops do not give you separate Windows accounts. They give you separate workspaces inside the same signed-in session.
You can switch between desktops with keyboard shortcuts, Task View, a touchpad gesture, or the taskbar. Once you understand how the feature works, you can create a cleaner setup that helps you work smarter, not harder.
When Virtual Desktops Are Most Useful
Virtual desktops are helpful when one screen feels too busy. They work especially well if you use several apps at once but do not want every window competing for attention.
You may benefit from virtual desktops if you regularly switch between:
- Work and personal tasks: Keep office apps, browser tabs, and personal messages apart.
- Research and writing: Put source material on one desktop and your draft or editor on another.
- Meetings and deep work: Keep video calls separate from focused project work.
- School and entertainment: Separate assignments, notes, streaming apps, and games.
- Multiple clients or projects: Give each project its own workspace so files and apps stay easier to find.
Note: Virtual desktops organize your windows, but they do not increase your computer’s memory or processing power. Too many open apps can still slow your PC down.
Creating Your First Virtual Desktop
To create your first virtual desktop in Windows 11, you need to open the virtual desktop feature through Task View.
Once you have Task View open, you can create a new desktop, name it, and open apps that fit that workspace.
After that, switching between desktops takes only a quick click or shortcut, which can improve your workflow efficiency.
Accessing Virtual Desktop Feature
Task View is the easiest place to manage virtual desktops. You can open it in two common ways:
- Click the Task View icon on the taskbar.
- Press Windows + Tab on your keyboard.
After Task View opens, you will see your current desktop and any additional desktops you have already created. From this screen, you can create, rename, rearrange, and close desktops.
You can also switch between desktops by returning to Task View or by using the keyboard shortcut Windows + Ctrl + Left/Right Arrow.
This feature helps you separate tasks, improve focus, and streamline your workflow without needing another monitor.
Creating New Desktop
Creating your first virtual desktop in Windows 11 is a straightforward process that can greatly improve your organization.
Follow these steps to create a new desktop:
- Access Task View: Click the Task View icon on the taskbar or press Windows + Tab.
- Create New Desktop: In the Task View interface, click + New desktop.
- Name Your Desktop: Right-click the desktop thumbnail or select its name area, then give it a clear title such as “Work,” “Research,” or “Personal.”
- Switch Applications: Open specific apps on this new desktop to keep your workflow organized.
With these simple steps, you can create a virtual desktop tailored to your needs. This gives you a cleaner and more focused work environment.
Enjoy the freedom of organization without crowding one desktop with every window.
Switching Between Desktops
Switching between virtual desktops in Windows 11 is quick and efficient, making it easier to manage multiple workflows.
To switch visually, press Windows + Tab to open Task View. You will see your desktops lined up. Click the desktop you want to use.
For faster navigation, press Windows + Ctrl + Left Arrow or Windows + Ctrl + Right Arrow to move between desktops without opening Task View first.
If you want to close a desktop, return to Task View, hover over the desktop you want to remove, and click the X that appears. Windows will move open windows from the closed desktop to another desktop, so your apps are not automatically deleted or uninstalled.
Use this feature to enhance your productivity and create a streamlined work environment that fits your daily routine.
Customizing Your Virtual Desktop Layout
Customizing your virtual desktop layout in Windows 11 can make each workspace easier to recognize and use.
You can organize applications efficiently, set personalized background images, rename desktops, and use keyboard shortcuts for quick navigation.
Let’s explore how these adjustments can improve your workflow.
Organize Applications Efficiently
Efficiently organizing applications on your virtual desktops can greatly improve your productivity. A thoughtful layout helps you reduce distractions and find the right app faster.
Here are four tips to help you organize effectively:
- Group Similar Apps: Place related applications on the same desktop, such as work tools on one and entertainment apps on another.
- Use Descriptive Names: Name your desktops based on their purpose, like “Work,” “School,” “Editing,” or “Gaming,” for quick identification.
- Pin Frequently Used Apps: Pin essential applications to the taskbar for easy access across all desktops.
- Regularly Review Layout: Periodically check your organization to make sure it still matches your current tasks and habits.
These strategies can clear your workspace and make Windows 11 feel easier to manage.
Personalize Background Images
One easy way to improve your virtual desktop experience in Windows 11 is by personalizing background images. This small change can help each workspace feel distinct.
To change your background, open Task View with Windows + Tab, right-click the desktop you want to customize, and choose Choose background. You can also right-click on the desktop, select Personalize, and choose a picture, solid color, or slideshow from the Background settings.
You can set different images for different virtual desktops, which helps you quickly identify which workspace you are using. For example, you might use a calm background for writing, a neutral background for meetings, and a colorful background for personal tasks.
Personalized backgrounds can boost motivation and make your digital space feel more intentional.
Rename and Rearrange Desktops
Renaming and rearranging desktops can make your setup easier to follow, especially when you use more than two workspaces.
Open Task View with Windows + Tab. Then select the desktop name or right-click the desktop thumbnail and choose the rename option. Use short, clear names that describe the task, such as “Admin,” “Design,” “Writing,” “Study,” or “Break.”
You can also drag desktop thumbnails in Task View to rearrange their order. Place your most-used desktops next to each other so keyboard switching feels more natural.
Pro Tip: Keep desktop names short. One or two words are easier to scan in Task View than long project labels.
Utilize Keyboard Shortcuts
Mastering keyboard shortcuts can make virtual desktops much faster to use in Windows 11.
These shortcuts help you navigate your workspace quickly, so you do not have to rely on repeated mouse clicks.
Here are four essential shortcuts to improve your virtual desktop management:
- Windows + Ctrl + D: Create a new virtual desktop instantly.
- Windows + Ctrl + Left/Right Arrow: Switch between virtual desktops.
- Windows + Ctrl + F4: Close the current virtual desktop.
- Windows + Tab: Open Task View for an overview of all desktops and apps.
Switching Between Virtual Desktops Efficiently
While juggling multiple tasks on Windows 11, switching between virtual desktops can greatly improve your productivity. The fastest method is the keyboard shortcut Windows + Ctrl + Left/Right Arrow. This lets you move between desktops without breaking your flow.
If you prefer a visual approach, open Task View by clicking the Task View icon on the taskbar or pressing Windows + Tab. From there, select the desktop you want to use.
You can also use touchpad gestures on many Windows 11 laptops. A common gesture is swiping with multiple fingers to move between desktops, though the exact gesture can depend on your touchpad settings.
Customizing your desktops for specific tasks can make switching more intuitive. With practice, you will glide between workspaces while keeping your focus sharp and your workload manageable.
Use this feature to improve your multitasking capabilities without making your screen feel crowded.
Organizing Applications Across Desktops
To organize applications across virtual desktops in Windows 11, group related tasks and programs together. This keeps your workflow cleaner and helps you return to the right context faster.
Here are four tips to help you maintain order:
- Designate Desktops by Function: Create separate desktops for work, personal use, creative projects, research, meetings, or entertainment.
- Limit Applications per Desktop: Keep only essential apps open on each desktop to reduce clutter.
- Utilize Desktop Backgrounds: Use different backgrounds to visually distinguish your desktops.
- Pin Frequently Used Apps: Use the taskbar to pin applications you frequently access across different desktops for quick retrieval.
You can also move windows between desktops from Task View. Open Task View, find the window you want to move, then drag it to another desktop. This is useful when an app opens in the wrong workspace or when your task changes during the day.
Using Keyboard Shortcuts for Quick Navigation
Managing virtual desktops in Windows 11 becomes much easier when you use keyboard shortcuts. These shortcuts reduce mouse clicks and help you stay focused.
To create a new desktop, press Windows + Ctrl + D. To navigate between desktops, press Windows + Ctrl + Left Arrow or Windows + Ctrl + Right Arrow. To close the desktop you are currently using, press Windows + Ctrl + F4.
You can view all your virtual desktops by pressing Windows + Tab. This lets you quickly check your open applications and choose the workspace you need.
To switch between apps on the same desktop, use Alt + Tab. These shortcuts help you manage your tasks efficiently, keep your focus sharp, and move through your digital workspace with less friction.
Moving Windows Between Virtual Desktops
Moving windows between virtual desktops helps you fix a messy setup without closing anything. This is useful when an app opens on the wrong desktop or when you decide to reorganize your workflow.
To move a window:
- Press Windows + Tab to open Task View.
- Find the app window you want to move.
- Drag the window to the desktop where it belongs.
- Click that desktop to continue working there.
You can also right-click a window in Task View and choose a move option if it appears on your system. This gives you another way to send the window to a different desktop.
Warning: Closing a virtual desktop is not the same as saving your work. Save documents, drafts, and browser work before shutting down, restarting, or closing apps.
Common Virtual Desktop Mistakes to Avoid
Virtual desktops are simple, but they can become confusing if you create too many or use them without a clear system.
Avoid these common mistakes:
- Creating too many desktops: More desktops can help, but too many can make switching harder.
- Using vague names: Names like “Desktop 2” and “Desktop 3” are harder to remember than “Work” or “Research.”
- Leaving every app open: Virtual desktops organize clutter, but they do not remove the system load from too many active apps.
- Mixing unrelated tasks: If every desktop contains the same apps, the feature loses its value.
- Ignoring Task View: Task View helps you clean up, move windows, and understand what is open.
The best setup is usually simple. Start with two or three desktops, then add more only when you have a clear reason.
Tips for Maintaining Focus and Productivity
Using virtual desktops effectively can greatly improve your focus and productivity. The goal is not to create as many desktops as possible. The goal is to create the right spaces for the way you work.
Here are some tips to help you stay on track:
- Designate Desktops: Create specific desktops for different tasks, such as work, personal projects, research, meetings, or entertainment. This separation minimizes distractions.
- Limit Open Applications: Keep only necessary applications open on each desktop to reduce clutter and maintain clarity.
- Schedule Breaks: Use a timer to remind yourself to take regular breaks. This helps prevent burnout and keeps your mind fresh.
- Customize Backgrounds: Use distinct wallpapers for each desktop. This visual cue helps you quickly identify your focus area.
You can also review your desktops at the end of the day. Close apps you no longer need, move windows back to the right desktop, and prepare your main workspace for the next session.
Troubleshooting Virtual Desktops in Windows 11
If virtual desktops feel confusing or do not behave as expected, a few quick checks can usually help.
Task View Icon Is Missing
If you do not see the Task View icon on the taskbar, right-click an empty area of the taskbar and open Taskbar settings. Look for the Task View option and turn it on. You can still use Windows + Tab even if the icon is hidden.
Keyboard Shortcuts Are Not Working
Check that your keyboard is working normally and that no utility app is overriding Windows shortcuts. On some compact keyboards, you may also need to use the Fn key depending on your keyboard layout.
Apps Keep Opening on the Wrong Desktop
Some apps may reopen where Windows or the app last placed them. Use Task View to drag the window to the right desktop. If the app supports startup or session settings, check those settings too.
Too Many Desktops Feel Overwhelming
Close desktops you do not need. In Task View, hover over an extra desktop and select the X. Open windows will move to another desktop, but you should still save your work before making major changes.
Related Guides
Frequently Asked Questions
Can I use different wallpapers for each virtual desktop?
Yes, you can use different wallpapers for different virtual desktops in Windows 11. Open Task View, right-click the desktop you want to customize, choose the background option, and select the image or style you prefer.
Are virtual desktops saved when I shut down Windows 11?
Windows 11 can preserve your virtual desktop layout after a restart in many cases, but open apps and unsaved work may not return exactly as you left them. Save your files before shutting down, and use app-specific session restore features when available.
How many virtual desktops can I create in Windows 11?
Windows 11 lets you create many virtual desktops, but the practical limit depends on your system resources and how many apps you keep open. For daily use, a small number of clearly named desktops is usually easier to manage than dozens of workspaces.
Can I run different applications on each virtual desktop?
Yes, you can run different applications on each virtual desktop. This helps you separate workflows, keep tasks organized, and reduce distractions when switching between work, personal tasks, research, or entertainment.
Is there a limit to the number of applications per virtual desktop?
Windows 11 does not set a simple visible app limit per virtual desktop for normal use. Your real limit is your computer’s performance. If too many apps are open, your system may slow down even if those apps are spread across different desktops.
Do virtual desktops work with multiple monitors?
Yes, virtual desktops can work with multiple monitors. Your exact experience can depend on your display settings and Windows version, but you can still use Task View and shortcuts to organize workspaces across your setup.
What is the fastest shortcut for virtual desktops?
The fastest shortcuts are Windows + Ctrl + D to create a desktop, Windows + Ctrl + Left/Right Arrow to switch desktops, and Windows + Ctrl + F4 to close the current desktop.
Conclusion
By mastering virtual desktops in Windows 11, you can streamline your workflow, reduce clutter, and boost your productivity. Create distinct workspaces for different tasks, switch between them with shortcuts, and customize each layout to match your routine.
Use Task View to create, rename, rearrange, and close desktops. Organize your applications by purpose, move windows when needed, and keep each workspace focused. With a simple system and a few reliable shortcuts, you can turn Windows 11 virtual desktops into a cleaner and more efficient way to work.
