
Connecting a printer to a Chromebook is usually simple when you use the right connection method. Most modern ChromeOS devices support driverless printing over Wi-Fi or USB, so you often do not need to download a traditional printer driver. Start by checking printer compatibility, connect the printer to the same network as your Chromebook, add it in Print and scan settings, then run a test print.
Quick Answer
To connect a printer to a Chromebook, turn on the printer, connect it to the same Wi-Fi network as your Chromebook, then open Settings > Print and scan > Printers. Select Add printer, choose your printer, follow any prompts, and print a test page to confirm the setup works.
Key Takeaways
- Chromebooks work best with printers that support IPP Everywhere, Mopria, or the “Works with Chromebook” label.
- Use Wi-Fi or USB for Chromebook printing. ChromeOS does not support Bluetooth printing.
- Most modern printers do not need downloaded drivers because ChromeOS uses built-in printing support.
- If your printer does not appear automatically, add it manually by IP address or try a USB connection.
- A test print is the fastest way to confirm your Chromebook, printer, paper size, and connection are working correctly.
At a Glance
| Time Required | 5 to 15 minutes for most printers |
| Difficulty | Easy |
| Tools Needed | Chromebook, printer, Wi-Fi password, and optional USB cable |
| Cost | Free, unless you need a USB cable or printer supplies |
Step 1: Check Printer Compatibility
Before you connect a printer to your Chromebook, confirm that the printer works well with ChromeOS. Not every older printer supports modern Chromebook printing, so checking this first can save time and frustration.
Look for terms such as IPP Everywhere, Mopria, or “Works with Chromebook.” These labels usually mean the printer supports modern, driverless printing standards that ChromeOS can use without a separate software download. You can check your printer’s manual, the manufacturer’s product page, or the printer’s settings menu for these details.
Next, make sure your printer has the latest firmware updates. Outdated firmware can cause connection problems, missing printer features, or failed print jobs. Also check which connection types your printer supports. ChromeOS supports printing over Wi-Fi and direct USB connections, but Bluetooth printing is not supported. By confirming compatibility upfront, you set yourself up for a smoother setup.
Note: If your printer worked with Google Cloud Print in the past, that setup no longer applies. Google Cloud Print was discontinued, so Chromebook printing now relies on local Wi-Fi, USB, IPP, and compatible printer standards.
[Amazon Products Picked for You]

ALL-IN-ONE: Print, Copy, Scan features for full control at your fingertips. Single-sided printing only.

Affordable Versatility - A budget-friendly all-in-one printer perfect for both home users and hybrid workers, offering exceptional value

Affordable Versatility - A budget-friendly all-in-one printer perfect for both home users and hybrid workers, offering exceptional value
Step 2: Connect Your Printer to Wi-Fi
To connect your printer to Wi-Fi, start by opening the printer’s settings menu. Use the printer’s screen, buttons, or companion app to select your wireless network and enter the password. Once the printer joins the network, verify the connection before you move to your Chromebook.
[Amazon Products Picked for You]

***USB 2.0 Printer Cable Overview*** 1.USB-A to USB-B 2.0 Port 2.Durable: Features gold-plated connectors 3.Widely Compatible: Works with various USB B printers and devices 4.Plug and Play: Offers more stability than Wi-Fi 5.Long Length: 6/10 Feet

IN THE BOX: (1) 10-foot high-speed multi-shielded USB 2.0 A-Male to B-Male cable
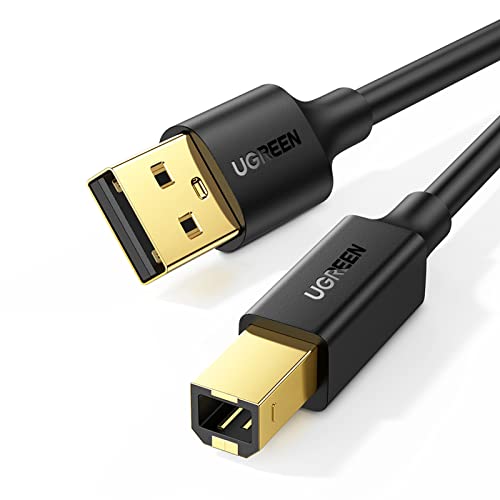
Ideal Printer Scanner Cable: UGREEN USB 2.0 printer cable is ideal for connecting your scanner, printer, server, hard drive, camera, piano, and other USB b devices to a laptop, computer (Mac/PC), or other USB-enabled devices for data transfer.
Printer Wi-Fi Setup
Setting up Wi-Fi on your printer is the easiest way to print from a Chromebook without cables. First, make sure your printer is powered on and ready. Open the printer’s control panel and find the Wi-Fi, Wireless, or Network settings. Choose your home or office Wi-Fi network, then enter the password carefully.
After the printer connects, it should show a confirmation message, a Wi-Fi icon, or a connected status. On your Chromebook, open Settings > Print and scan > Printers. Compatible printers on the same network often appear automatically. Select your printer and, if prompted, confirm the recommended driver or PPD that ChromeOS suggests. After that, you should be ready to print wirelessly.
Network Connection Verification
Verifying your printer’s network connection helps prevent setup errors. Start by checking that your printer and Chromebook are connected to the same Wi-Fi network. This matters because many homes and offices use separate networks, such as a main network and a guest network.
Open your printer’s network settings and confirm the network name. If needed, print a network configuration page from the printer menu. This page usually shows the printer’s network name, IP address, and connection status. Then, on your Chromebook, open Settings > Print and scan > Printers. Your printer should appear in the list. If it does not, restart both the printer and Chromebook, then check again.
Warning: Do not try to connect a Chromebook printer through Bluetooth. ChromeOS does not support Bluetooth printing, so use Wi-Fi, Wi-Fi Direct, or a USB cable instead.
Step 3: Power On Your Printer
Before you start printing, make sure your printer is powered on and ready. Check that it is plugged into a working power source, press the power button, and watch the indicator lights or screen for a ready message.
Check Power Source
To make sure your printer is ready for use, confirm that it is powered on and properly connected to a power source. Check that the power cord is securely plugged into both the printer and the wall outlet. If your printer has a power switch, confirm it is in the on position.
Some printers have a power indicator light that shows whether the printer is receiving power. If you use a power strip, verify that the strip is turned on and working. Also inspect the cable for loose connections or visible damage. A weak power connection can stop the printer from appearing on your Chromebook.
Turn On Printer
Once you have checked the power source, turn on the printer. Locate the power button, usually on the front, top, or side panel. Press it firmly, then wait while the printer starts up. During this time, the printer may make noise, move internal parts, or show lights on the control panel.
Do not skip this step. A powered-off printer cannot connect to your Chromebook or appear in the printer list. Once it is fully powered, you can continue setting up your printer with your Chromebook.
Indicator Lights Status
Understanding your printer’s indicator lights can help you quickly spot problems. A steady green light usually means the printer is on and ready. A blinking light may mean the printer is warming up, processing a job, or waiting for input.
A red or orange light often points to an error, such as low ink, low toner, an empty paper tray, an open cover, or a paper jam. Check the printer’s screen or manual for the exact meaning, since light patterns vary by model. Fixing these issues before setup helps your Chromebook detect the printer more reliably.
Step 4: Open Chromebook Settings
Once your printer is powered on and connected, open your Chromebook settings. This is where you manage printers, scanners, network options, and other device settings.
- Click the time in the bottom-right corner of your Chromebook screen.
- Select the gear icon to open Settings.
- Look at the menu on the left side.
- Find and select Print and scan.
- Click Printers to manage your printer options.
Opening the settings menu lets you add, remove, and manage printers. It also helps you confirm whether ChromeOS already detected your printer automatically.
Step 5: Access the Printers Section
To access the Printers section on your Chromebook, open the Settings menu and go to the printing options. This is where you will find available printers, saved printers, and manual setup tools.
Accessing Settings Menu
To reach the printer settings quickly, follow these steps:
- Click the time in the bottom-right corner of your screen.
- Select the gear icon to open the Settings menu.
- Select Print and scan on the left side of the Settings menu.
- Click Printers under Print and scan.
These steps take you directly to the printer management area. From here, you can add a new printer, select a saved printer, or remove an old one that no longer works.
Finding Printer Options
You can find printer options by going to the dedicated printer section inside Chromebook Settings. Click the status area in the bottom-right corner, choose the gear icon, then select Print and scan. Open Printers to view available devices.
In this section, you can manage your printers, add a new printer, check connected devices, or adjust saved printer settings. If you want a cleaner setup, remove old printers you no longer use. This can prevent confusion when you choose a printer from the print dialog.
Step 6: Add a New Printer
Adding a new printer to your Chromebook takes only a few steps when your printer is already powered on and connected to the right network.
- Verify that your printer is turned on and connected to the same Wi-Fi network as your Chromebook, or connect it with a USB cable.
- Open the Settings menu by clicking the time in the lower-right corner.
- Select Print and scan, then choose Printers.
- Click Add printer and wait for your Chromebook to detect available printers.
- Choose your printer from the list.
- Follow any on-screen prompts to complete setup. ChromeOS may suggest the right driver or PPD when needed.
Once you have added your printer, it should appear as a saved printer on your Chromebook. You can then open a document, image, email, or web page and send it to the printer from the print menu.
Pro Tip: If your printer does not appear automatically, look for its IP address on the printer’s network page. Then use the manual add option in Chromebook printer settings and enter that IP address.
Step 7: Select Your Printer
When choosing a printer for your Chromebook, start with compatibility. A printer that supports IPP Everywhere, Mopria, or the “Works with Chromebook” label usually gives you the easiest setup.
Wireless printers are ideal because they let you print from anywhere on the same network without connecting a cable. Wi-Fi Direct can also help if you do not have a regular router available. For a simple wired setup, a USB printer can also work well with many Chromebooks.
Also think about your printing needs. If you mostly print documents, a basic black-and-white laser printer may be enough. If you print school projects, photos, labels, or color documents, choose a printer that handles those jobs well. A reliable printer that matches your real needs will save you time, ink, and frustration.
Step 8: Install Necessary Drivers or Confirm Driverless Printing
On ChromeOS, you usually do not need to install printer drivers. Chromebooks use built-in CUPS and IPP support to communicate with many modern printers. This means the printer can often work without downloading software from the manufacturer’s website.
If your printer is not configured automatically, go to Settings > Print and scan > Printers, choose Add printer, and select your model. If ChromeOS asks you to choose a driver or PPD, select the recommended option from the list. If your printer still does not appear, enter the printer’s IP address manually.
Restarting your Chromebook is not always required, but it can help if the printer does not appear right away. You can also restart the printer and router to refresh the network connection.
[Amazon Products Picked for You]


VERSATILE LABEL SIZES FOR MORE USES: Print a wide range of direct thermal labels from 1.57" to 4.25" wide, giving you the flexibility to handle everything from shipping and return labels to product labels, inventory tags, barcodes, and everyday organization. One compact printer for packing orders, running a small business, crafting, and more.

AFFORDABLE COLOR PRINTING – Print everyday color documents like to-do lists, letters, financial documents and recipes
Step 9: Perform a Test Print
After you add the printer or confirm driverless setup, perform a test print to make sure everything works. Open a document, image, email, or web page that you want to print. Click the menu icon or press Ctrl + P to open the print dialog.
In the print settings, choose your printer from the destination list. Check the paper size, page orientation, number of copies, color options, and page range. Once everything looks correct, click Print to send the job to your printer.
Watch the printer as the page comes out. If the print looks right, your Chromebook and printer are connected successfully. If the page prints with the wrong size, wrong orientation, faded ink, or missing content, adjust the print settings and try again.
Step 10: Troubleshoot Common Issues
If your Chromebook cannot print, do not panic. Most printer problems come from network mismatches, power issues, stuck print jobs, or outdated printer firmware. Use these quick fixes to narrow down the problem.
- Printer Not Detected: Confirm your printer is turned on, connected to the same Wi-Fi network as your Chromebook, and compatible with IPP or driverless printing. If needed, add it by IP address or connect with USB.
- Print Jobs Stuck: Cancel the print job, turn the printer off and on, then remove and re-add the printer in Settings > Print and scan > Printers.
- Low Ink, Toner, or Paper: Check the printer for empty trays, low ink, low toner, open covers, or jammed paper.
- Outdated Software: Update your Chromebook and check whether your printer has a firmware update available through the printer menu or manufacturer app.
- Network Issues: Restart your router, printer, and Chromebook. If Wi-Fi still fails, try Wi-Fi Direct or USB as a fallback.
- Bluetooth Not Supported: ChromeOS does not support Bluetooth printing. Use Wi-Fi, USB, or Wi-Fi Direct instead.
- Wrong Printer Selected: In the print dialog, make sure you choose the correct printer from the destination list, especially if old printers are still saved.
- Manual Setup Needed: If automatic detection fails, use the printer’s IP address and add it manually in Chromebook printer settings.
Frequently Asked Questions
Can I connect a wired printer to my Chromebook?
Yes. Connect the printer with a USB cable, then follow any notification or setup prompt on your Chromebook. You can also go to Settings > Print and scan > Printers to confirm that the printer appears and is saved.
What type of printers work best with Chromebooks?
Printers that support IPP Everywhere, are Mopria certified, or carry a Works with Chromebook label usually work best. These printers are more likely to offer quick driverless setup and reliable printing from ChromeOS.
Do I need a Google account to print from a Chromebook?
No. Local printing over Wi-Fi or USB does not require Google Cloud Print. However, you usually sign in to a Chromebook with a Google account, and school or workplace administrators may control printer access on managed devices.
How can I print from mobile devices to my Chromebook printer?
Connect your phone and printer to the same Wi-Fi network. Then use your phone’s built-in print feature, Android printing or Mopria, iPhone or iPad AirPrint, or the printer manufacturer’s app. You print directly to the printer, not through the Chromebook.
Is there a way to print offline using a Chromebook?
Yes. You can print offline with a USB cable or to a printer on your local network when internet access is unavailable. Make sure both devices are on the same local network, or use Wi-Fi Direct if your printer supports it.
Why is my Chromebook not finding my printer?
Your Chromebook may not find the printer if the printer is off, connected to a different Wi-Fi network, blocked by a guest network, or missing compatible printing support. Restart the printer and Chromebook, confirm the same network, then try adding the printer manually by IP address.
Can I use Bluetooth to print from a Chromebook?
No. ChromeOS does not support Bluetooth printing. Use Wi-Fi, Wi-Fi Direct, or a USB cable instead.
Conclusion
Connecting your printer to a Chromebook is straightforward when you follow the right order. First, check that the printer supports ChromeOS-friendly standards such as IPP Everywhere, Mopria, or “Works with Chromebook.” Then power on the printer, connect it to Wi-Fi or USB, add it in Settings > Print and scan > Printers, and run a test print.
Remember that most modern Chromebook printer setups do not require downloaded drivers. ChromeOS can often use driverless printing through built-in support. If something goes wrong, check the Wi-Fi network, printer status lights, paper tray, ink or toner, and saved printer settings. With these steps, you can print from your Chromebook with less stress and fewer setup delays.
Sources
- Google Chromebook Help: Set up your printer — supports Chromebook printer setup steps and local printer management.
- Google Chromebook Help: Print from your Chromebook — supports Wi-Fi and USB printing guidance.
- Google Chrome Enterprise Help: Google Cloud Print deprecation — supports the note that Google Cloud Print was discontinued.
- Printer Working Group: IPP Everywhere — supports the IPP Everywhere compatibility standard.
- Mopria Certified Products — supports Mopria certification as a printer compatibility signal.
