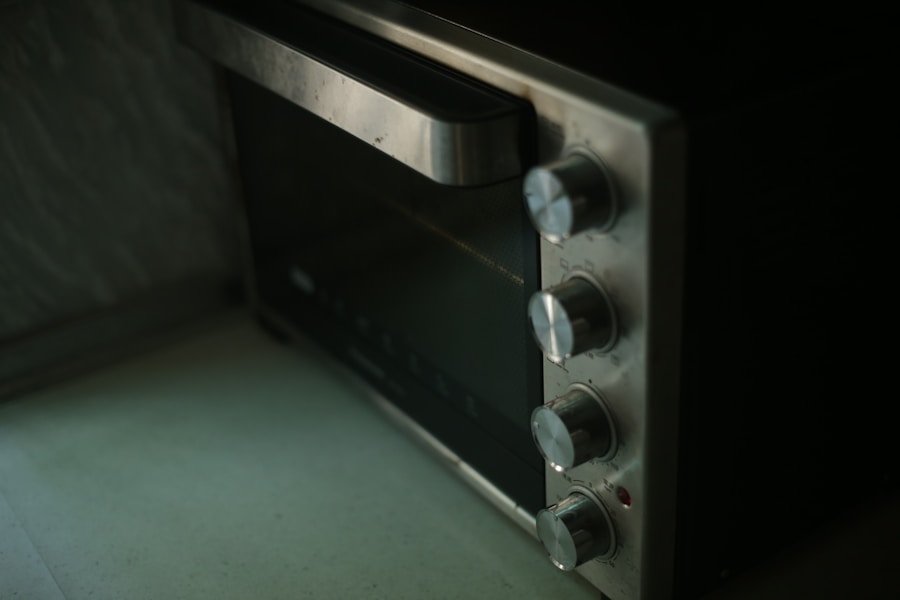
A dirty microwave can develop odors, collect grease, and leave dried food around the turntable, door, and interior walls. Fortunately, you can clean most everyday messes with mild dish soap, water, a soft cloth, and a short steam cycle. The key is to soften the residue before wiping it instead of attacking the surface with harsh chemicals or abrasive tools.
This guide shows you how to clean a microwave from the inside out, remove stubborn food and odors, maintain an over-the-range filter, and identify damage that needs professional attention.
Quick Answer
Remove the turntable, wipe away loose food, and heat a wide microwave-safe bowl containing one cup of water for a short steam cycle. Let it stand before removing it carefully. Wipe the softened residue with mild dish soap and a soft cloth, then clean and dry the turntable, door, seal, exterior, and controls.
Key Takeaways
- Use mild dish soap, water, and a soft cloth as your default cleaning method.
- Steam can soften dried food, but it should not be described as a guaranteed disinfecting process.
- Add a small amount of vinegar or lemon juice only when your owner’s manual permits it.
- Avoid bleach, steel wool, oven cleaner, sharp scrapers, and liquid sprayed directly into controls or vents.
- Stop using the microwave if you find serious rust, a damaged door, persistent arcing, smoke, or an electrical smell.
At a Glance
| Time Required | 10–20 minutes, plus drying time |
| Difficulty | Easy |
| Tools Needed | Microwave-safe bowl, microfiber cloth or soft sponge, dish soap, water, dry towel, and optional baking soda, vinegar, or lemon juice |
| Cost | Usually minimal when using household supplies |
Before You Clean the Microwave
Check the care section of your microwave’s owner’s manual before using vinegar, lemon, baking soda, or a commercial cleaner. Interior coatings and fingerprint-resistant exterior finishes vary, so a method that works on one appliance may damage another.
Gather Your Cleaning Supplies
- A wide microwave-safe glass or ceramic bowl
- Warm water
- A few drops of mild dish soap
- A soft sponge or microfiber cloth
- A clean, dry towel
- Oven mitts or a heat-resistant towel
- Optional baking soda for stuck-on residue
- Optional white vinegar or lemon juice for odors, when approved by the manual
- Cotton swabs for tight exterior areas
Warning: Microwave-heated water can become superheated and erupt when the bowl is moved. Use a wide microwave-safe bowl, avoid heating longer than necessary, let the bowl stand before touching it, keep your face away when opening the door, and use heat-resistant protection. The U.S. Food and Drug Administration documents this scalding risk.
What Not to Use
Avoid products and tools that could damage the cavity, door, controls, or protective coating. Unless your model’s manual specifically approves them, do not use:
- Bleach or chlorine-based cleaner
- Commercial oven cleaner
- Steel wool or abrasive scouring pads
- Sharp knives, metal scrapers, or razor blades
- Flammable solvents
- Paint thinner, benzene, or strong ammonia products
- Cleaner sprayed directly into vents, seams, controls, or openings
- Large amounts of water that could enter electrical components
Samsung’s microwave-cleaning guidance, for example, warns against bleach, steel wool, abrasive cleaners, and several solvents. Always follow the instructions written for your appliance.
Note: Cleaning removes grease, food, and much of the surface contamination. It is not the same as a validated sanitizing or disinfecting process. The CDC explains that regular cleaning with soap and water is sufficient in many household situations.
How to Clean a Microwave Step by Step
Step 1: Let the Microwave Cool and Disconnect the Power
Wait until the microwave and any removable parts are cool. Unplug a countertop microwave before cleaning its exterior or reaching around vents and controls. For a built-in or over-the-range model that cannot be unplugged easily, turn it off and follow the manual’s electrical-safety instructions.
You do not normally need to disconnect power just to run the steam-softening cycle. Disconnect it after the cycle and after removing the hot bowl.
Step 2: Remove Loose Food and the Turntable
Pick up crumbs with a damp paper towel or soft cloth. Do not scrape the interior with a knife or metal tool.
Remove the glass turntable and roller ring if your model has them. Set the glass on a stable surface and allow it to reach room temperature before washing. A sudden temperature change can crack some glass trays.
Step 3: Loosen Dried Food with Steam
Pour one cup of water into a wide microwave-safe bowl. For extra odor control, add about one tablespoon of white vinegar or lemon juice if your owner’s manual allows it. Whirlpool and Panasonic describe similar water-and-vinegar or water-and-lemon methods for applicable microwave models.
Place the bowl near the center of the microwave. Heat it only long enough to generate visible steam, following the time and power recommendations in your manual. A short cycle of about two minutes may be enough for a lightly soiled microwave. Add time in small increments rather than automatically running a long cycle.
Leave the door closed for several minutes so the steam can soften the residue. Open the door carefully, keep your face back, and remove the bowl with oven mitts or a heat-resistant towel.
Pro Tip: Wipe the ceiling and upper corners first. Condensation runs downward, so working from top to bottom prevents you from cleaning the floor twice.
Step 4: Wash the Interior
Add a few drops of mild dish soap to warm water. Dampen a soft cloth or non-abrasive sponge, wring it out well, and wipe the microwave’s ceiling, walls, floor, and inside of the door.
Pay special attention to the area beneath the turntable, where crumbs can obstruct the roller track. Food residue around the rollers may cause uneven or noisy turntable movement.
Do not saturate the waveguide cover, vents, seams, light openings, or control areas. The waveguide cover is commonly a small rectangular panel on an interior wall. Wipe it gently without bending, removing, or soaking it.
GE Appliances recommends mild, non-abrasive soap or detergent applied with a soft cloth or sponge for microwave doors and interiors.
Step 5: Clean the Door and Seal
Wipe both sides of the door, the frame, and the surfaces that meet when the door closes. Remove grease and crumbs with mild soapy water, then wipe again with a clean damp cloth.
Do not pull, scrape, or aggressively scrub a door seal. A damaged door, hinge, latch, screen, or sealing surface can affect safe operation.
Step 6: Wash the Turntable and Roller Ring
Wash the turntable and roller ring with warm water and mild dish soap. Some models allow dishwasher cleaning, while others require hand washing, so check the owner’s manual.
Rinse and dry each part fully. Clean the roller track inside the microwave before reinstalling the ring and glass tray. Make sure the turntable sits correctly on its center coupling.
Step 7: Rinse and Dry the Interior
Wipe the cavity with a separate cloth dampened with clean water to remove soap or cleaning residue. Dry the walls, floor, door, and turntable with a soft towel.
Leave the door open for a few minutes so remaining moisture can evaporate. Reconnect the power only after the exterior, controls, vents, and removable parts are dry.
Using Natural Cleaning Solutions Safely

Water, mild dish soap, baking soda, vinegar, and lemon juice can handle many microwave messes. However, “natural” does not automatically mean safe for every finish or effective as a disinfectant.
Use vinegar or lemon mainly to help with odors and steam-softening. Use baking soda as a mild cleaning paste for dried residue. Use dish soap for grease and general cleaning.
| Method | Best Use | Main Precaution |
|---|---|---|
| Warm water and dish soap | Grease, fresh splatters, door surfaces, and routine cleaning | Wring out the cloth and keep liquid away from vents and controls |
| Water and steam | Softening dried food before wiping | Avoid overheating the water and handle the bowl carefully |
| Water with a small amount of vinegar | Odors and light residue on compatible interiors | Do not treat vinegar as a reliable disinfectant; check finish compatibility |
| Water with lemon juice | Steam-softening with a citrus scent | Remove pulp and seeds, and wipe away acidic residue afterward |
| Baking-soda paste | Small areas of stuck-on food and lingering odors | Rub gently and remove all powdery residue |
How to Clean a Microwave with Vinegar and Water
Mix one cup of water with about one tablespoon of white vinegar in a wide microwave-safe bowl. Place it in the microwave and use a short heating cycle that follows your model’s care instructions.
Let the bowl stand behind the closed door for several minutes after heating. Remove it carefully, then wipe the ceiling, walls, door, and floor with a soft cloth.
Follow with a cloth dampened with clean water and dry the cavity. This removes remaining vinegar and helps prevent the odor from lingering.
Do not assume vinegar disinfects the microwave. The CDC notes that vinegar does not kill every type of germ and recommends soap or detergent for routine cleaning.
How to Steam Clean a Microwave Without Vinegar
Plain water is enough when your goal is to soften light splatters. Add one cup of water to a wide microwave-safe bowl and heat it according to the appliance manual until steam forms.
Allow the steam to work behind the closed door, then remove the bowl carefully. Wipe away the softened residue with mild soapy water and finish with a clean damp cloth.
This method reduces the need for hard scrubbing, but it does not prove that every surface has been sanitized. Cleaning performance also depends on the amount, age, and type of residue.
How to Remove Stubborn or Burnt-On Food

Repeat the steam-softening process before scrubbing. Rehydrating dried food is safer for the interior coating than applying heavy pressure with an abrasive pad.
[Amazon Products Picked for You]

CLEAN SMARTER - NOT HARDER: We all know the pain of scrubbing away dirty or burnt food on pots with a soft cloths, and the hassle of a dish cloth and scrubber taking up space on the sink. Why not get the best of both worlds with our brand designed scourer/microfiber cloth combo sponge.

✨ Easy To Use: Duck steam-breathing microwave cleaner makes it easy to remove tough stains. Simply add vinegar, water, and a little lemon, and this "Duck" will release steam to soften the dirt in 5-8 minutes!

Peel for a fresh surface - wet the sponge first, then peel a corner. Layers release easily when damp. Each layer traps dirt on top instead of letting it soak through to the ones below.
Use a Baking-Soda Paste
Mix baking soda with a small amount of water to create a soft paste. Apply a thin layer to the stained area with a cloth. Keep it away from vents, openings, and electrical components.
Let the paste sit for several minutes, then rub gently with a damp non-abrasive sponge. Wipe the area repeatedly with clean water until no powder remains. GE Appliances lists baking soda and water as an acceptable option for microwave interiors.
Soften the Spot with a Damp Cloth
For one isolated patch, place a warm, damp cloth over the cool stained area for a few minutes. Remove the cloth and wipe gently. Do not heat a cleaning cloth in the microwave unless the manufacturer specifically instructs you to do so.
Avoid Homemade Peroxide Sprays
Do not spray a homemade hydrogen-peroxide mixture around the microwave cavity. Liquid may enter openings, and the interior coating may not be compatible with it. A disinfectant claim applies only to a registered product used on the surfaces, at the concentration, and for the contact time stated on its label.
How to Remove Odors from a Microwave
First remove every visible crumb, grease deposit, and burnt food particle. Odor treatments are less effective when the source remains inside the appliance.
After washing the interior with mild dish soap, heat one cup of water with one tablespoon of lemon juice or vinegar for a short cycle if the manual permits it. Let the steam stand, wipe the cavity, rinse it with a clean damp cloth, and dry it.
For a lingering odor, place an open container of dry baking soda inside the cool, unplugged microwave overnight. Remove it before reconnecting or operating the appliance.
A persistent electrical, melting-plastic, or smoky smell is not a cleaning problem. Disconnect the microwave and arrange qualified service.
[Amazon Products Picked for You]

Mrs. Meyer's Baking Soda Cream Cleaner removes soap scum and grease build-up to make your kitchen sparkle

A HOUSEHOLD CLASSIC: This bulk 7 lb resealable bag of ARM & HAMMER Baking Soda unlocks 100+ uses across your home—from kitchens and laundry rooms to crafting tables and beyond

A HOUSEHOLD CLASSIC: This 2.7 lb resealable bag of ARM & HAMMER Baking Soda unlocks 100+ uses across your home—from kitchens and laundry rooms to crafting tables and beyond
Cleaning the Exterior and Control Panel
Unplug the microwave when practical. Wipe the exterior with a soft cloth dampened with warm, mildly soapy water. Apply cleaner to the cloth rather than spraying the appliance directly.
Clean the control panel with a barely damp cloth and dry it immediately. Prevent liquid from entering buttons, touch-panel edges, vents, seams, the display, or the door latch.
Use a cotton swab lightly dampened with soapy water around tight exterior edges. Do not push moisture into openings.
Cleaning a Stainless-Steel Exterior
Check whether the appliance has traditional stainless steel, coated stainless steel, or a fingerprint-resistant finish. These surfaces may have different care requirements.
When the manual allows it, use warm soapy water or a cleaner made for that specific stainless-steel finish. Wipe in the direction of the grain and dry with a clean microfiber cloth.
Do not automatically use vinegar, olive oil, window cleaner, or an abrasive stainless-steel polish. Some coated finishes prohibit acidic and solvent-based products.
Cleaning an Over-the-Range Microwave Filter
Over-the-range microwaves may have a reusable metal grease filter and a separate charcoal filter. The location, removal method, and maintenance schedule depend on the model.
[Amazon Products Picked for You]

FRESH AIR: This GE microwave filter replacement ensures your kitchen is well-ventilated by ensuring your microwave vent fan is functioning at top capacity by trapping grease in the filter.

FRESH AIR: This GE microwave filter replacement ensures your kitchen is well-ventilated by ensuring your microwave vent fan is functioning at top capacity by trapping grease in the filter.

FRESH AIR: This compatible GE and Frigidaire microwave filter replacement ensures your kitchen is well-ventilated by ensuring your microwave vent fan is functioning at top capacity by trapping grease in the filter.
Grease Filter
- Disconnect power and let the cooktop and microwave cool.
- Remove the grease filter according to the owner’s manual.
- Soak it in warm water with mild dish detergent.
- Brush it gently with a soft brush if grease remains.
- Rinse it thoroughly and allow it to dry completely.
- Reinstall it in the correct direction.
Whirlpool recommends cleaning many over-the-range grease filters monthly or when the filter indicator prompts you. Some filters are dishwasher-safe, but you should verify that in the manual.
Charcoal Filter
A charcoal filter is usually replaced rather than washed. Samsung advises replacement about every 6 to 12 months for many models, with more frequent replacement when cooking conditions require it. Use the schedule and part number listed for your microwave.
How Often Should You Clean a Microwave?
Wipe up fresh splatters after the microwave cools. This prevents food from hardening and reduces the need for heavy scrubbing.
Perform a general interior cleaning whenever you see residue or notice an odor. For a frequently used household microwave, a weekly inspection is practical, but a fixed weekly deep clean is unnecessary when the interior remains clean.
Check the turntable track regularly. Clean an over-the-range grease filter according to the manual, commonly about once a month. Replace a charcoal filter when the manual or filter indicator recommends it.
How to Keep the Microwave Clean
- Cover food with a vented microwave-safe lid or cover.
- Use a container large enough to prevent sauces and liquids from boiling over.
- Wipe fresh spills after the appliance cools.
- Do not run the microwave when it is empty.
- Make sure the turntable and roller ring are seated correctly.
- Keep vents unobstructed.
- Dry the cavity after steam cleaning.
- Clean the underside grease filter on over-the-range models as directed.
Safe reheating also depends on the food, not only the cleanliness of the appliance. The USDA notes that microwave ovens may leave cold spots, so stir or rotate food when appropriate, observe standing time, and check safe temperatures when reheating meat, poultry, fish, or eggs.
When to Stop Cleaning and Arrange Service
Disconnect the microwave and seek qualified service if you notice:
- A door that does not close, latch, or align correctly
- A cracked door, broken hinge, damaged screen, or damaged sealing surface
- Persistent sparks or arcing after all metal and food residue have been removed
- Smoke or an electrical, burning-wire, or melting-plastic odor
- Severe rust, a hole in the cavity, or extensive peeling of the interior coating
- A damaged or burnt waveguide cover
- Liquid inside the controls, vents, or electrical areas
- A turntable that still grinds, binds, or fails after the track and parts are cleaned and correctly installed
Do not remove the outer cabinet or attempt to repair internal high-voltage parts. A microwave can retain dangerous electrical energy even after it has been unplugged.
Related Guides
Frequently Asked Questions
What are the basic steps for cleaning a microwave?
Remove the turntable and loose food, use a short water-steam cycle to soften dried residue, and remove the hot bowl carefully. Wash the cavity with mild dish soap and a soft cloth, wipe it with clean water, dry it, and clean the turntable, roller ring, door, seal, exterior, and controls.
Can I use bleach to clean my microwave?
Avoid bleach unless your microwave’s manufacturer explicitly approves a specific product and procedure. Bleach can damage finishes, create irritating residue, and produce dangerous vapors if mixed with acids, ammonia, or other cleaners. Mild dish soap and water are safer for routine cleaning.
How often should I clean my microwave?
Clean fresh spills after the appliance cools and perform a full cleaning when you see buildup or notice an odor. Inspect a frequently used microwave weekly. Follow the owner’s manual for grease-filter cleaning and charcoal-filter replacement.
Is it safe to use a commercial microwave cleaner?
Use one only when the product label and your microwave’s owner’s manual both approve it for the interior or exterior surface you plan to clean. Apply it to a cloth rather than spraying it into vents, controls, seams, or openings. Rinse food-contact areas when the label requires it.
How do I remove a strong odor from my microwave?
Remove the source first, wash the interior with mild dish soap, and dry it. When the manual permits, steam one cup of water with one tablespoon of lemon juice or vinegar, then wipe and rinse the cavity. Disconnect the appliance and arrange service for an electrical, smoky, or melting-plastic odor.
Does vinegar disinfect a microwave?
Do not rely on household vinegar as a complete disinfectant. It can help loosen light residue and reduce some odors, but it does not kill every type of germ. Routine cleaning with mild soap and water is the safer default for most microwave interiors.
Can I clean a microwave with paper towels?
You can use a damp plain paper towel to wipe a cool microwave. Avoid towels containing metallic decoration or synthetic fibers, and do not heat a cleaning towel unless the manufacturer specifically approves that method. A washable microfiber cloth is usually more durable.
What should I do if the microwave has rust or peeling paint inside?
Stop aggressive cleaning and inspect the area. Minor surface discoloration may have a model-specific repair procedure, but deep rust, exposed metal, holes, extensive peeling, or repeated arcing requires manufacturer guidance or qualified service. Do not cover the damage with ordinary household paint.
Sources
- U.S. Food and Drug Administration: Microwave Ovens — microwave operation, container safety, door safety, and superheated-water risks
- Centers for Disease Control and Prevention: Cleaning and Disinfecting — distinction between routine cleaning and disinfection
- Whirlpool Product Help: Removing Microwave Odors and Smells — mild soap, water, vinegar, and lemon guidance
- GE Appliances: Microwave Cleaning Recommendations — dish soap, baking soda, and non-abrasive interior cleaning
- Samsung Support: How to Clean a Microwave — prohibited cleaners, exterior care, and filter maintenance
- USDA Food Safety and Inspection Service: Cooking with Microwave Ovens — uneven heating, cold spots, and safe reheating practices

1 thought on “How to Clean a Microwave: Quick and Easy Methods”