
Changing the engine oil in a Toyota Camry is a manageable DIY job when you use the correct oil for the engine, support the vehicle safely, replace the filter and drain-plug gasket, and verify the final level carefully. The detailed procedure below is based primarily on a U.S.-specification 2018 Camry with the 2.5-liter engine, with important differences for the V6 and hybrid noted throughout.
Quick Answer
To change the engine oil in a 2018 Toyota Camry, confirm the engine first, support the car on rated ramps or jack stands, drain the oil, replace the filter and drain-plug gasket, refill with the specified oil, check for leaks, verify the dipstick level, and reset Scheduled Maintenance through the multi-information display.
Key Takeaways
- Confirm the engine before buying oil: a 2018 Camry XSE may have a 2.5-liter four-cylinder or a 3.5-liter V6.
- Never work beneath a vehicle supported only by a hydraulic jack.
- Use a new drain-plug gasket and inspect the filter mounting surface for a stuck old gasket.
- Treat the listed capacity as an approximate refill amount and use the dipstick for the final level.
- Reset the 2018 XSE maintenance reminder through the multi-information display, not by pressing the accelerator.
At a Glance
| Time Required | About 45–75 minutes, including draining and final checks |
| Difficulty | Moderate DIY maintenance |
| Tools Needed | Ramps or floor jack and stands, wheel chocks, drain pan, 14mm wrench or socket, torque wrench, filter wrench or cap tool, funnel, gloves and rags |
| Cost | Typically about $40–$90 for oil, filter and gasket; tools are additional |
Warning: Never crawl beneath a Camry that is supported only by a hydraulic or emergency jack. Work on firm, level pavement, chock the wheels and support the vehicle with properly rated ramps or jack stands at approved lifting points. Push the vehicle gently before going underneath to confirm that it is stable.
How to Change Engine Oil in Your Toyota Camry: A Step-by-Step Guide

- Confirm the engine and oil specification. Check the oil-filler cap, underhood emissions label, VIN information or the applicable Toyota Camry owner’s manual. Do not assume every XSE uses the same oil.
- Warm the oil slightly. A short drive or a few minutes of running can help the oil drain, but the engine and exhaust must not be hot enough to burn you. If the engine is fully hot, wait until the components are safe to touch.
- Park securely. Use a flat surface, apply the parking brake, switch the engine off and chock the wheels that will remain on the ground.
- Raise and support the vehicle. Use rated ramps or Toyota-approved lifting points with a floor jack and jack stands. Never rely on the jack alone.
- Remove the service access panel. Some 2018 Camrys use 10mm fasteners and plastic clips. Keep every fastener organized and replace any damaged clip.
- Position the drain pan. Place a wide pan beneath and slightly behind the drain plug because the oil may initially flow outward.
- Remove the drain plug. Use the correct 14mm wrench or socket, finish loosening it by hand and move your hand away quickly as the oil begins flowing.
- Replace the filter. Use the correct filter wrench or cartridge-cap tool. Confirm that the old sealing gasket came off with the old filter.
- Install the drain plug and refill. Fit a new drain-plug gasket, tighten the plug correctly and add slightly less than the listed capacity before checking the dipstick.
- Run, inspect and recheck. Start the engine briefly, verify that the oil-pressure warning light goes out, inspect for leaks, shut the engine off, wait at least five minutes and check the dipstick again on level ground.
- Reinstall the panel and lower the vehicle. Make sure all fasteners are secure and no tools remain beneath the car.
- Reset the maintenance reminder. Reset Scheduled Maintenance only after the service is complete.
The capacity in the manual is an approximate refill quantity. The dipstick—not an empty oil bottle—is the final authority on the oil level.
Essential Tools and Supplies for an Oil Change
Gather every tool and replacement part before lifting the vehicle. Stopping halfway through the job to find a filter wrench or drain-plug gasket increases the chance of spills and mistakes.
- Correct engine oil in the viscosity specified for the engine
- Correct oil filter for the engine and filter-housing design
- New drain-plug gasket or crush washer
- Wide oil catch pan with enough capacity for the full oil fill
- 14mm six-point socket or box-end wrench for the drain plug
- Torque wrench capable of accurately applying 30 ft-lb
- Correctly sized oil-filter wrench or cartridge-filter cap tool
- 10mm socket and clip tool if required for the underbody panel
- Rated ramps, or a floor jack and rated jack stands
- Wheel chocks
- Clean funnel for refilling
- Nitrile or oil-resistant gloves, safety glasses and shop rags
- Sealable container for transporting used oil
Note: A tire inflator is useful for general vehicle care, but it is not required for an oil change. Check tire pressure separately when the tires are cold.
[Amazon Products Picked for You]
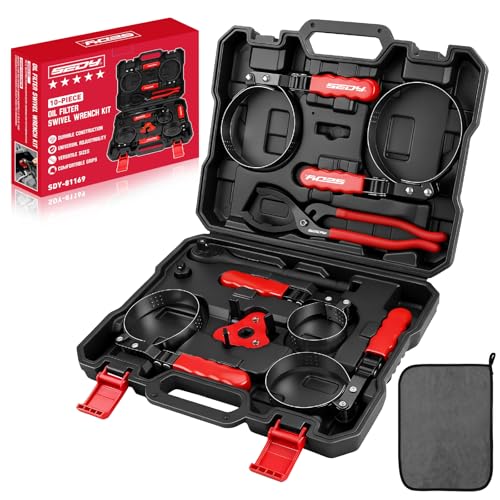
VERSATILE SIZES - The SEDY 10-Piece Oil Filter Wrench Set includes 5 swivel oil filter wrenches (2-3/8" to 4-3/4") with 180° adjustable heads for easy operation in tight spaces, ensuring precise fit and quick removal on most vehicles and engines
UNIVERSAL COMPATIBILITY - Fits Toyota, BMW, Honda, Mercedes, and Ford models, covering 7 essential metric sizes (24-38mm) for canister-style filter housings - perfect for DIY oil changes and professional shop use

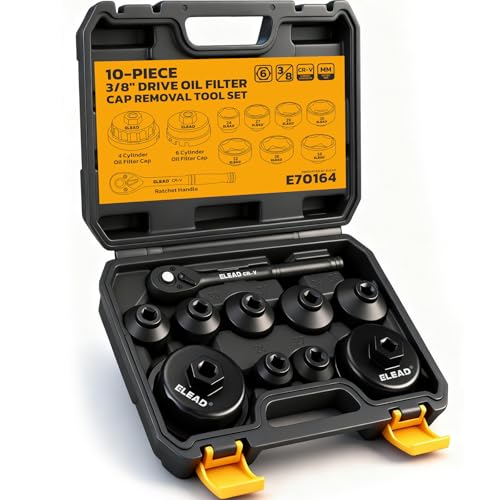
No More Messy Oil Filter Changes: Orion Motor Tech's 10pc oil filter wrench set helps you remove and install oil filter caps quickly and easily with a 3/8" drive rachet wrench and 9 oil cap sockets in the most commonly needed sizes (24, 27, 29, 30, 32, 36, 38, 64, & 64.5 mm)
Confirm Your Camry Engine and Oil Specification
A trim name alone does not always identify the engine. A U.S.-specification 2018 Camry XSE was available with either the 2.5-liter four-cylinder or the 3.5-liter V6. The hybrid uses a different version of the 2.5-liter engine.
| 2018 Camry engine | Recommended viscosity | Approximate capacity with filter |
| 2.5L gasoline A25A-FKS | SAE 0W-16 | 4.8 US qt (4.5 L) |
| 2.5L hybrid A25A-FXS | SAE 0W-16 | 4.8 US qt (4.5 L) |
| 3.5L V6 2GR-FKS | SAE 0W-20 | 5.7 US qt (5.4 L) |
Confirm these specifications in the manual that matches the vehicle’s VIN and market before purchasing supplies. Begin with slightly less than the full listed amount and bring the level up gradually.
Choose an oil carrying the appropriate API certification mark. Modern API SP oil is backward-compatible where API SN was originally specified, and ILSAC GF-6B applies specifically to SAE 0W-16 oil. The owner’s-manual viscosity recommendation still takes priority.
Pro Tip: Photograph the oil-filler cap, filter box and odometer before starting. The photos help confirm the specification and create a simple maintenance record.
[Amazon Products Picked for You]

Optimum oil pressure under all operating conditions

Mobil 1 0W-16 is a low viscosity, advanced full synthetic motor oil

How to Access the Oil Filter and Drain Plug
The filter and drain-plug locations depend on the engine and underbody panel. The 2.5-liter engine used in the common 2018 Camry oil-change example has service access beneath the engine. Do not remove a plug merely because it is the first plug you see; transmission and cooling-system components may also be nearby.
Locate the Access-Cover Fasteners
- Open the hood and remove the oil-filler cap so the crankcase can vent while draining.
- Raise and support the vehicle using the approved method.
- Locate the small service panel or relevant section of the engine under-cover.
- Remove the required 10mm fasteners and clips carefully. Hardware can vary if the panel has been repaired or replaced.
- Place the removed fasteners in a tray so none are lost.
Identify the Oil Filter Safely
Trace the engine oil pan and verify the filter location before loosening anything. The 2.5-liter engine commonly uses a spin-on filter, while another engine or model year may use a cartridge element and reusable housing.
Use a properly sized filter wrench only to loosen a stubborn spin-on filter. Adjustable pliers can crush the shell and make removal more difficult. A cartridge housing requires a cap tool that fits the housing without rounding or cracking it.
Locate the Drain Plug
The engine-oil drain plug is installed in the bottom or lower side of the engine oil pan and normally uses a 14mm head on the 2018 application described here. Confirm the component before loosening it. The engine oil pan is directly beneath the engine, not beneath the transmission.
How to Safely Remove and Replace the Oil Filter

Position the drain pan beneath the filter before loosening it because the filter retains oil even after the oil pan has drained.
[Amazon Products Picked for You]

Precision Sized Design of Oil Filter Wrench: The 1/2-inch square head drive of the oil filter wrench for toyota makes it easy to use with common tools, and the 64mm x 14 Flute provides a stable grip

COMPATIBLE WITH ALL TOYOTA CARTRIDGE STYLE OIL FILTERS - The Motivx Tools 64.3mm 14 flute oil filter wrench is compatible with all Toyota and Lexus cartridge style oil filter caps from 1.8L - 5.7L engines. This includes popular models like Camry, Tundra, Tacoma, 4Runner, RAV4, Corolla, Highlander, Prius and more that use a cartridge style filter where you remove a plastic cap to expose the paper filter element inside.

64mm 14-Flute Oil Filter Fit: Designed for oil filters with a 64mm diameter and 14-flute pattern, this 3/8" drive cap wrench provides a secure fit for proper engagement. The 4 bottom slots align with compatible catridge oil filter cap tabs to help maintain grip and reduce slipping during removal
For a Spin-On Filter
- Turn the old filter counterclockwise with the correct filter wrench.
- Once loose, rotate it by hand and keep it upright as it comes off.
- Confirm that the old rubber gasket is attached to the removed filter.
- Wipe the engine’s filter-mounting surface with a clean, lint-free rag.
- Apply a thin film of clean engine oil to the new filter gasket.
- Thread the filter on by hand until the gasket contacts the mounting surface.
- Tighten it according to the Toyota or filter-manufacturer instructions. Do not install it with pliers.
For a Cartridge-Style Filter
- Use the correct filter-housing cap tool.
- Remove the housing slowly and allow the retained oil to drain.
- Remove the old element and O-ring.
- Clean the specified O-ring groove and install the new O-ring in the correct groove.
- Lubricate the O-ring with clean engine oil.
- Install the new element and tighten the housing to the engine-specific Toyota specification.
Warning: A filter installed over a gasket left behind by the old filter can lose oil rapidly when the engine starts. Always touch and visually inspect the mounting surface before installing the replacement.
How to Drain Your Engine Oil Safely
Warm oil drains more completely than cold oil, but hot oil and exhaust components can cause serious burns. The goal is warm—not dangerously hot—oil.
Gather the Necessary Tools First
Keep the 14mm wrench or socket, drain pan, new gasket, torque wrench, gloves and rags within reach before removing the plug. The clean funnel should remain above the vehicle for refilling; it is not needed beneath the drain stream.
Prepare the Drainage Area Properly
- Place the drain pan under the plug and offset it in the direction the oil is likely to flow.
- Allow room for the stream to move inward as the oil level in the pan falls.
- Protect the pavement with an absorbent mat or flattened cardboard if desired.
- Make sure the catch pan can hold more than the engine’s full oil capacity.
Follow Safety Precautions Carefully
- Wear gloves and safety glasses.
- Loosen the plug with the wrench, then finish turning it by hand while pressing it lightly toward the oil pan.
- Pull the plug away quickly when the final thread releases.
- Allow the oil to drain until it slows to an occasional drip.
- Inspect the drain plug and threads. Stop if the plug is damaged or metal threads are attached to it.
- Clean the sealing surface and install a new drain-plug gasket.
- Thread the plug in completely by hand to prevent cross-threading.
- For the covered 2018 Camry applications, tighten the drain plug to 30 ft-lb (40 N·m). Verify the specification for another year or engine before using this value.
Do not use an impact wrench on the drain plug. Excessive torque can strip the oil pan, while insufficient torque can allow leakage.
Adding New Oil: Choosing and Measuring the Right Amount
- Confirm that the drain plug and filter are installed.
- Insert a clean funnel into the oil-filler opening.
- Add approximately half a quart less than the listed capacity.
- Wait one or two minutes for the oil to reach the pan.
- Remove, wipe and fully reinsert the dipstick.
- Check the level and add oil in small amounts until it approaches the full mark.
- Install the oil-filler cap securely.
- Start the engine and let it idle briefly.
- Confirm that the oil-pressure warning light goes out promptly.
- Shut the engine off, wait at least five minutes on level ground and check the dipstick again.
The oil level should be between the low and full marks and ideally near, but not above, the full mark. Do not pour in the entire container without checking the dipstick.
Note: If the dipstick is difficult to read, wipe it, wait a moment and check both sides under good lighting. The lower, continuous oil line is generally the reliable reading when one side is smeared.
Post-Oil-Change Checks and Vehicle Care Tips

- Check the oil-pressure light. It should turn off shortly after the engine starts. Shut the engine off immediately if it remains illuminated.
- Inspect the drain plug. Look for fresh oil forming around the plug and gasket.
- Inspect the filter. Check the filter gasket or housing for seepage.
- Verify the dipstick level. Recheck it after the engine has been off for at least five minutes and the car is level.
- Reinstall the underbody panel. Replace every fastener and damaged clip.
- Record the service. Note the date, mileage, oil viscosity, quantity and filter part number.
- Check again after driving. Inspect the parking area and recheck the level after the first normal trip.
Check the engine-oil level periodically and before a long trip. A correct oil change does not prevent oil loss caused by leaks, consumption or another mechanical problem.
Resetting the Maintenance Light After an Oil Change
On a 2018 Camry XSE equipped with the multi-information display, reset the scheduled-maintenance reminder through the display after completing the oil change:
- Switch the ignition on without starting the engine, or place the vehicle in the appropriate ignition-on mode.
- Use the steering-wheel controls to open the gear-shaped Settings menu.
- Select Vehicle Settings.
- Select Scheduled Maintenance.
- Select Yes when asked whether to reset the data.
- Confirm that the reset-complete message appears.
Do not use the “press the accelerator three times” method. That is not the normal 2018 Camry XSE procedure. Other Camry years and instrument displays can use a different menu or trip-meter sequence, so consult the manual that matches the vehicle.
How Often Should You Change Toyota Camry Engine Oil?
Follow the maintenance guide for the exact year, engine and driving conditions. For the 2018 Camry using its specified oil, Toyota’s normal schedule generally calls for engine oil and filter replacement at 10,000 miles or 12 months, whichever comes first.
A shorter interval can apply under special operating conditions, such as repeated short trips in freezing temperatures, extensive idling or low-speed operation, or driving on dirt and dusty roads. Review the special-operating-condition notes in the Toyota warranty and maintenance guide rather than relying on a universal mileage rule.
Troubleshooting Problems After an Oil Change
Oil Is Leaking Around the Filter
- Shut the engine off immediately.
- Check for a double gasket on a spin-on filter.
- Confirm that the filter is the correct part.
- Inspect a cartridge-housing O-ring for incorrect placement, twisting or damage.
- Do not continue driving until the leak is corrected and the oil level is restored.
Oil Is Leaking Around the Drain Plug
- Confirm that a new gasket was installed.
- Check whether the plug is cross-threaded or loose.
- Do not keep tightening a leaking plug beyond specification.
- Have damaged oil-pan threads professionally repaired.
The Dipstick Shows Too Much Oil
Do not operate the engine with a substantial overfill. Drain or extract a small amount, wait for the oil to settle and recheck on level ground.
The Oil-Pressure Warning Light Stays On
Switch the engine off immediately. Verify the oil level, filter installation and drain plug. If the level is correct and the warning remains, do not continue running the engine; arrange professional diagnosis.
The Old Filter Will Not Loosen
Use the correct filter wrench or cap tool and make sure you are turning counterclockwise when viewed from the filter end. Avoid puncturing the filter unless no approved removal method remains, because a torn shell can leave less material to grip.
Common Mistakes to Avoid During Your Oil Change
- Buying oil by trim name alone: Confirm the engine because an XSE may have the four-cylinder or V6.
- Working beneath a jack: Use properly rated ramps or jack stands.
- Removing the wrong plug: Identify the engine oil pan before loosening anything.
- Reusing a flattened drain-plug gasket: Install a new gasket to reduce the chance of leakage.
- Cross-threading the drain plug: Start it by hand for several turns before using a wrench.
- Overtightening the drain plug: Use a torque wrench rather than an impact tool.
- Installing a filter over the old gasket: Inspect and clean the mounting surface.
- Tightening a spin-on filter with pliers: Lubricate the gasket and follow the proper hand-tightening instruction.
- Adding the full capacity without checking: Refill gradually and finish by dipstick.
- Checking immediately after shutdown: Wait at least five minutes for the oil to return to the pan.
- Ignoring the oil-pressure light: Shut the engine off if it does not go out promptly.
- Resetting maintenance before completing the work: Reset only after the oil level and leak checks pass.
Related Guides
Frequently Asked Questions
How do I change the oil in a Toyota Camry?
Confirm the engine and oil specification, support the vehicle safely, remove the access panel, drain the old oil, replace the filter and drain-plug gasket, refill gradually, run the engine briefly, inspect for leaks, verify the dipstick level and reset the maintenance reminder.
Can I change the engine oil myself?
Yes, provided you have safe lifting equipment, the correct tools and specifications, and a suitable recycling location. Use a professional technician if you cannot support the vehicle securely, cannot identify the drain plug or filter, discover damaged threads, or see an oil-pressure warning after the service.
Does the oil-change procedure differ by Toyota Camry year?
Yes. Oil viscosity, capacity, filter design, underbody panels, torque specifications and maintenance-reset steps can differ by year, engine and market. Use the owner’s manual and Toyota repair information that match the VIN rather than applying one model year’s procedure to every Camry.
What tools do I need to change Toyota Camry oil?
Typical tools include rated ramps or a floor jack and jack stands, wheel chocks, a drain pan, 14mm wrench or socket, torque wrench, suitable filter wrench or cap tool, a 10mm socket and clip tool for the panel, a funnel, gloves, safety glasses and a sealable used-oil container.
How much oil does a 2018 Toyota Camry take?
With a filter change, the 2.5-liter gasoline and hybrid engines take approximately 4.8 US quarts, while the 3.5-liter V6 takes approximately 5.7 US quarts. Treat these as initial refill guides and use the dipstick to establish the final level.
What should I do with the used oil and filter?
Pour the used oil into a clean, leak-proof container with a secure lid. Do not mix it with coolant, brake fluid, fuel or solvents. Drain the old filter and take both items to a participating automotive shop, recycling center or local household-hazardous-waste facility.
Conclusion
A successful Toyota Camry oil change depends less on speed than on preparation and verification. Identify the engine, use the correct oil and filter, support the car securely, install a new drain-plug gasket, inspect the filter seal, refill gradually and complete both leak checks and a final dipstick reading. When a specification or component does not match this guide, stop and consult the manual or Toyota repair information for the vehicle’s VIN.
Sources
- Toyota 2018 Camry Manuals and Warranties — owner’s manual, maintenance guide, oil specifications and maintenance-reset information
- Toyota Technical Information System — engine-specific repair procedures, component identification and torque specifications
- American Petroleum Institute Oil Categories — current API and ILSAC oil-category compatibility
- U.S. Environmental Protection Agency: Managing, Reusing and Recycling Used Oil — safe handling and recycling of used engine oil and filters
