
If your Toyota Camry’s AC is not blowing cold air, first determine whether the problem is weak airflow or air that flows strongly but stays warm. Weak airflow usually points toward the cabin filter, blower, vents, ducts, or evaporator icing. Strong warm airflow can involve the settings, refrigerant circuit, condenser fan, compressor, temperature door, sensors, or electrical controls.
Quick Answer
Set the temperature to LO, select recirculation and dashboard vents, synchronize both temperature zones, and compare airflow at several fan speeds. Inspect the cabin filter and condenser, then note whether cooling improves while driving. Persistent warm air can involve a leak, fan, compressor, blend door, sensor, or electrical fault.
Key Takeaways
- Weak airflow and strong but warm airflow point to different groups of faults.
- A dirty cabin filter can restrict airflow, but it does not prove that the refrigerant charge is low.
- Refrigerant pressures cannot be judged safely from one universal PSI range or a single low-side gauge.
- Read the under-hood label before connecting equipment because refrigerant type and specified charge vary by model year.
- All U.S.-market Camrys from model year 2025 onward are hybrid and use high-voltage systems that require appropriate training and service procedures.
At a Glance
| Time Required | 10 to 20 minutes for basic checks; professional testing may take longer |
| Difficulty | Easy for settings, filter, fuse, thermometer, and visual checks; advanced for refrigerant, control, or compressor work |
| Tools Needed | Owner’s manual, flashlight, clean cloth, and an optional vent thermometer |
| Cost | Basic checks cost nothing; filter, electrical, leak, actuator, fan, and compressor repair costs vary by model year and failed component |
Warning: Do not open a charged AC system, release refrigerant, mix refrigerant types, bridge pressure switches, or touch orange high-voltage cables and connectors. The 2025-and-newer U.S. Camry is hybrid-only and uses high-voltage systems. Refrigerant recovery and internal system repairs require the correct equipment and training.
Common Reasons Your Toyota Camry AC Is Not Blowing Cold

A Camry AC can lose cooling because of a simple setting, restricted cabin airflow, poor condenser airflow, a refrigerant leak, a temperature-door problem, an electrical fault, or a compressor-control issue. The symptom you observe is more useful than assuming the system needs refrigerant.
| Symptom | Possible Causes | First Safe Check |
|---|---|---|
| Very little air from the vents | Clogged cabin filter, blower fault, blocked duct, evaporator icing, or closed vent | Open the vents, change fan speeds, and inspect the cabin filter |
| Strong airflow but warm air | Wrong settings, refrigerant loss, compressor fault, temperature-door fault, or sensor problem | Select LO, recirculation, and dash vents; then compare both sides of the cabin |
| Cold while driving but warm at idle | Condenser fan problem, blocked condenser, airflow fault, incorrect charge, or system-control issue | Inspect the condenser for loose debris and have fan operation tested |
| One side cold and the other side warm | Dual-zone setting, blend-door actuator, temperature sensor, or air-distribution fault | Synchronize both temperature zones and listen for clicking behind the dashboard |
| Cooling starts, then fades | Evaporator icing, sensor fault, restricted airflow, compressor control, or incorrect charge | Check whether airflow also becomes weaker as cooling fades |
| A/C button indicator flashes on an applicable older Camry | The control system has detected an air-conditioning fault and may have disabled compressor operation | Turn the AC off and consult the exact model-year manual; do not repeatedly force the system back on |
Weak Airflow Versus Warm Airflow
Weak airflow directs your attention toward the cabin filter, blower motor, blower controller, ducts, vents, or an icing evaporator. A refrigerant problem can affect temperature, but it does not usually explain why the blower produces very little air at every temperature setting.
Strong airflow that remains warm points more toward the refrigeration circuit, condenser airflow, compressor control, or the temperature-blend system inside the dashboard.
Start with the symptom, not a refrigerant can. Airflow strength, vent temperature, driving speed, and left-to-right temperature differences provide useful diagnostic clues.
Climate Settings and Cabin Heat
Set the temperature to LO, choose the dashboard vents, switch on recirculation, and use a medium or high fan speed. Synchronize the driver and passenger zones. Do not use windshield-defog mode for this cooling test because the system may select outside air to reduce window fogging.
If your Camry has S-FLOW or another occupancy-focused airflow mode, turn it off temporarily when comparing all dashboard vents. This prevents intentional airflow distribution from being mistaken for a blocked vent.
A Camry parked in direct sun may blow hot air at first because the dashboard, seats, ducts, and glass have stored heat. Open the doors briefly or lower the windows, begin driving, and then judge whether the vent air becomes colder.
Refrigerant, Compressor, and Condenser Problems
A refrigerant leak can reduce cooling, but adding refrigerant without finding the leak may provide only temporary relief. Too much refrigerant, too little refrigerant, air in the system, moisture, or an incompatible product can all reduce performance and damage components.
The condenser releases heat in front of the radiator. Leaves, insects, road debris, bent fins, or a failed cooling fan can reduce its ability to remove heat. This often becomes more noticeable at idle because the vehicle no longer receives the natural airflow it gets while moving.
Temperature-Door and Electrical Problems
The climate-control system uses doors and actuators to direct air through or around the heater and evaporator. A failed temperature-door actuator can leave warm air flowing even when the refrigeration circuit is working.
Blown fuses, damaged wiring, failed relays, pressure sensors, temperature sensors, fan controllers, or control-module faults can also prevent normal cooling. Use the fuse assignment shown for your exact model year rather than relying on a generic online diagram.
What Changes by Camry Model Year and Powertrain
Toyota has used different AC controls, compressors, refrigerants, wiring layouts, and diagnostic strategies across Camry generations. Before testing a clutch, relay, fuse, pressure, or refrigerant charge, identify the model year, engine or hybrid system, market, and refrigerant label.
| Camry Type | What May Be Different | Important Caution |
|---|---|---|
| Older gasoline Camry | May use a belt-driven compressor with a visible clutch, model-specific relays, and older refrigerant specifications | Visible clutch movement alone does not confirm correct charge or compressor health |
| Earlier Camry Hybrid | Can use a high-voltage electric compressor that operates independently of engine speed | Do not test it as though it were a conventional clutch-driven compressor |
| 2025-and-newer U.S. Camry | The current U.S. lineup is hybrid-only and uses electronically controlled climate and high-voltage systems | High-voltage compressor and wiring diagnosis belongs with a hybrid-qualified technician |
Note: Do not infer refrigerant type solely from model year. Read the under-hood AC label because production date, market, system configuration, and previous repairs can matter.
Flashing A/C Indicator on Applicable Older Camrys
Some older Camry manuals state that a flashing A/C-button indicator means the system has detected a fault and has shut off air-conditioning operation. The exact cause cannot be identified from the light alone. Possible faults include compressor-speed detection, clutch or relay operation, wiring, sensor input, or another system-control problem.
Turn the AC off, record when the flashing began, and check the instructions for the exact model year. Repeatedly pressing the button will not correct the underlying fault.
A Safe Diagnostic Order for a Toyota Camry AC
- Confirm the settings. Select LO, recirculation, dashboard vents, and a steady fan speed. Synchronize both temperature zones and turn off S-FLOW during an all-vent comparison if equipped.
- Compare airflow strength. Test low, medium, and high fan speeds. Weak airflow at every setting points toward the filter, blower, controller, ducts, or evaporator icing.
- Inspect the cabin filter. Replace a dirty, damp, collapsed, incorrectly installed, or heavily restricted filter according to the maintenance guide for your model year.
- Inspect the condenser from the front. Look for leaves, insects, and loose debris without pushing tools through the grille or bending the fins.
- Compare idle and road-speed performance. Cooling that improves while driving can indicate inadequate condenser airflow, fan trouble, or another condition affected by vehicle speed.
- Compare the left and right vents. A large side-to-side difference can indicate a dual-zone setting, temperature-door actuator, sensor, or air-distribution problem.
- Use a thermometer if available. Record ambient temperature and center-vent temperature under the same settings at idle and after driving. Compare changes rather than relying on one universal target.
- Check the correct fuses. Use the owner’s manual or fuse-box diagram for your exact Camry year and replace a fuse only with the specified rating.
- Record warning behavior. Note any flashing A/C indicator, clicking behind the dashboard, fan noise, abnormal odor, engine-temperature change, or cooling that fades after several minutes.
- Stop before opening the refrigerant circuit. A qualified shop should identify the refrigerant, scan the HVAC system, measure temperatures and pressures under specified conditions, leak-test the system, and verify the charge amount.
Using a Vent Thermometer
A vent thermometer can document whether the system changes temperature, but one reading does not prove that the charge is correct. Park safely, record the outside temperature, select LO, recirculation, dashboard vents, and a stable fan speed, then place the thermometer in a center vent.
Record the vent temperature after the system has stabilized. Repeat the observation while driving safely or have a passenger record it. Also compare the driver-side and passenger-side vents. A large difference between sides, a temperature that rises at idle, or cooling that fades as airflow weakens provides more diagnostic value than comparing the result with a universal internet number.
Note: Clear water dripping under the passenger side after AC use is usually condensation from the evaporator drain. Colored, oily, sweet-smelling, or persistent fluid should be inspected because it may come from another vehicle system.
Signs of Low Refrigerant Levels
Low refrigerant can cause weak cooling, but the same symptoms can come from airflow, fan, compressor, sensor, restriction, or temperature-door problems. Treat the following signs as reasons to test the system, not as proof that it needs a recharge.
Symptoms of Low Refrigerant
- Cooling has gradually weakened: A slow decline can occur as refrigerant escapes through a small leak.
- The system cools inconsistently: Cooling may vary with ambient temperature, vehicle speed, compressor command, or system protection logic.
- You hear a brief hiss: Some refrigerant movement sounds are normal, but a persistent hiss near a damaged hose or connection deserves inspection.
- Oil or dye appears near a fitting: Refrigerant oil can collect dirt around a leaking connection.
- Frost develops on a line or component: Low charge can contribute, but restricted airflow, a control fault, or a refrigerant restriction can produce similar icing.
Some older systems use a visible compressor clutch that may cycle abnormally when pressure is low. Other Camrys use variable-control or electric compressors, so clutch movement is not a universal diagnostic test.
Visual Leak Detection Methods
You can perform a non-invasive visual inspection without opening the system. Use a flashlight to check accessible hoses, fittings, and the condenser for oily dirt, impact damage, corrosion, or fluorescent dye left from previous service.
- UV dye: Compatible dye may glow under a UV lamp, but only if dye was already present or was introduced using the correct service procedure.
- Oil residue: A greasy dirt pattern around a connection can suggest leakage, although engine oil and other fluids can create similar residue.
- Condenser damage: Stones and road debris can damage the thin condenser tubes near the front of the vehicle.
- Frost or ice: Record where it forms and whether cabin airflow becomes weaker before the system is switched off.
Pressure Gauge Readings
Do not use one universal pressure range to decide whether your Camry has the correct refrigerant charge. Readings depend on the refrigerant, ambient temperature, humidity, compressor speed or command, fan operation, airflow through the condenser, system design, cabin heat load, and control strategy.
A low-side reading near zero while the compressor is commanded on under a valid model-specific test procedure is abnormal, but it does not prove complete refrigerant loss. A restriction, incorrect gauge connection, closed service coupler, sensor fault, or control problem can produce misleading results. Static pressure with the compressor off must be interpreted differently from operating pressure.
A single low-side gauge cannot show the complete behavior of the system or measure the amount of refrigerant inside it. Correct charging is normally performed by recovering the existing refrigerant, evacuating the system as required, and adding the specified mass shown in service information or on the vehicle label.
Check the under-hood refrigerant label before attaching equipment. EPA requires refrigerant-specific fittings to reduce accidental mixing and states that adapters should not be used to convert one fitting to another. Review the EPA refrigerant fitting and labeling guidance for more information.
Pro Tip: Photograph the under-hood AC label before scheduling service. The label helps the shop confirm the refrigerant type and specified charge information for your vehicle.
Diagnosing Your Toyota Camry AC Compressor and Fan Issues
The correct compressor check depends on the Camry’s model year and powertrain. Older belt-driven compressors may have a visible clutch. Newer variable-control compressors may run without obvious cycling, while Camry Hybrid models use an electric high-voltage compressor.
- Listen for abnormal noise: Grinding, rattling, or a sharp squeal with the AC on can indicate a belt, pulley, bearing, compressor, or mounting problem. Switch the system off and arrange an inspection.
- Check cooling-fan behavior: A failed condenser or radiator fan can reduce cooling at idle and increase system pressure. Fan testing may require scan data and electrical measurements.
- Check for engine overheating: Turn the AC off if the engine temperature rises abnormally. A cooling-system or fan problem can affect both engine temperature and AC performance.
- Scan the HVAC system: A capable scan tool can reveal sensor, actuator, compressor-control, or communication faults that a basic engine-code reader may not display.
- Verify the compressor request: A technician can compare requested compressor operation, sensor values, electrical command, line temperatures, pressures, and vent temperature before condemning the compressor.
Do not assume the compressor has failed simply because it is not visibly cycling. A pressure sensor, ambient-temperature input, wiring fault, control-module command, low charge, high-pressure condition, or protective shutdown may prevent operation.
On a hybrid Camry, the gasoline engine can stop while the electric compressor continues operating. Engine speed therefore does not provide a reliable indication of compressor operation.
[Amazon Products Picked for You]

[Vehicle Fitment] Compatible with Toyota Camry 2007-2008 L4 2.4L,Toyota Camry 2009 L4 2.4L(Japan Built, to 01/09/2009), Toyota RAV4 2006-2008 L4 2.4L. Check fitment via Amazon Garage to avoid mismatches before purchase.

[Specifications]: ①Condition: New; ②Compressor Style: 7ZSE17; ③Oil Type: PAG46; ④Oil Prefilled: 160 ml (20 ml tolerance); ④Pulley Grooves: 6; ⑤Pulley Diameter: 120 mm; ⑥Clutch Included: Yes

STRONG COOLING AIR CONDITIONER COMPRESSORS PARAMETER: 97386,98386,157341,158341,DW97386,10361581,3018271,DW97386,T98386,639340,639391,4472601208,4472601209,4710613,4710617,4711612,4711613,4711617,9247109NCO,100053,100098,CO1702,0918E0202,5512603,6512603,7512603,ACP909000P,ACP909000S,255540,275730,TEM255540,TEM275730,2021881,2021881AM,2021881R,97386,2013429,140384,140384C,140384NC,140384NEW,140384NIP,140384RC,7420616,CP13956,CP13956R,CP22149,CP7636,CP7636R,CP8981,0610255,8831006240,8831033250,8831042270,C1949,C1949R,C1949UA,ACC0384CV,811105,2403556496
The Role of the Cabin Air Filter in AC Performance

The cabin air filter removes dust, pollen, leaves, and other debris from incoming air. A heavily restricted filter can reduce vent airflow, increase blower noise, make the cabin take longer to cool, and contribute to uneven airflow.
A dirty filter does not normally change the refrigerant charge. It affects how much air passes across the evaporator and reaches the cabin. Severe restriction can also contribute to evaporator icing under some conditions.
Replacement intervals vary by model year and driving environment. Toyota’s 2026 Camry Warranty and Maintenance Guide marks cabin-filter replacement at 10,000-mile intervals and notes that heavy traffic, dirt roads, desert use, and dusty areas can shorten filter life. Check the guide for your exact Camry through Toyota’s manuals and warranties portal.
A cabin filter mainly affects airflow. Strong airflow that remains warm usually requires diagnosis beyond the filter.
Install the filter in the direction shown by the airflow marking or the vehicle instructions. A filter installed backward or out of position can deform, whistle, allow debris to bypass it, or restrict airflow.
How to Detect and Repair Refrigerant Leaks
A sealed AC system should not need routine refrigerant top-offs. If the charge is low, inspect the system for leakage before adding more refrigerant.
[Amazon Products Picked for You]

High-Sensitivity Freon Leak Detector: The GL77A refrigerant leak detector utilizes a premium heat dioxide semiconductor sensor. Boasting a maximum sensitivity of 0.49oz/year (14g/year), it accurately detects a wide range of halogenated refrigerants. Detection for R134a, R1234yf, R410a, R22, R404a, R407c, R454b, R32, and more. (Note: Due to space limitations, the user manual only lists common models, but this device is fully capable of detecting all halogen refrigerants).

Upgraded version of WJL-6000. Traditional corona sensor with updated analogue circuit, fast triggers on R11, R22, R134A, R404a, R410A and all halogenated refrigerants including HFCs, CFCs,HCFCs and blends.

10 Years Infrared Sensor Lifetime: Elitech independently developed the latest infrared sensor, greatly extending the sensor life up to 10 years; compared to traditional sensors, the results are also more accurate for all halogenated refrigerants.
Common Leak Symptoms
- Gradually weaker cooling: Cooling performance declines over weeks or months.
- Repeated loss of cooling after a recharge: A returning problem strongly suggests that the underlying leak or fault was not corrected.
- Oily dirt around fittings: Refrigerant oil can escape with refrigerant and attract dust.
- Visible UV dye: Compatible fluorescent dye may reveal a leak under the correct lamp and viewing conditions.
- Condenser impact damage: Road debris can puncture or crack the front-mounted condenser.
An evaporator leak may not be visible from the engine compartment. A technician may need an electronic detector, drain-tube inspection, approved pressure testing, or another manufacturer-appropriate method.
Leak Detection Methods
| Method | What It Does | Important Limitation |
|---|---|---|
| Visual inspection | Finds damaged hoses, condenser impact, corrosion, oily dirt, or existing dye | Small or hidden leaks may leave no visible evidence |
| Electronic detector | Senses compatible refrigerant near a suspected leak | Air movement, contamination, technique, and detector sensitivity affect results |
| UV dye | Makes some leak paths visible under UV light | The dye must be compatible and may take time to reach a slow leak |
| Pressure and temperature testing | Shows whether system behavior is abnormal under controlled conditions | It cannot locate every leak or confirm the correct charge from one reading |
| Approved pressure test | Checks the repaired system for leakage before charging | Requires correct equipment, procedures, pressure limits, and technician training |
Recharge Cans and Stop-Leak Products
A single-gauge recharge can does not reveal high-side pressure, recovered refrigerant weight, air or moisture contamination, condenser performance, compressor command, or the specified amount remaining in the system. A gauge in a colored “low,” “filled,” or “alert” zone is not a complete diagnosis.
Avoid products that combine refrigerant with an unidentified sealer, stop-leak chemical, or incompatible oil. Such products can complicate later recovery, leak detection, and component replacement. Use only refrigerant, oil, dye, seals, and procedures that match the vehicle label and Toyota service information.
Warning: Never attach a can or hose until you have confirmed the refrigerant type and service port. Do not use an adapter to connect equipment intended for another refrigerant.
Repairing Refrigerant Leaks
A complete refrigerant repair normally includes the following steps:
- Identify the refrigerant and system specifications. The technician checks the vehicle label and model-specific service information.
- Recover and identify the refrigerant. Approved equipment removes and stores the refrigerant instead of releasing it.
- Locate the leak. The shop uses inspection, an electronic detector, compatible UV dye, approved pressure testing, or a combination of methods.
- Replace or repair the failed component. Common repair points include O-rings, service valves, hoses, the condenser, compressor seals, and the evaporator.
- Replace required seals or related parts. The repair procedure may require new O-rings, a receiver or desiccant component, or the correct compressor oil.
- Evacuate and leak-test the system. The shop removes air and moisture and confirms that the repaired system holds as required.
- Recharge to the specified mass. Refrigerant is added according to the vehicle specification rather than guessed from a low-side gauge.
- Verify operation. The technician checks vent temperature, pressures, line temperatures, sensor data, fan operation, compressor request, and fault-code status under suitable conditions.
EPA prohibits intentional refrigerant venting during service and requires approved handling equipment. Anyone servicing an MVAC system for payment or other consideration must hold Section 609 certification. See the EPA MVAC servicing requirements.
Warning: Do not loosen a hose, fitting, service valve, compressor connection, or other refrigerant component to “see whether pressure is present.” Escaping refrigerant can cause cold burns, injure your eyes, and violate environmental rules.
Troubleshooting Electrical Issues Affecting Your Toyota Camry AC
An electrical or control fault can leave the blower working while the air stays warm. It can also stop the blower, condenser fan, compressor request, or temperature door.
- Fuse: Check only the fuse locations and ratings listed for your exact year. A replacement fuse that blows again indicates a fault that needs diagnosis.
- Blower motor or controller: A failed motor, resistor, or electronic controller can cause missing fan speeds, intermittent airflow, or no airflow.
- Cooling fan and fan controller: A fan that does not operate when commanded can reduce cooling at idle and increase system pressure.
- Pressure or temperature sensor: An implausible signal may cause the control module to disable or limit compressor operation.
- Blend-door actuator: Clicking behind the dashboard, uneven left-to-right temperature, or air stuck hot can point to an actuator or door problem.
- Wiring and connectors: Corrosion, loose pins, damaged insulation, poor grounds, or previous collision repairs can interrupt a control circuit.
- Climate-control module: Stored HVAC diagnostic codes and live data can reveal faults that are not visible during a basic inspection.
- Compressor feedback on applicable models: Some systems compare compressor command with speed or operating feedback and may shut the AC down when the values do not agree.
A multimeter can help a trained person test power, ground, resistance, and command signals. Avoid probing high-voltage hybrid circuits, bypassing safety inputs, or applying power directly to unfamiliar components.
[Amazon Products Picked for You]

[Vehicle Fitment]: The Air Blend Door Actuator Compatible with Chevrolet Silverado 1500/2500 1999-2013, Silverado 3500 2001-2006, Silverado 1500HD 1999-2013, Tahoe 2000-2014, Suburban 1500/2500 2000-2014; Compatible with GMC Sierra 1500/2500 2009-2013, Sierra 3500 2001-2006, Yukon/Yukon XL 2000-2014; Compatible with Cadillac Escalade 2000-2014. This actuator is also compatible with Chevy, GMC, Cadillac, Hummer, Isuzu, Oldsmobile, Buick, Pontiac Models, See the full model in the description below

Compatible with Buick Allure 2005-2009, LaCrosse 2005-2009; Cadillac XLR 2004-2009; Pontiac Grand Prix 2004-2008

[Vehicle Fitment]: Compatible with Chrysler 200 2011-2014, Aspen 2008-2009 (From 1/03/2008), Sebring 2007-2010; Compatible with Dodge Avenger 2008-2014, Caliber 2010-2012, Durango 2008-2009 (From 1/03/2008), Journey 2009-2020
What a Professional AC Diagnosis Should Include
A professional diagnosis should do more than connect a low-side gauge and recommend a recharge. The shop should identify the test conditions and explain which result points to the failed component.
- Vehicle identification: Model year, VIN, powertrain, refrigerant type, and specified charge.
- Visual inspection: Condenser condition, belt or pulley condition where applicable, hoses, fittings, wiring, service ports, and evidence of dye or oil.
- Control-system scan: HVAC, hybrid, engine, body, and communication codes when relevant.
- Live data: Ambient temperature, cabin sensors, pressure-sensor value, evaporator temperature, compressor request, fan request, and actuator positions where supported.
- Operating test: Vent temperature, high- and low-side behavior, line temperatures, fan operation, and compressor response under documented conditions.
- Leak test: The method used, the location found, and the evidence supporting the diagnosis.
- Charge verification: Recovered amount, specified amount, refrigerant identity, oil or dye added, and final performance.
Pro Tip: Before the appointment, record the outside temperature, whether the problem occurs at idle or road speed, which vents are affected, how long cooling lasts, and whether the A/C indicator flashes. These details can shorten diagnostic time.
When to Seek Professional Help for AC Repairs?
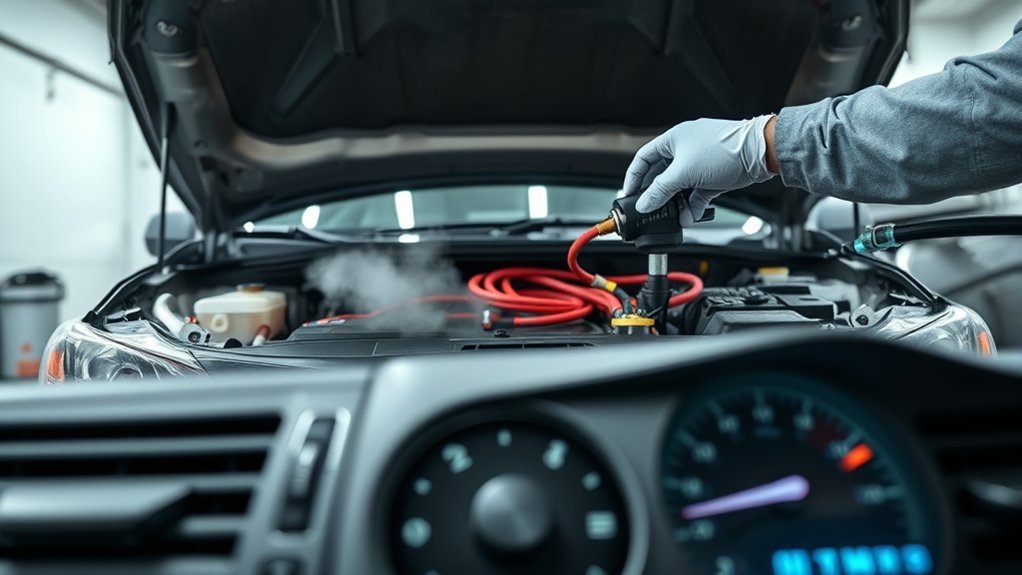
Schedule professional diagnosis when basic settings, airflow checks, thermometer observations, and a cabin-filter inspection do not explain the problem.
- The refrigerant charge is suspected to be low. The system needs leak diagnosis and the correct recovery and charging equipment.
- Cooling disappears again after a recharge. Repeated top-offs do not correct the leak or failed component.
- The AC is cold while driving but warm at idle. Fan operation, condenser airflow, pressure, temperature, and control data should be tested.
- You hear grinding, rattling, or squealing. Continuing to run the system can worsen belt, pulley, bearing, or compressor damage.
- One side remains warm. A blend-door actuator, sensor, wiring, or control-module fault may require dashboard access and scan-tool testing.
- The Camry is a hybrid. High-voltage electric-compressor diagnosis should be handled by a technician trained for hybrid systems. This applies to every U.S. 2025-and-newer Camry.
- The A/C indicator flashes. On applicable models, the system may have detected a fault and disabled compressor operation.
- The engine begins overheating. Turn off the AC and stop driving if the temperature reaches an unsafe level.
- You smell burning or see damaged wiring. Switch the system off and have the electrical fault inspected promptly.
A useful diagnosis should identify the failed component, abnormal measurement, code, leak location, or control result rather than recommending a recharge based only on warm vent air.
Maintenance Tips for Preventing Future AC Issues
- Follow the model-year maintenance guide. Replace the cabin filter at the specified interval or sooner when airflow drops or the filter becomes dirty.
- Keep the condenser clear. Remove loose leaves and surface debris gently. Avoid high-pressure spraying that can bend fins or damage electrical parts.
- Use the AC periodically. Regular operation can help you notice a developing noise, odor, airflow change, or cooling decline before hot weather arrives.
- Do not schedule routine refrigerant top-offs. A low charge deserves leak investigation.
- Address blower and fan faults promptly. Restricted cabin airflow and poor condenser airflow can reduce performance and place extra stress on the system.
- Use compatible parts and fluids. Refrigerant, compressor oil, seals, dye, and service equipment must match the vehicle specification.
- Avoid unidentified sealers. Do not add a stop-leak product unless it is specifically approved for the vehicle and the planned service procedure.
- Record previous AC work. Keep invoices showing the refrigerant type, quantity, oil or dye added, replaced components, and leak-test results.
An annual recharge is not normal maintenance. Arrange an inspection when cooling weakens, a noise appears, airflow changes, the A/C indicator flashes, or the system begins cycling or shutting down abnormally.
What Your Warranty Covers for AC Repairs
Toyota’s 2026 Camry warranty information lists basic coverage of 36 months or 36,000 miles for defects in materials or workmanship, subject to exclusions. Coverage for your Camry depends on its model year, original in-service date, mileage, failed component, maintenance history, prior repairs, and warranty terms.
The 2026 Camry Warranty and Maintenance Guide includes an important exception: air-conditioning recharge is covered for 12 months or 12,000 miles, whichever comes first. That limit does not automatically determine coverage for a compressor, condenser, sensor, actuator, wiring harness, or another component that failed because of a covered defect.
Normal maintenance, collision damage, environmental damage, improper service, unauthorized refrigerant mixing, incompatible fluids, and failures caused by neglect may not be covered. Extended-service agreements and certified-used warranties can have different terms.
Use Toyota’s manuals and warranties portal to select your exact Camry year. Contact an authorized Toyota dealer before approving a repair when you believe the failure may qualify for warranty coverage.
Frequently Asked Questions
Why is my Toyota Camry AC not blowing cold air?
Possible causes include incorrect climate settings, a clogged cabin filter, poor condenser airflow, a refrigerant leak, compressor-control trouble, a failed temperature-door actuator, a sensor fault, or an electrical problem. Start by checking settings, airflow strength, the filter, and whether cooling changes at road speed.
What is the most common cause of AC not blowing cold air?
No single cause applies to every Camry. Refrigerant leaks are common, but warm air can also result from incorrect settings, condenser-fan failure, compressor-control faults, blend-door problems, sensors, or wiring. The symptom and test results should identify the cause before refrigerant is added.
How do I reset a Toyota Camry AC system?
Toyota does not use one universal AC reset procedure for every Camry year. Restart the vehicle, confirm the climate settings, and check the owner’s manual for model-specific instructions. Do not disconnect the battery solely as a generic reset because it will not repair a leak, failed actuator, compressor fault, or sensor problem.
Why is my car AC running but not getting cold?
The blower can run even when the refrigeration system is not cooling. Check the temperature and recirculation settings, compare both sides of the cabin, inspect the filter, and note whether cooling improves while driving. A shop may need to test refrigerant charge, fan operation, compressor command, sensors, and blend doors.
Can a dirty cabin air filter make the AC blow warm air?
A dirty filter mainly reduces airflow and can make the cabin cool slowly. It may also contribute to evaporator icing when airflow becomes severely restricted. Strong airflow that remains warm usually points to another problem, such as refrigerant, compressor, fan, temperature-door, sensor, or electrical trouble.
Why is my Camry AC colder while driving than while idling?
Road speed pushes more air through the condenser. If cooling weakens at idle, the condenser fan, fan controller, condenser airflow, refrigerant charge, or compressor-control system may need testing. Check the engine temperature as well because a cooling-fan fault can affect both systems.
Why is the A/C light flashing in my Toyota Camry?
On applicable older Camrys, a flashing A/C-button indicator can mean the control system detected a fault and shut off compressor operation. Turn the AC off, consult the exact model-year manual, and arrange diagnosis. The light alone does not identify whether the fault is a relay, clutch, compressor, sensor, wiring, or control problem.
Can I add refrigerant to my Toyota Camry myself?
Basic visual checks are reasonable, but adding refrigerant without confirming the type, leak condition, operating state, and remaining charge can overcharge or contaminate the system. A qualified technician can recover the refrigerant, find the leak, evacuate the system, and recharge it to the specified mass.
Should I use an AC recharge can with stop-leak?
Avoid unidentified sealer or stop-leak products. A single-gauge can cannot confirm the total charge or diagnose the system, and an incompatible sealer, oil, or refrigerant can complicate later recovery and repair. Use only products and procedures approved for the exact vehicle specification.
Conclusion
Start with settings, airflow, the cabin filter, condenser condition, vent-temperature comparisons, and symptom patterns before assuming your Toyota Camry needs refrigerant. Weak airflow, strong warm airflow, uneven temperatures, flashing indicators, fading cooling, and poor idle performance each point toward different faults.
Stop the DIY diagnosis before opening the refrigerant circuit or testing high-voltage hybrid components. A qualified shop can identify the refrigerant, scan the HVAC controls, locate leaks, test fans and actuators, and verify compressor operation and charge using model-specific information.
Sources
- 2026 Toyota Camry Warranty and Maintenance Guide — cabin-filter schedule, warranty limits, recharge coverage, and hybrid safety precautions
- 2025 Toyota Camry Quick Reference Guide — current-generation climate controls, recirculation, synchronization, and S-FLOW operation
- Toyota Troubleshooting Common Car AC Issues — airflow, refrigerant, condenser, compressor, filter, and condensation guidance
- Toyota Camry Goes Exclusively Hybrid — official confirmation that the ninth-generation U.S. Camry became hybrid-only for 2025
- EPA Regulatory Requirements for MVAC System Servicing — technician certification, approved equipment, refrigerant recovery, and venting rules
- EPA Unique Fittings and Label Colors — refrigerant-specific fittings and safeguards against mixing refrigerants
