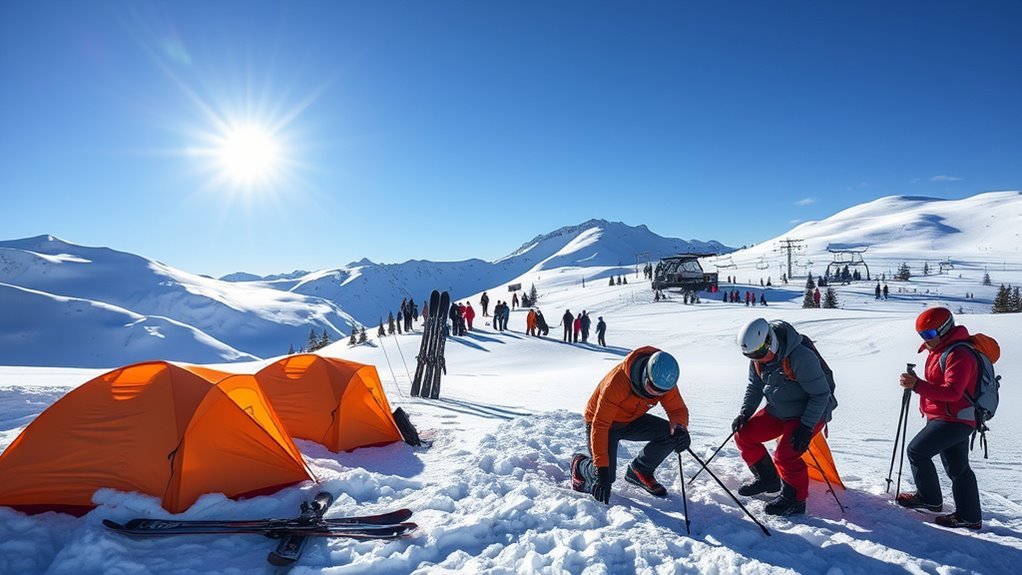
When buying a tent for a ski trip, match the shelter to the worst weather you realistically expect rather than choosing by one weight, waterproof rating, or capacity number. For camping on snow, near treeline, or where strong wind and substantial snowfall are possible, a true four-season ski-touring or mountaineering tent is usually the right choice. Sheltered trips below treeline in mild forecasts may allow a less aggressive design, but winter safety margins should come before saving a few ounces.
Quick Answer
Choose a four-season tent for ski trips when you expect snow camping, subfreezing weather, strong wind, or substantial snowfall. Prioritize strong pole geometry, secure guy-out points, a low or full-coverage fly, controllable ventilation, useful vestibule space, snow-compatible anchors, and enough floor space for winter gear. Compare actual dimensions instead of relying on capacity labels alone.
Key Takeaways
- Use a four-season ski-touring or mountaineering tent when strong wind, significant snowfall, or exposed winter terrain is realistic.
- Do not judge a winter tent by a single waterproof number; fly coverage, poles, seams, fabric, ventilation, and anchoring work as one system.
- Compare actual floor dimensions and vestibule space. Sizing up by one person is often more practical than automatically doubling the capacity.
- Balance packed weight against storm strength. A lightweight ski-touring tent and a heavy expedition dome solve different problems.
- Plan for snow anchors, ventilation, campsite hazards, and avalanche exposure before pitching the tent.
- Dry, inspect, and repair the shelter after winter trips so coatings, seams, poles, and zippers remain dependable.
Best Tent Features for Ski Trips
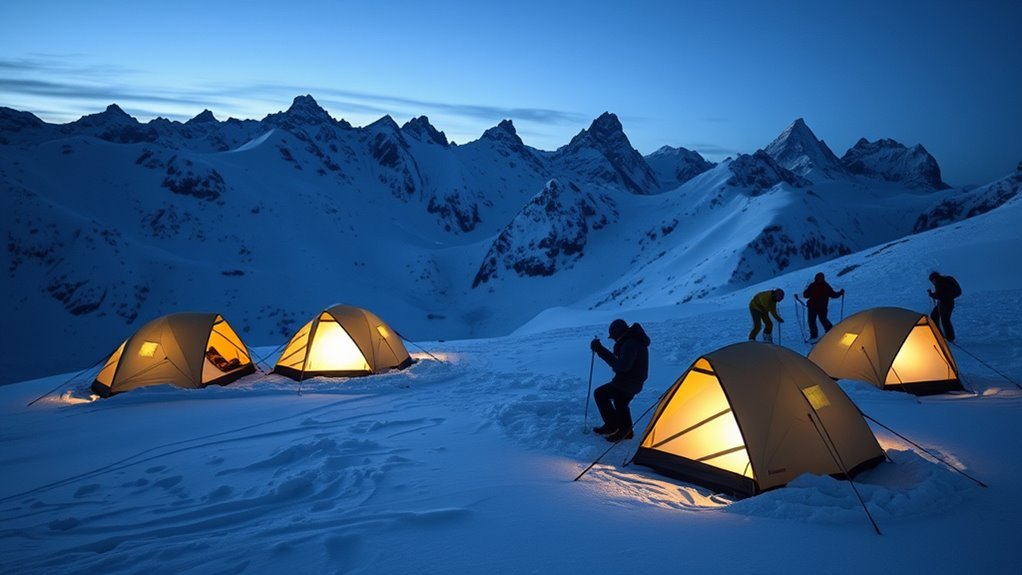
A ski-camping tent should be selected for the conditions you will actually face. The most useful winter features are a strong pole structure, dependable guy-out points, weather-resistant fabric, a fly that protects low on the tent body, controllable ventilation, practical vestibules, and an anchoring system that works in snow.
A four-season design generally uses stronger framing, more solid fabric and less exposed mesh than a typical three-season backpacking tent. These changes improve resistance to wind and blowing snow, although they may also increase weight and reduce ventilation in mild weather.
Vestibules are especially useful on ski trips because boots, packs, poles, skins, wet outerwear, and other bulky equipment can stay protected without filling the sleeping area. Two doors or two vestibules can also make entry easier when one side of the tent is exposed to wind.
Quick pitching matters, but simplicity should not come at the expense of a properly supported frame. Before a trip, practice connecting every pole, guy line, vent, and snow anchor while wearing gloves.
For winter ski camping, structure, anchoring, ventilation, and campsite choice matter more than chasing one waterproof or weight number.
[Amazon Products Picked for You]

【Total Blackout Sleep System】Enjoy peaceful rest day or night with advanced blackout fabric that creates near-darkness inside the blackout tent, even under bright sunlight. The heat-insulating layer helps maintain a comfortable temperature, so you can sleep in or nap during the day without being disturbed by sunrise or glare. Perfect for campers who value sleep quality and want a dark, cool blackout tent

FOUR SEASON TENT: While other 3 season tents are only available for spring, summer and fall, this extreme weather tent is suitable for all seasons of the year. In winter, the snow skirt of this 2 person tent makes sure that it can keep snow away. The roll-able design makes it convenient when there is no snow around. In other seasons, the mesh design of the 4 season backpacking tent keeps bugs away while the double-layer door ensures ventilation

Included rainfly offers extra weather protection
Choose the Right Ski Tent Type
The best shelter depends on whether the trip is a sheltered overnight below treeline, a mobile ski tour, or an exposed alpine base camp.
| Trip conditions | Tent category | What to prioritize |
|---|---|---|
| Sheltered below treeline, little snowfall, moderate forecast | Robust three-season or extended-season model may be suitable | Full weather protection, good anchoring, ventilation, realistic forecast margin |
| Snow camping, subfreezing nights, strong wind, or meaningful snowfall | Four-season ski-touring tent | Lower weight with winter-capable poles, solid fabric panels, guy points, and vestibules |
| Exposed alpine terrain, severe storms, heavy snow, or base-camp use | Four-season mountaineering or expedition tent | Maximum structural strength, redundant pole support, snow-load handling, and protected gear storage |
Hilleberg’s tent-selection guidance makes an important distinction: lighter shelters suit mobile trips, while stronger dome structures can be preferable where a tent remains pitched and may carry snow while unattended. Tent shape therefore matters, but no single geometry is best for every ski trip.
Pick a 4-Season Tent
A four-season tent becomes especially valuable when the forecast includes sustained wind, blowing snow, heavy accumulation, or exposed terrain. Typical winter-oriented designs use stronger poles, more solid fabric panels, lower profiles, extensive guy-out points, and rainflies that extend close to the ground.
Do not assume that “four season” makes every model equally storm-worthy. A lightweight ski-touring tent may sacrifice some expedition-level strength to save energy on long approaches, while a mountaineering base-camp tent may weigh twice as much because structural security is the priority.
Single-wall and double-wall tents also behave differently. A single-wall tent can reduce weight and setup complexity, which is useful for fast alpine travel, but moisture management can be more demanding. A double-wall tent normally provides more separation between occupants and condensation on the outer fly, though it adds components and weight.
Note: There is no universal rule that a winter tent’s rainfly must have a 3,000 mm waterproof rating. For example, the current MSR Access 2 four-season ski-touring tent lists a 1,200 mm rainfly coating and a 3,000 mm floor. Evaluate fabric coatings together with fly coverage, seams, pole structure, floor design, and the manufacturer’s intended-use rating.
[Amazon Products Picked for You]

【4 Season Tent】BISINNA all-season tent with snow skirt, it can keep inner dry and warm in snow or cold weather! And the rollable designe makes you can using this tent all season.Made from sturdy 210T tear-resistant polyester,with a PU 3000mm waterproof coating and offers excellent UV protection
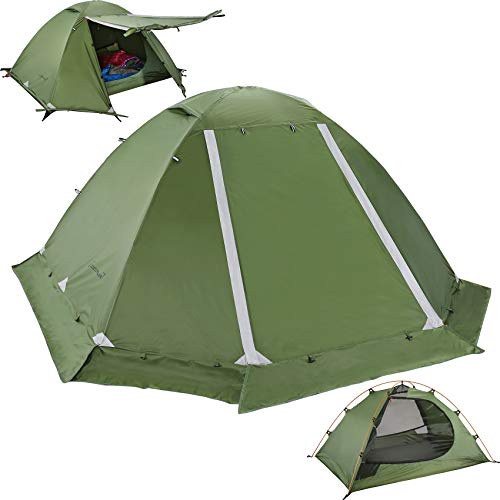
4 SEASON TENT: We offer a limited ONE-YEAR GUARANTEE. Polyester rain fly, groundsheet, and bathtub with PU 5000 coating are firmer than you expected. Weatherproof material with factory-sealed seams keeps you dry and comfortable in four seasons or cold weather! Better material but more affordable! You really need an appropriate lightweight 2-person tent for backpacking for ALL SEASON!
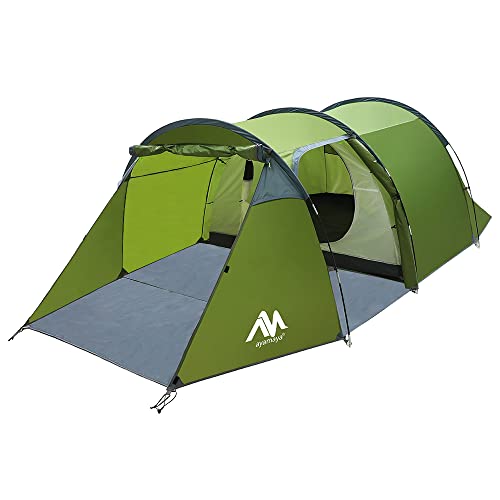
2 Room Design: The two-room tent consists of a detachable bedroom and a vestibule. You can sleep in the bedroom and then store your bicycle, motorcycle, or other camping gear in the vestibule. When the bedroom is removed, it will become a long tunnel sun shelter.
Choose the Right Tent Size
Winter gear consumes more space than summer gear, but automatically doubling the advertised tent capacity is unnecessary. Start with actual floor dimensions, sleeping-pad widths, occupant height, door placement, and vestibule volume.
If two winter campers use wide sleeping pads, check whether both pads physically fit without overlapping or pressing hard against the walls. Then decide where boots, packs, ski clothing, and other damp equipment will go.
[Amazon Products Picked for You]


Lightweight and Durable: The OneTigris STELLA Camping Tent features a lightweight and durable 20D Nylon outer fabric with a single-layer silicone coating, making it both sturdy and easy to carry at only 4.4lb/2kg. Suitable for backpackers, bushcrafters, everyday campers, and families Waterproof: With a 3000mm waterproof rating, the STELLA camping tent is perfect for use in all weather conditions. The removable blackout outer tent allows for greater flexibility in use.
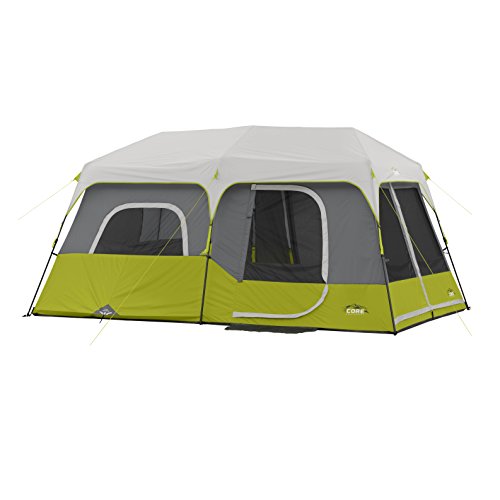
INSTANT POP UP TECHNOLOGY: Pre-attached poles lock into place for setup in 2 minutes or less
Match Capacity To Use
Tent capacity should be treated as a starting point rather than the only sizing measurement. Some manufacturers design the stated capacity to include normal gear space, while others produce tighter floor plans.
- Solo skier: a one-person winter tent may be enough for a minimalist tour, but a two-person model provides more room for changing layers and managing equipment.
- Two adults: compare the exact floor width with both sleeping pads. A three-person model can be worth the extra weight when bulky winter gear must come inside.
- Families or groups: use the manufacturer’s floor plan and dimensions rather than assuming an eight- or ten-person model is automatically necessary.
Hilleberg notes that its tents are designed for their stated number of occupants plus gear while also acknowledging that moving up a size adds comfort. That is a more useful approach than a blanket “halve the capacity” rule.
Size Up For Comfort
Sizing up is most useful when the extra space solves a specific winter problem: wide sleeping pads, large occupants, children, damp clothing, extended storm days, or limited vestibule storage.
For two people on a mobile ski tour, a three-person tent may provide a comfortable compromise if its weight and packed volume remain reasonable. For a base camp reached by vehicle, snowmobile, or pulk, extra interior volume may be more valuable than saving weight.
Peak height also matters. You should be able to sit upright and change layers without constantly brushing frost or condensation from the walls.
Balance Weight And Space
Every additional square foot has a weight and packed-volume cost. On long approaches, carrying a slightly tighter shelter may be worthwhile. At a static winter camp, more interior room and a larger vestibule can make bad-weather days substantially easier.
- Measure the sleeping pads that will actually be used.
- Check the floor width at both the head and foot ends.
- Compare vestibule area for boots, packs, poles, and wet layers.
- Confirm peak height and wall shape provide usable sitting room.
- Only then decide whether moving up one capacity is worth the weight.
Balance Weight and Packed Size
There is no single ideal winter-tent weight. A mobile ski tour rewards low weight, while a storm-exposed alpine camp rewards structural strength and redundancy.
Current products illustrate the difference. The MSR Access 2 has a packaged weight of about 4 lb 1 oz and packs to roughly 18 × 6 inches. A stronger expedition-oriented shelter can be much heavier and bulkier. That does not make the heavier tent worse; it reflects a different performance target.
Instead of requiring every ski tent to weigh under 4.5 pounds or pack below 15 inches, ask:
- Will the tent ride inside a backpack, outside it, on a pulk, or in a vehicle?
- How far and how much elevation will you carry it?
- Can the load be split between partners?
- What storm strength would you give up to save weight?
- Will the tent move every day or remain as a base camp?
Check Setup Time Before You Buy
A tent that is simple to pitch can be valuable when wind rises, visibility falls, or hands are cold. Pole clips, sleeves, hubs, color coding, linked inner-and-outer designs, and freestanding structures each affect setup differently.
Practice the complete pitch at home before relying on the shelter in winter. Attach guy lines, identify every pole, learn the vent controls, and determine which anchors will be required for snow.
Pro Tip: Practice one setup while wearing winter gloves. If a buckle, pole sleeve, tensioner, or vent is frustrating in the yard, it will be much harder to manage in wind, darkness, or blowing snow.
Freestanding does not mean windproof without anchors. In exposed conditions, secure the tent and use the recommended guy-out points instead of relying on the frame alone.
Look for Winter-Ready Features
Useful winter features include strong poles, multiple guy points, protected vents, solid fabric panels, low fly coverage, durable zippers, usable vestibules, reflective lines, and attachment points that remain manageable with gloves.
Snow skirts or snow flaps can help on some shelters, particularly around vestibules or specialized base-camp designs, but they are not mandatory on every capable winter tent. Pole geometry, anchoring, fly coverage, and ventilation are more universal considerations.
Insulation And Ventilation
A normal ski-touring tent is not a substitute for an insulated sleep system. The shelter blocks wind and precipitation, while your sleeping bag, clothing, and insulated sleeping pad provide most of the protection against heat loss.
Reduced mesh can make a winter tent feel warmer than a highly ventilated summer model, but closing every vent creates another problem: condensation from breathing, damp clothing, and snow brought inside.
Use adjustable vents and keep airflow paths open whenever conditions permit. In drifting snow, check that external vents have not become buried or blocked.
For winter backcountry travel, the National Park Service winter-camping guidance emphasizes both a suitable sleeping bag and sleeping pad as part of the complete shelter system.
Warning: Never use a normal fuel-burning camp stove, charcoal grill, lantern, or portable gas heater inside an ordinary tent. Carbon monoxide is colorless and odorless, and opening a door or vent does not make unsafe equipment safe indoors. Follow CDC carbon-monoxide guidance and the tent and appliance manufacturers’ instructions.
Snow And Wind Resistance
A winter tent must transfer wind and snow forces through its poles, fabric, anchors, and guy lines without excessive deformation. Multiple pole intersections can improve static strength, while lower profiles reduce the amount of fabric exposed to the wind.
Dome and geodesic structures are popular in demanding winter use because their intersecting poles can distribute load efficiently. However, a well-designed tunnel tent can offer an excellent space-to-weight ratio for mobile ski touring when it is properly oriented and anchored.
A fly that reaches close to the ground reduces wind-driven snow entering under the outer tent. Strong guy-out points and snow-compatible anchors also matter because even a robust frame can be damaged if the shelter is allowed to move violently in gusts.
Prepare the Snow Platform and Anchors
Before pitching on soft snow, compact the platform with skis, snowshoes, or boots and allow the packed surface to settle when conditions permit. A firmer platform reduces uneven melting and creates a more stable sleeping surface.
Normal summer stakes may pull straight through unconsolidated snow. Use purpose-built snow stakes or buried anchors appropriate for the snowpack. Skis, poles, or other equipment are sometimes used as anchors, but only when doing so will not leave essential travel equipment frozen in place or damaged.
After pitching, tension the fly and guy lines evenly. Recheck them after wind, snowfall, or major temperature changes because snow can settle and fabric tension can change.
Choose a Safe Winter Campsite
Tent strength cannot compensate for a dangerous location. Before building camp, assess avalanche exposure, overhead hazards, wind, drainage, cold-air pooling, access, and local regulations.
Avalanche.org notes that avalanches are possible on slopes steeper than 30 degrees and stresses the importance of connected terrain, runout zones, gullies, and other terrain traps. A campsite does not have to sit on a steep slope to be exposed; debris can travel into flatter terrain below.
- Avoid avalanche start zones, tracks, runouts, and terrain traps.
- Do not camp beneath dead, damaged, or heavily loaded trees and branches.
- Look for natural wind protection without pitching where drifting snow can bury the tent.
- Avoid obvious low spots where cold air and water can collect.
- Check permits, wildlife restrictions, food-storage rules, and winter camping regulations for the exact destination.
- Keep the shelter’s vents and exits clear as snow accumulates.
Compare Durability and Weather Protection
Durability is the result of the complete shelter system rather than one fabric number. Compare pole material and diameter, pole intersections, guy-out reinforcement, fly coverage, floor construction, seam treatment, zipper quality, fabric denier, coatings, and availability of replacement parts.
Waterproof ratings are useful for comparing similar fabrics, but they should not override the manufacturer’s intended-use guidance. A lower numerical coating on a properly designed winter shelter can still be more suitable for ski touring than a higher-rated fabric attached to a weak summer frame.
Repairability also matters. A small tear, damaged pole section, or broken guy line can become serious in winter. Carry the pole-repair sleeve, compatible patches or tape recommended by the manufacturer, spare cord, and any small parts your shelter requires.
Inspect the tent before every major winter trip for cracked pole sections, damaged ferrules, worn guy loops, zipper problems, coating deterioration, holes, loose seams, and missing stakes.
Set Your Tent Budget
Budget should be tied to the conditions the tent must survive. A recreational campground shelter and a four-season ski-touring tent should not be evaluated in the same price category.
| Tent category | Budget approach | Where the money should go |
|---|---|---|
| Sheltered three-season / extended-season use | Lower | Reliable fly coverage, quality poles, ventilation, and correct weather limits |
| Four-season ski touring | Higher | Strength-to-weight ratio, winter pole system, ventilation, vestibules, and packability |
| Expedition / alpine base camp | Highest | Maximum frame strength, redundant support, large vestibules, heavy-weather durability, and repairability |
As a current U.S. market reference in September 2026, dedicated MSR four-season models span roughly the high hundreds of dollars, with ski-touring and expedition tents costing substantially more than ordinary weekend camping shelters. Prices change, so treat that as context rather than a permanent price rule.
Value is not simply the lowest purchase price. A better measure is whether the tent provides the weather protection you need at a weight you can realistically transport and whether replacement poles, parts, and repairs are available.
Maintain Your Tent for Longer Use
Winter tents are repeatedly exposed to moisture, ice, grit, UV radiation, abrasion, and tight packing. Drying and inspection after each trip do more for longevity than frequent aggressive washing.
Follow the manufacturer’s instructions because coatings and seam treatments differ between tents. Repair small defects early rather than waiting until they become leaks or structural failures.
Cleaning and Drying
Most dirt can be removed with clean water and gentle hand cleaning. For heavier cleaning, MSR’s tent-care guidance recommends warm water, a sponge, and mild non-detergent soap, followed by thorough rinsing and complete air drying.
- Shake or rinse away loose dirt and debris.
- Spot-clean only where necessary.
- Use the cleaner recommended by the tent manufacturer.
- Avoid bleach, harsh detergent, machine washing, and machine drying unless the manufacturer specifically permits them.
- Air-dry the tent completely before long-term storage.
Pay special attention to the floor, seams, corners, pole sleeves, and areas where wet gear repeatedly touches the fabric.
Storage and Inspections
Never store the tent wet. Trapped moisture can encourage mildew and accelerate deterioration of waterproof coatings.
For long-term storage, keep the tent in a cool, dry place away from direct sunlight and excessive heat. If the manufacturer recommends loose storage in a breathable bag instead of leaving the tent compressed in its travel sack, follow that guidance.
Before the next ski trip, inspect:
- pole sections and connectors;
- guy lines and tensioners;
- stakes and snow anchors;
- zippers and buckles;
- fabric tears and abrasion;
- floor and fly coatings;
- seams and seam tape;
- vents and mesh;
- repair kit contents.
Frequently Asked Questions
What should I know before buying a tent for a ski trip?
Match the tent to the worst realistic weather on your route. Compare season rating, pole structure, actual floor dimensions, packed weight, vestibule space, ventilation, snow anchoring, fly coverage, setup complexity, repairability, and the manufacturer’s intended use. Also consider avalanche exposure and campsite regulations before assuming any shelter makes a location safe.
What are four common tent shapes?
Common shapes include dome, geodesic, tunnel, and ridge or A-frame designs. For winter use, geometry should be judged by the complete pole structure and intended conditions rather than the shape name alone. Domes and geodesic tents often offer strong static snow-load performance, while tunnel tents can provide excellent usable space for their weight.
What is the best tent for a beginner winter camper?
A beginner should choose the simplest shelter that safely matches the planned conditions. For snow camping or trips where substantial wind or snowfall is possible, a straightforward four-season tent with a predictable pole layout, good ventilation, reliable guy points, and easy-to-use doors is preferable to a highly specialized ultralight shelter.
How much should a good ski-camping tent cost?
Serious four-season ski-touring and mountaineering tents usually cost several hundred dollars. As a September 2026 U.S. reference, current MSR four-season models extend from roughly the high-$600 range into the $900 range. Other manufacturers vary, so compare structural capability, weight, warranty, repair support, and intended use rather than buying to one price target.
Can I use a 3-season tent for winter ski camping?
Sometimes, but only in appropriately mild and sheltered conditions. A robust three-season or extended-season tent may work below treeline when heavy snowfall and severe wind are not expected. For exposed terrain, snow camping, strong wind, or substantial accumulation, use a shelter specifically designed for four-season winter conditions.
What waterproof rating does a winter tent need?
There is no universal millimeter rating that automatically makes a tent winter-ready. Hydrostatic-head numbers should be considered with fabric construction, floor design, seam treatment, rainfly coverage, pole strength, ventilation, and the manufacturer’s intended-use rating. A dedicated four-season ski tent can use different waterproof ratings for its fly and floor.
Can I use a camp stove or heater inside my ski tent?
Do not use ordinary fuel-burning camp stoves, portable gas heaters, charcoal devices, or similar combustion equipment inside a normal tent. They can produce deadly carbon monoxide and create a fire hazard. Cook outside in a properly ventilated location and follow the equipment manufacturer’s safety instructions.
Conclusion
The best tent for a ski trip is the one that matches your route, weather exposure, group size, and transportation method. In true winter conditions, prioritize a strong four-season structure, dependable anchors, usable ventilation, adequate gear space, and a setup you can manage in poor weather. Do not let one waterproof rating, weight target, capacity label, or low price override the complete shelter design. Pair the tent with an appropriate winter sleep system, choose a safe campsite, and maintain the shelter carefully after every trip.
Sources
- MSR Access 2 Four-Season Ski Touring Tent — current ski-touring tent weight, packed size, construction, and waterproof specifications.
- Hilleberg — Choosing the Right Tent — all-season strength, sizing, dome-versus-tunnel considerations, and mobile versus base-camp use.
- Yellowstone National Park — Winter Backcountry Camping — winter shelter, ventilation, route hazards, equipment, and campsite guidance.
- Avalanche.org — Identify Avalanche Terrain — slope angles, connected terrain, avalanche runouts, and terrain traps.
- CDC — Carbon Monoxide Poisoning Basics — carbon-monoxide risks from portable fuel-burning equipment.
- MSR Tent Cleaning and Storage Guidance — cleaning, drying, mildew prevention, and long-term storage.
