
A multi cooker can handle both rice and homemade yogurt, but the two jobs need very different settings. Rice depends on the correct liquid ratio, pressure time, and release method, while yogurt depends on clean equipment, controlled milk temperatures, live cultures, and several hours of incubation. Because programs vary between appliances, your model manual should always take priority over generic timing charts.
Quick Answer
For white jasmine or basmati rice, a 1:1 rice-to-water ratio is a useful pressure-cooker starting point, with roughly 3–5 minutes at high pressure and about 10 minutes of natural release. For yogurt, heat milk to about 180–185°F, cool it to 108–115°F, add live culture, incubate 6–10 hours, then refrigerate promptly.
Key Takeaways
- Rice ratios and pressure times are not universal; grain type and multicooker model matter.
- A tested Instant Pot starting point is 1:1 water for jasmine rice, 3 minutes at high pressure, and a 10-minute natural release.
- For standard homemade yogurt, heat milk to about 180–185°F and cool it to 108–115°F before adding starter.
- Use fresh plain yogurt with live cultures or a packaged yogurt starter, and keep all yogurt equipment very clean.
- Refrigerate finished yogurt at 40°F (4°C) or below and use it within about 14 days.
At a Glance
| Time Required | Rice: usually about 15–30 minutes total including pressure buildup and release. Yogurt: about 6–10 hours incubation plus chilling time. |
| Difficulty | Easy once the correct program, temperatures, and ratios are known. |
| Tools Needed | Multi cooker, measuring cup, rice paddle or fork; for yogurt, also use a food thermometer, clean spoon or spatula, and clean storage containers. |
| Cost | Low if you already own the cooker; the main costs are rice or milk plus a small amount of yogurt starter. |
How to Cook Rice in a Multi Cooker
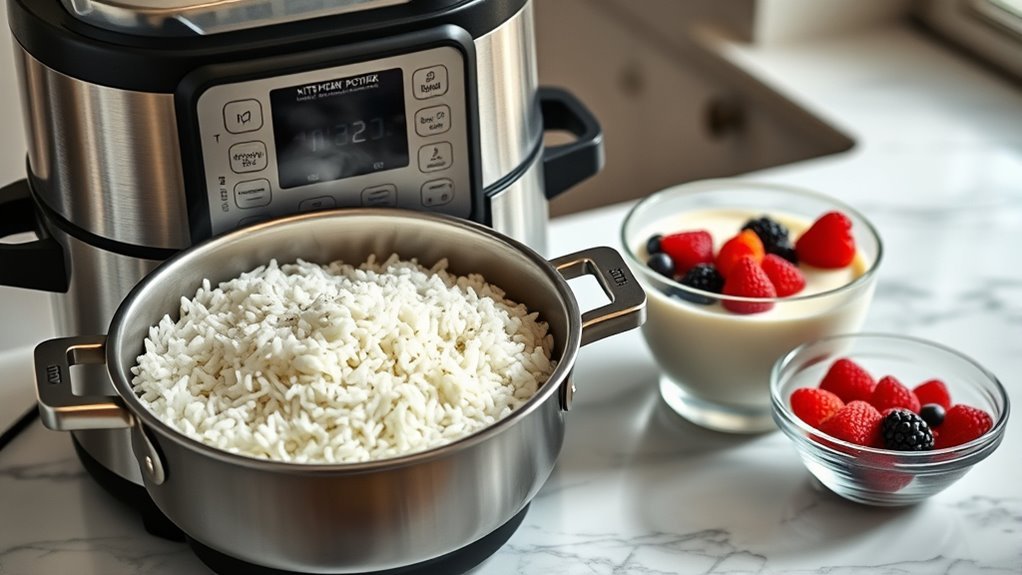
Cooking rice in a multi cooker starts with identifying the grain and the cooking program. Do not assume that every Rice preset uses the same pressure level or time. If your model has a dedicated Rice or Grain program, follow its manual. If you use manual pressure cooking, start with a tested recipe for that rice variety.
For example, Instant Pot’s basic jasmine rice method uses equal volumes of rinsed jasmine rice and water, 3 minutes of pressure cooking, and a 10-minute natural release. Its basic basmati method also uses a 1:1 ratio but cooks for 5 minutes before a 10-minute natural release. These are useful starting points, not universal specifications for every grain or appliance.
For pressure-cooked white rice, measure by volume with the same cup for both rice and water, then adjust only after testing the manufacturer’s recommended method for your grain and appliance.
Step 1: Rinse and Drain the Rice
Rinse jasmine, basmati, and many other white rices under cool running water until the runoff becomes noticeably clearer. Rinsing removes loose surface starch that can make cooked grains stick together. Drain well so leftover rinse water does not unintentionally change the measured liquid ratio.
Step 2: Add Rice and Water
Add the drained rice and measured water to the inner pot. For the jasmine and basic basmati examples above, equal volumes of rice and water are used. Other varieties may require different ratios, so check the model manual or a tested recipe before changing grains.
Step 3: Choose the Correct Program
If you are following a manual Pressure Cook recipe, use the pressure level and time specified by that recipe. A practical manufacturer-tested example is 3 minutes on High for jasmine rice or 5 minutes for the basic basmati recipe.
If you instead use the appliance’s automatic Rice preset, let that program control the cycle as the manual directs. Do not assume the preset is equivalent to manually programming High Pressure for the same number of minutes.
Step 4: Let the Pressure Release as Directed
For the jasmine and basic basmati examples, allow about 10 minutes of natural pressure release. Then carefully vent any remaining pressure before opening the lid. Natural release continues cooking the grains gently and can reduce starch spray compared with immediately venting a very starchy pot.
Warning: Rice expands during pressure cooking. Instant Pot advises keeping expanding foods such as rice at or below the inner pot’s halfway mark. Keep your face and hands away from the steam outlet when releasing remaining pressure, and never force the lid open while the cooker is pressurized.
Step 5: Fluff and Check the Texture
Open the lid only after pressure is fully released. Fluff the rice gently with a fork or rice paddle and let excess steam escape for a minute or two. Properly cooked rice should be tender with no pool of water at the bottom.
Pro Tip: Change only one variable at a time when fine-tuning rice. If it is slightly firm, add a little more water next time or extend the natural release. If it is mushy, reduce the water slightly before changing the pressure time.
What About Brown Rice?
Brown rice needs substantially more cooking than white jasmine or basmati rice because the bran layer remains intact. Manufacturer recipes vary here too. For example, an Instant Pot brown-rice recipe uses a 1:1 water ratio and 25 minutes at high pressure. Other official recipes use longer programs. Follow the recipe written for your model instead of applying a white-rice time to brown rice.
Can You Convert Slow-Cooker Rice Recipes?
A slow-cooker rice recipe should not be converted merely by reducing its cooking time. Pressure cookers need enough thin liquid to create steam, have strict fill limits, and cook under very different conditions. Use a pressure-cooker recipe designed for the same type and quantity of rice rather than guessing at a conversion.
How Multi Cooker Yogurt Works
A multi cooker with a true Yogurt program can maintain the warm environment needed for fermentation. Standard homemade yogurt generally follows four stages: heat the milk, cool it to starter-friendly temperature, add live culture, and incubate without disturbing it.
University of Illinois Extension recommends heating milk to about 180–185°F (82–85°C), cooling it to 108–115°F (42–46°C), adding starter, and incubating it in that same warm range for approximately 6–10 hours.
Standard Heated Yogurt Method
- Clean the equipment. Wash the inner pot, thermometer, spoon, containers, and anything else that will touch the milk or starter.
- Add pasteurized milk. Whole, reduced-fat, or low-fat dairy milk can be used, although texture will vary.
- Heat to 180–185°F. Use the appliance’s Yogurt/Boil program if available, and confirm the temperature with a food thermometer.
- Cool to 108–115°F. Do not add the starter while the milk is still near 180°F because excessive heat can damage the live culture.
- Add starter. Mix in fresh plain yogurt labeled as containing live cultures, or use a commercial yogurt starter according to its directions.
- Incubate undisturbed. Hold the yogurt in the recommended temperature range for roughly 6–10 hours. A longer incubation generally develops more acidity and tang.
- Refrigerate promptly. Once the yogurt has set, refrigerate it at 40°F (4°C) or below. Chilling also firms the texture.
Heating the milk is not simply about “pasteurizing” it again. The high-temperature step also changes milk proteins in ways that help yogurt form a firmer gel and retain water. Washington State University Extension notes that heating milk to around 180°F denatures whey proteins and improves yogurt viscosity and texture.
Warning: Use clean equipment and pasteurized milk, keep the yogurt within the temperature range required by your recipe, and refrigerate the finished batch promptly. If yogurt develops mold, unusual discoloration, or an obviously spoiled odor, discard it rather than tasting it.
What Is the Cold Start Method?
Some tested multicooker recipes use ultra-pasteurized or ultra-filtered milk and skip the traditional 180°F heating step. This is often called a Cold Start or no-boil method. Instant Pot, for example, publishes a no-boil yogurt recipe using ultra-filtered milk and yogurt with active cultures.
Cold Start should not be treated as permission to skip heating with any milk. Use it only when the milk, starter, and multicooker recipe are specifically suitable for that process. If your model manual does not support yogurt fermentation, do not assume its Keep Warm setting will hold the correct temperature.
Best Milk for Multi Cooker Yogurt
Whole dairy milk is a dependable choice when the goal is naturally rich, creamy yogurt because its higher fat content gives the finished batch a fuller mouthfeel. It is not mandatory, however. Lower-fat milk can also ferment successfully.
Milk selection mainly changes texture:
- Whole milk: usually produces rich, creamy yogurt without additional fat.
- Reduced-fat or low-fat milk: works well but may produce a lighter or thinner texture.
- Nonfat dry milk powder: can be added in tested recipes to increase milk solids and produce firmer yogurt.
- Ultra-pasteurized or ultra-filtered milk: may be suitable for certain tested Cold Start recipes.
- Plant-based milk: requires a recipe designed for that specific base because culture activity, available sugars, protein content, and thickening needs differ from dairy milk.
Note: The best milk depends on the desired texture and the recipe. Whole milk is convenient for naturally creamy dairy yogurt, while plant-based yogurt should follow a tested formula written for the particular milk being used.
[Amazon Products Picked for You]

Effortless to Make at Home: Making yogurt at home is simple and rewarding. Heat 2 liters of your preferred cow's milk to 82°C (180°F), cool to 42°C (108°F), mix in the starter culture with 1 cup of the cooled cow's milk, pour everything into your yogurt maker and incubate for 8 hours. Chill for at least 2 hours, and enjoy fresh, creamy yogurt anytime!

Effortless to Make at Home: Making yogurt at home is simple and rewarding. Heat 2 liters of your preferred cow's milk to 82°C (180°F), cool to 42°C (108°F), mix in the starter culture with 1 cup of the cooled cow's milk, pour everything into your yogurt maker and incubate for 8 hours. Chill for at least 2 hours, and enjoy fresh, creamy yogurt anytime!

Easy Homemade Yogurt: Make your own creamy yogurt at home with our simple starter powder, designed for hassle free preparation and reliable results every time.
Improve Yogurt Texture With Add-Ins
Yogurt texture can be changed with milk choice, milk solids, straining, cream, or recipe-specific sweeteners. The safest way to learn your multicooker’s yogurt cycle is to make the first batch with milk and starter only, then adjust later batches after you know the base method sets correctly.
Heavy cream can make a dairy batch richer when used in a tested recipe. Nonfat dry milk powder is another established option for adding milk solids and improving body without adding as much fat.
Sweetened condensed milk is used in some dessert-style yogurt recipes and adds both sweetness and milk solids. Because sugar and other ingredients can affect a recipe, follow a tested formula rather than adding a large amount by guesswork before fermentation.
Vanilla extract can be added according to a tested flavored-yogurt recipe or stirred into chilled yogurt afterward. For the most predictable first batch, ferment plain yogurt and flavor it after chilling.
Fruit, jam, honey, granola, and other toppings are easiest to control when they are added after fermentation or at serving time.
Fruit or jam is especially easy to add after the yogurt has chilled. Keeping the main batch plain also allows each serving to be customized without changing the fermentation conditions.
Pro Tip: For thicker Greek-style yogurt, chill the finished yogurt first, then strain it in the refrigerator through a fine strainer or cheesecloth until it reaches the texture you prefer.
[Amazon Products Picked for You]

Hoosier Hill Farm Instant Nonfat Dry Milk Powder is made from 100% hormone-free, fat-free milk. It’s great to keep on hand for cooking, baking, or any time you need a refreshing glass of milk. High in protein and rich in nutrients, this convenient instant milk powder has a sweet, pleasing flavor, just like fresh milk. Nonfat milk powder is also an easy, healthy addition to smoothies, energy bites, oatmeal, and your favorite baked goods.

Adds Calcium and Vitamins A D to your smoothies and shakes SNAP and EBT Eligible item

Fortified with Vitamins A & D.
How to Tell When Rice and Yogurt Are Done
Rice is ready after the programmed cooking cycle and the release period specified by the recipe. For the jasmine and basic basmati methods described above, that means completing the pressure cycle, allowing about 10 minutes of natural release, venting the remaining pressure safely, and then opening the lid.
Properly cooked rice should have tender grains and no standing water. The grains may be separate or slightly sticky depending on the rice variety, so “not sticky” is not a universal doneness test.
Yogurt follows a different timetable. Home-yogurt guidance commonly uses about 6–10 hours of incubation. It should develop a cohesive set and a pleasantly tart aroma. Longer fermentation usually creates a more pronounced tang.
After incubation, refrigerate the yogurt rather than repeatedly stirring or tasting it while warm. Chilling slows fermentation and helps the gel become firmer.
Troubleshooting Multi Cooker Rice and Yogurt
[Amazon Products Picked for You]
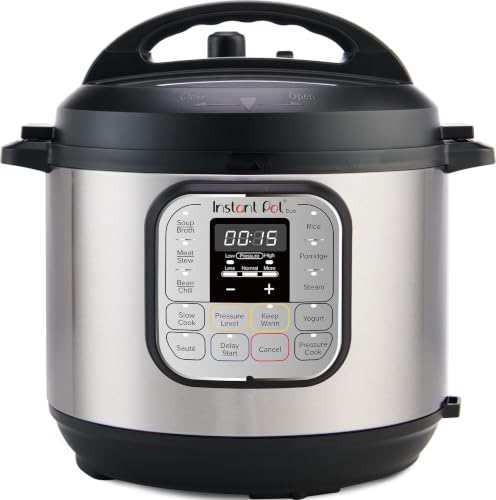
7 Cooking Functions: Pressure cook, slow cook, sauté, steam, make rice, yogurt, or simply keep your meal warm—all in one appliance.

7 Cooking Functions: Pressure cook, slow cook, sauté, steam, make rice, yogurt, or simply keep your meal warm—all in one appliance
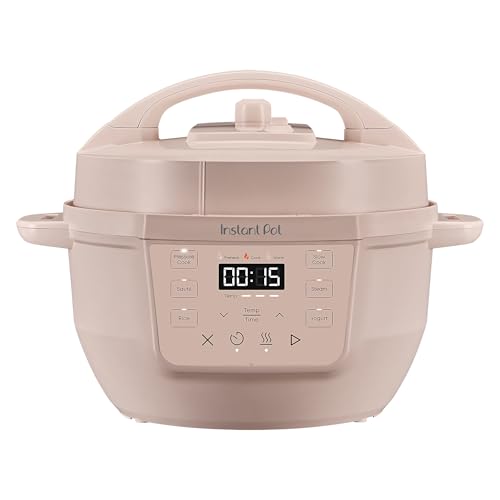
7 Cooking Functions: Pressure cook, slow cook, sauté, steam, cook rice, make yogurt, or keep your meals warm, all in one compact device.
Rice Is Mushy
Too much liquid is a common cause. Check that rinsed rice was drained thoroughly and that the rice and water were measured with the same cup. If the manufacturer’s recipe was followed exactly and the rice is still too soft, reduce the water slightly on the next batch rather than making several changes at once.
Rice Is Hard or Dry
The rice may need slightly more liquid, a longer natural release, or a different cooking time for that grain. Confirm that the cooker actually reached pressure and that the sealing ring and valve were installed correctly.
The Cooker Shows a Burn or Overheat Warning
Food stuck to the bottom, insufficient thin liquid, very thick sauces, or an improperly assembled cooker can trigger a warning. Stop and follow the appliance manufacturer’s troubleshooting instructions rather than continuing to force the cycle.
Yogurt Is Thin or Did Not Set
Possible causes include inactive starter, adding starter while the milk was too hot, incubation that was too cool, insufficient fermentation time, or equipment carrying detergent or unwanted microbes. Use a fresh live culture and verify temperatures with a thermometer.
Yogurt Has Whey on Top
A small amount of yellowish whey can be normal. Stir it back in for a looser yogurt or strain some away for a thicker texture. Excessive separation can result from disturbing the yogurt while it sets or from temperature problems.
Yogurt Is Too Sour
Longer incubation generally produces more acidity. For a milder batch, begin checking near the earlier end of the recipe’s incubation range and refrigerate the yogurt once it has set.
Frequently Asked Questions
How Long to Cook Rice in a Multicooker?
It depends on the rice and appliance. One current Instant Pot method uses 3 minutes at high pressure plus a 10-minute natural release for jasmine rice, while its basic basmati method uses 5 minutes plus a 10-minute natural release. Brown rice generally takes much longer. Follow a tested recipe for your grain and model rather than using one time for every rice.
Can I Use a Rice Cooker for Yogurt?
Only if the rice cooker has a yogurt program or another manufacturer-approved mode that can hold the required fermentation temperature steadily. A basic Keep Warm mode may run too hot. Check the manual instead of assuming that every rice cooker can safely incubate yogurt.
What Are the Common Problems With Multicookers?
Common problems include rice that is too wet or too firm, Burn or overheat warnings, steam leaks, incorrect sealing, and yogurt that fails to set. Most issues come from using the wrong liquid ratio, choosing the wrong program, improper lid or sealing-ring setup, inaccurate yogurt temperatures, or an inactive starter.
What Is the Point of a Multi Cooker?
A multi cooker combines several controlled cooking functions in one appliance. Depending on the model, those may include pressure cooking, rice or grain programs, slow cooking, steaming, sautéing, and yogurt incubation. Its main practical benefit is being able to perform several different cooking methods without separate appliances.
What Yogurt Can I Use as a Starter?
Use fresh plain yogurt that states it contains live or active cultures, or use a packaged yogurt starter according to its instructions. Avoid using a product that has been heat-treated after culturing because the bacteria needed for fermentation may no longer be active.
How Long Does Homemade Yogurt Last in the Refrigerator?
Keep homemade yogurt refrigerated at 40°F (4°C) or below and use it within about 14 days. USDA guidance gives a general refrigerated storage range of one to two weeks for yogurt, while University of Illinois Extension recommends eating homemade yogurt within 14 days.
Conclusion
A multi cooker can make both rice and yogurt reliably when each food is treated as a separate process. For rice, identify the grain, use a tested water ratio and program, allow the specified pressure release, and adjust only after trying the baseline method. For yogurt, focus on clean equipment, accurate temperatures, active culture, undisturbed incubation, and prompt refrigeration. Whole milk produces an especially creamy dairy yogurt, while lower-fat and alternative milks require their own texture adjustments. Following model-specific instructions instead of relying on one universal setting gives the most consistent results.
Sources
- Instant Pot — Basic Jasmine Rice — manufacturer example for rice-to-water ratio, pressure time, rinsing, and natural release.
- Instant Pot — Frequently Asked Questions — pressure-release guidance and pressure-cooker fill limits for expanding foods such as rice.
- University of Illinois Extension — Making Yogurt at Home — milk heating, cooling, incubation temperatures, fermentation time, and refrigerated storage.
- Washington State University Extension — Yogurt Made Simple — yogurt heating, starter temperature, sanitation, texture, and troubleshooting guidance.
- USDA — Dairy Product Refrigerator Storage — refrigerated yogurt storage guidance.
