
Precise liquid measurement helps you cook, bake, mix drinks, and scale recipes with fewer surprises. A small splash may not matter in soup, but it can change the texture of cake batter, bread dough, custard, syrup, or salad dressing. When you use the right tool, read the mark correctly, and pour with control, you get more consistent results every time.
Liquid measuring also matters outside the kitchen. Labs, pharmacies, and manufacturing settings all depend on accurate volume or weight because small errors can change safety, strength, or repeatability. You do not need laboratory tools for everyday cooking, but the same basic idea applies: measure with care, choose the right unit, and avoid guessing when a recipe depends on balance.
Quick Answer
To measure liquids accurately, use a clear liquid measuring cup, place it on a flat surface, pour slowly, and read the bottom of the meniscus at eye level. For sticky or high-precision liquids, weigh the ingredient with a kitchen scale and use the tare function.
Key Takeaways
- Precision in liquid measurements helps you get consistent texture, flavor, and structure in cooking and baking.
- Liquid measuring cups, measuring spoons, jiggers, graduated cylinders, and kitchen scales all serve different purposes.
- Read clear cups at eye level and use the bottom of the meniscus, not the highest edge of the liquid.
- Weight is often more reliable than volume for sticky liquids such as honey, molasses, syrup, and oil.
- Temperature and viscosity can affect how liquids pour, settle, and measure, especially in precise recipes.
At a Glance
| Time Required | Less than 1 minute for most kitchen measurements |
| Difficulty | Easy for home cooking; moderate for baking and high-precision work |
| Tools Needed | Liquid measuring cup, measuring spoons, kitchen scale, jigger, funnel, or graduated cylinder |
| Cost | Usually low; most kitchens already have the basic tools |
Why Precision in Liquid Measurements Matters
Precision in liquid measurements is a cornerstone of successful cooking and baking. The accuracy with which you measure ingredients can significantly influence the outcome of a recipe. Even slight deviations in the amount of liquid can change flavor, texture, thickness, browning, or how well a dish sets.
In baking, the balance between wet and dry ingredients is especially important. Too much liquid can make a cake dense, gummy, or slow to set. Too little liquid can create a dry, crumbly texture. This precision is not only a preference. It helps the chemical reactions in baking happen as intended.
Precision in liquid measurements also extends beyond the kitchen. In fields such as pharmaceuticals and chemistry, accurate liquid measurement helps protect safety and consistency. A small dosage error can affect patient health, while imprecise laboratory measurements can make experiments harder to repeat.
A careful liquid measurement is one of the simplest ways to make a recipe more repeatable, especially when baking, making sauces, or scaling ingredients.
Tools and Equipment for Accurate Pouring
To achieve precision in liquid measurements, the right tools and equipment are indispensable. Measuring cups and spoons are among the most common instruments found in kitchens, but not all measuring devices work the same way. Liquid measuring cups usually include a spout, a handle, and clear volume markings that you can read from the side.
These cups are often made from glass or plastic and can accommodate various volumes, making them versatile for different recipes. When using them, fill the cup to the correct line without overfilling or underfilling. Set the cup on a flat surface before you check the mark because holding it in the air can tilt the liquid and create an inaccurate reading.
Measuring spoons work well for small amounts, such as vanilla extract, lemon juice, vinegar, or oil. For cocktail recipes and bar work, a jigger gives you better control than free pouring. Jiggers usually have two sides with fixed measurements, so they help keep drinks balanced and consistent.
Digital kitchen scales have also become popular because they provide precise measurements in grams or ounces. While many cooks associate scales with dry ingredients, you can also use them for liquids. Place a bowl or cup on the scale, press tare to reset the display to zero, then pour the liquid until you reach the correct weight.
Specialized tools such as graduated cylinders and pipettes are more common in scientific settings where very fine accuracy is required. These tools allow precise dispensing of liquids and can be useful for small batches, recipe testing, candy making, flavor extracts, or laboratory work.
Pro Tip: Lightly coat a measuring spoon or cup with neutral oil before measuring honey, molasses, or syrup. The sticky liquid will slide out more cleanly, which helps reduce waste and improves accuracy.
[Amazon Products Picked for You]

ESSENTIAL KITCHEN TOOL: 2 piece set includes 1-cup, and 2-cup, measuring cups that are perfect for baking, cooking, mixing and more!
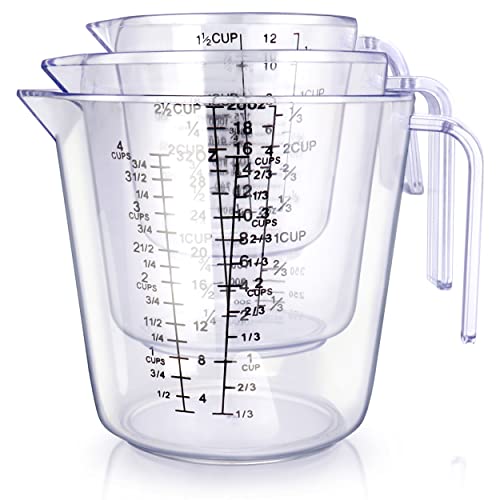
【Commonly Used 3 Size in 1 Set】The set includes 3 common sizes of measuring cups. Satisfying most cooking & baking needs; suitable for holding flour, powder, and liquid. Large(1000ml,4 cups,32 oz), medium (600ml,2.5 cups,12 oz), small(300ml,1.5 cups,20 oz).
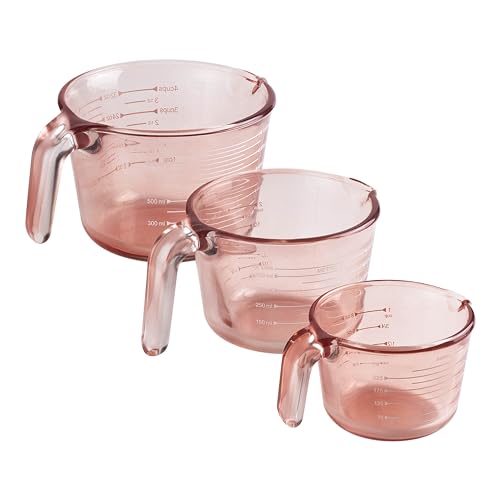
Durable Glass Measuring Cup Set: This product offers a 3 piece measuring cup set, perfect for all your cooking and baking needs. Made of high-quality colored glass, these liquid measuring cups are a must-have in every kitchen.
Understanding Different Measurement Units

Liquid measurements can be expressed in several units, and each unit serves a specific purpose depending on the recipe or setting. The most common units include milliliters (mL), liters (L), fluid ounces (fl oz), cups, pints, quarts, and gallons. Understanding these units helps you follow recipes accurately, especially when a recipe uses a different measurement system than the one you normally use.
For example, one recipe might call for 500 mL of water, while another might list 2 cups. Knowing how to convert between these units helps you keep the same ingredient ratio. This skill becomes even more useful when you double a recipe, cut a recipe in half, or use a cookbook from another country.
Conversions can be challenging when you switch between metric and U.S. customary units. In many kitchen references, 1 U.S. cup is about 237 mL, and 1 liter is about 4.23 U.S. cups. For everyday cooking, these rounded values are usually enough. For baking, candy making, or formula-style recipes, use the exact measurement system listed in the recipe when possible.
Regional cooking practices also affect which units you see. Many American recipes favor cups, tablespoons, teaspoons, and fluid ounces. Many European and international recipes use milliliters, liters, and grams. Learning both systems gives you more flexibility and helps you avoid common conversion mistakes.
Common Liquid Measurement Conversions
| Measurement | Approximate Equivalent |
| 1 teaspoon | 5 mL |
| 1 tablespoon | 15 mL |
| 1 U.S. cup | About 237 mL |
| 1 pint | 2 cups |
| 1 quart | 4 cups |
| 1 liter | About 4.23 U.S. cups |
Note: Fluid ounces measure volume, while ounces can also measure weight. Do not treat them as the same thing unless a recipe clearly says so.
Techniques for Pouring with Precision
| Technique | Precision Level |
|---|---|
| Free Pouring | Medium |
| Jigger | High |
| Measuring Cup | High |
| Weighted Pourer | High |
Mastering the art of pouring liquids with precision involves specific techniques that improve accuracy and control. One fundamental technique is to pour slowly and steadily, allowing the liquid to flow smoothly into the measuring device or container. This approach reduces splashing and lowers the chance of overfilling.
When pouring from a larger container, such as a bottle or jug, tilt the container gradually rather than abruptly. A controlled motion helps maintain a steady stream of liquid. For narrow containers, start with a small tilt and increase the angle only when you feel the pour is stable.
Another effective technique is to use a funnel when transferring liquids from one container to another. Funnels direct the flow of liquid and help prevent spills that could lead to inaccurate measurements. When using a funnel, make sure it sits securely in the receiving container so liquid does not leak around the sides.
Good posture also helps. Place the measuring cup on a flat counter, bend or crouch until the marking is at eye level, and check the liquid line from the side. If you hold the cup up to your face, your hand may tilt the cup and change the reading.
How to Read the Meniscus
The meniscus is the curved surface you see at the top of a liquid in a clear container. In most kitchen measurements, you should read the lowest point of the curve at eye level. Looking from above can make the amount seem smaller, while looking from below can make it seem larger.
- Place the measuring cup on a flat, stable surface.
- Pour the liquid slowly until it nears the target line.
- Stop pouring and let the liquid settle for a moment.
- Lower your eyes to the same level as the marking.
- Adjust the amount until the bottom of the curve meets the line.
How to Measure Liquids by Weight
Measuring by weight can be more accurate than measuring by volume, especially for sticky liquids or recipes that require consistent ratios. Use a digital kitchen scale when a recipe gives grams or ounces by weight.
- Place your empty bowl, cup, or measuring container on the scale.
- Press the tare button so the display returns to zero.
- Pour the liquid slowly into the container.
- Stop when the scale reaches the required weight.
- Tare again before adding the next ingredient, if your recipe allows it.
Common Mistakes in Liquid Measurements
Even experienced cooks can make mistakes when measuring liquids. One common error is failing to read measurements at eye level. When measuring liquids in transparent containers, align the meniscus with the measurement line from the side. Reading from above or below can create inaccuracies that affect the final outcome of a recipe.
Another frequent mistake involves using the wrong measuring tools for specific types of liquids. For example, dry measuring cups are designed to be filled to the top and leveled off. Liquid measuring cups have extra space above the markings, which makes it easier to move the cup without spilling.
Using a measuring spoon over a mixing bowl is another small habit that can cause problems. If you overpour oil, extract, or vinegar directly into the main bowl, you may not be able to remove the excess. Measure over a separate small dish first, then add it to the recipe.
Neglecting temperature and viscosity can also lead to discrepancies. Some liquids pour more slowly when cold and flow more freely when warm. Thick liquids may cling to the cup or spoon, so the amount that reaches the bowl may be less than what you measured.
Warning: Do not use kitchen measuring methods for medication dosing. Use the dosing cup, syringe, or device provided with the medicine, and follow the label or a qualified healthcare professional’s instructions.
Adjusting for Temperature and Viscosity

Temperature and viscosity play significant roles in liquid measurements and must be considered for accurate results. Viscosity refers to a liquid’s thickness or resistance to flow. Thicker liquids such as honey, molasses, corn syrup, and some oils require different handling compared with water, broth, milk, or juice.
When measuring viscous liquids, warming them slightly can reduce thickness and make pouring easier. However, avoid overheating them because too much heat can change flavor, texture, or how the ingredient behaves in a recipe. Gentle warming is usually enough for honey, syrup, or molasses.
Temperature can also affect volume because liquids may expand when heated and contract when cooled. In most home cooking, these changes are small and will not ruin a casual recipe. In baking, candy making, brewing, and scientific work, the difference matters more because precision affects structure, sweetness, concentration, or repeatability.
For thick liquids, you can improve consistency by using a flexible spatula to scrape the measuring cup or spoon. For high-precision work, weigh the liquid instead of relying only on volume. This reduces the effect of clinging, bubbles, and uneven pouring.
Tips for Mastering Liquid Measurements
To master liquid measurements, use practical habits that improve both accuracy and efficiency. First, choose measuring tools designed specifically for liquids. A clear liquid measuring cup with easy-to-read markings makes a noticeable difference, especially when measuring water, milk, broth, cream, oil, or juice.
Second, practice mise en place, which means preparing and measuring ingredients before you start cooking. This habit reduces the chance of mistakes once the heat is on or the mixer is running. It also helps you notice whether you have enough of every ingredient before you begin.
Third, keep a conversion chart nearby if you often use recipes from different countries or websites. Quick access to teaspoon, tablespoon, cup, milliliter, and liter conversions saves time and helps prevent mental math errors.
Fourth, use the tare function on a kitchen scale when measuring several liquids into the same bowl. Taring between ingredients allows you to measure each one accurately without dirtying multiple containers.
Finally, practice with different recipes. Sauces, vinaigrettes, cakes, pancakes, cocktails, custards, and bread dough all teach you something different about liquid balance. The more you measure, pour, and compare results, the more natural precision becomes.
Applications of Precision Pouring in Cooking and Baking
Precision pouring has far-reaching applications in both cooking and baking. In baking, chemical reactions are critical for achieving desired textures and flavors. Accurate liquid measurements can determine whether a cake rises properly, whether bread develops good structure, or whether a custard sets smoothly.
For example, when making bread dough, the ratio of water to flour must be controlled. Too much water can lead to overly sticky dough that fails to hold its shape during proofing. Too little water can make the dough stiff, dense, and difficult to knead.
In cooking applications such as sauces or dressings, precision pouring helps you balance flavors. A well-measured amount of vinegar or oil can turn a simple vinaigrette into a bright, balanced dressing. An imprecise pour can make the same dressing too sharp, too oily, or too bland.
Precision pouring also matters in professional kitchens where consistency is key. Chefs need to replicate dishes day after day so customers receive the same flavor, texture, and portion size each time. Home cooks benefit from the same approach when they want a favorite recipe to turn out reliably.
When Volume Is Enough and When Weight Is Better
Volume measurement works well for many everyday liquids, including water, stock, milk, juice, and vinegar. If a soup recipe calls for a cup of broth, a liquid measuring cup is usually accurate enough. The recipe has room for small variations, and the final result can often be adjusted by taste.
Weight is better when accuracy matters more. Use a scale for baking formulas, sticky sweeteners, large-batch recipes, and any recipe that lists ingredients in grams. Weight also helps when you need to scale a recipe because percentages and ratios stay more consistent.
For very small amounts, measuring spoons are usually practical. For tiny amounts below a standard spoon measurement, a dropper, pipette, or specialty measuring spoon can improve control. This can help when working with flavor extracts, food coloring, bitters, or concentrated ingredients.
[Amazon Products Picked for You]

𝗘𝗳𝗳𝗼𝗿𝘁𝗹𝗲𝘀𝘀 𝗪𝗲𝗶𝗴𝗵𝗶𝗻𝗴: Supports 5 units (oz/lb:oz/fl'oz/g/mL), tare function, and includes 2 AAA batteries for hassle-free operation

Contemporary Slim Design: Made of Stainless Steel Material; It is easy to use and clean; Provides accurate weight data with a user-friendly control panel and system; With high precision sensors to ensure correct performance and readouts

𝗠𝗮𝘅 𝗖𝗮𝗽𝗮𝗰𝗶𝘁𝘆: Weigh objects as heavy as 22 lb/10 kg and as light as 2 g in increments of 1 g
How to Troubleshoot Liquid Measurement Problems
If your baked goods turn out dense, gummy, or dry, check how you measured the liquids before changing the recipe. A tilted measuring cup, a rushed pour, or a misread line can shift the balance between wet and dry ingredients.
If your sauce is too thin, you may have added liquid too quickly or measured more than the recipe required. Simmering can reduce some sauces, but dairy-based or delicate sauces may split if overheated. Add liquids slowly and stop before the full amount if the texture looks right.
If your dressing tastes harsh, the vinegar or citrus may be too high compared with the oil. Measure both parts carefully, then adjust gradually. A small amount of sweetener, mustard, or extra oil can help bring the dressing back into balance.
If sticky liquids stay behind in the measuring cup, scrape the container well or use weight instead. Measuring by weight avoids the problem of ingredients clinging to the sides and gives you better consistency.
In summary, precision in liquid measurements is vital across various domains, from culinary arts to scientific applications, where accuracy directly impacts outcomes. By using appropriate tools and techniques while staying mindful of common pitfalls, temperature, and viscosity, you can improve your skill in measuring liquids accurately. Mastery of these principles elevates cooking and baking while building a deeper appreciation for the science behind everyday recipes.
If you are interested in smart home devices, you may also want to check out this article on the 5 Best Smart Doorbells with Video. These devices can provide added security and convenience to your home.
[Amazon Products Picked for You]

⭐ MEASURING LIQUIDS HAS NEVER BEEN EASIER – Our BPA-Free plastic measuring cups for liquids have measurements not only on the side but also at the special angled surface on the inside. That way you don‘t have to bend or squat down to look at the side measurements anymore. Just look down straight to the cup while pouring to see the exact amount.
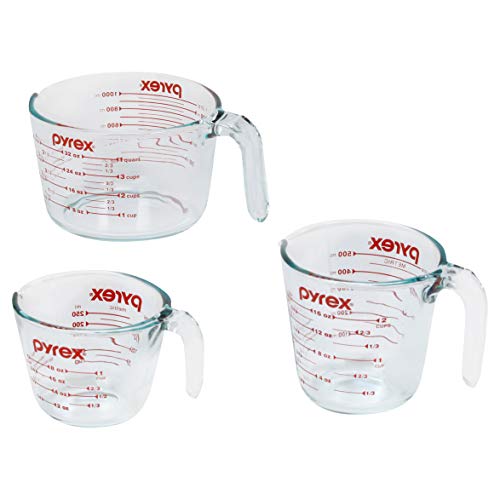
3-PIECE: Includes 1-cup, 2-cup, and 4-cup measuring cups that are perfect for baking, cooking, mixing and more. Dimensions for 1 cup: 6'' diameter x 4.5'' high. Dimensions for 2 cup: 6.5'' diameter x 4.5'' high. Dimensions for 4 cup: 8'' diameter x 6'' high.

Patented angled surface lets you read measurements from above
Related Guides
Frequently Asked Questions
What are some common tools used to measure liquids accurately?
Common tools for accurate liquid measurement include liquid measuring cups, measuring spoons, graduated cylinders, jiggers, pipettes, and kitchen scales. For most home kitchens, a clear liquid measuring cup, a set of spoons, and a digital scale cover most needs.
Why is measuring liquids accurately important?
Accurate liquid measurement helps recipes turn out consistently. It matters most in baking, sauces, syrups, cocktails, and scientific experiments, where too much or too little liquid can change texture, strength, flavor, or repeatability.
How can I measure liquids accurately using a measuring cup?
Place the measuring cup on a flat surface, pour the liquid slowly, let it settle, and read the measurement at eye level. Use the bottom of the meniscus, or curved liquid line, as your guide.
What is the difference between measuring liquids by volume and by weight?
Measuring by volume uses cups, spoons, jiggers, or cylinders to measure how much space a liquid occupies. Measuring by weight uses a scale to measure how heavy the liquid is. Weight is often more precise, especially for baking and sticky liquids.
Are there any tips for measuring liquids accurately?
Use the right tool, pour slowly, keep the measuring cup level, check markings at eye level, and use a scale when a recipe lists grams. For sticky liquids, lightly oil the measuring tool or weigh the ingredient directly.
Should I use a dry measuring cup for liquids?
You can use one in a pinch, but a liquid measuring cup is better. Dry measuring cups are meant to be filled to the top and leveled, while liquid measuring cups have side markings and extra space to prevent spills.
Is a kitchen scale more accurate for liquid measurements?
A kitchen scale is often more accurate when a recipe gives weights. It is especially helpful for baking, large batches, honey, syrup, molasses, oil, and other liquids that may cling to a measuring cup.
Sources
- NIST SI Units — supports the use of metric units such as milliliters and liters.
- NIST Approximate Conversions to U.S. Customary Measures — supports common kitchen conversion guidance.
- FDA: Measuring Your Medicine — supports the warning to use proper dosing tools for medication.
