If you’re installing a BLACK+DECKER 8,000 BTU portable air conditioner (BPP05WTB), this step-by-step guide walks you through the full setup process, from unboxing and window kit assembly to exhaust hose connection, drain plug checks, and first power-on with the LCDI safety plug. I filmed the process and captured clear photos so you can assemble and install your portable AC safely, quickly, and without guesswork.
Along the way, I’ll share practical tips for keeping the unit upright, sealing the window panel, avoiding common hose mistakes, and checking the drain plug before use. Follow the sequence below to get your Black & Decker portable air conditioner ready for a bedroom, office, rental, or small living space.
Quick Answer
To install the BLACK+DECKER BPP05WTB portable air conditioner, keep the unit upright, attach both hose adapters, snap the exhaust hose to the unit, size and seal the window panel, connect the duct, plug directly into a grounded outlet, press RESET on the LCDI plug, and start cooling mode.
Key Takeaways
- Keep the portable AC upright before use so compressor oil can settle correctly.
- Use shallow cuts when opening the box to avoid damaging tubing, wiring, or the power cord.
- Expand the exhaust hose fully, then carefully thread and snap the adapters into place.
- Seal the window kit with foam strips to reduce warm air leaks, vibration, and extra workload.
- Plug the unit directly into a grounded three-prong outlet and reset the LCDI plug before powering on.
At a Glance
| Time Required | About 20 to 45 minutes, depending on your window and how much trimming the foam needs. |
| Difficulty | Beginner-friendly, but the hose adapters and window panel may take patience. |
| Tools Needed | Box cutter or utility knife, scissors, and the included screws, foam strips, hose, adapters, and window kit. |
| Cost | No extra cost for a standard install if the included window kit fits your window. |
Affiliate disclosure:. As an Amazon Associate I earn from qualifying purchases. This article includes an Amazon affiliate link. If you buy through it, I may earn a small commission at no extra cost to you.
Table of Contents
- Step 1: Unboxing — Open carefully 📦
- Step 2: Keep the unit upright & remove protective tape ⚖️
- Step 3: Install the drain plug and inspect vents 🛠️
- Step 4: Layout parts — remote, hose, adapters 📦➡️🔧
- Step 5: Attach the hose adapters 🔩
- Step 6: Snap the hose to the unit and prepare the window kit 🪟
- Step 7: Size the window panel and secure it with screws 🪛
- Step 8: Apply foam strips and seal gaps 🧼
- Step 9: Snap the window panel into the bracket and connect the duct 🔗
- Step 10: Power considerations & first power on ⚡
- Step 11: Maintenance tips and everyday use 🧰
- Step 12: FAQ ❓
- Step 13: Final thoughts 👍
BLACK+DECKER Portable Air Conditioner
A compact portable AC for small-room cooling with a window vent kit, exhaust hose, remote, and LCDI safety plug.
Step 1: Unboxing — Open carefully 📦
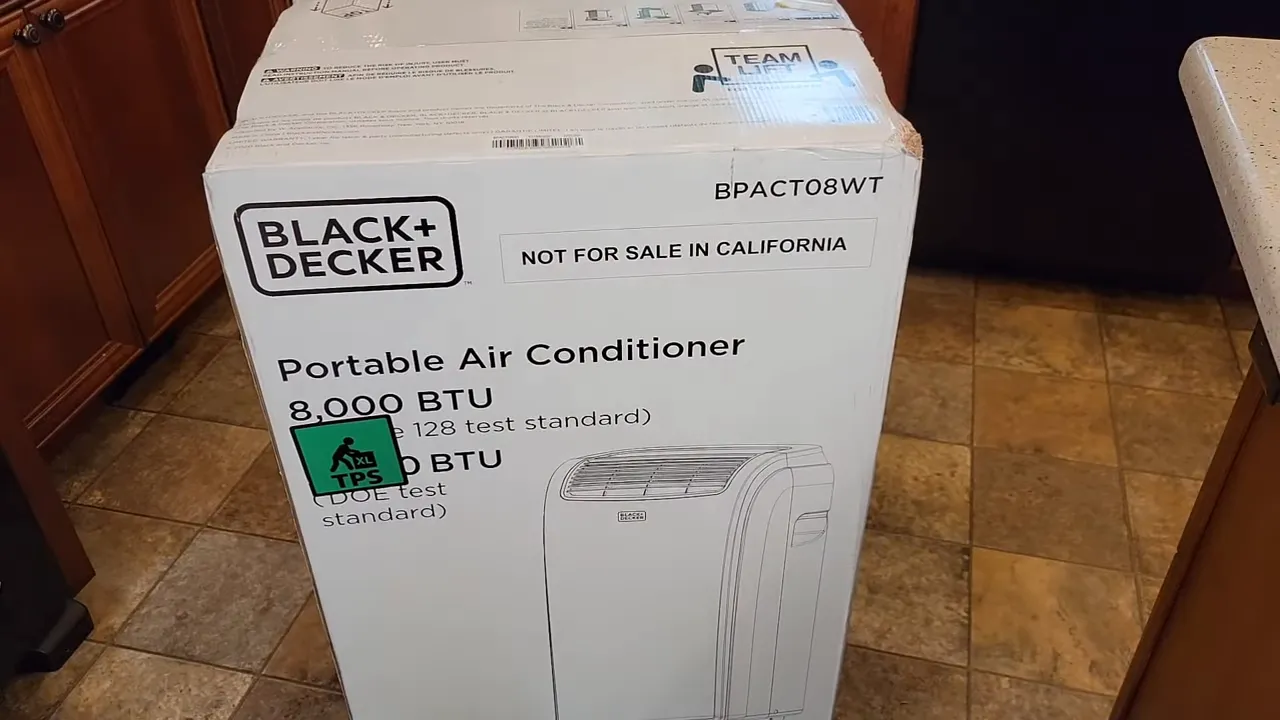
When the unit arrives, it should be packed upright in foam with straps. Before you cut anything, read the top of the box. The packaging includes directions and warnings that help you avoid damaging the unit during unboxing.
“Be very careful. Don’t let the blade go too far in. There is a tube and there is some electrical connection.”
Tools you’ll need:
- A box cutter or utility knife for shallow cuts.
- Scissors for tape, straps, and foam trimming.
Key tips:
- Cut the tape just enough to open the box. Do not plunge the blade inside.
- Guide the electrical cord through the foam opening when removing the unit so you do not tug or yank it.
- Keep the box and foam nearby until you confirm all parts are present and the unit powers on correctly.
Warning: Use only shallow cuts when opening the box. A deep blade can damage the power cord, tubing, plastic housing, or internal components.
Step 2: Keep the unit upright & remove protective tape ⚖️
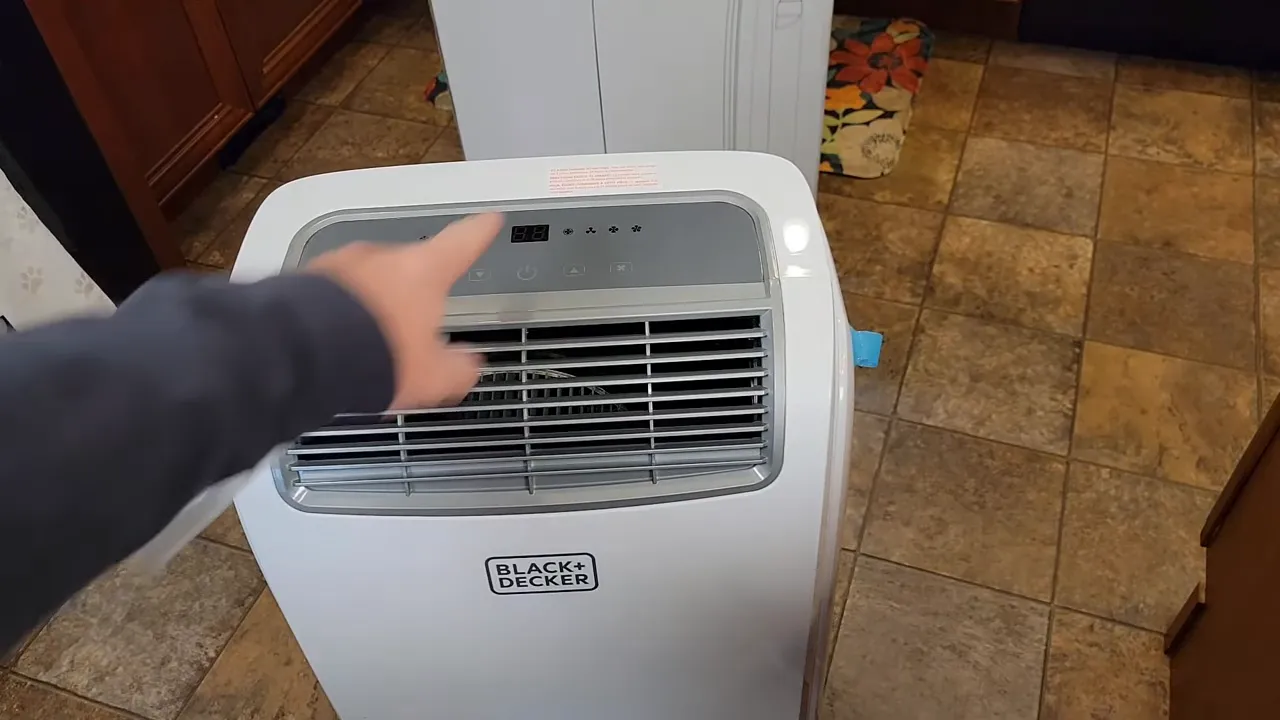
Once the portable air conditioner is out of the box, keep it upright at all times. Portable AC compressors contain oil that needs to stay in the right place. If your unit was shipped, stored, or carried on its side, let it stand upright before powering it on.
Remove the blue painter’s tape and protective plastic film from the control panel. Check around the cabinet, handles, vents, and hose connection area for any shipping tape or packing material you may have missed.
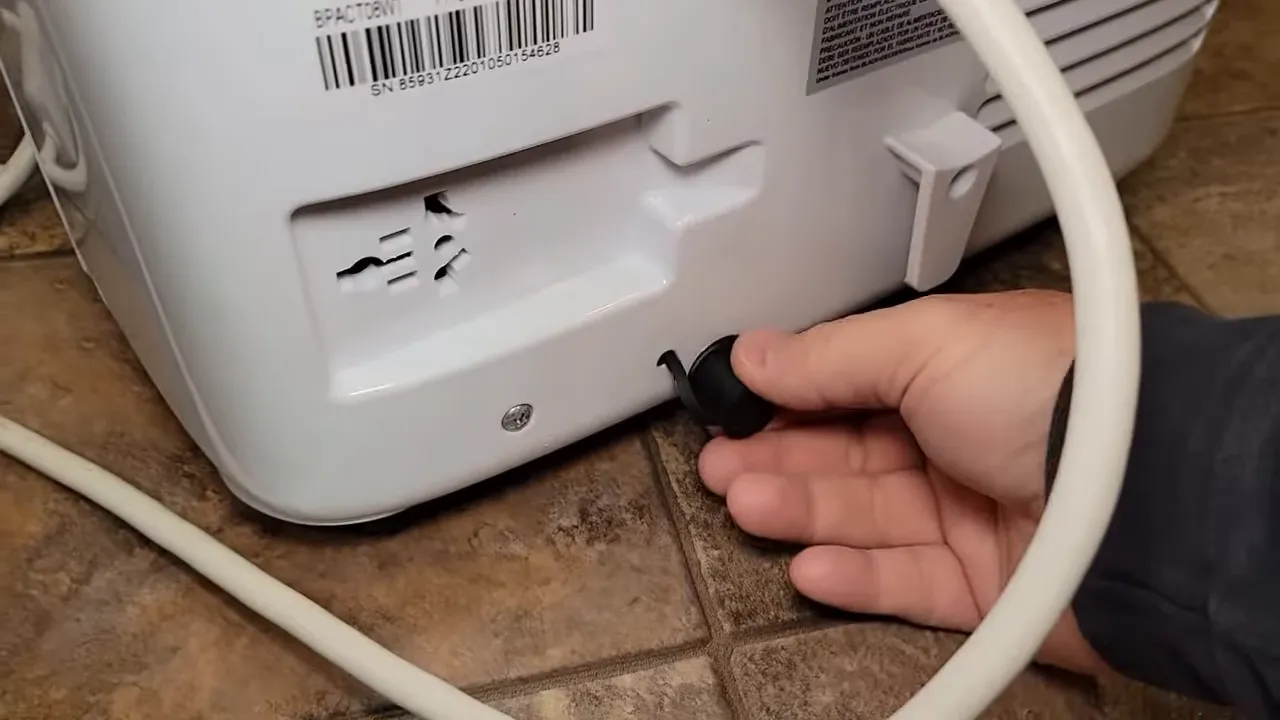
Also check the back of the unit for the drain plug. Some units may ship with the plug loose, taped, or not fully seated. You want to confirm the plug is in place before running the unit in normal cooling mode.
Step 3: Install the drain plug and inspect vents 🛠️
At the rear bottom, you’ll find the drain plug used for condensation drainage. The drain plug usually fits by friction. Push it in firmly if you plan to use the unit in normal closed-drain mode. Remove it only if you are connecting a drain hose for continuous gravity drainage and your setup allows safe water flow.
Next, inspect the intake screen. This screen collects dust over time and should be cleaned periodically. Also check the wheels and the cold air outlet on the front so you know how the cool air will move into the room.
Note: If water collects during humid weather, the unit may need draining. Always turn it off and unplug it before removing the drain plug or moving the appliance.
Step 4: Layout parts — remote, hose, adapters 📦➡️🔧
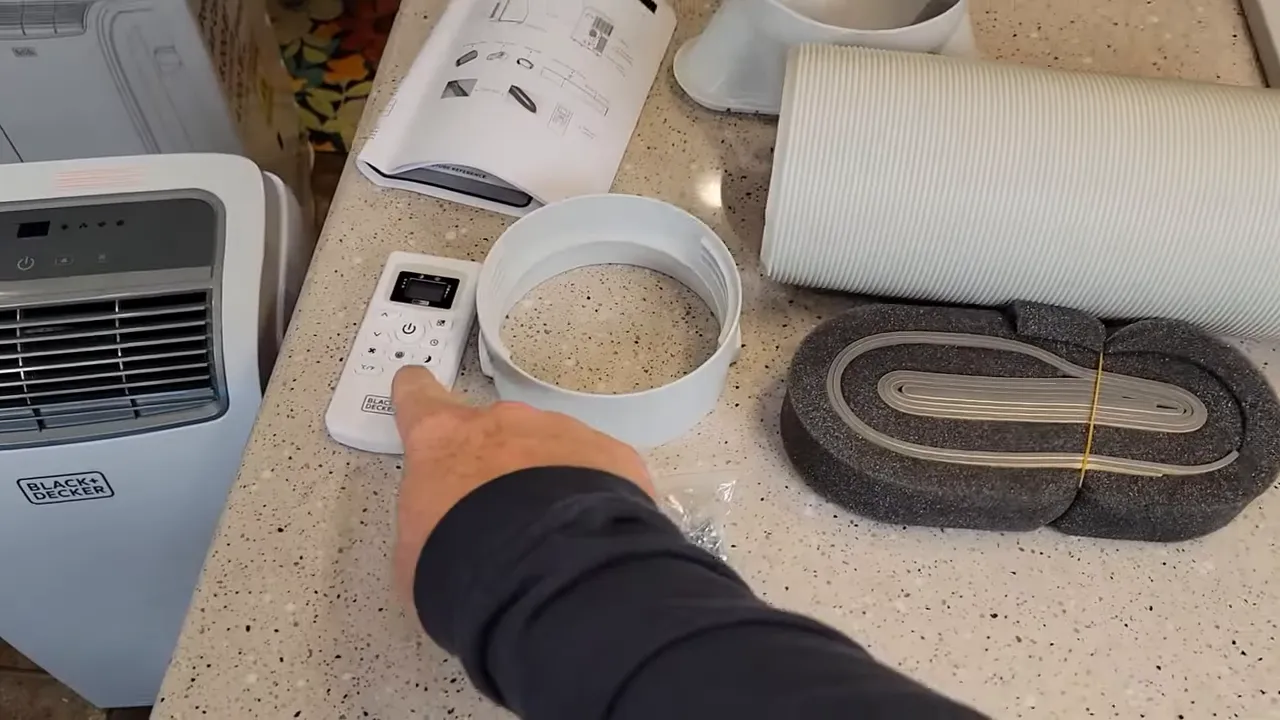
Take the window kit, exhaust hose, remote, and hose adapters out of the box. Lay everything on the floor so you can see each part before assembly. This prevents you from forcing the wrong piece into the wrong connection.
The remote uses two AAA batteries, which are not included. Install them while observing polarity so the display powers up. The exhaust hose has an accordion design, so gently extend it before attaching the adapters.
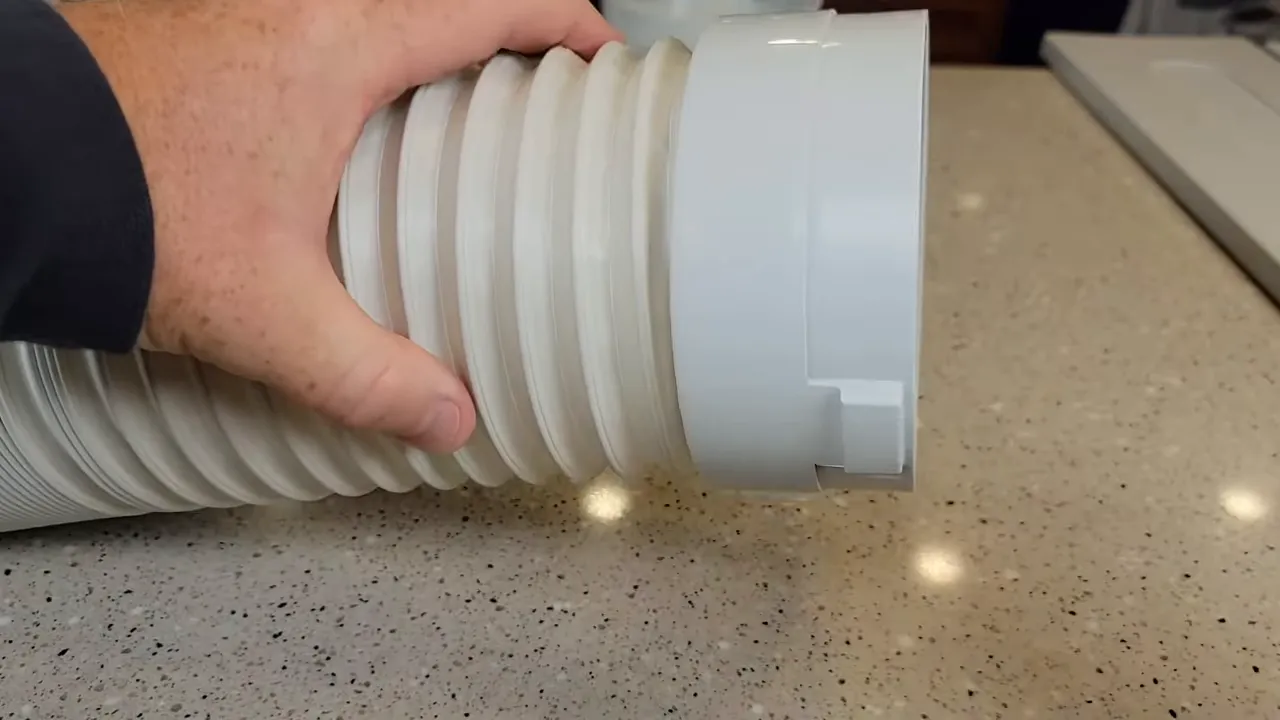
The threaded adapters screw onto the hose ends. They can be tricky to line up because the hose grooves need to catch the adapter threads evenly. Take your time here because a poorly seated adapter can leak warm air back into the room.
Step 5: Attach the hose adapters 🔩
The adapters have matching threads and grooves. To engage them properly, start with the hose fully expanded and support the end of the hose with one hand while you turn the adapter with the other.
- Expand the duct fully so the grooves are easier to see.
- Align the adapter threads with the hose grooves.
- Screw the adapter onto the hose. I found turning counterclockwise helped the threads seat into the grooves.
- Check the edge all the way around to make sure the adapter is not tilted or cross-threaded.
Repeat the same process on the other end of the hose. One end will snap onto the exhaust outlet on the portable AC. The other end connects to the window panel adapter.
Pro Tip: If the adapter keeps slipping, back it off, realign the first groove, and restart slowly. Forcing it can bend the hose edge and make the connection leak.
Step 6: Snap the hose to the unit and prepare the window kit 🪟
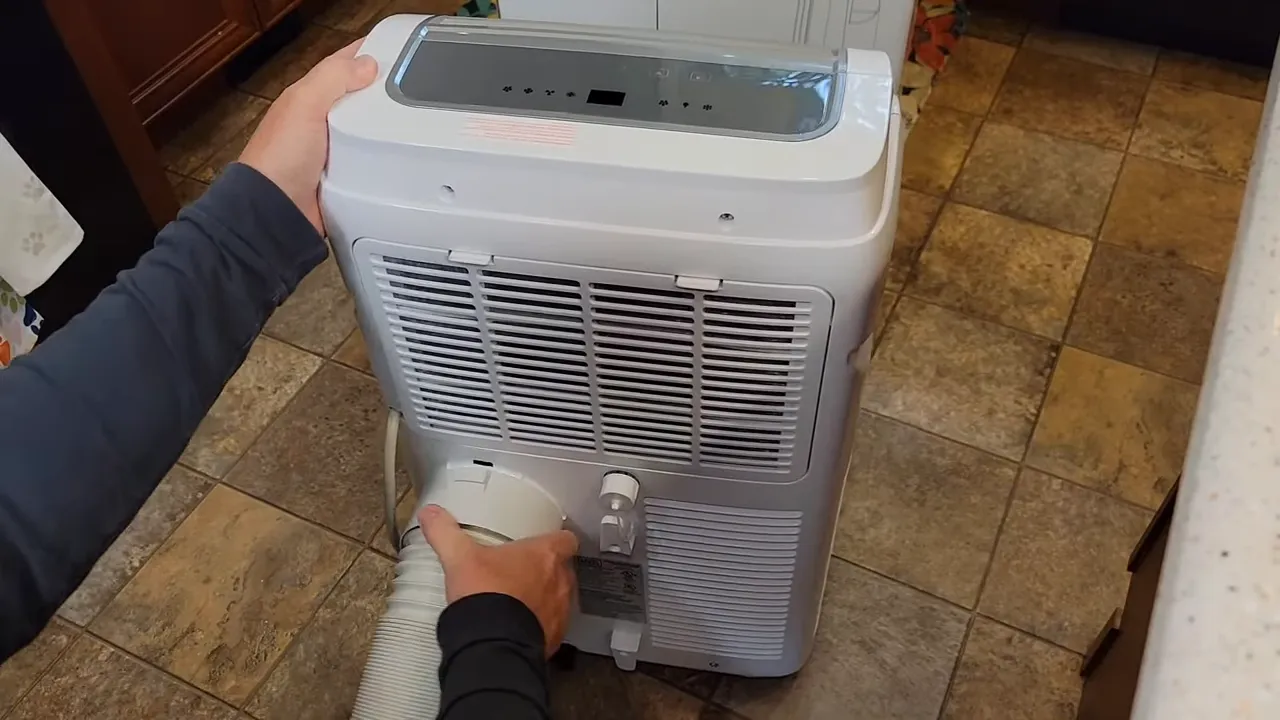
There’s a groove on the exhaust outlet of the unit. Line up the adapter and snap it into place until it feels snug. The goal is a secure connection that does not wiggle or leave a visible gap.
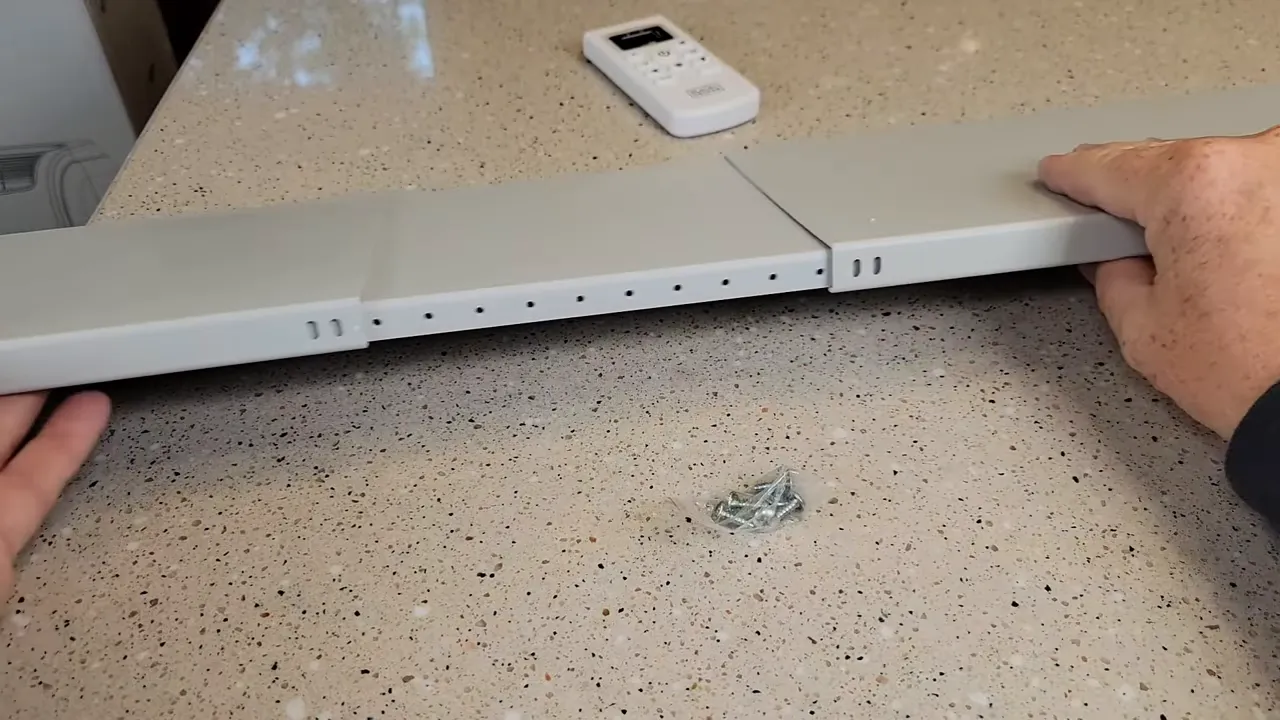
The window kit consists of sliding plastic panels. One panel has a cutout for the hose adapter and a plastic knob or screw that may be taped during shipping. Remove the tape and knob so the panel can slide and adjust to your window opening.
Before you place the panel in the window, test-fit the duct connection. This helps you understand how the hose will angle once the window kit is locked in place.
Step 7: Size the window panel and secure it with screws 🪛
Measure the opening where the exhaust panel will sit. The kit slides in and out to fit different window widths or heights, depending on whether your window opens vertically or horizontally.
Use the provided metal screws to lock the sliding pieces at the correct length. Set the panel where the window sash will close down firmly. Do not rest it too far out on the sill, because the window may not seal properly and warm air can leak back into the room.
If your window is wider or taller than the included panel range, do not run the exhaust hose through an open gap. You need a secure, sealed opening so hot exhaust air exits outside instead of circulating indoors.
Step 8: Apply foam strips and seal gaps 🧼
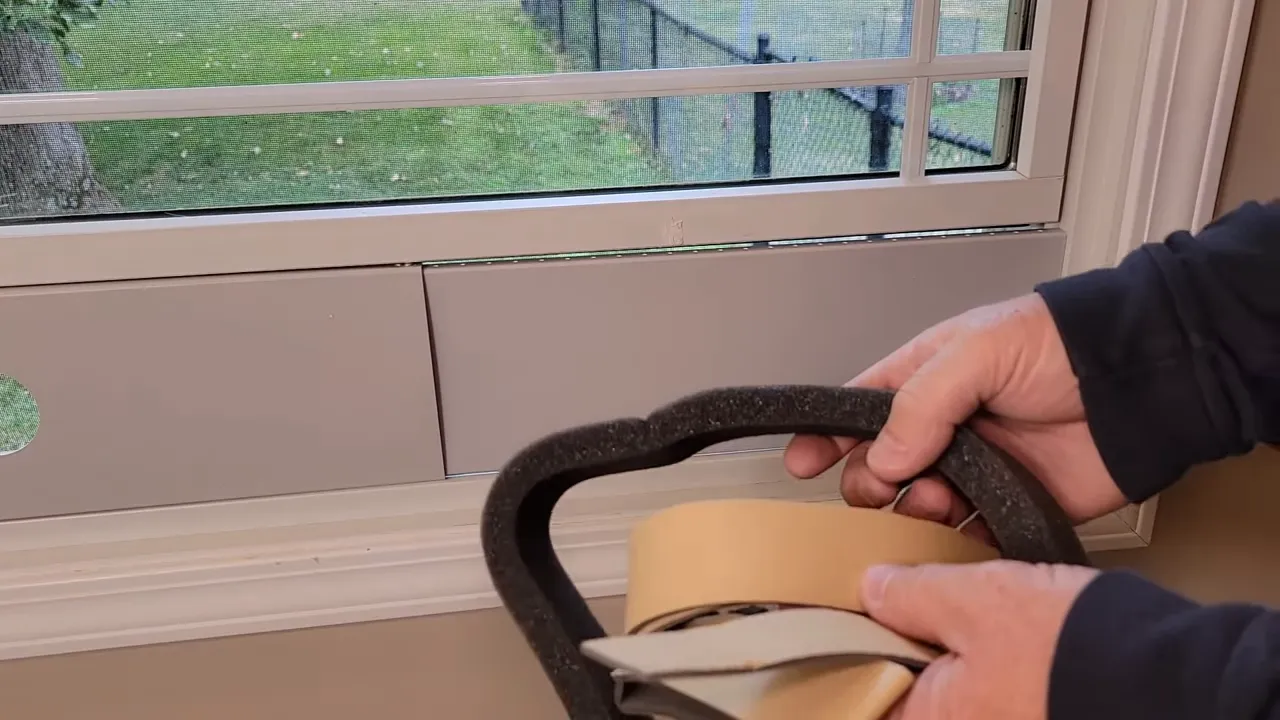
The box includes adhesive foam tape pieces. Stick the smaller foam pieces where the window panel rests to create a better seal and reduce vibration. Use the thicker foam strip for the vertical or horizontal gap left by the open window.
Good sealing matters. If warm outdoor air leaks around the panel, the AC has to work harder, the room cools more slowly, and noise may increase. Press the foam firmly into place and check both sides of the panel before connecting the hose.
- Seal the bottom or side where the panel meets the sill.
- Seal the top gap where the window remains open.
- Check around the duct connection for visible gaps.
- Make sure the window can close firmly without bending the panel.
Step 9: Snap the window panel into the bracket and connect the duct 🔗
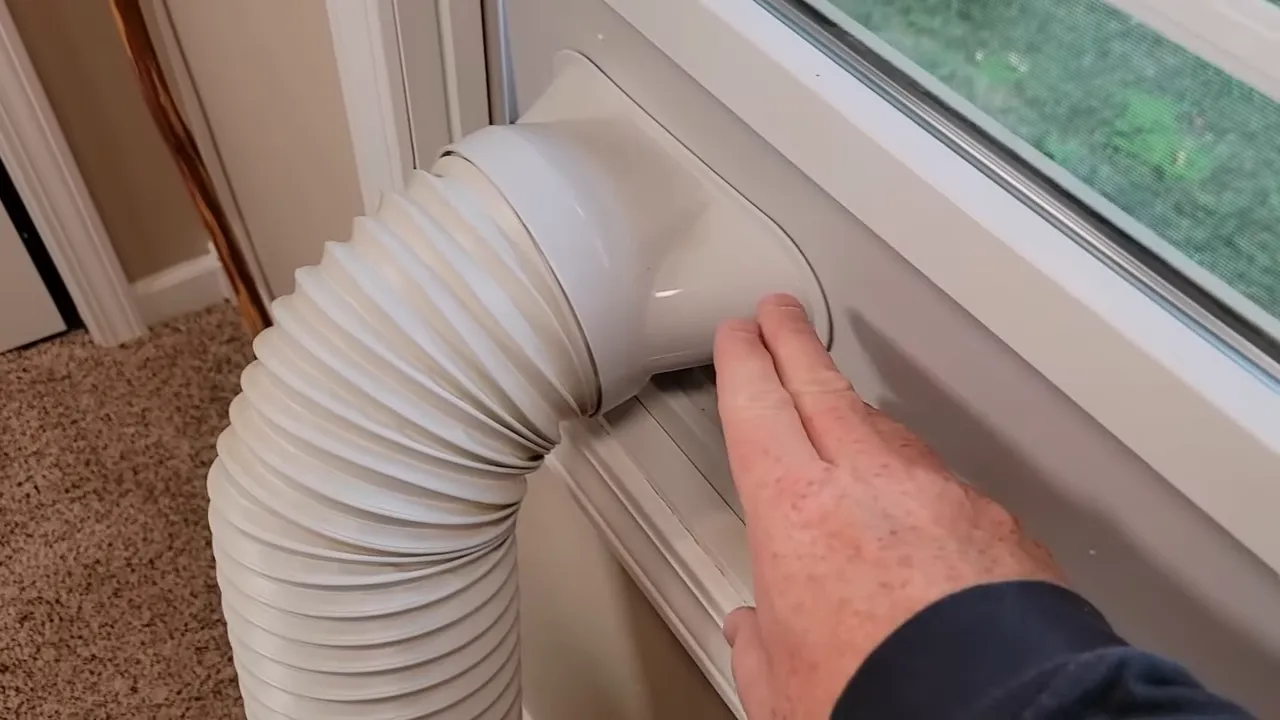
With the panel sized and sealed, snap the panel into the bracket that holds the duct adapter. This can be the trickiest part of the installation. Work slowly so you do not push the panel out of the window.
The top and bottom should click into place to form a tight connection. After the bracket is seated, connect the duct and check the full hose path. Avoid sharp bends, crushed sections, or a stretched hose that pulls against the window panel.
Allow enough space between the unit and the window. In my install, the unit needed at least about 10 inches of space to accommodate the ductwork comfortably. More space may help if your hose needs a gentle curve.
Step 10: Power considerations & first power on ⚡
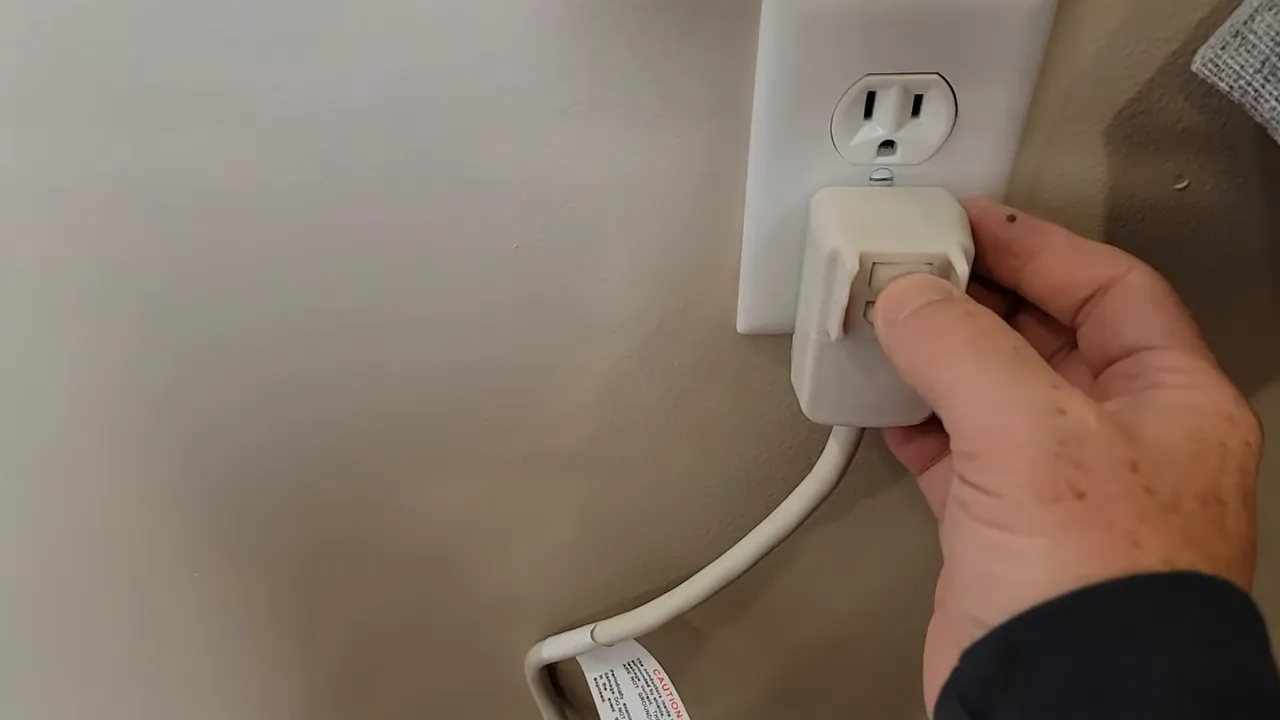
The power cord is approximately 70.8 inches, or about 6 feet. Place the unit close enough to reach a grounded three-prong outlet without stretching the cord. Plug the unit directly into the wall outlet. Do not use an extension cord or power strip.
This model uses an LCDI safety plug with TEST and RESET buttons on the plug. Press RESET before switching on the unit. Once the hose, window panel, foam seals, and drain plug are ready, turn the unit on and choose cooling mode with the control panel or remote.
Warning: Do not use an extension cord with this portable air conditioner. Use a properly grounded three-prong wall outlet and keep the plug accessible.
After the first power-on, stand near the window kit and feel for warm air leaks. Also check that hot air is exhausting outside and that the hose stays firmly attached when the fan starts.
Step 11: Maintenance tips and everyday use 🧰
Routine care will keep the portable AC performing well. Most everyday maintenance is simple, but it makes a big difference in airflow, cooling speed, odor control, and noise.
- Clean the intake screen and filter periodically because dust builds up over time.
- Empty condensate or route the drain correctly if water collects.
- Keep the exhaust hose as straight and short as your setup allows.
- Store the hose and window kit carefully when not in use to avoid cracks or bent edges.
- Keep the unit upright during storage, transport, and installation.
- Check the window foam seal every few weeks during heavy use.
If the room is not cooling well, check the basics first. Make sure the window panel is sealed, the hose is not kinked, the filter is clean, the drain plug is secure, and the temperature setting is lower than the room temperature.
Step 12: FAQ ❓
Frequently Asked Questions
Do I need any cutting or additional tools?
No cutting of your window is required for a standard setup. You may need scissors or a utility knife to trim foam to length, but the window kit is designed to slide and lock with the provided screws.
How long is the exhaust hose and power cord?
The exhaust hose is expandable with an accordion-style design, and the power cord is about 70.8 inches, or roughly 6 feet. Plan the unit location so the plug reaches a grounded three-prong outlet directly.
What is the drain plug for?
The drain plug seals the internal condensate drain. Keep it installed during normal use unless you are connecting a drain hose for continuous drainage. If you remove it, make sure water can flow safely into a drain or container.
My unit was shipped on its side. Do I need to wait?
Yes. If the unit was shipped, stored, or carried on its side, let it stand upright before powering it on so the compressor oil can settle back into place.
Can the window kit be installed vertically?
Yes. The sliding panels can be configured for many vertical or horizontal window openings. The key is to lock the panel securely and seal the surrounding gaps with foam.
Is the GFI or test button supposed to be pushed in?
Make sure the RESET button on the LCDI plug is pressed before powering the unit. The TEST and RESET buttons are on the plug, not on top of the portable AC.
Why is warm air coming back into the room?
Warm air usually leaks back in when the window panel has gaps, the hose adapter is not fully seated, or the exhaust hose is kinked. Reseat the adapters, straighten the hose, and add foam where light or air passes around the window kit.
Can I move the portable AC while it is running?
No. Turn the unit off, unplug it, check the drain plug, and move it slowly while keeping it upright. Moving it while running can pull the hose loose, spill condensate, or stress the power cord.
Step 13: Final thoughts 👍
This Black & Decker 8,000 BTU portable AC is straightforward to assemble when you follow the steps in order: unbox carefully, keep the unit upright, attach the hose and adapters, size and seal the window kit, check the drain plug, and verify the power requirements before the first start.
The biggest installation wins come from patience. Seat the hose adapters evenly, avoid sharp hose bends, seal every visible window gap, and use the LCDI plug correctly. With the included foam seals and remote, you can get comfortable cooling without cutting your window or making permanent changes.
BLACK+DECKER Portable Air Conditioner |
|
A compact portable AC with an included window kit, exhaust hose, remote control, and LCDI safety plug for small-room cooling. |
| Check Latest Price on Amazon |