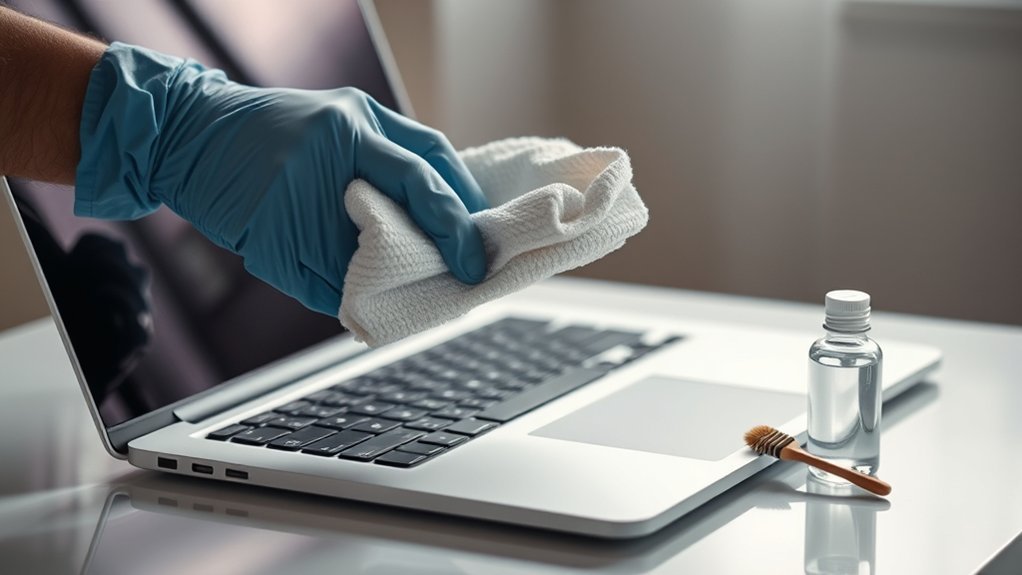
Your laptop keyboard collects dust, crumbs, skin oils, and germs every time you type. Cleaning it the wrong way can push moisture under the keys or damage the electronics, so a careful method matters. With the right supplies and a few safe habits, you can clean your laptop keyboard without soaking it, scratching it, or causing key problems.
Quick Answer
To clean a laptop keyboard safely, power down and unplug the laptop first. Remove loose debris with gentle shaking and compressed air, then wipe the keys with a lightly damp microfiber cloth. Avoid spraying liquid directly on the keyboard, let it dry fully, and only reassemble removable parts when no moisture remains.
Key Takeaways
- Always shut down, unplug, and remove the battery if your laptop model allows it before cleaning.
- Use a microfiber cloth, cotton swabs, and short bursts of compressed air instead of harsh tools.
- Never pour or spray liquid directly onto the keyboard because moisture can seep below the keys.
- Use only a slightly damp cloth with water, 70% isopropyl alcohol, or an electronics-safe cleaner.
- Let the keyboard dry completely before turning the laptop back on or reinstalling any removable parts.
At a Glance
| Time Required | 15 to 30 minutes, plus drying time |
| Difficulty | Easy, if you avoid excess liquid and rough pressure |
| Tools Needed | Microfiber cloth, cotton swabs, compressed air, soft brush, and a small amount of electronics-safe cleaner |
| Cost | Low, usually only basic cleaning supplies |
Gather Your Cleaning Supplies
Before you clean your laptop keyboard, gather the right supplies. Start with a microfiber cloth, which is soft enough for keys, palm rests, and the area around the keyboard.
Next, grab isopropyl alcohol or a gentle cleaning solution designed for electronics. A 70% isopropyl alcohol solution is usually a practical choice because it dries quickly, but you should still use only a small amount on the cloth.
You’ll also need cotton swabs for the narrow spaces between keys. If you have compressed air, it’s a handy tool for moving crumbs, lint, and dust from under key edges.
A soft brush can help lift stubborn debris around the edges of the keys. You may also want a small bowl if you need to dilute a mild cleaning solution, but you should never pour liquid near the laptop.
Warning: Do not use bleach, ammonia-based cleaners, abrasive pads, soaking-wet cloths, or direct sprays on your laptop keyboard. Strong chemicals and excess moisture can damage key legends, coatings, and internal components.
Having these supplies on hand will streamline your cleaning process, making it more efficient and effective. Once you’ve gathered everything, you’ll be ready to restore your keyboard without rushing or using the wrong tool.
Gathering your cleaning supplies first sets the stage for a smooth and safer keyboard refresh.
A clean keyboard also supports a cleaner workspace. It can make typing feel better and help prevent grime from building up around the keys.
Power Down and Unplug Your Laptop
To keep the cleaning process safe, always power down and unplug your laptop before you start. This step helps prevent accidental key presses, short circuits, and possible electrical issues.
Shut the laptop down normally instead of putting it to sleep. Then disconnect the power adapter, USB devices, memory cards, external drives, and any other accessories.
If your laptop has a removable battery, take it out, too. Many newer laptops do not have removable batteries, so do not force the case open unless your manufacturer’s manual says the battery is designed to be removed by the user.
Give the laptop a minute after shutdown before cleaning. This small pause helps you avoid working on a warm surface and gives the device time to fully power off.
Note: If your laptop has a touchscreen, convertible hinge, or detachable keyboard, clean only the keyboard area unless the manufacturer’s care guide says the same cleaner is safe for the screen and other surfaces.
Once your laptop is completely powered off and unplugged, you can focus on the keyboard without worrying about accidental inputs or liquid reaching active electronics.
Remove Loose Debris
Once your laptop is powered down and unplugged, it’s time to tackle the loose debris that often accumulates between the keys.
Start by opening the laptop and holding it at a slight angle. Turn it carefully upside down or nearly upside down, then gently shake it. This simple action can dislodge crumbs, dust, and small particles.
Next, grab a can of compressed air. Hold it upright and use short bursts to blow out particles trapped beneath the keys. Keep the nozzle a few inches away from the keyboard to avoid spraying propellant or moisture onto the surface.
Move across the keyboard in sections. Aim the air between the rows of keys instead of forcing the nozzle directly under a keycap.
If you notice stubborn debris, a soft brush or a microfiber cloth can help lift it out. Brush lightly so you do not scratch the keys or push dirt deeper underneath them.
Finally, check around the edges of the keys, the hinge area, and the space between the keyboard and palm rest. Dirt often hides there, especially if you eat near your laptop.
Pro Tip: Clean the keyboard over a towel or desk mat. It catches loose crumbs and protects the laptop from scratches while you tilt it.
With these steps, you’ll free your keyboard from unwanted clutter before wiping the surface.
Clean the Keyboard Surface
Cleaning the keyboard surface is essential for maintaining both hygiene and functionality. The goal is to remove oils, dust, and light grime without letting moisture seep under the keys.
Start by choosing a gentle cleaning solution, such as isopropyl alcohol or a mild soap and water mix. Dampen a microfiber cloth with the solution, but do not soak it.
The cloth should feel lightly damp, not wet. If liquid drips when you squeeze it, it is too wet for a laptop keyboard.
Wipe down the keys and surrounding areas with gentle pressure. Use slow, controlled movements across the top of the keys, then wipe the palm rest and the area around the keyboard.
Avoid using excessive liquid, as it can seep into the keyboard and cause damage. For stubborn spots, apply a little extra pressure with the cloth, but do not scrub too hard.
For the spaces between keys, use a cotton swab lightly dampened with the cleaner. Roll the swab along the edges instead of pressing down hard.
After you’ve cleaned the surface, use a dry section of the cloth to remove any remaining moisture. This simple step keeps your keyboard looking better and enhances your typing experience.
Disinfect the Keyboard Safely
If you want to disinfect your laptop keyboard, use a wipe or cloth that is damp, not dripping. Excess moisture is the main risk, so control the amount of liquid before it touches the keyboard.
Disinfectant wipes can be safe for many keyboards when used gently. Wring out the wipe first if it feels too wet, then pass it lightly over the key tops and palm rest.
Do not press liquid into the gaps around the keys. Also avoid spraying disinfectant directly onto the keyboard because it can pool under the keycaps.
After disinfecting, wipe the keyboard again with a dry microfiber cloth. This removes leftover moisture and reduces streaks or residue.
Warning: Do not use hydrogen peroxide, window cleaner, bathroom cleaner, or kitchen degreaser on your laptop keyboard. These products can damage plastics, coatings, and printed key labels.
Handle Sticky or Unresponsive Keys
Sticky keys usually come from spilled drinks, crumbs, dust, or dried residue around the key edges. Start with the safest method before trying anything more aggressive.
First, use compressed air around the sticky key. Then clean around the key with a lightly damp cotton swab and dry it with a microfiber cloth.
If the key still sticks, check whether your laptop model has removable keycaps. Some laptop keys are delicate and easy to break, especially low-profile keys with small scissor mechanisms.
Only remove a key if your manufacturer’s instructions say it is safe for your specific model. If you are unsure, avoid prying it up.
If a key remains unresponsive after cleaning, the issue may be liquid damage, a worn key switch, or an internal keyboard fault. In that case, professional service is safer than forcing the key apart.
Allow to Dry and Reassemble
After you’ve finished cleaning your laptop keyboard, it’s crucial to let it dry completely before reassembling any removable parts. This step helps prevent moisture from damaging your components when you put everything back together.
Depending on your cleaning method, the drying time may vary, so be patient. The keyboard should feel dry to the touch, and you should not see moisture around the key edges.
Here’s a simple guide to help you determine when to reassemble:
| Drying Method | Estimated Time | Notes |
|---|---|---|
| Air Dry | 30-60 minutes | Confirm no visible moisture |
| Cloth Drying | 10-20 minutes | Check for dampness |
| Fan-assisted Drying | 15-30 minutes | Use a low setting |
| Sunlight Drying | 20-40 minutes | Avoid direct heat |
| Blow Dryer | 5-10 minutes | Use cool air only and keep it moving |
Once dry, carefully reassemble any removable parts you took off. Then reconnect the power adapter, turn the laptop on, and test the keys in a blank document.
Maintenance Tips for a Cleaner Keyboard
A quick weekly wipe can prevent buildup and make deeper cleaning easier. Keep a microfiber cloth near your desk so you can remove dust and fingerprints before they harden into grime.
Try not to eat over your laptop. Crumbs are one of the most common reasons keys feel gritty or sticky.
Wash or sanitize your hands before long typing sessions, especially after eating or using shared devices. This reduces oil transfer and keeps the key surfaces cleaner.
If you carry your laptop in a bag, use a sleeve or case. This helps keep lint, dust, and debris away from the keyboard area.
Frequently Asked Questions
Can I use water to clean my laptop keyboard?
You should not use water directly on your laptop keyboard. Instead, dampen a microfiber cloth with a small amount of water, then gently wipe the keys. The cloth should be barely damp so moisture does not seep between the keys.
How often should I clean my laptop keyboard?
Clean your laptop keyboard once a week if you use it daily. If you eat near your laptop, share the device, travel often, or work in a dusty space, a quick wipe every few days can help keep it cleaner.
What if my keys are sticky or unresponsive?
If your keys are sticky or unresponsive, use compressed air first, then clean around the affected key with a lightly damp cotton swab. Do not pry off keycaps unless your laptop model allows it. If the problem continues, get professional service.
Is it safe to use disinfectant wipes on my keyboard?
Yes, disinfectant wipes can be safe on many laptop keyboards if you use them carefully. Wring out excess liquid first, wipe gently, and avoid pushing moisture into the gaps around the keys. Finish with a dry microfiber cloth.
Can I clean my keyboard without removing the keys?
Yes, you can clean your keyboard without removing the keys. Use compressed air for loose debris and a slightly damp microfiber cloth for the surface. This is the safest method for most laptop keyboards.
Can I spray cleaner directly onto the keyboard?
No. Never spray cleaner directly onto a laptop keyboard. Spray or apply the cleaner to a microfiber cloth first, then wipe the keyboard gently. Direct spraying can send liquid under the keys.
Can I use a vacuum cleaner on my laptop keyboard?
Avoid using a strong household vacuum on a laptop keyboard because suction can loosen keycaps or damage delicate parts. If you use a small electronics vacuum, use low suction and keep the nozzle above the keys.
Conclusion
By following these careful steps, you can breathe new life into your laptop keyboard and make it feel closer to the day you unboxed it. Start by powering down the laptop, remove loose debris, wipe with controlled moisture, and let everything dry completely.
A clean keyboard not only improves your typing experience, but it can also help reduce grime buildup and prevent minor key issues. Treat your laptop with care, and it’ll serve you well as a dependable tool in your daily digital routine.
