Connecting a second monitor on Windows 11 might feel like unchaining a superpower for your productivity. With just a few simple steps, you can transform your workspace into a multi-display setup that enhances your efficiency. But before you plunge in, there are essential considerations to guarantee everything runs smoothly. Let’s explore what you need to know to get started on this seamless expansion of your digital workspace.
Check Your Hardware Compatibility
Before diving into setting up a second monitor, you should verify that your hardware is compatible. Start by checking your computer’s graphics card; it needs to support multiple displays. Look for either dedicated graphics cards or integrated options that specify dual-monitor capabilities.
Next, review your computer’s ports. Common connections include HDMI, DisplayPort, or VGA. Make sure your second monitor has a matching port or adapter.
Additionally, consider your system’s performance—running multiple displays can demand more resources, so confirm your CPU and RAM are up to the task.
Finally, consult your manufacturer’s specifications to confirm your setup. By verifying compatibility, you’ll pave the way for a seamless dual-monitor experience that enhances your productivity and freedom.
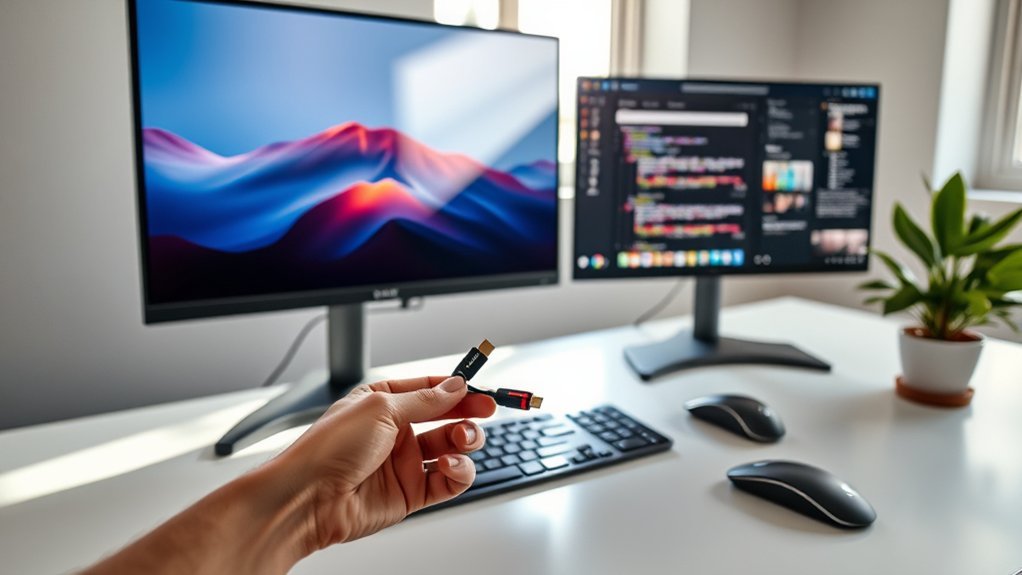
Gather the Necessary Cables
Before you connect your second monitor, you need to gather the right cables.
Check the connection types for both your monitor and your computer to guarantee compatibility.
Don’t forget to take into account any necessary adapters that might be required for a successful setup.
Monitor Connection Types
Connecting a second monitor requires the right cables to guarantee a seamless setup.
You’ll need to choose from various connection types, each offering its own advantages. Here are three common options:
- HDMI: This is the most popular option, delivering high-definition video and audio in one cable.
- DisplayPort: Ideal for higher resolutions and refresh rates, it’s a go-to for gamers and professionals needing top performance.
- VGA: Though older, it’s still functional for basic setups, especially with legacy devices.
Knowing which cable to use is essential for maximizing your monitor’s potential.
Make sure you have the right type on hand, and you’re one step closer to enhancing your workspace!
Cable Compatibility Checklist
To guarantee a smooth dual monitor setup, you’ll need to gather the right cables that match both your computer and monitors.
Start by identifying the connection ports on your devices, such as HDMI, DisplayPort, DVI, or VGA. Once you’ve pinpointed the types, check if you already have the necessary cables or if you need to purchase them.
Ascertain the cables are long enough to reach from your computer to the monitors without stretching or straining. If your monitors use different connectors, you may need to take into account additional adapters, but we’ll cover that in the next section.
Essential Adapter Options
When your monitors have different connection types, you’ll need the right adapters to guarantee compatibility. Choosing the correct adapter can enhance your multi-monitor experience, ensuring both displays work seamlessly together.
Here are three essential adapter options you should consider:
- HDMI to VGA Adapter: Perfect for connecting newer devices to older monitors.
- DisplayPort to HDMI Adapter: Great for connecting high-performance displays to HDMI-enabled monitors.
- USB-C to HDMI Adapter: Ideal for laptops and devices that utilize USB-C connections.
Before purchasing, double-check your devices’ ports to avoid any surprises.
Having the right adapters on hand empowers you to set up your dual monitor system effortlessly, maximizing your productivity and experience. Enjoy the freedom of a multi-monitor workspace!
Connect Your Second Monitor
Now that you’ve gathered your cables, it’s time to connect your second monitor.
First, you’ll need to choose the right connection type for your setup.
Once that’s sorted, you can configure your display settings and arrange the monitor positions to suit your workspace.
Choose Your Connection Type
Choosing the right connection type for your second monitor is essential for a smooth setup. You’ve got several options, and selecting the right one can enhance your experience.
Here are three common connection types:
- HDMI: This is the most popular option, providing high-definition video and audio with a single cable.
- DisplayPort: Ideal for high refresh rates and resolutions, DisplayPort is great for gaming or design work.
- VGA: While older, VGA still works for basic tasks and is widely available on older monitors.
Consider your monitor’s ports and your computer’s capabilities to make the best choice. This will guarantee you enjoy an efficient and effective dual-monitor setup.
Configure Display Settings
After connecting your second monitor, it’s time to configure your display settings for best use. Right-click on your desktop, select “Display settings,” and you’ll see options to adjust resolution, orientation, and scaling. You can customize how you want your monitors to work together.
Here are some common display settings to evaluate:
| Setting | Description |
|---|---|
| Resolution | Adjusts the clarity of your display. |
| Orientation | Switches between landscape and portrait. |
| Multiple displays | Choose how displays operate together. |
| Scale and layout | Changes text and app size for readability. |
Make sure to select the best settings that suit your work style, enhancing your productivity and freeing you to multitask effectively.
Arrange Monitor Positions
While setting up your second monitor, you’ll want to arrange its position to match your workspace effectively. This makes multitasking smoother and enhances your overall productivity.
Here’s how to do it:
- Align Displays: Drag the monitor icons in the Display Settings to position them as they’re physically arranged on your desk. This guarantees seamless movement of your cursor between screens.
- Set Primary Monitor: Designate your main display by selecting the preferred monitor and checking the option for “Make this my main display.”
- Adjust Resolution: Confirm both monitors have ideal resolution settings for clarity and comfort, which you can find in the Display Settings menu.
With these steps, you’ll create a harmonious workspace that liberates your workflow.
Power On Your Displays
To get started, make certain both your primary and secondary monitors are powered on and connected properly.
Verify that the power cables are securely plugged into the outlets and that each monitor’s power button is turned on. You might see a light indicator on each display; if it’s on, you’re good to go. If either monitor isn’t responding, double-check your connections and try restarting the monitors.
Once everything’s lit up, your system should recognize the additional screen. This step is essential for creating an effective workspace, allowing you to maximize productivity.
With both displays powered on, you’re ready to plunge into the next phase of your setup, where you’ll adjust the display settings to suit your needs.
Adjust Display Settings
With both displays powered on, it’s time to adjust your display settings to optimize your viewing experience.
Here’s how to make the most of your dual monitor setup:
- Choose Display Mode: Decide between Duplicate, Extend, or Second Screen Only to tailor how the screens interact.
- Set Resolution: Adjust the resolution for each monitor to guarantee crisp visuals that match your preferences and capabilities of your displays.
- Arrange Displays: Drag and drop the monitor icons in the settings to match their physical layout, making it easier to navigate between screens.
Organize Your Workspace
Organizing your workspace effectively can greatly boost your productivity when using dual monitors. Start by positioning your monitors at eye level and within arm’s reach to minimize strain.
Use one screen for primary tasks, like writing or coding, and the other for supplementary information, such as emails or research. You can also arrange your windows neatly—snapping them to the sides of each screen keeps everything visible and accessible.
Consider using a task management tool to prioritize your projects and stay focused.
Finally, declutter your physical workspace; a tidy environment enhances mental clarity. By creating a functional and efficient setup, you’ll find yourself working smarter and feeling more liberated to tackle your tasks.
Explore Multi-Tasking Features
How can you take full advantage of your dual monitors? By leveraging their potential, you can enhance your productivity and streamline your workflow.
Here are three multi-tasking features you should explore:
- Snap Layouts: Windows 11 offers Snap Layouts, allowing you to organize your apps effortlessly. Just hover over the maximize button, and choose how you want to arrange your windows.
- Virtual Desktops: Create multiple desktops for different tasks. Switch between them easily, keeping your work organized and focused.
- Drag and Drop: Move files and applications seamlessly between screens. This simple action saves time and keeps your projects flowing smoothly.
Embrace these features to liberate your work style and maximize efficiency with your dual monitors!
Frequently Asked Questions
Can I Connect More Than Two Monitors to My Windows 11 Device?
Yes, you can connect more than two monitors to your Windows 11 device, provided your graphics card supports it. Just make certain you have the right cables and ports available to set everything up efficiently.
What Should I Do if My Second Monitor Is Not Detected?
Check your connections first; verify cables are secure. Then, right-click on your desktop, select “Display settings,” and click “Detect.” If it still doesn’t work, update your graphics driver or restart your computer.
Are There Specific Display Resolutions for Multiple Monitors?
Yes, specific display resolutions exist for multiple monitors. For example, many users prefer 1920×1080 for clarity. When connecting, verify both monitors support the same resolution or adjust settings for ideal performance and visual harmony.
Can I Use Different Monitor Brands and Sizes Together?
Yes, you can use different monitor brands and sizes together. Just make sure they support compatible resolutions and connections. Mixing them can enhance your workspace, but you might need to adjust settings for best performance.
How Do I Switch Between Display Modes in Windows 11?
To switch between display modes in Windows 11, press Windows + P. You’ll see options like Duplicate or Extend. Just choose the mode you need, and enjoy a more flexible workspace without hassle!
Conclusion
Now that you’ve seamlessly connected your second monitor, imagine the vibrant desktop stretching across your screens, ready for your creativity to flow. With your workspace organized and multi-tasking features at your fingertips, you’re set to conquer tasks like never before. Embrace the enhanced productivity as you effortlessly drag files and windows between displays, transforming your setup into a dynamic hub. Immerse yourself and experience a new level of efficiency that makes every project feel like a breeze!
