
Using a stand mixer can simplify your baking and cooking tasks. It’s a versatile tool that saves time and effort in the kitchen.
A stand mixer is your best friend for mixing, whipping, and kneading. Whether you’re preparing dough for bread or whipping cream for desserts, this appliance makes the job easier and faster. Many home cooks and bakers find that stand mixers offer consistent results and reduce manual labor.
You can mix ingredients more thoroughly than by hand, ensuring a better texture and flavor in your recipes. Stand mixers come with different attachments for various tasks, making them incredibly versatile. Let’s dive into how to use a stand mixer effectively and explore its benefits for everyday cooking and baking.
Choosing The Right Stand Mixer
Choosing the right stand mixer is essential for any kitchen. A good stand mixer can save time and effort. It makes baking and cooking easier. With many options available, finding the right one can be confusing.
Types Of Stand Mixers
Stand mixers come in various types. The most common are tilt-head and bowl-lift mixers. Tilt-head mixers are popular for home use. They allow easy access to the bowl and beaters. Bowl-lift mixers are often used in professional kitchens. They are sturdy and handle heavy mixing.
Key Features To Consider
Consider the mixer’s power. More watts mean better mixing. Look at the bowl size. Larger bowls mix more ingredients. Check the attachments. Different attachments suit different tasks. Think about speed settings. More speeds offer better control. Examine the build quality. Strong materials last longer. Ensure easy cleaning. Removable parts help.
Assembling Your Stand Mixer
Assembling your stand mixer might seem daunting at first, but it’s actually quite straightforward. With a few simple steps, you’ll be ready to start mixing, kneading, and whipping like a pro. Let’s walk through the process to get your stand mixer up and running.
Unboxing And Setup
Start by carefully unboxing your stand mixer. Make sure you have all the components: the mixer unit, mixing bowl, attachments (like the whisk, dough hook, and flat beater), and the user manual. Place the mixer on a stable, flat surface where you’ll be using it.
Plug in your stand mixer to ensure it’s receiving power. Most models have a safety lock that needs to be engaged before operation. Check the manual for any specific setup instructions unique to your model.
Attaching The Mixing Bowl
Next, it’s time to attach the mixing bowl. Position the bowl onto the base of the stand mixer. Depending on your model, you might need to twist the bowl to lock it into place or simply press it down until it clicks.
Ensure the bowl is securely attached. Give it a gentle tug to make sure it’s locked in and won’t move during mixing. This is crucial for safe and effective mixing.
Once the bowl is secured, you’re ready to attach your desired mixing attachment. Whether you’re making dough, batter, or whipped cream, your stand mixer is now ready to tackle any recipe you throw at it. How will you put your stand mixer to use first?
Understanding Mixer Attachments
Stand mixers come with various attachments designed for specific tasks. The whisk is perfect for whipping cream. The dough hook kneads bread effortlessly.
Understanding Mixer Attachments Using a stand mixer is a game-changer in the kitchen. However, to make the most of it, you need to understand the different attachments. Each attachment has a unique purpose, making your baking and cooking tasks easier and more efficient.
Common Attachments
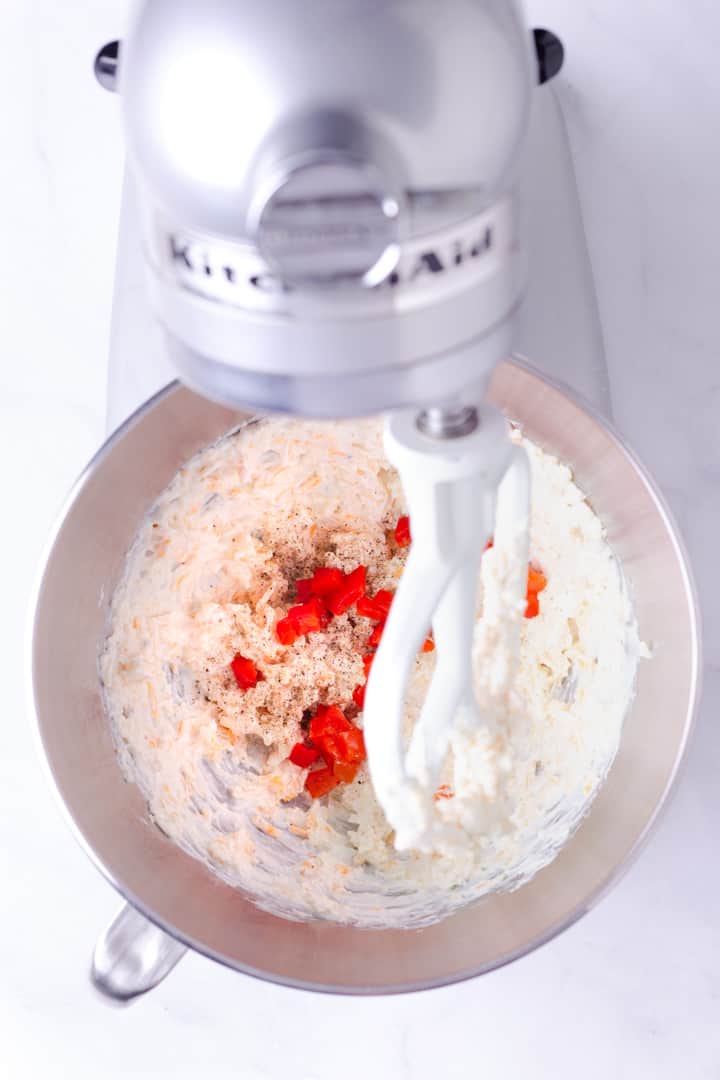
The most common mixer attachments include the flat beater, wire whip, and dough hook. The flat beater is your go-to for mixing cake batters, cookie dough, and frostings. It’s versatile and perfect for everyday tasks. The wire whip is designed to incorporate air into your mixtures. It’s ideal for whipping cream, beating egg whites, and making meringues. The dough hook is essential for kneading bread dough. It saves you time and effort, ensuring your dough is perfectly mixed and elastic.
Specialty Attachments
Specialty attachments can take your stand mixer to the next level. These include pasta rollers, food grinders, and spiralizers. A pasta roller attachment allows you to make fresh pasta at home. You can control the thickness and shape, making your meals truly special. The food grinder attachment is great for making ground meat, sausages, and even grinding vegetables. It’s a fantastic way to customize your recipes. A spiralizer attachment helps you create vegetable noodles. It’s perfect for healthy eating and adds a fun twist to your dishes. Understanding your mixer’s attachments can transform your kitchen experience. Which attachment do you think will become your favorite?
Basic Mixing Techniques
Learn basic mixing techniques with a stand mixer. Adjust the speed for different tasks. Use the right attachments for best results.
When you first start using a stand mixer, you might feel a bit overwhelmed. There are so many settings and attachments! But don’t worry, understanding the basic mixing techniques can make a huge difference. Once you get the hang of it, you’ll wonder how you ever baked without it. ###
Creaming And Beating
Creaming involves mixing butter and sugar together until they are light and fluffy. This is a crucial step for many baked goods, like cookies and cakes. Start with room temperature butter, and use your paddle attachment. Set your mixer to a medium speed. Watch the butter and sugar transform. It should look pale and airy after a few minutes. Beating is similar but usually involves eggs. Add them one at a time to ensure they mix well. This technique incorporates air, making your batter light and tender. ###
Whipping And Kneading
Whipping is used for cream and egg whites. It adds a lot of air, making them fluffy and voluminous. Use the whisk attachment for this. Start at a lower speed to avoid splashing. Gradually increase the speed. You’ll know you’re done when you see stiff peaks. Kneading is essential for bread dough. It develops gluten, which gives bread its structure. Use the dough hook for this task. Mix at a low speed until the dough pulls away from the sides. It should be smooth and elastic. Kneading usually takes about 5-10 minutes. Don’t be afraid to experiment with these techniques. What will you create next with your stand mixer? The possibilities are endless!
Advanced Mixing Techniques
Learn how to use a stand mixer with ease. Follow simple steps to mix ingredients thoroughly for perfect results. Make your baking and cooking tasks more efficient.
Advanced mixing techniques with a stand mixer can make a noticeable difference in your baking results. These methods can transform your dough, batter, or mixture into something truly special. Let’s dive into two key techniques: folding ingredients and using the dough hook.
Folding Ingredients
Folding ingredients is an essential technique, especially for delicate batters like meringue or sponge cake. This method ensures that you incorporate ingredients without deflating your mixture. To fold ingredients with a stand mixer, use the paddle attachment on the lowest speed. Add your delicate ingredients gradually, allowing the mixer to gently pull them into the batter. I once used this technique while making a chiffon cake, and the result was incredibly airy. Have you ever noticed how a light touch can make such a big difference?
Using The Dough Hook
The dough hook is your best friend when it comes to kneading bread. It saves you time and effort, ensuring that your dough is perfectly elastic. Attach the dough hook to your stand mixer and set it to a medium speed. Allow it to work the dough for about 8-10 minutes. You’ll know it’s ready when the dough forms a ball and pulls away from the sides of the bowl. When I first used the dough hook, I was amazed at how smooth my bread turned out. Do you feel the difference in texture when you knead by hand versus using a mixer? Mastering these advanced mixing techniques can elevate your baking skills. Give them a try and see how they improve your recipes.

Credit: www.youtube.com
Cleaning And Maintenance
Proper cleaning and maintenance of your stand mixer ensure its longevity and performance. Regular care not only keeps it looking good but also ensures safe and hygienic use. Let’s dive into the essential steps for cleaning and storing your stand mixer.
Cleaning The Attachments
Start by unplugging your stand mixer. Remove the attachments such as the whisk, dough hook, and beater. Wash these parts with warm, soapy water. Rinse them thoroughly and dry them with a clean towel. Most attachments are dishwasher safe, but check your manual to be sure.
For stubborn residue, soak the attachments in warm soapy water for a few minutes. Use a soft brush to scrub them clean. Avoid abrasive sponges or cleaners as they can scratch the surfaces. Dry the attachments completely to prevent rust.
Storing The Stand Mixer
Find a cool, dry place to store your stand mixer. Keep it covered with a dust cover or a clean kitchen towel to prevent dust buildup. If you have limited counter space, store it in a cupboard.
Ensure the power cord is neatly wrapped and secured. This prevents damage and keeps your workspace tidy. Store the attachments in a designated drawer or container near the stand mixer.
Regular maintenance extends the life of your stand mixer. Clean it after each use and store it properly. This keeps it ready for your next baking adventure.
Troubleshooting Common Issues
Stand mixers are a fantastic addition to any kitchen, but they can sometimes present challenges. Understanding how to troubleshoot common issues can save you time and frustration. Below, we cover practical solutions to keep your mixer running smoothly.
Mixer Overheating
It’s not uncommon for a stand mixer to overheat, especially during extended use. If your mixer feels hot to the touch or shuts off unexpectedly, it may be overheating.
- Rest Periods: Give your mixer a break. After about 10 minutes of continuous use, let it cool down for at least 20 minutes.
- Check Load: Overloading the mixer can cause it to overheat. Ensure you’re not exceeding the recommended quantity of ingredients.
- Ventilation: Ensure the vents are not blocked. Adequate airflow is crucial for keeping the motor cool.
Attachment Malfunctions
Attachment issues can be frustrating, but they’re usually easy to fix. If your mixer attachments aren’t working as expected, check the following:
- Proper Installation: Make sure the attachment is securely locked into place. A loose attachment can wobble or fail to mix ingredients properly.
- Inspect for Damage: Look for cracks or bends in the attachments. Damaged parts should be replaced immediately.
- Correct Attachment: Ensure you’re using the right attachment for the task. Dough hooks for heavy doughs, whisks for light mixtures, etc.
Have you faced any of these issues with your stand mixer? What solutions have worked for you? Share your experiences in the comments below!

Credit: www.kitchenaid.com
Creative Recipes To Try
Using a stand mixer opens up a world of culinary possibilities. You can create delicious and impressive dishes right in your kitchen. Let’s dive into some creative recipes you can try, making the most out of your stand mixer.
Baking Bread And Cakes
Imagine the smell of freshly baked bread filling your home. With a stand mixer, you can easily knead dough without breaking a sweat. Just add your ingredients, attach the dough hook, and let the mixer do the hard work.
Baking cakes becomes a breeze too. The whisk attachment ensures your batter is perfectly smooth and well-mixed. Try a classic chocolate cake or experiment with a zesty lemon drizzle. Your mixer helps you achieve a consistent texture every time.
Have you ever tried making your own pizza dough? It’s simpler than you think. Mix flour, yeast, water, and a pinch of salt in your stand mixer. Let it knead until smooth, then let it rise. You’ll have a perfect base for your favorite toppings.
Making Pasta And Sauces
Homemade pasta might sound daunting, but a stand mixer can make it fun and easy. Use the pasta attachment to roll out dough into perfect sheets. Cut them into your favorite shapes, like fettuccine or lasagna. Fresh pasta tastes so much better than store-bought.
Don’t stop at pasta—your stand mixer can help with sauces too. Mix up a creamy Alfredo or a rich marinara. The mixer ensures your ingredients blend smoothly, giving you a restaurant-quality sauce.
Why not try something new this weekend? Make a batch of ravioli with spinach and ricotta filling. Serve it with a homemade tomato sauce. Your guests will be impressed, and you’ll have a blast making it.
Are you ready to get creative in the kitchen? What recipe will you try first with your stand mixer?
Credit: www.asweetpeachef.com
Frequently Asked Questions
How To Use A Stand Mixer Step By Step For Beginners?
To use a stand mixer, attach the desired mixing tool. Add ingredients to the bowl. Start on a low speed, gradually increasing. Mix until well combined. Turn off and unplug after use.
What Are The Disadvantages Of A Stand Mixer?
Stand mixers can be expensive and bulky, requiring significant counter space. Cleaning can also be time-consuming due to multiple parts.
What Is The Correct Way To Use A Mixer?
To use a mixer correctly, start at a low speed, gradually increase it, and mix ingredients evenly. Clean the mixer after each use.
What Should I Make With My Stand Mixer?
You can make bread, pizza dough, cakes, cookies, whipped cream, and meringue with your stand mixer.
Conclusion
Using a stand mixer makes baking easier and more enjoyable. Start with low speeds to avoid splatters. Gradually increase speed for thorough mixing. Always scrape the sides of the bowl. Experiment with different attachments for various tasks. Clean the mixer after each use.
Practice with different recipes to get comfortable. Over time, you’ll become more efficient. Remember, baking should be fun and creative. Enjoy the process and happy baking!
