
Cooking temperatures shape the way food tastes, feels, looks, and performs on the plate. The right temperature can give steak a browned crust, help bread rise, keep fried food crisp, and prevent harmful bacteria from surviving in meat, poultry, seafood, and eggs.
Temperature matters because cooking is both a flavor tool and a safety step. The Maillard reaction, which creates browning and deeper flavor, usually becomes noticeable around 300°F (150°C). Safe internal temperatures matter just as much, especially for foods linked to bacteria such as Salmonella and E. coli. When you use a reliable thermometer, you stop guessing and start cooking with more control.
Quick Answer
Use a food thermometer to check the thickest part of food, away from bone, fat, or the pan. Poultry should reach 165°F, ground meats 160°F, and whole cuts of beef, pork, veal, and lamb should reach 145°F with a 3-minute rest.
Key Takeaways
- Cooking temperature affects food safety, doneness, browning, texture, and moisture.
- Instant-read thermometers work best for quick checks, while probe thermometers help with roasts, smoking, and long cooks.
- Poultry needs 165°F, ground meats need 160°F, and whole cuts of beef, pork, veal, and lamb need 145°F plus a 3-minute rest.
- Baking, deep frying, and candy making depend on precise temperatures for consistent results.
- Calibrate your thermometer regularly so you can trust every reading.
At a Glance
| Time Required | 10 seconds to several minutes, depending on the thermometer and food thickness. |
| Difficulty | Easy once you know where to place the probe. |
| Tools Needed | Instant-read thermometer, leave-in probe thermometer, oven thermometer, candy thermometer, or frying thermometer. |
| Cost | Basic thermometers are affordable, while advanced digital probes cost more but offer faster readings and alerts. |
Why Cooking Temperatures Matter
Cooking temperatures influence flavor, texture, moisture, and safety. High heat helps create browning on meat, roasted vegetables, and baked goods. Lower, slower heat can soften tough cuts of meat, reduce moisture loss, and give connective tissue time to break down.
Food safety is the other major reason to track temperature. Many harmful bacteria grow best in unsafe temperature ranges. Cooking food to the right internal temperature helps reduce the risk of foodborne illness.
Poultry is a clear example. Chicken and turkey should reach an internal temperature of 165°F (74°C). That temperature helps make the food safer while still allowing you to keep it juicy if you avoid overcooking.
A thermometer is the simplest way to confirm doneness because color, juices, and cooking time can all mislead you.
Choosing the Right Thermometer for Different Cooking Methods
Selecting the right thermometer helps you measure food temperature accurately across different cooking methods. Each thermometer type has a specific use, and using the wrong one can slow you down or give you less reliable results.
Instant-read thermometers are ideal for quick checks. You insert the probe into the thickest part of the food, wait for the reading to stabilize, and remove it. These thermometers work well for steaks, burgers, chicken pieces, fish, casseroles, and reheated leftovers.
Probe thermometers are better for long cooking processes, such as roasting, smoking, or slow cooking. You can leave the probe in the food while it cooks, which lets you track the temperature without opening the oven, grill, or smoker.
Oven-safe thermometers stay inside food during cooking, while oven thermometers measure the actual oven temperature. These tools help because many ovens run hotter or cooler than the setting on the dial.
Candy and deep-fry thermometers measure higher temperatures than many meat thermometers. They are built for hot sugar syrup and cooking oil, where even a small temperature change can affect texture.
Note: A meat thermometer is not always the best choice for candy or frying. Use a thermometer rated for the temperature range you need.
[Amazon Products Picked for You]

【8X Faster + 4X More Precise】: Upgraded with an industrial-leading professional thermocouple sensor, Themomonster meat thermometer digital with NIST certified ±0.5℉ precision provides you the accurate temperature of your food in just 0.5 Seconds.

Instant Read Food Thermometer | Our instant read thermometer features a temperature probe and advanced, highly accurate technology with 1-2 seconds response time; Instructions, meat temperature chart, comes pre-calibrated for your convenience, and recalibrating feature if needed.
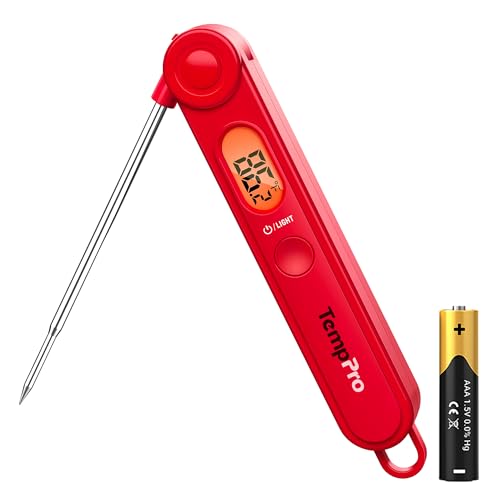
【Easy to Use】Easily release the meat probe at the push of a button, and control the backlight or power with another button. With TempPro, cooking becomes a seamless, stress-free experience
The Ideal Temperatures for Cooking Different Types of Meat

Different meats need different internal temperatures for the best balance of safety and quality. The safest method is to measure the thickest part of the food and avoid touching bone, gristle, or the cooking surface with the probe.
Beef steaks are often cooked to different levels of doneness. Medium-rare usually falls around 130°F to 135°F (54°C to 57°C). This range gives steak a warm red center and a tender texture. However, doneness preferences do not replace food safety rules for ground meat.
Ground beef should reach at least 160°F (71°C). Grinding spreads surface bacteria throughout the meat, so the center needs to reach a safe temperature. The same general rule applies to many ground meat mixtures.
Poultry needs careful temperature control. Chicken and turkey should reach 165°F (74°C). For whole birds, check the thickest part of the breast, the innermost thigh, and the wing area. Dark meat can take longer than white meat, so one reading is not always enough.
Pork is now commonly cooked to 145°F (63°C), followed by a 3-minute rest for whole cuts. This can give you juicier pork chops, tenderloin, and roasts while still meeting safe cooking guidance. Ground pork should still reach 160°F (71°C).
| Food | Safe Internal Temperature | Best Practice |
|---|---|---|
| Poultry | 165°F (74°C) | Check breast, thigh, and wing area on whole birds. |
| Ground beef, pork, veal, or lamb | 160°F (71°C) | Insert the thermometer from the side for thin patties. |
| Whole cuts of beef, pork, veal, or lamb | 145°F (63°C) with a 3-minute rest | Rest before slicing so juices redistribute. |
| Fish and seafood | 145°F (63°C) | Look for opaque flesh that flakes easily. |
| Egg dishes | 160°F (71°C) | Cook until set, especially in casseroles or custards. |
Warning: Do not rely only on meat color. A burger can look brown before it reaches a safe temperature, and poultry can appear done while still undercooked near the bone.
The Importance of Temperature in Baking and Pastry Making
| Temperature | Effect |
|---|---|
| Room Temperature | Room temperature ingredients blend more easily and result in a smoother batter or dough. |
| Oven Temperature | The right oven temperature is crucial for the rise and texture of baked goods. Too high can cause burning, while too low can result in undercooked or dense products. |
| Butter Temperature | Butter at the right temperature is essential for proper creaming and incorporation of air in baking, resulting in a light and fluffy texture. |
| Egg Temperature | Room temperature eggs emulsify better and result in a more stable batter or dough. |
| Chocolate Tempering | Tempering chocolate at specific temperatures ensures a glossy finish and a satisfying snap when broken. |
In baking and pastry making, temperature is not just a guideline. It can decide whether dough rises, butter creams properly, pastry flakes, or chocolate sets with a glossy finish.
Yeast-based doughs need warmth to activate properly. Water that is too cold can slow fermentation, while water that is too hot can damage or kill the yeast. Many bakers use warm water around 100°F (38°C) for active dry yeast, though the ideal range can vary by recipe and yeast type.
The temperature of ingredients also changes the final texture. Room temperature butter creams well with sugar because it can trap air. That air helps cakes and cookies rise and creates a lighter texture.
Cold butter works better for flaky pastries such as pie crusts, biscuits, and croissants. As the cold butter melts in the oven, it creates steam pockets. Those pockets help form flaky layers and a tender bite.
Oven temperature also deserves attention. Even a small oven temperature error can affect browning, rise, spread, and bake time. An inexpensive oven thermometer can help you confirm whether your oven runs hot or cool.
Pro Tip: For better baking results, measure ingredient temperature and oven temperature separately. A recipe can fail even when the oven is correct if the butter, eggs, or dough are too warm or too cold.
Using Thermometers for Deep Frying and Candy Making
Deep frying and candy making both depend on precise heat control. In deep frying, oil that is too cool can make food greasy. Oil that is too hot can brown the outside before the inside cooks through.
Most deep frying happens between 350°F and 375°F (175°C to 190°C). This range helps create crisp exteriors while giving the inside enough time to cook. A frying thermometer helps you monitor oil temperature before and during cooking.
Food temperature also affects oil temperature. Adding too much food at once can drop the oil temperature quickly. That is why frying in smaller batches often produces crisper results.
Candy making requires even tighter control. Sugar syrup changes texture as it reaches different temperature stages. Soft ball stage happens around 234°F to 240°F (112°C to 116°C), which works well for fudge and some caramel-style sweets. Hard crack stage reaches about 300°F to 310°F (149°C to 154°C), which is needed for hard candies and lollipops.
A candy thermometer reduces guesswork because visual cues can be hard to judge. Humidity, pan size, burner strength, and stirring habits can all affect how fast sugar cooks.
| Sugar Stage | Temperature | Common Uses |
|---|---|---|
| Soft Ball | 234°F to 240°F | Fudge, fondant, pralines, soft caramels |
| Firm Ball | 244°F to 248°F | Caramels and some nougats |
| Hard Ball | 250°F to 266°F | Marshmallows, gummies, divinity |
| Soft Crack | 270°F to 290°F | Taffy and butterscotch |
| Hard Crack | 300°F to 310°F | Lollipops, brittles, hard candy |
[Amazon Products Picked for You]

【High Accuracy & Fast Reading】Digital candy thermometer get precise temperature readings in just 1 second with accuracy ±0.9°F, making it a smart choice for candy making and deep frying
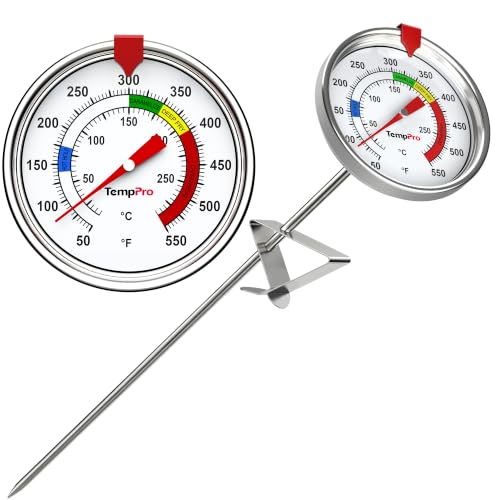
【9" Long Probe with Pot Clip】The frying thermometer for oil comes with a 9-inch probe and a secure pot clip, allowing it to be safely attached to cooking pots of different sizes, effectively protecting you from hot oil splatter

ADJUSTABLE PAN CLIP FOR ANY SIZE POT: The built-in clip secures to pots and pans of all sizes, keeping the thermometer stable and hands-free so you can monitor candy stages or frying oil without constant attention.
Understanding Safe Cooking Temperatures to Prevent Foodborne Illness

Food safety is a critical concern in any kitchen. Safe cooking temperatures help reduce the risk of foodborne illness, especially when preparing poultry, ground meat, seafood, eggs, and leftovers.
The USDA and food safety agencies provide minimum internal temperature guidance for common foods. Seafood should reach 145°F (63°C). Egg dishes should reach 160°F (71°C). Leftovers and casseroles should reach 165°F (74°C).
You should also understand the temperature danger zone. Perishable food should not sit too long between 40°F and 140°F because bacteria can multiply faster in that range. Keep hot food hot and cold food cold when serving meals for a group.
Carryover cooking matters, too. Food can continue to rise in temperature after you remove it from the heat. This happens because residual heat keeps moving toward the center. Larger cuts, such as roasts and whole turkeys, can rise several degrees while resting.
Resting is not only about safety. It also improves texture. When meat rests, juices redistribute instead of running out as soon as you cut into it.
Warning: Wash hands, utensils, boards, and thermometer probes after touching raw meat, poultry, seafood, or eggs. A correct temperature reading will not prevent cross-contamination if raw juices spread to ready-to-eat food.
How to Take an Accurate Food Temperature
Reading temperature correctly is just as important as owning a thermometer. A poor probe placement can make food seem safer or more done than it really is.
- Choose the right thermometer. Use an instant-read thermometer for quick checks and a leave-in probe for long cooks.
- Insert the probe into the thickest part. Avoid bone, fat, gristle, and the pan because they can distort the reading.
- Check more than one spot. This is especially important for whole birds, roasts, casseroles, and uneven pieces of meat.
- Wait for the reading to stabilize. Some thermometers need only seconds, while others take longer.
- Clean the probe after use. Wash it with hot soapy water or sanitize it according to the thermometer instructions.
For thin foods such as burgers, pork chops, or chicken cutlets, insert the thermometer from the side. This helps place the probe tip in the center instead of pushing through the food.
Common Temperature Mistakes to Avoid
Many cooking problems come from small temperature mistakes. These errors can affect both food quality and safety.
- Guessing by color: Meat color can change before the food reaches a safe temperature.
- Checking too close to bone: Bone can conduct heat differently and give a misleading reading.
- Not preheating the oven or oil: Food may cook unevenly or absorb extra oil.
- Overcrowding the pan: Too much food lowers heat and slows browning.
- Skipping rest time: Cutting meat too soon can release juices and lower eating quality.
- Using an uncalibrated thermometer: Even a small error can matter for poultry, candy, or frying.
Tips for Calibrating and Maintaining Your Thermometer
To keep your thermometer accurate, check its calibration regularly. Calibration helps confirm that the tool reads correctly before you rely on it for food safety or precise cooking.
The ice water method is simple. Fill a glass with ice and water, let it sit briefly, then insert the thermometer probe into the mixture without touching the sides or bottom. It should read 32°F (0°C).
You can also use boiling water. Bring water to a rolling boil and insert the thermometer probe. At sea level, it should read 212°F (100°C). Boiling temperature changes with elevation, so this method may need adjustment if you live far above sea level.
Maintenance also matters. Clean the probe after each use with warm soapy water or a suitable sanitizing wipe. Dry it before storage, and keep it in a protective sheath or case when possible.
Replace weak batteries in digital thermometers when readings slow down or the display fades. If the probe bends, cracks, rusts, or gives unstable readings, replace the thermometer.
Pro Tip: Check thermometer accuracy before major cooking days, such as holidays or large gatherings. It is easier to fix a thermometer problem before the turkey, roast, or candy syrup is already cooking.
[Amazon Products Picked for You]

Versatile & Accurate pH Measurement: This pH meter quickly and reliably reads pH values for a wide range of liquids, including soil, pool water, plants, food, water, and more. It covers applications in gardening, agriculture, cooking, food processing, and industrial fields, accurately assessing soil fertility, maintaining plant ecological balance, and ensuring food safety

ULTRA-FAST & HIGHLY ACCURATE: With a precision sensor, this Digital meat thermometer reads temperature in 2 to 4 seconds and is accurate within 2 °F . Supporting Celsius and Fahrenheit display from -58°F to 572°F (-50°C to 300°C) makes the food thermometer suitable for BBQ, grill, pan-frying, baking or candy making.
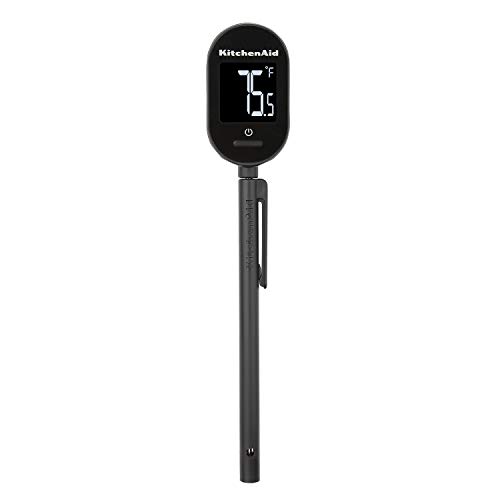
UNIQUE FEATURE: Extra-large backlit display makes viewing easy from any angle
Mastering Cooking Temperatures for Perfectly Cooked Dishes
Mastering cooking temperatures turns ordinary home cooking into more consistent, confident cooking. When you understand how food responds to heat, you can adjust your method instead of hoping the recipe works.
High heat helps with searing, browning, and crisping. Gentle heat helps with tender braises, custards, slow-roasted meats, and delicate fish. Controlled heat keeps deep-fried food crisp and helps candy reach the right texture.
Temperature knowledge also helps you solve common cooking problems. If chicken dries out, you may be overshooting the final temperature. If bread comes out dense, the dough may be too cold or the yeast may not be active enough. If fried food turns greasy, the oil may be too cool.
Sharing this knowledge can make meals more enjoyable for everyone at the table. When you cook with a thermometer and understand the reason behind each temperature, you serve food that is safer, better textured, and more reliable.
If you’re looking to elevate your cooking experience, you may also be interested in learning about the 5 most stylish cocktail glasses featured in a recent article on gomyreview.com. These elegant glasses can add a touch of sophistication to your next dinner party or gathering.
Related Guides
Frequently Asked Questions
What is the importance of reading cooking temperature with a thermometer?
Using a thermometer helps confirm that food reaches a safe internal temperature. It also helps you cook food to the doneness you prefer without relying on guesswork, color, or cooking time alone.
What types of thermometers can be used to read cooking temperature?
Common options include instant-read thermometers, oven-safe thermometers, leave-in probe thermometers, candy thermometers, frying thermometers, and oven thermometers. Each one fits a different cooking task.
How do you use an instant-read thermometer to read cooking temperature?
Insert the probe into the thickest part of the food. Avoid bone, fat, and the pan. Wait for the number to stabilize, then compare the reading with the recommended internal temperature for that food.
How do you use an oven-safe thermometer to read cooking temperature?
Place the thermometer in the food before it goes into the oven. Make sure the probe sits in the thickest part. Leave it in during cooking, then read the display or dial when the food nears the target temperature.
How do you use a probe thermometer to read cooking temperature?
Insert the probe into the thickest part of the food before cooking or early in the cooking process. Keep the probe in place while the food cooks, and use the display or alarm to track the temperature.
What are the recommended cooking temperatures for different types of food?
General guidelines include poultry at 165°F, ground meats at 160°F, seafood at 145°F, egg dishes at 160°F, and whole cuts of beef, pork, veal, and lamb at 145°F with a 3-minute rest.
Where should you insert a thermometer in meat?
Insert the probe into the thickest part of the meat. For thin foods, insert it from the side. Avoid touching bone, fat, or the cooking surface because those spots can give inaccurate readings.
How often should you calibrate a kitchen thermometer?
Check calibration regularly, especially before holiday cooking, after dropping the thermometer, or whenever readings seem wrong. The ice water method is the easiest way to check accuracy at home.
Sources
- FoodSafety.gov Safe Minimum Internal Temperatures — supports safe cooking temperatures for meat, poultry, seafood, eggs, leftovers, and casseroles.
- USDA FSIS Safe Temperature Chart — supports minimum internal temperature guidance and rest-time recommendations.
- USDA FSIS Kitchen Thermometers — supports thermometer use, placement, and food safety practices.
- USDA FSIS Danger Zone Guidance — supports the 40°F to 140°F food safety danger zone guidance.
- University of Minnesota Extension: Thermometers and Food Safety — supports thermometer selection, cleaning, and calibration practices.

2 thoughts on “Mastering Cooking Temperatures: A Guide to Thermometer Readings”