
A weak or dead trailer brake controller can turn a normal tow into a dangerous stop. If your Tundra’s trailer brake controller isn’t working, start with the parts that fail most often: the trailer plug, ground, brake-output wire, fuses, wiring, and brake magnets. This guide walks you through a safe, step-by-step method to narrow down the fault before you call a dealer or install an aftermarket controller.
⚡ Quick Answer
If your Tundra trailer brake controller stops working, check the trailer plug and ground first. Then test the brake-output wire with a circuit tester, inspect fuses and error codes, and trace trailer wiring to each brake magnet. If those checks pass but braking still feels weak or erratic, adjust the gain, ask your dealer about software updates, or consider a proven aftermarket controller such as the Tekonsha P3.
- Check the trailer plug and ground before testing deeper wiring or controller faults.
- Use a circuit tester to confirm brake-output voltage at the vehicle connector.
- Trace trailer wiring to each drum when one wheel shows weak or no braking force.
- Adjust gain in small steps so the trailer brakes feel firm without locking.
- Escalate to a dealer or aftermarket controller only after you prove the basic circuit works.
At a Glance
| Time Required | 30–60 minutes for basic triage; up to half a day if you’re pulling a drum to inspect a magnet |
| Difficulty | Beginner to intermediate — plug/ground checks are beginner-friendly; drum removal and magnet testing require basic hand tools and comfort with 12V electrical work |
| Tools Needed | 12V circuit tester or digital multimeter, jack and rated jack stands, wire brush, electrical contact cleaner, basic hand tools, OBD2 scanner (optional) |
| Cost | Free to diagnose with tools on hand; replacement magnets run roughly $15–$30 each, and a full aftermarket controller runs $100–$250 installed |
How the Tundra’s Integrated Brake Controller Works
Toyota’s factory Integrated Brake Controller (IBC) is not new to the third-generation Tundra — it debuted on the 2015 model-year, second-generation Tundra, standard on trucks equipped with the 5.7L V8 engine and the Tow Package. Second-generation trucks from 2015–2021 use a physical dash-mounted IBC module, while the redesigned third-generation Tundra (2022+) integrates the same function into the central touchscreen and instrument cluster, controlled through the vehicle’s CAN bus network. Both versions work the same way at their core: an accelerometer inside the truck senses deceleration and sends a proportional voltage signal through the 7-pin trailer connector to energize the trailer’s electric brake magnets. The harder you brake, the more voltage the controller delivers — up to the gain level you have set.
Earlier Tundra models — first-generation trucks and second-generation Tundras built before the 2015 update, along with lower trim levels that skipped the Tow Package — include a dedicated brake controller output wire in the factory harness but require an aftermarket or dealer-installed controller to drive it. Knowing which setup your truck has is the first step, because the diagnostic path differs slightly between integrated and aftermarket units.
Note: On 2022+ Tundras, the IBC is controlled through the vehicle’s CAN bus network. A wiring fault in the trailer harness can sometimes trigger an error code that limits or shuts off brake output entirely, even if the controller itself is fine.
Step 1 — Quick Triage: Plug, Ground, and Tire Test
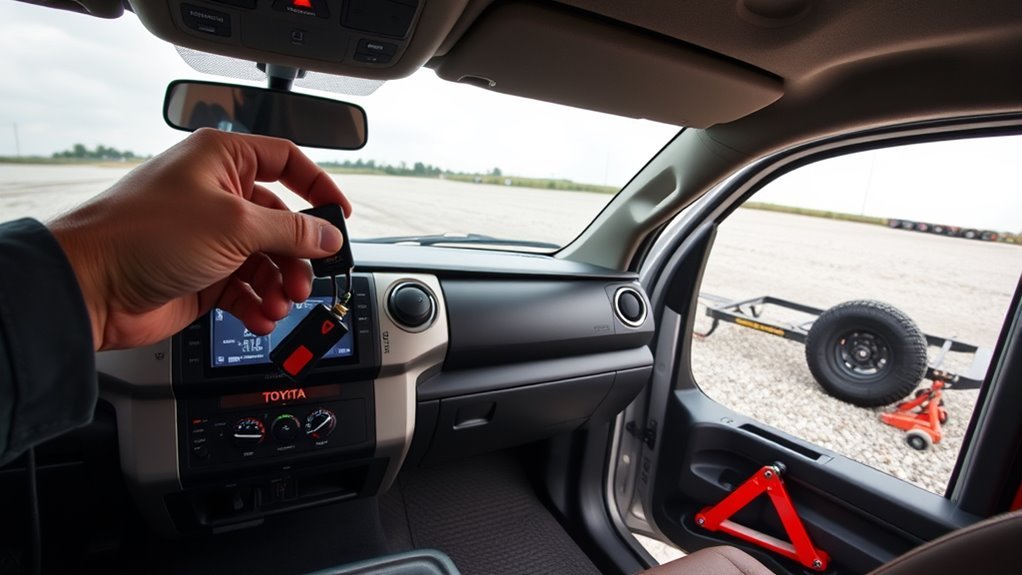
Start with the basics before you pull panels or blame the controller. Most brake failures trace back to a dirty connector or broken ground rather than a faulty controller module.
Inspect the Trailer Plug
Disconnect the 7-pin trailer plug and look inside both the vehicle-side and trailer-side connectors. Check for:
- Green or white corrosion on the pins
- Bent or pushed-back terminals
- Moisture or debris inside the housing
- Melted or discolored plastic around any pin
Clean corroded pins with electrical contact cleaner and a small wire brush. Bent terminals can often be straightened with a pick tool. If the housing is cracked or heavily corroded, replace the connector before continuing.
Verify the Trailer Ground
A poor ground is the single most common cause of trailer brake failure. The brake circuit cannot complete a return path without a solid, low-resistance ground.
- Locate the ground bolt on the trailer frame — it usually has a white or bare wire ring terminal.
- Loosen the bolt and lift the terminal away from the frame.
- Use sandpaper or a wire wheel to remove paint, rust, and oxidation from both the frame surface and the terminal lug.
- Re-secure the terminal to bare metal and tighten firmly.
- Repeat for the ground wire at the vehicle’s trailer hitch receiver if it has a separate chassis ground.
Tire Spin Test
Once the plug and ground are confirmed, perform a hands-on test at the wheel:
- Jack up one trailer wheel and support it with proper jack stands.
- Have an assistant sit in the Tundra and manually activate the brake controller override button or slider.
- Spin the raised wheel by hand. You should feel clear drag or resistance as the brake magnet engages against the drum.
- If the wheel spins freely with no resistance, the problem lies in the wiring between the connector and that wheel’s magnet, or in the magnet itself.
Warning: Always support the trailer on rated jack stands before spinning a raised wheel or reaching near brake components. Never rely on a floor jack alone.
Step 2 — Test Brake Controller Output With a Circuit Tester
After confirming the plug, ground, and wheel drag, verify that the Tundra’s brake controller is actually sending a signal before you open up the trailer wiring.
What You Need
- A 12V circuit tester or a digital multimeter set to DC voltage
- A helper to activate the controller while you probe
Testing Procedure
- Locate pin 7 on the vehicle’s 7-pin connector — this is the dedicated brake output pin (blue wire on most Tundras).
- With the trailer disconnected, connect the tester’s ground clip to a known chassis ground.
- Touch the probe to the brake output pin.
- Have your assistant press the manual brake override button or slider on the controller.
- A healthy controller should show between 7 and 12 volts DC when activated. The exact reading depends on your gain setting.
Interpreting Results
- Voltage present and steady: The controller and output wire are working. Move to trailer-side diagnostics.
- No voltage at all: Check the trailer brake fuse first — use your owner’s manual fuse diagram to find the correct circuit in the underhood or interior fuse box, since exact location and labeling can differ by model year. Also check for stored error codes using an OBD2 scanner.
- Voltage present but low (under 5V): Indicates high resistance in the circuit — look for corroded terminals, a damaged output wire, or a weak fuse connection.
- Intermittent voltage: Points to a loose terminal, damaged wire insulation, or a controller cutting out due to an error condition.
Pro tip: Use a digital multimeter instead of a basic test light if you can. A light only tells you voltage is present; a multimeter tells you how much, which helps distinguish a good signal from a weak one caused by resistance in the circuit.
Step 3 — Inspect Trailer Wiring, Grounds, and Brake Magnets
Once you’ve confirmed the Tundra sends a proper output signal, shift your focus entirely to the trailer side of the system.
Trace the Brake Wiring Harness
Follow the brake wiring from the trailer’s 7-pin plug to the junction box, and from the junction box out to each axle. Run your hands along the entire harness and check for cuts or abrasion where it rubs on frame edges, chafing near axle pivot points or suspension components, loose or corroded butt-splice connectors, and sections zip-tied too tight against hot or sharp metal. With the circuit tester, probe the brake wire at the junction box, then at the midpoint of each axle run, then at the wheel end. A drop in reading at one test point narrows the fault to that segment.
Check Trailer Grounds
Each axle typically has its own ground strap running from the brake backing plate to the trailer frame. Test continuity from each brake ground wire back to the trailer tongue. A reading above 0.5 ohms on a ground path indicates too much resistance and will cause weak or erratic braking even when everything else is correct.
Inspect Brake Magnets
If wiring continuity checks out but drag is still absent on one or more wheels, remove the hub and drum assembly on the suspect wheel to expose the brake shoes and magnet.
- Cracked magnet face: Replace the magnet.
- Glazed or polished surface: Lightly scuff the drum contact surface and replace the magnet if it no longer makes firm contact.
- Heavy or uneven wear: Replace the magnet and inspect the drum surface for grooving.
- Weak pull test: Hold a metal object near the magnet face and apply controller power. A healthy magnet pulls the object firmly.
- Broken lead wires: Look where the two thin wires enter the magnet body — a common failure point from repeated flex over the trailer’s life.
- Out-of-spec resistance: Most single electric brake magnets read in the 3–4 ohm range, but this varies by manufacturer and magnet size — check your trailer or magnet maker’s spec sheet rather than relying on one universal number.
Note: Brake magnets typically last 30,000–50,000 miles but can fail sooner on trailers in wet or salty conditions. If one magnet has failed, inspect all of them — they tend to wear at similar rates.
Note: Most states legally require a trailer above a certain weight to have its own brakes and a functioning breakaway system, but the exact GVWR threshold varies widely — from around 1,000 lbs in states like New York to 3,000–4,500+ lbs elsewhere. If you’re diagnosing a brake fault on a borderline-weight trailer, check your state’s specific requirement before deciding whether the trailer legally needs working brakes to be towed.
Step 4 — Adjust Gain, Check Updates, and Escalate to a Dealer
If the physical circuit checks out — plug clean, ground solid, output voltage confirmed, trailer wiring intact, and magnets healthy — but braking still feels wrong, the issue is likely calibration or a software fault in the controller.
Setting Gain Correctly
Gain controls how aggressively the controller energizes the brakes relative to the deceleration it senses, adjustable from 0 to 10 in half-step increments. Too low and the trailer pushes the truck; too high and the trailer brakes lock before the truck brakes engage.
- Start at the midpoint of the gain range — 5.0.
- Drive on a quiet road at about 20–25 mph and do a firm stop.
- If the trailer feels like it’s pushing the truck forward, increase gain by one step.
- If you feel or hear the trailer wheels locking, decrease gain by one step.
- Repeat until stops feel smooth and controlled, with truck and trailer decelerating together.
Adjust gain any time you change trailer weight, add cargo, or switch to a different trailer. The correct setting for an empty flatbed is very different from a fully loaded enclosed trailer.
Check for Firmware or Software Updates
Toyota has released IBC calibration and software updates for some Tundra model years to address sensitivity and output issues. Ask your dealer’s service department specifically whether any Technical Service Bulletins (TSBs) apply to your truck’s brake controller. Request written confirmation of the update version and date.
When to Escalate
- Bring your documented test results — what you checked, what you found, what you replaced — to the service manager.
- Ask for the brake controller module to be bench-tested or swapped to rule out an internal hardware fault.
- If dealer service does not resolve it, contact Toyota Customer Care directly and reference your repair order numbers.
Step 5 — Install an Aftermarket Controller
An aftermarket brake controller is the right move when diagnostics prove the factory IBC module itself has failed, or when the factory system simply doesn’t tune well enough for your specific trailer setup.
Recommended Options
- Tekonsha P3 — proportional controller with digital display, easy calibration, and self-leveling. Popular choice for Tundra owners.
- Tekonsha Prodigy P2 — simplified proportional option at a lower price point, suitable for most trailer setups.
- Redarc Tow-Pro Elite — offers both proportional and user-controlled modes; well regarded for heavy or off-road towing.
| Step | Action | Why It Matters |
|---|---|---|
| 1. Mount the controller | Secure within easy reach of the driver’s seat | Allows manual override without reaching awkwardly |
| 2. Run wiring | Connect to battery positive, ground, brake pedal switch, and trailer brake output | Powers the unit and provides the deceleration trigger signal |
| 3. Verify ground integrity | Ground to bare chassis metal, not painted surface | Poor ground causes erratic output |
| 4. Route harness safely | Keep wiring away from heat sources and moving parts | Prevents insulation damage and intermittent faults |
| 5. Test output | Measure voltage at brake output wire with a multimeter | Confirms the controller is delivering signal before you tow |
| 6. Set gain | Program to match your trailer’s weight and brake type | Prevents under- or over-braking on the first stop |
Warning: If your Tundra already has a factory IBC, consult the aftermarket controller’s compatibility guide before purchase. Some units require a bypass harness to disable the factory controller output first.
Common Symptoms and Likely Causes
Use the pattern you observe while towing to choose the next diagnostic test.
| Symptom | Most Likely Cause | First Check |
|---|---|---|
| No trailer braking at all | Blown fuse, corroded plug, broken output wire, or controller fault | Fuse box and plug pins |
| Weak braking on all wheels | Gain set too low, poor trailer ground, worn brake shoes | Gain setting, then trailer ground continuity |
| One wheel not braking | Failed brake magnet, broken wire to that wheel, wheel-end ground fault | Tire spin test on that wheel |
| Braking feels grabby | Gain set too high, brake shoes need adjustment | Reduce gain one step at a time and retest |
| Braking cuts in and out | Corroded pins, loose splice, damaged wire chafing on frame | Wiggle test on harness connections while controller is active |
| Error code or warning light | Controller detecting open circuit, short, or overload on brake wire | Disconnect trailer and clear code; reconnect and identify trigger |
| Brakes apply without pedal | Brake pedal switch shorted, controller fault, gain boost too aggressive | Inspect brake switch wiring; check sensitivity settings |
Pro tip: Test only one change at a time. If you replace a magnet and adjust gain simultaneously, you won’t know which fix resolved the problem.
Preventive Maintenance Tips
- Clean and protect the trailer plug after every trip. Apply dielectric grease to the pins to prevent moisture intrusion and corrosion.
- Test the brakes before every long haul using the tire spin method. A five-minute check in the driveway prevents dangerous discoveries at highway speed.
- Inspect magnet condition annually or every 10,000–15,000 towed miles. Replace all magnets as a set rather than one at a time.
- Check ground connections each season. Even stainless fasteners can develop corrosion at the contact surface over time.
- Store the trailer plug off the ground. A plug left dragging on pavement collects water, dirt, and road salt that accelerate pin corrosion.
- Verify gain after any cargo change. A correct gain setting for a loaded trailer is almost always too high for the same trailer running empty.
Related Guides
Frequently Asked Questions
Why did my trailer brake controller suddenly stop working?
The most common causes are a blown fuse, corroded trailer plug pins, a broken brake-output wire, or a failed connection inside the controller module. Corrosion builds gradually and can reach a tipping point where the connection fails entirely, which is why it may seem sudden. Start with the plug and ground, test brake-output voltage, then check fuses and wiring before assuming the controller module itself has failed.
What does a brake controller error mean on a Toyota Tundra?
A brake controller error on the Tundra’s dashboard typically means the system detected an abnormal condition — such as an open circuit, a short to ground, or an overload. Connect an OBD2 scanner to read the specific code. Then check the 7-pin connector, the brake-output fuse, wire continuity, and each brake magnet for resistance before concluding the controller module is faulty.
Can a bad trailer ground cause the brakes to stop working?
Yes — and it is one of the most frequently overlooked causes. Electric trailer brakes work on a complete circuit: the controller sends power to the magnet through the brake wire, and that current must return through the ground wire. If the ground has high resistance, the circuit cannot carry enough current to fully energize the magnet, resulting in weak, erratic, or absent braking. Clean both the trailer frame ground and the hitch receiver ground to bare metal and retest.
How do you know if trailer brake magnets are bad?
Signs of a failed brake magnet include no drag during the raised-wheel spin test, a glazed, cracked, or heavily worn magnet face, brittle or broken lead wires at the magnet body, or a resistance reading well outside your magnet’s rated spec. If one wheel shows no braking during a controller test, inspect that magnet and its wiring before replacing the controller.
Should I replace the factory controller with an aftermarket unit?
Only after you have fully ruled out the trailer plug, ground, fuses, output wire, trailer harness, and brake magnets as the root cause. Installing an aftermarket controller into a faulty circuit will not fix the underlying issue and may damage the new unit. Aftermarket controllers like the Tekonsha P3 offer more tuning flexibility and clearer diagnostics, making them a worthwhile upgrade once the factory unit is confirmed faulty.
How do I adjust brake controller gain on a Tundra?
On 2022+ Tundras, gain is adjusted through the center display or the instrument cluster trailer settings menu; on 2015–2021 trucks, it’s adjusted on the dash-mounted IBC unit itself. Start at the midpoint (5.0), make a 20–25 mph test stop, and adjust one step at a time until the trailer and truck stop as a single unit without the trailer pushing or its wheels locking. Recheck the setting any time your trailer load changes significantly.
Is there a dedicated fuse for the trailer brake controller?
Yes. Most Tundra model years have a dedicated fuse for the trailer brake output circuit. Check your owner’s manual fuse diagram for the exact location and amperage, since this differs by model year. A blown brake controller fuse results in zero output voltage at pin 7 of the trailer connector even if the controller module itself is functioning. Always replace with the correct amperage rating; a higher-rated fuse can damage the controller or wiring.
Sources
- Toyota Owner’s Manual — Trailer Brake Controller — official gain range, setup, and operating procedure for the factory IBC.
- The Fast Lane Truck — 2015 Tundra Integrated Brake Controller Preview — confirms the model year the factory IBC was introduced.
- Tekonsha — Prodigy P3 Brake Controller — official specs and troubleshooting for the recommended aftermarket controller.
- REDARC — Tow-Pro Elite Electric Brake Controller — official specs for the dual-mode aftermarket option.
- FMCSA — 49 CFR §393.42(b)(3), Brakes Required on All Wheels — federal baseline for trailer brake weight thresholds.
Conclusion
Reliable trailer braking starts with a clean, low-resistance signal path from the Tundra to each brake magnet. The most important lesson from this guide is to work through the system in order — plug, ground, brake-output voltage, trailer harness, and magnets — before touching controller settings or replacing any modules.
The vast majority of trailer brake failures have a straightforward cause: a corroded connector, a loose ground bolt, a blown fuse, or a worn-out magnet. Each takes less than an hour to diagnose and fix at home with basic tools. Only once you confirm the entire circuit is clean and intact should you adjust gain, request a firmware update, or consider an aftermarket unit.
If dealer service has not resolved the issue after documented attempts, escalate with your written records of each test and repair. A clear paper trail makes warranty claims and escalations far more effective. Careful testing helps you fix the real fault and tow with confidence.
Safety Disclaimer: This article provides general diagnostic information only and does not replace professional mechanical advice. If trailer brakes behave unpredictably, stop towing immediately and have a qualified technician inspect both the truck and trailer before driving again.
