Toyota Tundra OBD2 codes can point you toward an engine, emissions, transmission, or communication problem, but they do not name the failed part. A careful diagnosis starts by recording the code status and freeze-frame data. You can then check the correct repair information and test the related system before replacing anything.
Quick Answer
Plug a compatible OBD2 scanner into the 16-pin connector under the driver-side dash, switch the ignition on, and read every stored, pending, and permanent code. Save freeze-frame data before clearing anything. Decode each code for your exact Tundra model year, then test the related system instead of replacing a part from the code alone.
Key Takeaways
- An OBD2 code identifies a detected condition or circuit. It does not prove that a specific part has failed.
- Record stored, pending, and permanent codes, freeze-frame data, and readiness status before clearing the scanner.
- A basic scanner may not access ABS, airbag, four-wheel-drive, body, or Toyota-enhanced network codes.
- Use the repair procedure for your exact model year, engine, and code rather than relying on a generic parts list.
- Treat a flashing check-engine light and severe misfiring as urgent conditions.
At a Glance
| Time Required | About 10–20 minutes to retrieve and record codes; complete diagnosis may take longer |
| Difficulty | Easy for code retrieval; moderate to advanced for electrical and mechanical testing |
| Tools Needed | Compatible OBD2 scanner, flashlight, notes or phone, and model-specific service information |
| Cost | No added cost if you already have a compatible scanner; tool and professional diagnostic costs vary |
Why OBD2 Codes Matter for Your Toyota Tundra

Your Tundra’s onboard diagnostic system monitors emissions-related equipment and many electronic operating conditions. When a monitored value falls outside an expected range, the system may store a diagnostic trouble code, capture operating data, and switch on a warning light. The California Air Resources Board’s OBD overview explains how these systems detect malfunctions and retain information for diagnosis.
A trouble code narrows the search. It does not prove that the sensor, valve, module, or converter named in the description is defective. A damaged wire, weak battery, air leak, exhaust leak, mechanical problem, or another system fault can produce the same code.
A diagnostic trouble code is a starting point for testing, not a parts order.
Scanner coverage also matters. A basic reader usually focuses on emissions-related powertrain codes. ABS, airbag, body, four-wheel-drive, transmission, and communication modules may require an enhanced Toyota-compatible scanner or Toyota Techstream.
How to Use an OBD2 Scanner on a Toyota Tundra
Prepare the truck before connecting the scanner. Park on a level surface, shift into Park, apply the parking brake, and turn off accessories. Work in a ventilated area if the engine must run for live-data testing.
Warning: A flashing check-engine light can indicate a severe misfire that may damage the catalytic converter. Reduce engine load, avoid towing or hard acceleration, and stop as soon as it is safe if the engine shakes, stalls, loses power, or smells unusually hot. Arrange professional service or towing when continued driving may cause damage.
- Locate the diagnostic connector. Look beneath the lower driver-side dashboard for the 16-pin OBD2 connector. Use your owner’s manual if trim panels or accessories make it difficult to find.
- Inspect the connector. Check for bent pins, moisture, dirt, or an aftermarket device already connected to the port.
- Connect the scanner. Follow the scanner manufacturer’s instructions. Many tools are connected with the ignition off and then powered when you switch the ignition on.
- Turn the ignition on. Select the ON position without starting the engine for the initial scan unless your tool directs you differently.
- Enter vehicle information if requested. Select the correct model year, engine, and vehicle profile. An enhanced scanner may identify the truck automatically.
- Run a complete vehicle scan when available. A full scan may reveal related codes in the engine, transmission, ABS, body, and communication modules.
- Record every code and its status. Save confirmed or stored codes, pending codes, permanent codes, and module names.
- Save freeze-frame and readiness data. Record engine speed, load, temperature, speed, fuel-trim values, and other information captured when the fault occurred.
- Do not clear the codes yet. Diagnose the fault while the original evidence remains available.
Pro Tip: Take screenshots or photos of the complete scan report and freeze-frame screen. This record helps you compare conditions after a repair and prevents useful evidence from being lost.
[Amazon Products Picked for You]
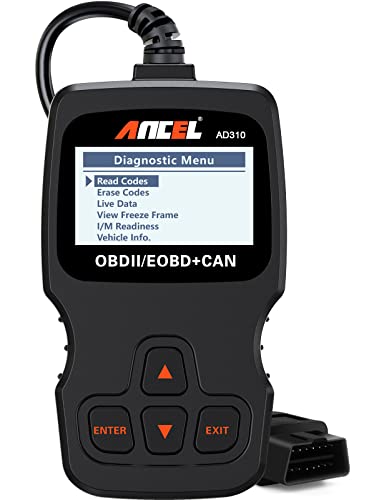
CEL Doctor: The ANCEL AD310 is one of the best-selling OBD II scanners on the market and is recommended by Scotty Kilmer, a YouTuber and auto mechanic. It can easily determine the cause of the check engine light coming on. After repairing the vehicle's problems, it can quickly read and clear diagnostic trouble codes of emission system, read live data & hard memory data, view freeze frame, I/M monitor readiness and collect vehicle information

Understand Your Check Engine Light – The ANCEL AD410 OBD2 scanner helps everyday drivers quickly read and clear engine-related fault codes, view code definitions, and understand why the check engine light is on before visiting a repair shop. With 42,000+ built-in DTC lookups, this car code reader helps reduce guesswork and makes basic vehicle diagnostics easier for beginners and DIY users
Understand Stored, Pending, and Permanent Codes
- Stored or confirmed code: The control module has detected the fault enough times to meet its criteria. The warning light may be on.
- Pending code: The system detected a possible fault, but the conditions required to confirm it may not have occurred yet.
- Permanent code: An emissions-related code that may remain after a repair until the vehicle completes its self-tests and confirms that the fault is gone.
- History code: Some enhanced modules retain a record of a fault that is not currently active.
Code terminology varies by scanner. Check your scanner manual so you know how it labels each status.
Why Freeze-Frame and Readiness Data Matter
Freeze-frame data shows selected operating conditions from the moment a fault was recorded. For example, it may reveal whether the engine was cold, under heavy load, idling, or traveling at highway speed. This context can help you reproduce an intermittent problem.
Readiness monitors show whether the vehicle has completed its emissions self-checks. Clearing codes or disconnecting the battery can reset these monitors to incomplete. The CARB OBD II fact sheet notes that further driving may be required before reset monitors run again.
How to Decode a Toyota Tundra OBD2 Code
A standard diagnostic trouble code normally contains five characters. Read the complete code rather than focusing only on the first letter.
| Position | What It Shows | Examples |
|---|---|---|
| First character | The main system associated with the fault | P = powertrain, C = chassis, B = body, U = network communication |
| Second character | Whether the definition is broadly standardized or may be manufacturer-related | A 0 is commonly generic, while 1 is often manufacturer-specific; 2 and 3 can vary by code family |
| Final three characters | The subsystem and detected fault condition | P0300 identifies a random or multiple-cylinder misfire condition |
Note: The short code label is not the complete diagnostic procedure. Use repair information for your exact model year, engine, drivetrain, and calibration. Toyota’s Technical Information System provides repair manuals, wiring diagrams, service bulletins, and Toyota diagnostic information.
Common Toyota Tundra OBD2 Codes and What to Check
The following codes can appear on a Toyota Tundra, but their presence does not confirm a failed part. Start with other related codes, freeze-frame information, visual checks, and the diagnostic procedure for your truck.
| Code | Basic Meaning | Useful First Checks | Do Not Assume |
|---|---|---|---|
| P0420 | Catalyst system efficiency below threshold, Bank 1 | Check for misfire or fuel-control codes, exhaust leaks, sensor wiring, and abnormal air-fuel or oxygen-sensor data. | Do not replace the catalytic converter until upstream causes and sensor operation have been tested. |
| P0441 | Evaporative-emission system incorrect purge flow | Inspect the fuel-cap seal, EVAP hoses, purge-valve connector, damaged lines, and commanded purge operation. | Do not assume the purge valve is defective without electrical and flow testing. |
| P0101 | Mass or volume air-flow sensor circuit range or performance | Check the intake duct, air-filter installation, vacuum leaks, sensor connector, wiring, and mass-air-flow readings. | Do not replace or clean the sensor until intake leaks, wiring, and operating data have been checked. |
| P0300 | Random or multiple-cylinder misfire detected | Review individual-cylinder codes, freeze-frame data, ignition parts, injectors, vacuum leaks, fuel delivery, and mechanical condition. | Do not assume spark plugs or ignition coils are the only possible causes. |
| P0500 | Vehicle speed sensor or speed-signal fault | Compare vehicle-speed data across available modules and inspect related wiring, connectors, ABS codes, and wheel-speed information. | Do not assume one replaceable speed sensor is responsible on every Tundra generation. |
| U0073 | Control-module communication bus “A” off | Check battery condition, charging voltage, fuses, grounds, network connectors, damaged wiring, and aftermarket electronics. Scan every available module. | Do not replace a control module before power, ground, wiring, and network integrity have been tested. |
[Amazon Products Picked for You]

[All System Diagnostics, Professional-Level Scanner] - BLCKTEC 460T is the ultimate OBD2 diagnostic tool for home mechanics and professionals. It supports all 10 OBD2 modes, reads and clears Engine/Transmission/ABS/SRS codes, performs All-System Diagnostics, offers workshop reset tools, and provides real-time live data. It helps you pinpoint issues, assess your car's condition, and prepare for SMOG checks with ease. NOTE: Function availability depends on your vehicle. Before you buy, be sure to use the Compatibility Checker on BLCKTEC website or contact our customer support to verify that the features you need are supported for your vehicle’s specific year, make, and model.

SUBSCRIPTION REQUIRED for Advanced Features: The Carista EVO Scanner activates basic OBD2 features upon purchase. To access advanced diagnostics, service tools, live data parameters, and vehicle customization, a paid subscription to the Carista App is required. Choose between 1-month, or 12-month plan to access Carista Advanced features.
Effective Troubleshooting Steps for OBD2 Fault Codes

Use a repeatable process instead of replacing the first component mentioned by the scanner. This approach is especially important when several codes appear together.
1. Verify the Complaint and Basic Conditions
Note how the truck behaves, when the warning light appears, and whether the problem occurs during a cold start, idle, acceleration, towing, or highway driving. Check battery condition, obvious fluid leaks, loose intake parts, damaged wiring, and disconnected hoses.
2. Review All Codes Before Choosing a Starting Point
Scan every module your tool can access. A low-voltage or communication code may explain several secondary faults. When available, review code status, timestamps, mileage records, and the module that first reported the problem.
Give urgent attention to:
- Low system-voltage and power-supply codes
- Network communication codes affecting several modules
- Misfire codes with a flashing warning light
- Temperature, oil-pressure, or throttle faults accompanied by severe symptoms
3. Compare the Code With Freeze-Frame Data
Use the recorded temperature, engine speed, vehicle speed, load, and fuel-control data to understand when the problem occurred. A cold-start fault may require a different test than a fault that appears only under heavy load.
4. Inspect Before Replacing Parts
Look for loose connectors, damaged insulation, corroded terminals, broken vacuum hoses, intake leaks, exhaust leaks, blown fuses, poor grounds, and signs of water entry. Confirm that previous repairs or aftermarket equipment have not disturbed the circuit.
5. Use Live Data and Circuit Tests
Compare relevant sensor readings with expected operating behavior. When a circuit code is present, test power, ground, signal, resistance, or continuity according to the Toyota repair manual. Do not probe airbag or network circuits without the correct procedure and equipment.
6. Check Toyota Service Information
Use the Toyota manual lookup for vehicle-specific owner information. For diagnostic procedures, wiring diagrams, and applicable service bulletins, use Toyota TIS or a qualified repair facility with access to equivalent information.
7. Repair the Confirmed Cause and Verify the Result
After the repair, clear codes only when you have saved the original data. Start the truck, confirm normal operation, and check live data for the repaired system. Drive under suitable conditions, rescan the vehicle, and review readiness-monitor status.
A code that does not return immediately is not always proof of a complete repair. Some monitors run only after specific temperature, speed, fuel-level, or driving conditions are met.
What to Do if the Scanner Says “No Communication”
A no-communication message does not always mean that the engine computer has failed. Work through these checks:
- Confirm that the ignition is in the position required by the scanner.
- Make sure the scanner plug is fully seated.
- Inspect the diagnostic connector for damaged, spread, pushed-back, or corroded pins.
- Check whether the scanner powers on from the connector.
- Confirm that the truck’s battery is not discharged.
- Inspect the correct fuses using the owner’s manual or wiring information.
- Remove an aftermarket splitter, tracker, tuner, alarm interface, or other device connected to the diagnostic port.
- Test the scanner on another compatible vehicle, or try a known-good scanner.
- Confirm that the scanner supports your Tundra’s model year and the module you are trying to access.
If several modules are offline or communication returns intermittently, a network, power, ground, or wiring fault may require professional testing.
[Amazon Products Picked for You]

[Diagnose Like a Pro] BlueDriver Pro is a professional OBD2 scanner and diagnostic tool that helps you scan, understand, and clear vehicle trouble codes with confidence. Turn...
When to Seek Professional Help for OBD2 Issues
Basic code retrieval is manageable for many owners. Professional diagnosis is the safer choice when:
- The check-engine light flashes or the engine misfires severely.
- The truck stalls, overheats, loses oil pressure, or has a major loss of power.
- You smell raw fuel, burning material, or an overheated catalytic converter.
- Several modules report communication or low-voltage faults.
- The code involves an airbag, ABS, electronic throttle, high-current circuit, or control-module network.
- Your scanner cannot access the affected module.
- The fault returns after a repair.
- Testing requires a wiring diagram, oscilloscope, smoke machine, fuel-pressure equipment, compression testing, or bidirectional controls.
- You cannot safely reach or test the suspected circuit.
A qualified technician can use enhanced Toyota diagnostics, wiring information, active tests, and measured circuit results to identify the cause. Toyota’s warning-light resource can also help you review vehicle-specific warning information before deciding whether to drive.
Related Guides
Frequently Asked Questions
How do you read a Toyota Tundra OBD-II fault code?
Connect a compatible scanner to the OBD2 port under the driver-side dashboard. Switch the ignition on, select the correct vehicle if required, and run a code scan. Record every code, its module and status, freeze-frame data, and readiness status before clearing anything.
How do I decode a Toyota Tundra OBD2 code?
Start with the first character: P refers to powertrain, C to chassis, B to body, and U to network communication. The remaining characters identify the code family and detected condition. Look up the complete code using information for your exact Tundra model year and engine.
How do you use an OBD scanner step by step?
Park safely, apply the parking brake, locate the diagnostic port, connect the scanner, and switch the ignition on. Run a complete scan, record the codes and freeze-frame data, research the exact diagnostic procedure, test the related system, repair the confirmed cause, and rescan after a suitable drive.
Can you read Toyota Tundra engine codes without a scanner?
A compatible OBD2 scanner is the normal safe method for a modern Toyota Tundra. Do not bridge terminals in the diagnostic connector or rely on a check-engine-light blinking method unless an official Toyota repair procedure specifically instructs you to do so for your exact model year and system.
Can I drive my Tundra with the check-engine light on?
A steady light may allow cautious driving for prompt diagnosis when the truck runs normally and no other warnings appear. A flashing light, severe misfire, stalling, overheating, strong fuel smell, or major power loss requires urgent attention. Reduce load and stop safely when continued driving could cause damage.
Should I clear OBD2 codes before diagnosing the problem?
No. Record the full scan report, code status, freeze-frame data, and readiness monitors first. Clearing codes can erase evidence and reset emissions monitors. Clear them after the fault has been tested or repaired, then verify the result with a rescan.
Can a basic OBD2 scanner read ABS and airbag codes?
Not always. Many basic readers access only generic emissions-related powertrain codes. ABS, airbag, body, four-wheel-drive, transmission, and network systems may require a scanner with enhanced Toyota coverage.
Why did the same code return after a repair?
The original cause may still be present, the replacement part may not have solved the circuit or system fault, or another related problem may exist. Compare the new freeze-frame data with the original record and repeat the proper tests instead of replacing additional parts by guesswork.
Conclusion
Reading Toyota Tundra OBD2 codes is straightforward, but diagnosing the cause requires more than matching a code to a parts list. Save the original data, consider every related code, inspect the system, and test the circuit or component before replacing anything. After the repair, rescan the truck and confirm that the relevant monitor completes without the fault returning.
Use professional help when the warning light flashes, severe symptoms appear, several modules lose communication, or the required tests exceed your tools and experience. A careful diagnosis protects your truck, avoids unnecessary repairs, and provides a more reliable result.
Sources
- Toyota Manuals and Warranties — vehicle-specific owner manuals and warranty information
- Toyota Technical Information System — repair manuals, wiring diagrams, service bulletins, and Toyota diagnostic information
- Toyota Warning Lights — vehicle-specific warning-light guidance
- California Air Resources Board OBD Program — purpose and operation of onboard diagnostic systems
- CARB OBD II Systems Fact Sheet — warning-light, readiness-monitor, and OBD-II background information
- U.S. EPA Vehicle and Engine Emissions Regulations — current federal emissions-regulation resources