
Perfectly seared scallops should taste sweet, buttery, and tender, with a deep golden crust on the outside. The secret is not complicated: choose dry-packed sea scallops, remove extra moisture, use a hot heavy pan, avoid overcrowding, and cook them quickly. With the right prep and timing, you can get restaurant-style scallops at home without turning them rubbery.
Quick Answer
To sear scallops with a golden crust, pat dry-packed sea scallops very dry, season with salt and pepper, heat a cast-iron or stainless steel pan until hot, add high-smoke-point oil, and sear the scallops without moving them for 1–2 minutes per side.
Key Takeaways
- Choose dry-packed sea scallops because they brown better than wet-packed scallops.
- Pat the scallops very dry and remove the tough side muscle before cooking.
- Use a heavy-bottomed pan, such as cast iron or stainless steel, for steady high heat.
- Do not overcrowd the pan, or the scallops will steam instead of sear.
- Cook scallops quickly, usually 1–2 minutes per side, until browned outside and tender inside.
At a Glance
| Time Required | 15–25 minutes, including drying and prep |
| Difficulty | Easy to medium, mainly because timing matters |
| Tools Needed | Paper towels, tongs, heavy skillet, instant-read thermometer if available |
| Cost | Varies by scallop size, source, and whether you buy fresh or frozen |
Choosing the Best Scallops for Searing
When it comes to selecting scallops, the first step is understanding the different types available at the market. The two primary varieties are sea scallops and bay scallops. Sea scallops are larger, meatier, and usually better for searing because they hold their shape under high heat.
Bay scallops are smaller and sweeter, but they cook very quickly and can overcook before they develop a strong crust. They work well in pastas, soups, and gentle sautés, but sea scallops give you the best results when you want a golden sear.
When purchasing scallops, look for scallops labeled as dry-packed or dry. Dry-packed scallops have not been soaked in phosphate solutions, so they release less liquid in the pan. That makes them easier to brown and helps preserve their naturally sweet flavor.
Wet-packed scallops can still be edible, but they often hold extra moisture. That added moisture makes them harder to sear because the liquid steams in the pan before the scallops can brown. If you have wet-packed scallops, dry them extra carefully before cooking.
Freshness also matters. Fresh scallops should smell clean, mild, and ocean-like. Avoid scallops with a strong fishy odor, a dull surface, or a slimy texture. Good scallops should look slightly translucent to creamy white, depending on the variety and handling.
If you buy frozen scallops, choose scallops that look individually frozen rather than packed into a solid icy block. Thaw them safely in the refrigerator overnight, then drain and dry them well before cooking. Avoid thawing scallops at room temperature because seafood can move into unsafe temperature ranges quickly.
Size matters too. Larger sea scallops, often labeled around 10–20 per pound, are easier to sear evenly and provide a satisfying bite. Smaller scallops can still work, but they cook faster and need closer attention.
Note: Scallop labels can vary by store. If the package does not say dry-packed, ask the seafood counter whether the scallops were treated with phosphates or added water.
[Amazon Products Picked for You]

Responsibly Farmed or sustainable wild-caught

DABC OAK LAND Dried Scallop Dried Top Graded Scallop Conpoy 100% Natural Sun Grocery Gourmet Food Meat Seafood Dried Seafood 8oz/bag

Responsibly Farmed or sustainable wild-caught
Preparing the Scallops for Searing
Preparation is the step that makes or breaks the crust. Begin by checking the scallops for grit or small bits of shell. If needed, rinse them briefly under cold water, then dry them thoroughly with paper towels.
Moisture is the enemy of a good sear. If the scallops are wet, they will steam instead of brown, which leads to a soft surface and weaker flavor. Press them gently between layers of paper towels until the surface feels tacky rather than wet.
Next, inspect each scallop for the small side muscle. This firm little tab sits on the side of some scallops and can feel chewy after cooking. Pull it away with your fingers or trim it with a small knife.
After cleaning and drying, season the scallops with salt and pepper. Keep the seasoning simple if you want the scallops’ natural sweetness to shine. You can add more flavor later with butter, herbs, lemon, or sauce.
Some cooks let scallops sit at room temperature for 10–15 minutes before searing. This short rest can help the center cook more evenly. Do not leave seafood out for a long time, though, because food safety matters just as much as flavor.
Warning: Do not reuse plates, towels, or utensils that touched raw scallops unless you wash them first. Keep raw seafood separate from ready-to-eat foods to reduce cross-contamination.
Selecting the Ideal Pan for Searing
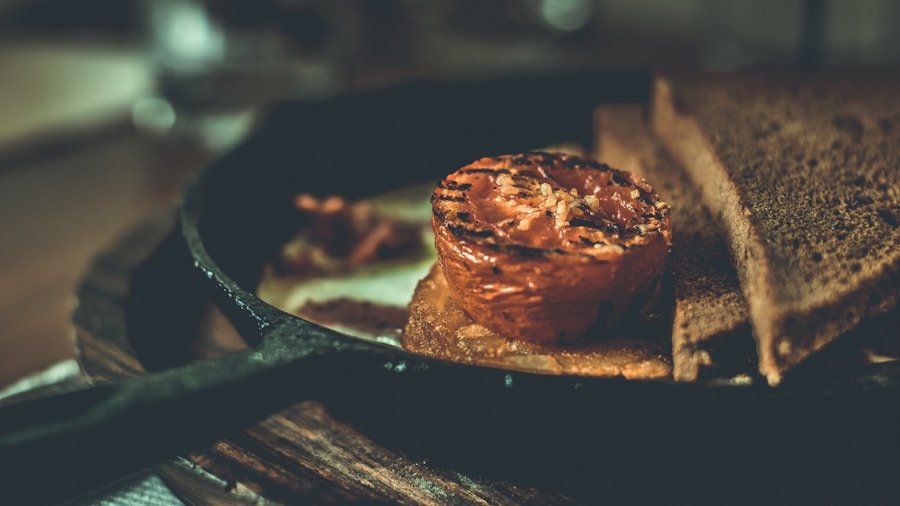
The choice of pan can significantly affect the final texture of your seared scallops. A heavy-bottomed skillet or cast-iron pan works well because it retains heat and recovers quickly after you add the scallops.
Stainless steel is another strong choice. It can create deep browning when the pan is hot enough and the scallops are dry. The scallops may stick at first, but they usually release once a crust forms.
Non-stick pans can also be used, especially for beginners, but they may not create the same deep crust. If you choose non-stick, make sure the pan is rated for the heat level you plan to use. Avoid overheating older non-stick pans.
Pan size matters. Leave space between the scallops so steam can escape. If the scallops are crowded, moisture builds up and prevents browning. When cooking a large batch, sear in batches instead of forcing everything into one pan.
Pro Tip: Use a pan large enough to leave at least a small gap between scallops. That one detail helps the edges brown instead of turning pale and watery.
[Amazon Products Picked for You]
Great for Family Meals: Spacious 12-inch fry pan ideal for cooking multiple servings at once—perfect for stir-fries, large omelettes, and pan-searing meats, making it a great addition to any kitchen.

MULTIPLY CLAD STURDY CONSTRUCTION: Multi-clad technology creates the highest-quality 3-ply stainless steel cookware set for your kitchen. The 304 stainless steel interior ensures safe, easy-to-clean cooking; a thick aluminum core enables even heat distribution; and the 430 stainless steel exterior is compatible with all cooktops. This design allows heat to flow uniformly across the entire pan, from bottom to sidewalls, for fast, consistent heating.

Extra-Large for Big Batches: Designed for professional and home chefs, this 14-inch fry pan is ideal for cooking large meals, making it perfect for families, entertaining, and everyday kitchen use.
Choosing the Right Oil and Fat
Use a high-smoke-point oil for the first part of the sear. Grapeseed oil, avocado oil, canola oil, and refined vegetable oil can handle high heat better than delicate finishing oils.
Butter adds excellent flavor, but it can brown or burn quickly over high heat. For the best balance, start with oil, sear the first side, then add butter near the end with garlic, thyme, parsley, or lemon zest.
Avoid adding sugary sauces too early. Sweet sauces can scorch before the scallops finish cooking. Add glazes, citrus, or pan sauces after the scallops have developed their crust.
[Amazon Products Picked for You]

Graza Frizzle Oil Made from 100% Olives: A neutral-flavored, high heat cooking oil made from 100% peak harvest olives. With a smoke point of up to 450 degrees, Frizzle is your high-heat kitchen hero. 1 bottle/750ml.

America's #1 Avocado Oil for Cooking — Every batch of Chosen Foods avocado oil is independently tested to confirm 100% pure avocado oil with no fillers or seed oil blends. Our purity standard was verified by UC Davis as one of only two avocado oil brands to pass their rigorous quality test. This bottle delivers the clean, neutral taste and consistent high-heat performance that has made Chosen Foods the avocado oil of choice for home cooks, professional chefs, and clean-eating households across the United States.

Light Buttery Flavor That Elevates Every Meal: Algae Cooking Club Chef-Grade Algae Oil enhances every dish with subtle richness. Its neutral profile makes it ideal for searing, baking, and dressings, transforming everyday meals into gourmet experiences.
Achieving the Perfect Searing Temperature
| Meat Type | Perfect Searing Temperature (Fahrenheit) |
|---|---|
| Beef (steak) | 400-450 |
| Pork (chops) | 400-425 |
| Chicken (breast) | 425-450 |
| Lamb (chops) | 400-450 |
Temperature control is crucial when searing scallops. The pan should be hot enough to brown the surface quickly before the inside overcooks. For most home cooks, medium-high to high heat works best, depending on the stove and pan.
A good test is to sprinkle a few drops of water into the preheated pan. If the droplets sizzle and evaporate quickly, the pan is getting close. If they sit quietly, the pan is too cool.
Once the pan is hot, add a thin layer of high-smoke-point oil. Let the oil heat until it shimmers. If it smokes heavily, lower the heat slightly before adding the scallops.
Do not add scallops to a cold pan. A cold pan slowly pulls moisture from the scallops and prevents the surface from browning. You want fast contact with strong heat.
Mastering the Searing Technique
The actual process of searing scallops requires attention and precision. Place the scallops in the pan gently, laying them down one at a time. Start at one side of the pan and move in order so you know which scallop went in first.
After the scallops hit the pan, leave them alone. Do not slide, press, or constantly check them. Letting them sit undisturbed gives the crust time to form.
For large sea scallops, the first side usually takes about 1–2 minutes. Very large scallops may need closer to 2–3 minutes. The bottom should look deeply golden, not pale beige.
Once the first side is browned, use tongs or a thin fish spatula to flip each scallop carefully. If a scallop sticks hard, give it a few more seconds. Scallops often release more easily once the crust is ready.
After flipping, add butter and aromatics if desired. Garlic, thyme, and a small squeeze of lemon work especially well. Tilt the pan slightly and spoon the melted butter over the scallops for extra richness.
Cook the second side for about 1 minute, or until the scallops turn opaque around the edges but still feel tender. Overcooking turns scallops firm and rubbery, so pull them from the pan before they become completely stiff.
The best scallop crust comes from three simple controls: a dry surface, a hot pan, and enough space for steam to escape.
Timing the Searing Process

Timing Is Everything
When searing scallops, timing is crucial because they cook quickly and can easily become overcooked. In general, a total cooking time of 3–6 minutes is enough for most sea scallops, depending on size and thickness.
The first side usually takes longer because it builds the main crust. The second side cooks faster because the scallop is already hot from the first sear.
Measuring Doneness
For better accuracy, use an instant-read thermometer. Many cooks pull scallops from the pan when they reach about 120°F to 125°F in the center, then let carryover heat finish the job gently.
If you do not have a thermometer, use visual and touch cues. The outside should be golden brown, the edges should look opaque, and the center should still feel slightly springy. A scallop that feels very firm is likely overcooked.
The Perfect Balance
This balance between doneness and texture is what makes seared scallops so appealing. You want a flavorful crust on the outside and a tender, slightly silky center inside.
Common Mistakes That Prevent a Golden Crust
Even good scallops can turn out pale if a few basic details go wrong. The most common mistake is not drying the scallops enough before they hit the pan. Surface moisture creates steam, and steam blocks browning.
Another common mistake is overcrowding. When too many scallops sit in the pan at once, the temperature drops and moisture collects. Cook in batches if needed, and keep the finished scallops warm on a plate while you finish the rest.
Moving scallops too soon can also ruin the crust. Let the scallops cook undisturbed until the bottom browns. If you keep lifting them, the crust tears and the scallops lose contact with the pan.
Using too much butter too early can also cause problems. Butter tastes great, but its milk solids brown quickly. Start with oil, then add butter during the final minute for flavor.
Enhancing the Flavor with Seasonings and Sauces
Salt and pepper are enough for excellent scallops, but you can easily build more flavor. A squeeze of fresh lemon juice just before serving brightens the dish and balances the scallops’ natural sweetness.
Fresh herbs also work well. Parsley, chives, dill, tarragon, and thyme add freshness without hiding the seafood flavor. Add delicate herbs at the end so they stay bright.
For a richer finish, make a quick pan sauce. After removing the scallops, lower the heat and add a small knob of butter, minced shallot, lemon juice, or a splash of white wine. Scrape up the browned bits, then spoon the sauce around the scallops.
A classic beurre blanc sauce also pairs beautifully with seared seafood. This French-style butter sauce uses wine, shallots, and butter to create a silky finish. Keep the sauce light so it does not overpower the scallops.
If you like heat, add a pinch of red pepper flakes, a drizzle of chili oil, or a small spoonful of chili crisp. Use spicy additions sparingly because scallops have a delicate flavor.
Serving and Enjoying the Perfectly Seared Scallops
Once your scallops are perfectly seared and seasoned, serve them immediately. Scallops cool quickly, and their texture is best right after cooking. Warm plates help keep them tender at the table.
Seared scallops pair well with creamy risotto, lemon pasta, mashed potatoes, sautéed greens, asparagus, roasted vegetables, or a crisp salad. Choose sides that support the scallops instead of covering them up.
For a simple restaurant-style plate, place the scallops over risotto or purée, spoon sauce around the edge, and finish with herbs or lemon zest. Microgreens or edible flowers can add color, but they are optional.
As you serve your scallops, enjoy both the contrast and the simplicity: a crisp golden surface, a tender center, and a naturally sweet seafood flavor. That combination is what makes seared scallops feel special without requiring a complicated recipe.
If you’re looking to elevate your cooking skills beyond searing scallops, you may want to consider investing in one of the 5 Best Electric Tea Kettles with Temperature Control. These kettles offer precise temperature settings for brewing the perfect cup of tea or coffee, making them a valuable addition to any kitchen. Mastering the art of searing scallops with a golden crust is just the beginning of your culinary journey.
Related Guides
Frequently Asked Questions
What are scallops?
Scallops are shellfish prized for their sweet, delicate flavor and tender texture. The part most commonly sold for cooking is the adductor muscle, which opens and closes the scallop’s shell.
What does it mean to sear scallops?
Searing scallops means cooking them quickly over high heat so the outside develops a golden crust while the inside stays tender and moist.
How do you sear scallops with a golden crust?
Pat the scallops very dry, season them with salt and pepper, heat a heavy skillet until hot, add a small amount of high-smoke-point oil, and cook the scallops for about 1–2 minutes per side without moving them too much.
What are some tips for achieving a golden crust when searing scallops?
Use dry-packed scallops, remove excess moisture with paper towels, preheat the pan well, leave space between scallops, and let the first side cook undisturbed until the crust forms.
Should you use butter or oil for searing scallops?
Use oil first because it handles high heat better. Add butter near the end for flavor, then baste the scallops briefly with the melted butter.
Why did my scallops turn watery in the pan?
Scallops often turn watery when they are wet-packed, not dried well, cooked in a pan that is too cool, or crowded too closely together. Dry them thoroughly and cook in batches for better browning.
What are some serving suggestions for seared scallops with a golden crust?
Seared scallops can be served as an appetizer or main dish. They pair well with risotto, pasta, mashed potatoes, sautéed greens, fresh salad, lemon butter sauce, beurre blanc, or a light balsamic glaze.
Sources
- U.S. Food and Drug Administration — seafood selection, storage, and safe handling guidance
- NOAA FishWatch: Sea Scallop — background on sea scallops and U.S. scallop seafood information
- FDA Food Code 2022 — food safety temperature and handling reference
