Baking bread without a bread machine gives you more control over the dough, the crust, and the final texture of each loaf. You do not need special equipment to start. With flour, water, yeast, salt, a bowl, and a hot oven, you can make a fresh loaf by hand and learn how bread changes at every stage.
The process can feel intimidating at first, but it becomes much easier when you understand what each step does. Mixing hydrates the flour, kneading develops gluten, proofing lets the yeast create lift, and baking sets the structure. Once you know those basics, you can adjust flavor, shape, and texture to match the bread you want to make.
Quick Answer
To bake bread without a bread machine, mix flour, water, yeast, and salt into a shaggy dough, knead it until smooth, let it rise until doubled, shape it, proof it again, and bake it in a preheated oven until the crust is browned and the loaf sounds hollow or reaches the right internal temperature.
Key Takeaways
- Baking bread without a bread machine is a rewarding hands-on process that gives you more control over texture, flavor, and shape.
- The basic ingredients are flour, water, yeast, and salt, with optional sugar, honey, butter, or oil depending on the recipe.
- Bread flour usually gives yeast bread a stronger rise, while all-purpose flour can still work for many simple loaves.
- Kneading, proofing, shaping, baking, and cooling all affect the final crumb, crust, and structure.
- Common problems like dense bread, dry bread, or poor rise usually come from measurement issues, weak yeast, under-kneading, or incorrect proofing time.
At a Glance
| Time Required | About 3 to 4 hours total, including rising and cooling time |
| Difficulty | Beginner-friendly with a little patience |
| Tools Needed | Mixing bowl, spoon or dough scraper, measuring cups or kitchen scale, clean work surface, loaf pan or baking sheet, towel, and wire rack |
| Cost | Low, especially if you already have basic pantry ingredients |
Essential Ingredients and Equipment Needed
To start your bread-baking journey, gather the right ingredients and equipment before you mix the dough. Most basic bread recipes use four core ingredients: flour, water, yeast, and salt. Flour gives the loaf structure. Water hydrates the flour and helps activate the yeast. Yeast creates the rise. Salt improves flavor and helps control fermentation.
You can also add sugar, honey, butter, milk, eggs, or oil, depending on the type of bread you want. Sugar or honey can lightly sweeten the dough and give yeast extra food. Butter or oil can make the crumb softer and help the bread stay tender for longer. Enriched doughs, such as dinner rolls or sandwich bread, often use these extras.
For equipment, you do not need a bread machine. A large mixing bowl, a sturdy wooden spoon, a dough scraper, measuring cups, measuring spoons, and a clean surface for kneading are enough for a basic loaf. A loaf pan works well for sandwich bread, while a baking sheet works for round loaves or free-form bread.
A kitchen scale can make your results more consistent because flour can pack differently into cups. If you have an instant-read thermometer, it can also help you check water temperature and confirm when the bread is fully baked.
Pro Tip: Measure flour lightly if you use cups. Spoon it into the measuring cup and level it off instead of scooping directly from the bag, which can pack in too much flour and make bread dry.
Understanding the Bread Baking Process
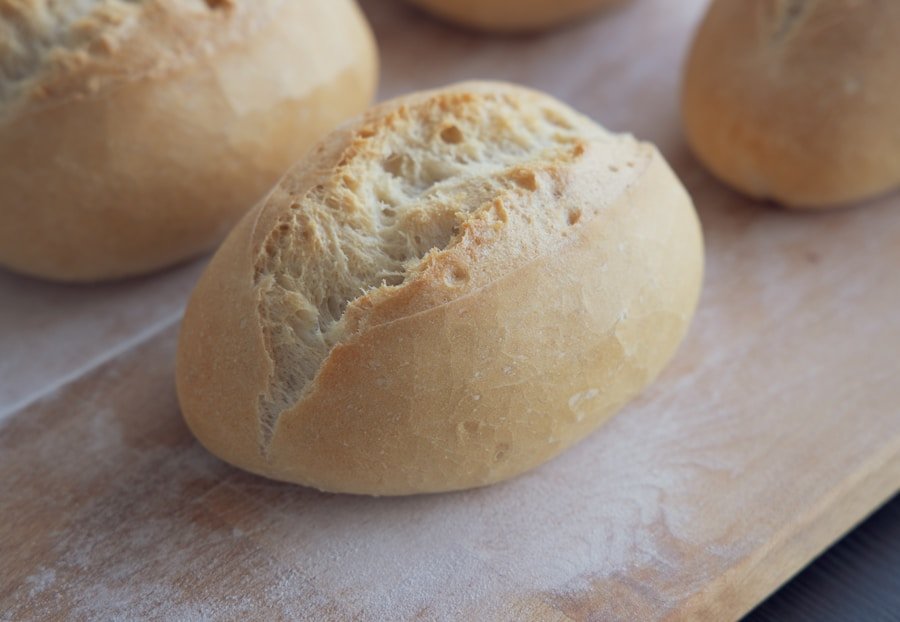
The bread baking process has several important stages: mixing, kneading, first rise, shaping, final proof, baking, and cooling. Each stage affects the flavor, texture, and structure of the final loaf. When you understand what each step does, you can spot problems early and make better bread with practice.
Mixing brings the flour, water, yeast, and salt together into a shaggy dough. At this point, the flour absorbs moisture and gluten begins to form. Gluten is the protein network that gives bread dough its stretch, strength, and ability to hold gas as it rises.
After mixing, kneading develops that gluten network further. You fold, press, stretch, and turn the dough until it becomes smoother and more elastic. This step also helps distribute yeast evenly through the dough.
Next comes the first rise, also called bulk fermentation. During this stage, yeast feeds on available sugars and produces carbon dioxide gas. That gas expands inside the dough, creating lift and improving flavor. For many simple breads, the first rise takes about one to two hours, or until the dough has roughly doubled in size.
After the first rise, you shape the dough and let it proof again. The final proof gives the shaped loaf time to relax and expand before baking. Once the dough enters the hot oven, steam and yeast activity create a final burst of rise called oven spring.
Note: Rising times are guides, not strict rules. Dough rises faster in a warm kitchen and slower in a cool one, so watch the dough more than the clock.
Choosing the Right Flour and Yeast
| Flour Type | Typical Protein Content | Best For |
|---|---|---|
| All-Purpose Flour | About 10-12% | Basic loaves, rolls, pancakes, waffles, and general baking |
| Bread Flour | About 12-14% | Yeast breads, pizza dough, chewy loaves, and taller sandwich bread |
| Whole Wheat Flour | Often about 13-15%, depending on brand | Whole grain breads, rustic loaves, muffins, and heartier doughs |
| Yeast Type | How It Is Used | Best For |
| Active Dry Yeast | Often dissolved in warm water before mixing | Traditional recipes, longer rise times, and beginner-friendly proofing checks |
| Instant Yeast | Can usually be mixed directly into dry ingredients | Shorter rise times, simple sandwich bread, rolls, and everyday loaves |
Selecting the right flour and yeast makes a clear difference in homemade bread. Bread flour is often recommended for yeast breads because its higher protein content helps create a stronger gluten structure. That structure supports a better rise and a chewier texture.
All-purpose flour can still work well for many simple loaves, especially if you prefer a softer texture. If your loaf turns out a little denser with all-purpose flour, that does not mean you failed. It may simply have less gluten strength than a loaf made with bread flour.
Whole wheat flour adds more flavor, color, and fiber, but it can also make bread feel heavier. The bran in whole wheat flour can interfere with gluten development, so many bakers start with a blend of whole wheat flour and bread flour or all-purpose flour.
Yeast choice also matters. Active dry yeast often needs to be dissolved in warm water before you add it to the dough. Instant yeast has finer granules and can usually go straight into the flour. Both can make excellent bread, so use what your recipe calls for or what you already have.
Warning: Do not use very hot water with yeast. Water that feels hot rather than warm can weaken or kill the yeast, which may stop your dough from rising properly.
Step-by-Step Method for Baking Bread Without a Bread Machine
A basic handmade loaf follows a simple pattern. Once you learn the rhythm, you can use it for many beginner bread recipes.
- Mix the dry ingredients. Add flour, yeast, and salt to a large bowl. If your recipe uses sugar, add it at this stage unless the recipe says otherwise.
- Add the water. Pour in warm water gradually and stir until a shaggy dough forms. The dough should look rough, not perfectly smooth.
- Rest the dough briefly. Let it sit for 10 to 15 minutes if the recipe allows. This helps the flour hydrate and can make kneading easier.
- Knead until smooth and elastic. Work the dough by pressing, folding, turning, and stretching it. Add only small amounts of flour if it sticks badly.
- Let it rise. Place the dough in a lightly greased bowl, cover it, and let it rise until roughly doubled.
- Shape the loaf. Gently press out large air bubbles, shape the dough, and place it in a loaf pan or on a baking sheet.
- Proof again. Cover the shaped dough and let it rise until puffy.
- Bake in a preheated oven. Bake until the crust is browned and the loaf tests done.
- Cool before slicing. Let the loaf cool on a wire rack so the crumb can set.
This basic method works because it gives the dough enough time to develop structure and flavor. Rushing the process can lead to dense bread, torn shaping, or a gummy center.
Kneading and Shaping the Dough
Kneading is the step that turns a sticky mixture into a smooth, stretchy dough. To knead by hand, place the dough on a lightly floured surface. Press it forward with the heels of your hands, fold it back over itself, turn it slightly, and repeat. This steady motion builds strength in the dough.
At first, the dough may feel sticky and uneven. As you keep kneading, it should become smoother and more elastic. Try not to add too much extra flour during this stage. A little flour can prevent sticking, but too much can make the final loaf dry or heavy.
You can check the dough by pressing it gently. Well-kneaded dough should feel springy and hold together as one smooth mass. Some bakers also use the windowpane test, where a small piece of dough stretches thin enough to let light through before tearing. This test is most useful for white bread doughs with enough gluten.
Once the dough has risen, shaping gives it structure before baking. For a basic round loaf, gently flatten the dough into a rectangle, fold the edges toward the center, and turn it seam-side down. Cup your hands around it and tighten the surface by gently dragging the dough across the counter.
For sandwich loaves, flatten the dough into a rectangle, fold the sides in slightly, and roll it tightly from one short end into a log. Place it seam-side down in a greased loaf pan. Proper shaping creates surface tension, which helps the loaf rise upward instead of spreading outward.
Proofing the Dough the Right Way
Proofing is the resting period that allows yeast to create gas and expand the dough. The first rise usually happens after kneading. The second rise happens after shaping. Both are important, but they do different jobs.
The first rise develops flavor and gives the dough strength. The second rise creates a lighter loaf and prepares the dough for the oven. If the dough is under-proofed, it may split, feel tight, or bake up dense. If it is over-proofed, it may collapse or taste overly yeasty.
A simple way to check proofing is the poke test. Lightly flour your finger and press the dough gently. If the indentation springs back slowly and leaves a slight mark, the dough is usually ready. If it springs back immediately, it may need more time. If it does not spring back at all, it may be over-proofed.
Pro Tip: For a warmer rising spot, place the covered dough inside an oven that is turned off with only the oven light on. Check it often so it does not over-proof.
Baking and Testing for Doneness
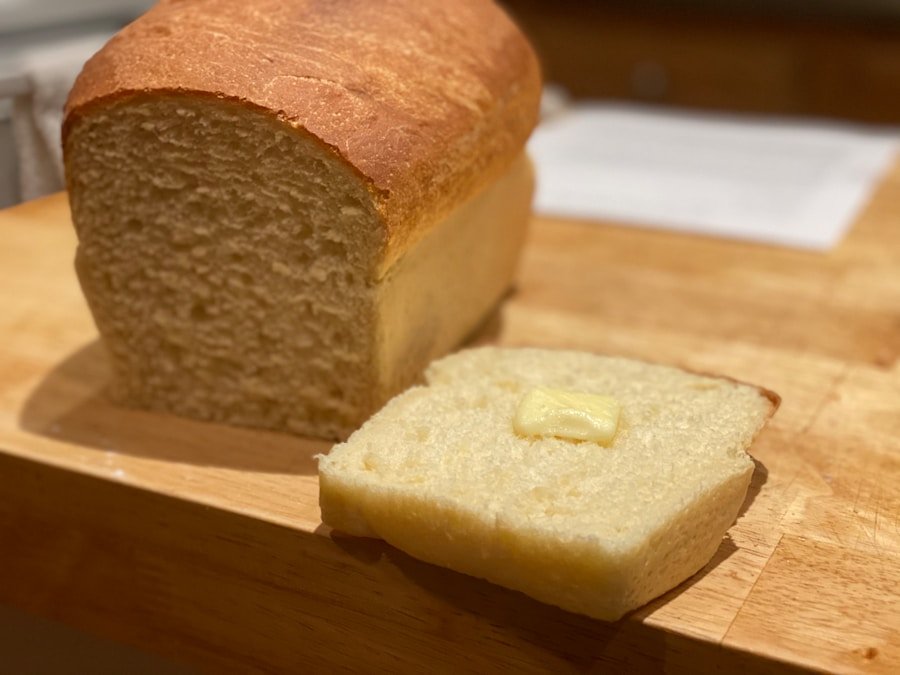
Preheating the Oven
Preheating your oven is crucial because bread needs strong heat at the start of baking. Most recipes recommend temperatures between 375°F and 475°F (190°C to 245°C), depending on the type of bread. A hot oven helps steam form quickly around the dough and encourages oven spring during the first few minutes of baking.
For sandwich bread, many recipes use a moderate oven temperature. Rustic loaves, artisan-style breads, and lean doughs often use higher heat. Always follow your recipe first, then adjust in future batches if your oven runs hot or cool.
Adding Steam for a Better Crust
Steam can help the loaf expand before the crust sets. It also supports a shinier, crisper crust on rustic breads. You can create steam by placing a metal pan on the lower oven rack while the oven preheats, then carefully adding hot water when you load the bread.
You can also mist the inside of the oven lightly with water, but avoid spraying glass oven doors because sudden temperature changes may damage them. For simple sandwich bread, extra steam is optional and often unnecessary.
Testing for Doneness
To test for doneness, use both visual cues and temperature if possible. A finished loaf should have a browned crust and should sound hollow when you tap the bottom. An instant-read thermometer gives a more reliable check. Many lean breads are done around 190°F to 210°F (88°C to 99°C), depending on the recipe and style.
If the crust browns too quickly but the inside is not done, loosely tent the loaf with foil and continue baking. If the loaf looks pale, it may need more time or a slightly hotter oven in the next batch.
Cooling the Bread
Cooling bread is not just a waiting step. The interior continues to set after the loaf leaves the oven. If you slice too soon, the crumb may turn gummy or collapse slightly. Place the bread on a wire rack so air can circulate around it and moisture does not collect underneath.
Tips for Troubleshooting Common Bread Baking Issues
Even experienced bakers run into problems. Bread responds to temperature, humidity, flour type, yeast strength, and timing, so small changes can affect the final loaf. The good news is that most problems have simple causes.
Dense or Heavy Bread
Dense bread often comes from under-kneading, under-proofing, weak yeast, or too much flour. Make sure the dough becomes smooth and elastic before the first rise. Let it rise until it has roughly doubled, not just until the timer ends.
If your yeast is old, test it before using it in dough. Mix it with warm water and a small amount of sugar. If it does not foam after several minutes, it may no longer be active enough for bread.
Dry or Crumbly Bread
Dry bread often happens when too much flour is added during mixing or kneading. If your dough feels stiff and cracks as you work it, add water a teaspoon at a time until it softens. Using a kitchen scale can also help you avoid over-measuring flour.
Overbaking can also dry out bread. Check your loaf near the low end of the baking time, especially if your oven runs hot.
Dough That Will Not Rise
If dough does not rise, the yeast may be expired, the water may have been too hot, or the room may be too cold. Move the covered dough to a warmer spot and give it more time. If nothing changes after a long rest, the yeast may not be active.
Bread That Collapses
A loaf can collapse when it over-proofs, when the dough is too wet for its structure, or when it is handled too roughly before baking. Watch the dough during the final proof and use the poke test to avoid waiting too long.
Crust Is Too Hard
A very hard crust may come from high heat, long baking, or too much steam. For softer sandwich bread, brush the warm crust with a little melted butter after baking and cool it under a clean towel.
Enjoying and Storing Your Homemade Bread
Once your homemade bread has cooled completely, it is time to enjoy it. Fresh bread tastes great on its own, but it also works well with butter, jam, olive oil, soups, sandwiches, toast, and simple dinner plates. One of the best parts of baking by hand is that each loaf feels personal.
Store homemade bread properly so it keeps its texture as long as possible. For short-term storage, keep it wrapped in a clean kitchen towel, paper bag, or bread box at room temperature. This helps protect the bread while allowing enough airflow to reduce trapped moisture.
For longer storage, freeze the bread. Wrap it tightly in plastic wrap, then place it in a freezer bag or wrap it again with foil. You can freeze a whole loaf or individual slices. Sliced bread is easier to toast straight from the freezer.
Baking bread without a machine may seem difficult at first, but practice makes the process feel natural. Once you understand the dough, you can experiment with different flours, shapes, toppings, and flavors. With patience, simple ingredients can become a warm loaf that feels satisfying from the first slice to the last.
If you’re looking to enhance your kitchen skills beyond baking bread, you may want to check out this article on the 5 Best Coat Racks for Small Spaces. It offers practical solutions for organizing your entryway or bedroom. Additionally, if you enjoy hosting gatherings and serving delicious homemade bread on stylish trays, you might find the 5 Best Indoor Outdoor Serving Trays article helpful. And for those interested in upgrading their home security, the 5 Best Smart Doorbells with Video article provides insights into the latest technology available.
Related Guides
Frequently Asked Questions
What are the basic ingredients needed to bake bread without a bread machine?
The basic ingredients are flour, water, yeast, and salt. Some recipes also use sugar, honey, milk, butter, oil, or eggs to change the flavor, texture, crust, or softness of the bread.
What are the steps to knead bread dough by hand?
Mix the ingredients until a shaggy dough forms. Turn the dough onto a lightly floured surface, press it forward with the heels of your hands, fold it back, turn it, and repeat for about 10 to 15 minutes, or until the dough feels smooth and elastic.
How long does it take for bread dough to rise?
Most basic bread dough takes about 1 to 2 hours for the first rise, but timing depends on room temperature, yeast type, and dough formula. Instead of relying only on the clock, look for dough that has roughly doubled in size.
What are some tips for shaping bread dough before baking?
Handle the dough gently so you do not press out all the gas. For a sandwich loaf, press the dough into a rectangle, roll it tightly into a log, tuck the ends under, and place it seam-side down in the pan. For a round loaf, tighten the surface by gently tucking the dough underneath itself.
What temperature and how long should bread be baked in the oven?
Many basic breads bake in a preheated oven at about 375°F to 425°F (190°C to 220°C) for 20 to 30 minutes, depending on loaf size and recipe. Some rustic breads bake hotter. The bread should be golden brown and sound hollow when tapped on the bottom.
Can you make bread without a stand mixer?
Yes. A stand mixer can save effort, but it is not required. You can mix and knead bread dough by hand with a bowl, spoon, clean work surface, and patience.
Why is my homemade bread dense?
Dense bread often comes from too much flour, weak yeast, under-kneading, or not enough rising time. Measure flour carefully, check that your yeast is active, knead until the dough is elastic, and let the dough rise until it is properly expanded.
Sources
- King Arthur Baking: Yeast Guide — supports general yeast handling and yeast type information.
- King Arthur Baking: Ingredient Weight Chart — supports the recommendation to measure flour carefully for consistent bread results.
- King Arthur Baking: Bread Baking Techniques — supports oven heat, steam, and crust development guidance.