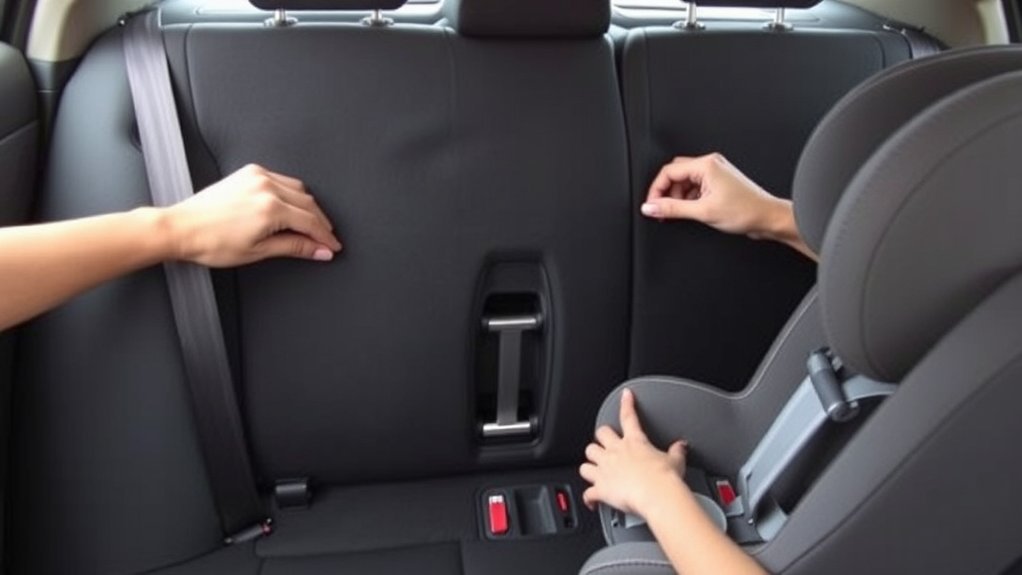
Installing a car seat in a 2010 Toyota Camry starts with choosing a rear seating position where the restraint can be installed exactly as both the Toyota manual and the car seat manufacturer require. The Camry provides lower LATCH anchors for the two outboard rear seats and top-tether anchors for all three rear seating positions. A center installation can be a good choice when the seat fits securely, but it normally relies on the center seat belt rather than a dedicated pair of lower anchors.
Quick Answer
Install the car seat in the 2010 Camry’s rear seat. Use the two outboard lower-anchor positions or a correctly locked seat belt. The center rear seat does not have its own designated lower-anchor pair, so use the center belt there. For a forward-facing harnessed seat, use the appropriate top tether and keep movement under one inch at the belt path.
Key Takeaways
- The 2010 Camry has designated lower LATCH anchors for the left and right rear seats, not a dedicated center pair.
- The rear center can still be an excellent position when the child restraint installs correctly with the center lap-and-shoulder belt.
- Use either an approved lower-anchor installation or the vehicle seat belt as the primary attachment method; do not casually combine both.
- For a harnessed forward-facing seat, connect the top tether to the anchor for that seating position.
- With a seat-belt installation, the Camry’s shoulder belt can be switched into its child-restraint locking mode by fully extending it and then allowing it to retract.
- A correctly installed restraint should move no more than one inch side to side or front to back at the belt path.
At a Glance
| Time Required | About 10–20 minutes after reviewing both manuals |
| Difficulty | Moderate; correct belt routing, locking, recline, and tether use matter |
| Tools Needed | No normal hand tools; have the car-seat manual and 2010 Camry owner’s manual available |
| Cost | $0 for installation; many child-passenger-safety inspection services are free |
Warning: This guide supplements, but does not replace, the instructions for your exact child restraint and the 2010 Camry owner’s manual. Never place a rear-facing child restraint in front of an active front passenger airbag, and never improvise an anchor point, tether route, or center LATCH setup.
Choose the Safest 2010 Camry Seat Spot
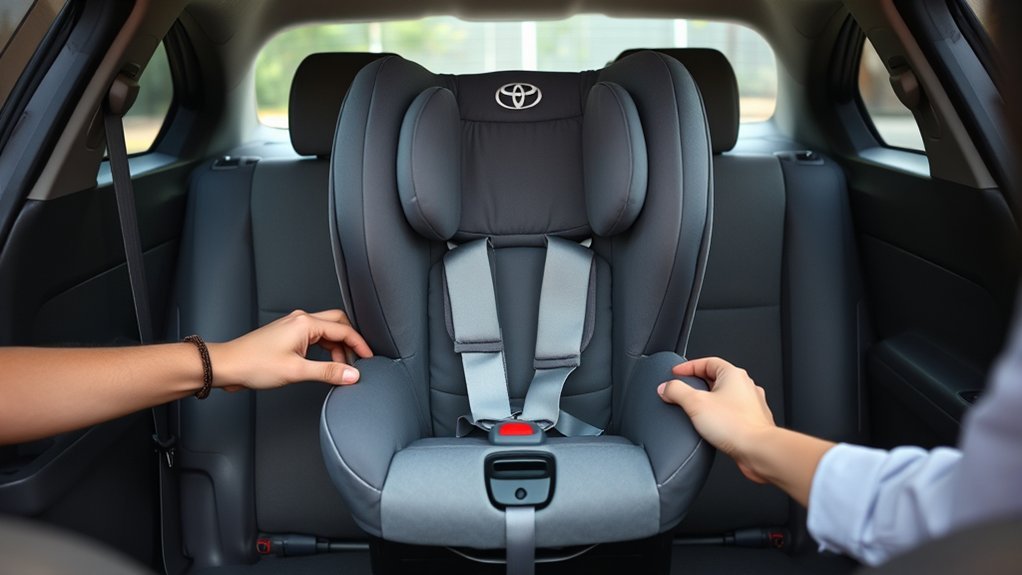
The rear seat is the correct place for a child restraint in normal use. Current child-passenger guidance also favors the rear middle seat when possible because it is farther from common side-impact zones. However, the center is only the better choice when the particular restraint fits there correctly and can be secured according to both manuals.
The 2010 Camry is important here because its lower-anchor layout is not the same at all three rear positions. Toyota identifies designated lower LATCH anchors for the two outside rear seats, while top-tether anchor brackets are available for all rear seating positions. Check the exact manual for your vehicle through Toyota’s official Manuals and Warranties portal.
| Rear Position | Lower Anchors | Top-Tether Anchor | Typical Installation Choice |
|---|---|---|---|
| Driver-side outboard | Yes | Yes | Lower anchors or seat belt |
| Center | No designated pair | Yes | Seat belt |
| Passenger-side outboard | Yes | Yes | Lower anchors or seat belt |
If a center installation is loose, causes the restraint to tilt, interferes with the buckle, or conflicts with the car-seat instructions, use whichever outboard position allows a correct installation. A properly installed outboard restraint is safer than a poorly installed center restraint.
Check the Car Seat Before Installation
Before attaching anything to the Camry, confirm that the restraint is being used in the correct mode for the child’s current height and weight. Current CDC child-passenger guidance recommends keeping children rear-facing until they reach the maximum rear-facing height or weight allowed by their seat, then using a forward-facing harness and tether until that restraint is outgrown.
- Read the installation section of the exact child-restraint manual.
- Confirm whether the seat is being used rear-facing, forward-facing, or as a booster.
- Check the child’s height and weight against the restraint limits.
- Check the restraint’s stated lower-anchor weight limit before choosing LATCH.
- Inspect the restraint for crash damage, recalls, missing parts, or an expired service life according to its manufacturer.
- Identify the correct rear-facing or forward-facing belt path before routing the Camry seat belt.
Note: LATCH is an installation system, not a safety upgrade over a correctly installed seat belt. Either method can provide a secure installation when the vehicle and car-seat manufacturers permit it.
Find the 2010 Camry Lower Anchors
The 2010 Toyota Camry’s lower anchors are located in the seat bight—the gap where the rear seatback meets the bottom cushion—for the two outside rear seating positions. Toyota places indicators near those locations to help owners find the anchor bars.
Do not assume that every visible metal bar in the seat crease is a usable car-seat anchor. Identify the marked anchor locations and connect the restraint only to the pair assigned to that seating position.
[Amazon Products Picked for You]

[Adjustable Length Design] This connector strap features an adjustable length design to support different mounting and attachment needs. The flexible structure helps provide added convenience when used with compatible anchor point setups

【SPRING LOADED BUCKLE LOCK】Features a built-in spring-padded mechanism that ensures smooth insertion and automated locking upon connection. Designed for effortless one-touch release and one-handed operation during frequent seat transfers.

AUTOMATIC LOCKING SWITCH: Features a built-in spring-loaded pad switch for smooth insertion and removal. The auto-locking mechanism engages instantly to prevent accidental loosening, allowing efficient one-handed operation during frequent vehicle transfers
Lower Anchor Locations
For an outboard lower-anchor installation:
- Locate the two lower-anchor indicators for the chosen outside rear seating position.
- Reach into the seat bight and identify the corresponding metal anchor bars.
- Connect the restraint’s lower attachments with the straps flat and untwisted.
- Apply pressure to the restraint in the area directed by its manufacturer while removing slack from the lower-anchor strap.
- Check movement only at the belt path. It should not move more than one inch side to side or front to back.
Do not continue using lower anchors after the child reaches the lower-anchor limit specified by the restraint manufacturer. NHTSA advises checking the restraint’s label and instructions for the applicable limit and switching to an approved seat-belt installation when required.
Center Seat Limitations
The center rear position does not have its own designated pair of lower anchors in the 2010 Camry. For a center installation, the straightforward approved method is the center lap-and-shoulder belt, routed through the correct car-seat belt path and locked according to Toyota’s instructions.
Warning: Do not “borrow” the two inner anchors from the outboard LATCH positions to create a center LATCH installation unless both the vehicle manufacturer and the child-restraint manufacturer explicitly approve that exact arrangement. The 2010 Camry manual designates its lower anchors for the outside rear seats.
A center seat-belt installation can still be very secure. If the restraint cannot be tightened correctly there, move it to an approved outboard position rather than improvising.
Decide Between LATCH and Seat Belt
The 2010 Camry supports both lower-anchor installation in its two designated outboard positions and seat-belt installation in the rear seating positions when the restraint manufacturer permits it.
Choose the method that is approved for the seat, appropriate for the child’s weight, and produces a secure installation.
[Amazon Products Picked for You]

【Universal ISOFIX Adapter for Older Vehicles】: Upgrade any car with this ISOFIX adapter-securely installs child safety seat mount brackets in vehicles without built-in anchors. Ideal ISOFIX retrofit kit solution for older models needing a safety boost.

ISOFIX ADAPTER: Enables secure installation of ISOFIX safety seats in vehicles WITHOUT built-in ISOFIX anchors. Give older vehicles modern safety upgrades.

【Compatible Vehicles】Child Seat Anchor Cover Compatible with Toyota For Camry after December 2017,for Avalon After March 2019.OEM:7371706250C0
LATCH Vs Seat Belt
Neither method is automatically safer when both are allowed and used correctly. Lower anchors can simplify installation in the outboard seats, while the vehicle belt is particularly important for a center installation and after a child exceeds the restraint’s lower-anchor limit.
- Use the lower anchors only in a designated lower-anchor seating position.
- Use the correct rear-facing or forward-facing belt path for the restraint.
- If installing with the vehicle belt, lock the belt or use the restraint’s approved lock-off system exactly as instructed.
- Do not use both the lower anchors and the vehicle belt as primary attachment methods unless the child-restraint manufacturer specifically instructs you to do so.
- For a forward-facing harnessed seat, use the top tether whether the primary installation uses lower anchors or the seat belt, as long as the manufacturers permit it.
Check the Lower-Anchor Weight Limit
Lower anchors are not intended to be used without regard to weight. Modern child restraints state their lower-anchor limits on the label or in the manual. When the child reaches that limit, reinstall the restraint with the vehicle seat belt if the child is still within the harnessed seat’s height and weight limits.
Do not guess based only on the child’s age. Car-seat shell weight and manufacturer requirements affect when lower-anchor use must stop.
Lock the Camry Seat Belt for a Harnessed Car Seat
Toyota’s 2010 Camry instructions describe an ALR child-restraint locking mode for the rear seat belts. When the child restraint is installed with the vehicle belt and its instructions call for the vehicle’s locking system:
- Route the lap-and-shoulder belt through the correct car-seat belt path.
- Buckle the belt and make sure the webbing is flat and untwisted.
- Fully extend the shoulder belt.
- Allow it to retract. The belt should now retract without freely extending again.
- Press the child restraint into the vehicle seat while feeding the remaining slack back into the retractor.
- Pull on the belt to confirm that it stays locked.
- Check the restraint at the belt path for no more than one inch of movement.
Note: The locking procedure above applies to installing a harnessed child restraint with the Camry seat belt. A belt-positioning booster is used differently; follow Toyota’s booster guidance and the booster manufacturer’s instructions rather than treating it like a harnessed seat installation.
Best Install Method
The best installation method is the approved method that gives the restraint a solid fit in the chosen seating position. Test the seat at the belt path, not by shaking the headrest area or upper shell. Some movement at the top of a rear-facing restraint can be normal even when the belt path is properly secured.
If the center seat does not produce a good fit, try an approved outboard position. If lower anchors are difficult to use or the child has exceeded their limit, use the locked vehicle belt.
Install a Rear-Facing Seat in a Camry
A rear-facing infant or convertible seat can be installed with either the vehicle seat belt or the designated outboard lower anchors when the restraint instructions permit that method. NHTSA’s rear-facing installation guidance also emphasizes the correct belt path, a locked installation, and the manufacturer-specified recline angle.
- Place the restraint rear-facing in an approved rear seating position.
- Set the recline angle according to the restraint’s built-in indicator or level line.
- Choose either the approved lower-anchor method or the seat-belt method.
- If using outboard lower anchors, connect both attachments to the correct anchor pair and remove slack.
- If using the seat belt, route it through the rear-facing belt path, buckle it, and lock it according to the Camry and car-seat instructions.
- Apply pressure where the restraint manufacturer instructs while tightening.
- Grip the seat at the rear-facing belt path and confirm movement is no more than one inch side to side or front to back.
- Place the child in the seat with the harness straps flat and positioned at or below the shoulders unless the restraint manufacturer specifies otherwise.
- Tighten the harness until you cannot pinch excess webbing at the shoulder and position the chest clip as directed by the restraint manufacturer.
Warning: Do not invent a rear-facing tether point. If the restraint uses a rear-facing tether, load leg, anti-rebound bar, or another anti-rotation feature, use it only in the manner and location specifically approved by that restraint’s instructions and the vehicle manufacturer.
If the restraint manufacturer permits a tightly rolled towel or approved positioning aid to obtain the required rear-facing recline, use it exactly as instructed. Do not place unapproved cushions, mats, or padding beneath the restraint.
[Amazon Products Picked for You]

Convertible car seat grows with your child from rear-facing harness (4-50 lb) to forward-facing harness (26.5-65 lb)

Grows Through 3 Stages: This Safety 1st convertible car seat is a 3-in-1 design carrying a child from 5 to 100 lb, rear-facing right up to the booster years

Grows Through 3 Stages: This Safety 1st convertible car seat is a 3-in-1 design carrying a child from 5 to 100 lb, rear-facing right up to the booster years
Tighten the Car Seat Securely
Once the rear-facing or forward-facing restraint is positioned in the 2010 Camry, remove slack from the installation until it moves no more than one inch side to side or front to back at the belt path. This is the standard installation check described by NHTSA.
| Check | Correct Result |
|---|---|
| Lower-anchor strap | Flat, correctly attached, and tightened |
| Seat belt | Correct belt path, locked, flat, and untwisted |
| Rear-facing angle | Matches the restraint’s indicator or instructions |
| Movement test | No more than 1 inch at the belt path |
Pro Tip: Use your non-pulling hand to press the restraint into the vehicle seat near the belt path while your other hand removes slack. Do not rely on excessive force; correct routing and belt locking matter more than simply pulling harder.
Attach the Top Tether for Forward-Facing
The 2010 Camry provides top-tether anchor brackets for all three rear seating positions. A forward-facing harnessed restraint should use the tether when the restraint and vehicle instructions call for it because the tether reduces forward movement of the child’s head and the upper part of the restraint during a crash.
Toyota’s Camry instructions tell owners using a top tether to secure the child restraint first, remove the applicable rear head restraint, open the anchor-bracket cover, connect the tether hook, and tighten the strap. Store a removed head restraint securely so it cannot become a loose object in the vehicle.
- Install the forward-facing restraint with the approved lower-anchor pair or the vehicle seat belt.
- Remove the rear head restraint when required by the 2010 Camry instructions for the tethered child restraint.
- Locate the tether-anchor cover for that exact rear seating position.
- Route the tether exactly as the restraint manufacturer specifies.
- Connect the tether hook to the designated anchor, not to a cargo hook or other metal hardware.
- Remove slack until the tether lies flat and secure.
- Check the restraint at the forward-facing belt path and confirm movement remains within one inch.
Current NHTSA forward-facing guidance recommends using the top tether with a forward-facing harnessed seat because it helps limit forward movement in a crash.
Fix Buckle and Fit Problems in Camry
If the Camry’s seat belt buckle interferes with the child restraint, first verify that the belt is using the correct belt path and that the restraint is centered on the chosen seating position. The buckle should not sit in a location that prevents the restraint’s belt path, lock-off, or installation hardware from functioning as designed.
Do not twist the buckle stalk simply because generic internet instructions recommend it. The Camry instructions reviewed for this installation do not direct owners to use a buckle-stalk twist. If buckle geometry prevents a secure installation, use another manufacturer-approved seating position or installation method, or obtain hands-on help from a certified Child Passenger Safety Technician.
If the restraint is too upright when rear-facing, recheck its recline mechanism and level indicator. Use a rolled towel or similar recline aid only if the child-restraint manufacturer specifically allows it.
If an outboard lower-anchor connector will not attach easily, make sure you are using the marked anchor for that seating position and that no seat belt, debris, or upholstery is obstructing the anchor.
For forward-facing seats, check that the head restraint and tether routing follow Toyota’s instructions and that the tether is connected to the anchor assigned to the same seating position.
Test Your 2010 Camry Car Seat Install
After the buckle position, recline, belt or lower-anchor attachment, and tether have been set, perform a final installation test before placing the child in the restraint.
- Confirm that the car seat is in an approved rear seating position.
- Verify that you used the correct rear-facing or forward-facing belt path.
- If using lower anchors, confirm both connectors are attached to the designated pair and that the child is within the restraint’s lower-anchor limit.
- If using the Camry seat belt for a harnessed restraint, verify that the belt is locked and cannot freely extend after tightening.
- Grip the restraint at the belt path with your non-dominant hand and push side to side and front to back. Movement should not exceed one inch.
- For a forward-facing harnessed seat, verify that the top tether is connected to the correct anchor and tightened.
- Check that straps, belts, and tether webbing are flat rather than twisted.
- Confirm that the restraint’s recline or upright angle matches its instructions.
The one-inch test is performed at the car seat’s belt path. Movement at the top of the shell is not the measurement used to determine whether the installation is tight enough.
Check the Child’s Harness or Booster Fit
A tight installation is only half of car-seat safety. The child must also be secured correctly in the restraint.
For a rear-facing harness, NHTSA advises keeping the straps flat and generally at or below the child’s shoulders. For a forward-facing harness, straps are generally at or above the shoulders. The harness should be snug enough that excess webbing cannot be pinched at the shoulder, and the chest clip should be positioned according to the restraint manufacturer’s instructions, commonly at armpit level.
A belt-positioning booster works differently. The vehicle lap-and-shoulder belt restrains the child. The lap portion should lie low across the upper thighs rather than the abdomen, and the shoulder belt should cross the center of the chest and shoulder. Follow the booster instructions rather than locking and tightening the belt around the booster as though it were a harnessed car seat.
Get Help if the Installation Does Not Fit
If you cannot achieve a secure installation, do not compensate with unapproved padding, improvised anchors, excessive buckle twisting, extra straps, or hardware that did not come with the restraint.
NHTSA maintains car-seat inspection resources and trained Child Passenger Safety Technicians who can check the installation and teach caregivers how to reproduce it correctly. Many inspection services are offered at no charge. Start with NHTSA’s car-seat installation resources.
Frequently Asked Questions
How do you hook a car seat anchor in the back seat of a 2010 Camry?
For an outboard installation, find the two marked lower anchors in the seat bight and connect the child restraint’s lower attachments to that designated pair. Tighten according to the restraint instructions. A forward-facing harnessed restraint should also use the top-tether anchor assigned to the same seating position.
Can you use LATCH in the center seat of a 2010 Toyota Camry?
The 2010 Camry owner’s manual designates lower LATCH anchors for the two outside rear seats, not a dedicated lower-anchor pair for the center. A center car seat can instead be installed with the center seat belt when the restraint fits correctly and both manuals allow that seating position.
Can the back seats of a 2010 Toyota Camry fold down from inside?
Some 2010 Camry configurations have folding rear seatbacks. On equipped models, the seatback release levers are accessed from the trunk and the seatbacks can then be folded. Rear-seat equipment varies by configuration, so confirm the feature in the vehicle manual before relying on it.
Can you install a car seat with just a seat belt?
Yes. A compatible child restraint can be installed with the vehicle seat belt when routed through the correct belt path and locked as required. In the 2010 Camry, the rear shoulder belt can be fully extended to engage its child-restraint locking mode and then tightened so the restraint moves no more than one inch at the belt path.
Is it better to install a car seat with a seat belt or LATCH?
Neither is universally better. Use the approved method that gives a correct installation in your seating position and stays within the restraint’s limits. Lower anchors are available in the Camry’s two outboard rear positions, while a center installation normally uses the seat belt.
Can I use the seat belt and lower anchors together?
Normally, choose one primary installation method: the approved lower anchors or the vehicle seat belt. Do not combine them unless the child-restraint manufacturer specifically states that its seat is designed and approved for simultaneous use of both methods.
Do I remove the rear head restraint when using the top tether?
Toyota’s 2010 Camry instructions for a child restraint with a top tether tell the installer to remove the relevant rear head restraint, secure the child restraint, open the tether-anchor cover, connect the hook, and tighten the tether. Store the removed head restraint securely and reinstall it when it is no longer removed for the child restraint.
Conclusion
Safe 2010 Toyota Camry car seat installation depends on matching the restraint to the correct rear seating position and following both manuals. The Camry provides lower anchors for the two outboard rear seats and tether anchors for all three rear positions, while the center position normally uses the vehicle seat belt. Lock a seat-belt installation correctly, stay within lower-anchor limits, use the top tether for an approved forward-facing harnessed seat, and confirm that movement at the belt path stays under one inch. If the restraint cannot meet those checks, change to another approved seating position or have the installation checked by a certified Child Passenger Safety Technician rather than improvising.
Sources
- Toyota Manuals and Warranties — official Toyota source for the Camry owner’s manual and vehicle-specific child-restraint instructions.
- Toyota 2010 Camry Quick Reference Guide — confirms vehicle equipment information, including rear-seat operation on equipped models.
- NHTSA Car Seat Installation Tips — installation methods, one-inch movement test, rear-seat placement, and tether guidance.
- NHTSA Rear-Facing Car Seat Installation — rear-facing belt routing, lower-anchor installation, locking, tightening, and recline guidance.
- NHTSA Forward-Facing Car Seat Installation — forward-facing installation and top-tether guidance.
- CDC Child Passenger Safety Guidance — current recommendations for rear-facing, forward-facing, booster, and rear-seat use.
