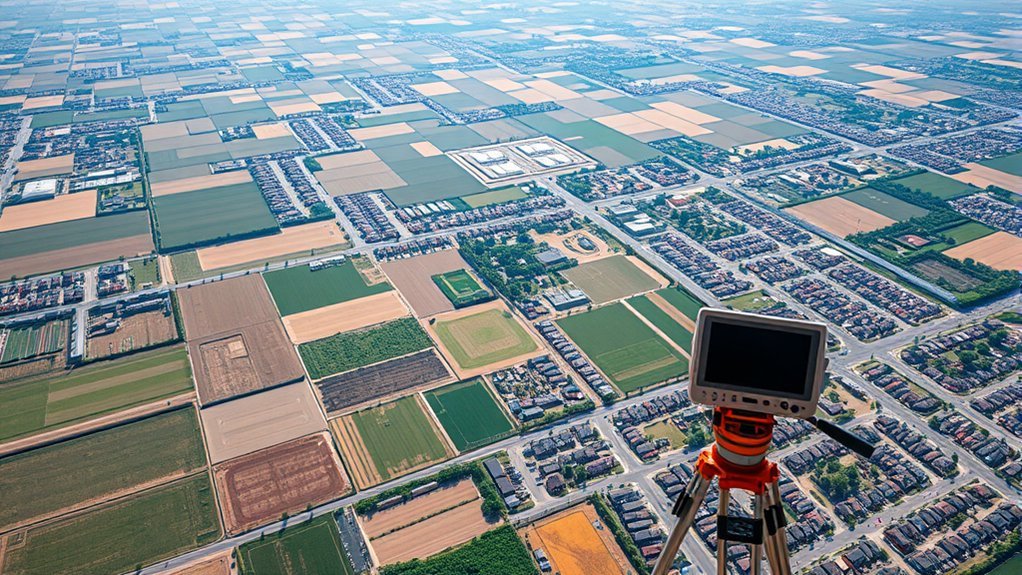
ArcGIS Pro can create accurate orthomosaics from drone, digital aerial, satellite, and scanned aerial imagery, but the result depends on more than clicking the Orthomosaic button. Before buying or configuring ArcGIS Pro, check the license level, image metadata, overlap, coordinate system, block adjustment, ground control, and elevation data. In 2026, it is also important to distinguish traditional ArcGIS Pro Ortho Mapping from the separate ArcGIS Reality workflow.
Quick Answer
For traditional ArcGIS Pro orthomosaic production, Esri documents the Ortho Mapping workflow with an ArcGIS Pro Advanced license. Create an Ortho Mapping workspace, adjust the overlapping imagery, add and check control where needed, choose an accurate elevation source, then run the Orthomosaic Wizard for orthorectification, color balancing, seamlines, and export.
Key Takeaways
- Classic ArcGIS Pro Ortho Mapping and ArcGIS Reality for ArcGIS Pro are related but separately licensed workflows.
- ArcGIS Pro 3.6 is the current documentation baseline; old references to version 2.6 should not be treated as a current buying recommendation.
- There is no documented 100-GCP limit for drone projects; the commonly cited 100 and 1,000 figures are gigapixel project-size guidelines.
- Good image overlap, correct camera/geolocation metadata, well-distributed control, and an appropriate DEM have a direct effect on output accuracy.
- Review GCP residuals, independent check-point RMSE, seams, building lean, gaps, and elevation artifacts before treating an orthomosaic as analysis-ready.
At a Glance
| Time Required | Workspace setup may take minutes; adjustment and product generation can take minutes to many hours depending on image count, resolution, hardware, and settings. |
| Difficulty | Intermediate to advanced; photogrammetry and coordinate-system knowledge are helpful. |
| Tools Needed | Eligible ArcGIS Pro license, overlapping imagery, camera/geolocation metadata, elevation source, and optional survey GCPs/check points. |
| Cost | License-dependent. Traditional Ortho Mapping and ArcGIS Reality have different licensing paths, so verify the required capability before purchasing. |
Do You Need a License for ArcGIS Pro Orthomosaic?

Yes. The license depends on which photogrammetry workflow you intend to use. Esri’s current ArcGIS Pro Ortho Mapping documentation lists the traditional Ortho Mapping workflow as available with an Advanced license.
For Named User licensing, current ArcGIS user types generally map to ArcGIS Pro levels as follows:
| User type | ArcGIS Pro level | Traditional Ortho Mapping |
|---|---|---|
| Creator | Basic | Not the documented license level for the full workflow |
| Professional | Standard | Some capabilities may require an extension |
| Professional Plus | Advanced | Supports the traditional Ortho Mapping workflow |
ArcGIS Reality for ArcGIS Pro is different. It extends ArcGIS Pro with high-fidelity Reality Mapping products such as True Orthos, DSMs, DTMs, dense point clouds, meshes, and other 2D/3D outputs. Esri documents the extension for Standard or Advanced ArcGIS Pro together with the applicable Reality license or entitlement. See Esri’s ArcGIS Reality for ArcGIS Pro documentation.
Note: Do not buy ArcGIS Reality merely because you need a conventional orthomosaic. First decide whether you need traditional Ortho Mapping outputs or Reality Mapping products such as True Ortho and 3D meshes.
ArcGIS Pro 3.6 is the current software baseline in Esri documentation. An old statement that “ArcGIS Pro 2.6 or later” is required came from earlier tutorial material and should not be treated as the current purchasing recommendation.
What Can ArcGIS Pro Orthomosaic Create?
ArcGIS Pro can photogrammetrically correct overlapping imagery from drones, digital aerial cameras, satellites, and scanned aerial photographs. The correction accounts for sensor geometry, camera position, terrain displacement, and image-to-image alignment.
Traditional Ortho Mapping can generate:
- Orthorectified imagery with geometric distortion reduced.
- Orthomosaics created from multiple adjusted images.
- Digital surface models (DSM) containing ground plus above-ground objects.
- Digital terrain models (DTM) representing the bare-earth surface where the imagery supports reliable ground extraction.
The resulting orthomosaic can be used as a GIS basemap, backdrop for digitizing, mapping input, change-detection source, or other spatial-analysis layer when its accuracy meets the project’s requirements.
ArcGIS Pro’s Orthomosaic Wizard supports output formats including Cloud Raster Format (CRF), TIFF, JPEG, JPEG2000, and MRF, with available compression options depending on the chosen format. The orthorectified imagery can also participate in image-service publishing where the organization’s ArcGIS deployment supports that workflow.
ArcGIS Pro Ortho Mapping vs. ArcGIS Reality
The two workflows overlap, but they should not be treated as identical.
| Capability | Ortho Mapping | Reality Mapping |
|---|---|---|
| Standard orthomosaic | Yes | Related 2D product workflows available |
| DSM / DTM | Yes | Yes |
| True Ortho | Not the main traditional orthomosaic product | Yes |
| Dense point cloud / 3D mesh | Not part of the standard Ortho Mapping product set | Yes, for supported imagery/workflows |
A standard orthomosaic corrects the imagery using an elevation model and mosaics the adjusted images. A True Ortho goes further by correcting perspective effects from elevated objects so structures do not lean over and hide ground features in the same way. True Ortho production requires suitable overlapping imagery and a detailed DSM generated from the adjusted image block.
[Amazon Products Picked for You]

You get 2 sets of 3 Labels, 1 FAA ID Card - All customized with your FAA information

Customized FAA UAS registration ID Card with your FAA registration information
What Data Do You Need Before Starting?
A successful orthomosaic begins with suitable source data. For a drone project, ArcGIS Pro normally needs geolocation information and camera information, often stored in each image’s EXIF metadata.
- Overlapping images: The software needs common features between photographs to calculate tie points.
- Camera information: Focal length, sensor information, camera model, and other calibration information help define image geometry.
- Geolocation: Latitude, longitude, altitude, and available orientation information provide initial exterior orientation.
- Elevation reference: A DEM, image-derived elevation product, or suitable initial elevation value is used during processing.
- Ground control: Survey-quality GCPs can strengthen absolute positioning when project accuracy requires them.
- Check points: Independent surveyed points provide a better test of absolute accuracy because they are not used to force the adjustment.
- Correct spatial reference: Horizontal and vertical reference systems, units, and transformations must match the intended deliverable.
For drone-derived elevation products, Esri’s current drone tutorial describes approximately 80% forward overlap and 60% overlap between flight lines as typical coverage for creating point clouds. Actual requirements still depend on terrain, vegetation, camera geometry, flight pattern, and the required product.
Warning: A horizontal coordinate system can appear correct while the vertical reference is wrong. Mixing ellipsoidal heights, orthometric heights, feet, meters, or incompatible vertical datums can introduce serious elevation and orthorectification errors.
How Does the ArcGIS Pro Orthomosaic Workflow Work?
The traditional ArcGIS Pro Ortho Mapping workflow has three broad phases: create the workspace, perform block adjustment, and generate the products. In practice, a reliable project is easier to manage as the following sequence:
- Create an Ortho Mapping workspace.
- Load imagery and verify camera, geolocation, spatial-reference, and elevation information.
- Run an initial block adjustment so ArcGIS Pro calculates tie points and improves image alignment.
- Add or review Ground Control Points when external ground control is available.
- Reserve independent points as check points for accuracy testing.
- Rerun the adjustment after changing control-point measurements, statuses, or important adjustment settings.
- Create or select the elevation source and run the Orthomosaic Wizard.
- Inspect the finished output for residual error, seams, color differences, gaps, lean, blur, and terrain-related displacement.
An orthomosaic is only as dependable as the imagery geometry, adjustment, control, elevation model, and quality checks used to create it.
The Ortho Mapping workspace acts as the project’s photogrammetric container. It organizes the imagery, control information, adjustment results, and generated products in ArcGIS Pro.
How Do You Create an Ortho Mapping Workspace?
For a drone project, open or create an ArcGIS Pro project and use the Imagery tab to create a new workspace. The exact interface can vary slightly with software release and licensing.
- Open the Imagery tab and choose New Workspace.
- Enter a descriptive workspace name.
- Choose Ortho Mapping as the workspace type.
- Select Drone, digital aerial, satellite, or scanned aerial imagery as appropriate.
- Select a basemap if useful for visual reference.
- Load the source images or an existing supported image collection.
- Review the detected camera model and image geolocation information.
- Confirm the workspace spatial reference.
- Set the initial elevation source.
- Optionally configure the Parallel Processing Factor to control CPU utilization.
- Finish the wizard and inspect the image centers, footprints, coverage, and metadata before adjustment.
Esri’s detailed drone workflow is available in its Ortho Mapping workspace documentation.
Pro Tip: Inspect the flight path and image footprints before running a long adjustment. Missing strips, weak overlap, obviously incorrect elevations, or a misplaced image are cheaper to fix before photogrammetric processing begins.
How Do You Run Block Adjustment and Check Accuracy?
Block adjustment aligns overlapping images using automatically generated tie points, camera geometry, image positions, elevation information, and Ground Control Points when supplied.
ArcGIS Pro first finds common image features and creates tie points. Triangulation then solves image-to-map transformations and refines the camera positions and orientations.
After the initial adjustment, review the adjustment report and the GCP Manager. GCP residual fields such as dX, dY, and dZ show the difference between measured and expected control positions. An unusually high residual may indicate a bad image measurement, wrong ground coordinate, incorrect point identification, or another problem with the control.
Ground Control Points and check points have different jobs:
- GCP: Used by the adjustment to help position the image block.
- Check point: Excluded from the adjustment and used afterward to assess accuracy independently.
ArcGIS Pro can calculate RMSE from check-point differences. The acceptable RMSE is not universal; it should be compared with the accuracy requirement established for the project, survey, contract, or intended analysis.
Esri’s GCP documentation recommends good control distribution and explains how GCPs can be converted to independent check points.
Understand the Real Project-Size Limits
The figures sometimes quoted as “100 GCPs” and “1,000 GCPs” are incorrect. Esri documents expected aerial-triangulation project-size limits in gigapixels:
- Drone and digital frame imagery: 100 gigapixels.
- Scanned aerial imagery: 1,000 gigapixels.
- Satellite imagery: no project-size limit is stated in that guidance.
Project gigapixels can be estimated as:
Number of images × megapixels per image ÷ 1,000
These figures describe image-block size, not the number of GCPs. Esri notes that larger blocks may sometimes process, but the documented values describe the expected sizes ArcGIS Pro can effectively handle.
Note: There is no useful rule that every drone project needs a fixed number of GCPs. Control quality, survey accuracy, geographic distribution, terrain, flight geometry, GNSS method, and required final accuracy matter more than chasing a universal point count.
Which DEM Should You Use for an Orthomosaic?
The elevation model is one of the most important orthorectification inputs because terrain-height errors translate into horizontal displacement in the corrected imagery. Esri recommends an authoritative, current elevation model and specifically notes that an elevation product created from the images being processed can be an appropriate choice.
| Situation | Useful elevation choice | Why |
|---|---|---|
| Current image block with good stereo overlap | Image-derived DEM/DSM/DTM appropriate to the workflow | Matches the acquisition date and image geometry closely. |
| Reliable recent lidar is available | Current lidar-derived elevation model | Provides an authoritative high-resolution elevation source when dates and reference systems match. |
| Bare-earth mapping | DTM | Represents terrain after above-ground features have been removed where ground can be recovered. |
| Canopy or surface-height analysis | DSM | Preserves trees, buildings, and other above-ground surfaces. |
| True Ortho production | Detailed DSM derived from the adjusted image block | Needed to correct elevated structures and reduce building lean. |
Older or coarse elevation data can introduce visible anomalies when the terrain or built environment has changed since the DEM was created. Resolution alone is not enough: acquisition date, positional accuracy, vertical reference, and suitability for the mapped surface all matter.
[Amazon Products Picked for You]


How Do You Generate an Orthomosaic in ArcGIS Pro?
Generate the orthomosaic only after the image block has been adjusted and the adjustment meets the project’s accuracy requirements. The Orthomosaic Wizard then guides the user through orthorectification, color balancing, seamline generation, and final output settings.
Create Ortho Workspace
Create the Ortho Mapping workspace and load the imagery, camera information, geolocation, spatial reference, and starting elevation data. Check that image centers and footprints appear in sensible positions before proceeding.
For drone projects, verify that the image set provides adequate coverage and overlap. Missing images or inconsistent flight heights can weaken tie-point geometry and later elevation reconstruction.
Run Adjustment Wizard
Use the Adjust tools to calculate tie points and perform block adjustment. Review the results, then add or refine GCPs where required. Keep suitable survey points independent as check points when you need a defensible absolute-accuracy assessment.
If a GCP measurement, control coordinate, point status, or significant adjustment setting changes, rerun the adjustment before relying on the reported accuracy.
Run the Orthomosaic Wizard
After adjustment:
- Open the Ortho Mapping tab.
- Choose Orthomosaic in the Product group.
- Select the appropriate elevation source.
- Configure or accept suitable color balancing settings.
- Generate and review seamlines.
- Set the output pixel size.
- Select the required output format and compression.
- Run the process and inspect the completed orthomosaic.
The current Orthomosaic Wizard documentation explains the elevation, color-balance, seamline, pixel-size, format, and compression controls.
Which Orthomosaic Output Format Should You Use?
The best format depends on how the orthomosaic will be stored and used.
- TIFF: A common choice for interoperable GIS raster delivery.
- CRF: Esri’s Cloud Raster Format, useful for ArcGIS-centric raster processing and large multidimensional or distributed workflows.
- JPEG: Smaller output where lossy compression and format limitations are acceptable.
- JPEG2000: Supports high compression and large raster workflows where compatible software is available.
- MRF: Another supported raster output option for applicable workflows.
For analysis or archival mapping, avoid unnecessary lossy compression when fine image detail matters. Also choose a pixel size that reflects the genuine information content of the imagery rather than artificially creating finer-looking pixels through resampling.
How Do You Check the Final Orthomosaic?
Do not judge a finished orthomosaic only by whether it looks seamless when zoomed out. Inspect both geometric and visual quality.
- Review independent check-point RMSE against the project’s accuracy target.
- Zoom into roads, roof edges, fences, painted lines, and other sharp features to check alignment.
- Inspect seamlines for duplicated or missing objects.
- Look for abrupt brightness or color transitions.
- Check tall structures for unacceptable lean or displacement.
- Inspect steep terrain for stretching, smearing, and displaced features.
- Check water, vegetation, and low-texture areas for matching artifacts.
- Look for NoData holes or weak coverage near project edges.
- Confirm output projection, pixel size, units, and vertical-reference assumptions.
An orthomosaic may look attractive while still being poorly positioned. Independent check points provide a stronger accuracy test than visual inspection alone.
Common ArcGIS Pro Orthomosaic Problems
| Problem | Likely cause | What to check |
|---|---|---|
| Images do not align | Weak overlap, incorrect GPS/orientation, poor tie points, or wrong camera information | Image metadata, coverage, camera model, tie-point distribution, and adjustment report |
| High GCP residual | Bad image measurement or incorrect surveyed coordinate | Remeasure the point and verify the control record before rerunning adjustment |
| Features shift on slopes | Elevation source is too coarse, inaccurate, or outdated | DEM resolution, date, vertical datum, and positional accuracy |
| Visible mosaic boundaries | Poor seamlines or radiometric differences | Color balance, seamline method, mosaic candidates, and blend settings |
| Buildings appear to lean | Perspective displacement in conventional orthoimagery | Consider whether a Reality Mapping True Ortho workflow better matches the requirement |
| New Workspace or required tools unavailable | License level or extension entitlement | ArcGIS Pro license level, assigned user type, extension assignment, and software version |
| Processing is extremely slow | Large image block, limited RAM/CPU, slow storage, or unsuitable processing settings | Project size, SSD space, RAM, CPU resources, parallel-processing settings, and unnecessary output resolution |
What Computer Do You Need for ArcGIS Pro Orthomosaics?
ArcGIS Pro 3.6 runs on supported 64-bit Windows environments. Esri lists 8 GB RAM as the minimum, 32 GB as recommended, and 64 GB or more as optimal. CPU guidance is two cores minimum, four recommended, and ten cores optimal for the application generally.
A discrete GPU is recommended but not universally mandatory. For current ArcGIS Pro 3.6 visualization workloads, Esri recommends a supported discrete GPU with 8 GB or more dedicated graphics memory. DirectX 12 is recommended, while DirectX 11 remains the documented minimum.
See the current ArcGIS Pro 3.6 system requirements before buying a workstation.
Large photogrammetry projects can consume substantial temporary and output storage, so an SSD with generous free space is preferable to operating close to the minimum disk requirement.
Pro Tip: For orthomosaic work, prioritize sufficient RAM, fast SSD storage, a modern multicore CPU, and enough room for temporary files. A powerful GPU helps ArcGIS Pro visualization and GPU-enabled workloads, but it cannot compensate for poor imagery or weak photogrammetric geometry.
Frequently Asked Questions
What are the key differences between orthomosaics and photogrammetry?
Photogrammetry is the broader science of obtaining measurements and spatial information from overlapping photographs. An orthomosaic is one possible photogrammetric output: a set of orthorectified images combined into a spatially referenced mosaic. Photogrammetry can also produce DSMs, DTMs, point clouds, meshes, and other 2D or 3D products.
Why is GIS so difficult?
GIS combines several disciplines at once: coordinate systems, databases, cartography, spatial analysis, statistics, remote sensing, and software operation. Orthomapping adds camera geometry and photogrammetry. The learning curve becomes easier when the workflow is separated into input quality, coordinate reference, processing, accuracy assessment, and final validation rather than learning every GIS function at once.
Is ArcGIS Desktop being discontinued?
ArcGIS Desktop, including ArcMap, is no longer merely approaching retirement. Esri officially retired ArcGIS Desktop and ArcMap on March 1, 2026. Esri’s active desktop GIS development is centered on ArcGIS Pro, so new projects and migrations should be planned around ArcGIS Pro and other supported ArcGIS products.
Do you need a good GPU for GIS?
Not for every GIS task. ArcGIS Pro can run without a discrete GPU, but Esri recommends a supported discrete GPU for better visualization performance. For ArcGIS Pro 3.6, 8 GB or more of dedicated graphics memory is recommended. Orthomosaic processing also depends heavily on CPU performance, RAM, SSD speed, available storage, and image-block size.
Do you need Ground Control Points to create an ArcGIS Pro orthomosaic?
Not every project requires GCPs simply to complete a block adjustment. ArcGIS Pro can align overlapping imagery using tie points and available image geolocation. However, accurate and well-distributed ground control can improve absolute positioning, while independent check points are valuable for determining whether the final adjustment meets the project’s accuracy requirement.
Is ArcGIS Reality required to make an orthomosaic in ArcGIS Pro?
Not necessarily. Esri documents the traditional ArcGIS Pro Ortho Mapping workflow with an Advanced license. ArcGIS Reality for ArcGIS Pro is a separate extension for Reality Mapping capabilities such as high-fidelity True Orthos and supported 3D products. Choose the licensing path based on the products your project actually requires.
Conclusion
ArcGIS Pro can produce accurate, analysis-ready orthomosaics, but the quality of the output depends on the entire photogrammetric chain. Start with the correct license and workflow, verify camera and geolocation metadata, collect sufficient image overlap, use an appropriate coordinate system and elevation source, perform block adjustment, and assess the result with control and independent check points where accuracy matters.
For a standard ArcGIS Pro orthomosaic, do not assume that ArcGIS Reality is automatically required, and do not confuse Esri’s 100- and 1,000-gigapixel project-size guidance with GCP limits. After processing, inspect both positional accuracy and visual quality before publishing or analyzing the raster. These checks reduce reprocessing, licensing mistakes, and the risk of treating an attractive-looking mosaic as more accurate than the underlying data supports.
Sources
- Esri — Ortho mapping in ArcGIS Pro — licensing, workflow, block adjustment, accuracy assessment, project-size guidance, and product generation.
- Esri — ArcGIS Reality for ArcGIS Pro extension — Reality licensing and supported high-fidelity products.
- Esri — Orthomosaic Wizard — elevation sources, color balancing, seamlines, formats, and compression.
- Esri — Add Ground Control Points — GCPs, check points, control distribution, and accuracy assessment.
- Esri — ArcGIS Pro 3.6 system requirements — Windows, CPU, RAM, storage, GPU, DirectX, and hardware recommendations.
- Esri — ArcGIS Desktop retirement — confirms ArcGIS Desktop and ArcMap retired March 1, 2026.
