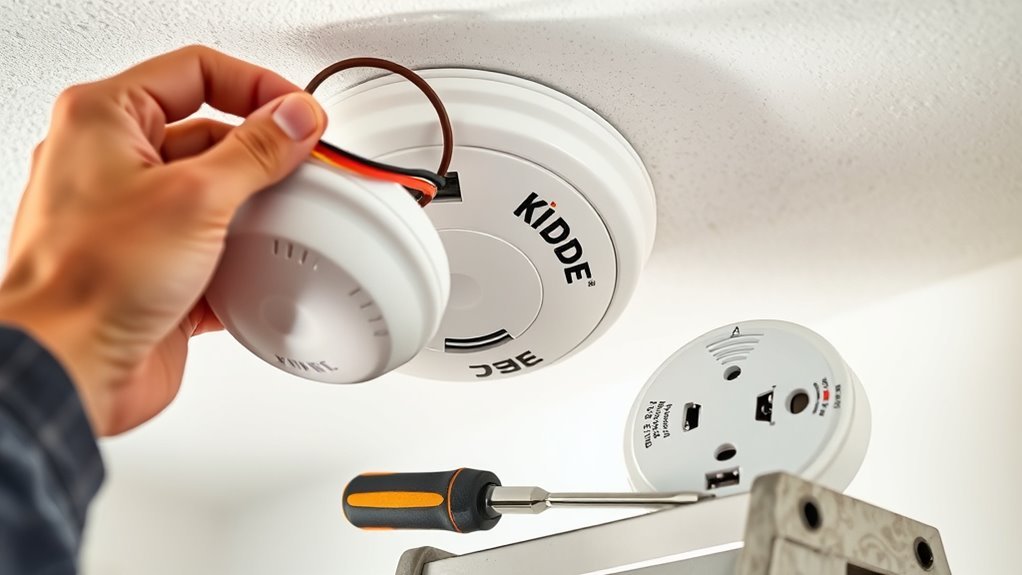
Changing a Kidde hardwired carbon monoxide detector requires more than swapping a battery. First determine whether the alarm needs a new backup battery or the entire unit has reached end of life. For a whole-unit replacement, shut off the alarm circuit, identify the exact model, confirm the replacement is compatible with any interconnected alarms, install it according to its manual, restore power, and test the system.
Quick Answer
To change a Kidde hardwired carbon monoxide detector, shut off its circuit at the breaker, remove the alarm according to its model instructions, unplug the quick-connect harness if equipped, confirm the replacement is compatible with the existing interconnect system, install it, restore power, and perform the manufacturer’s test procedure.
Key Takeaways
- If the alarm is actively signaling carbon monoxide, treat it as an emergency instead of starting maintenance or disconnecting the unit.
- Turn off the alarm circuit at the breaker before removing a hardwired Kidde alarm or disconnecting its harness.
- Check the exact model number, manufacture date, battery design, and user guide before buying parts or a replacement alarm.
- Some Kidde hardwired alarms use replaceable backup batteries; others have sealed 10-year backup batteries that should not be opened or replaced.
- Use only a replacement alarm that Kidde lists as compatible with the existing interconnected system.
- After installation, restore power and use the Test button as directed by the manual; the button checks alarm circuitry but does not prove the CO sensor’s measurement accuracy.
At a Glance
| Time Required | About 15–30 minutes for a compatible like-for-like replacement; longer if a mounting plate or fixed wiring must be changed. |
| Difficulty | Moderate. Stop and use a qualified electrician if fixed household wiring must be altered or you cannot verify that the circuit is de-energized. |
| Tools Needed | Stable step ladder, flashlight, the correct replacement Kidde alarm, the model’s approved backup battery if replaceable, and a screwdriver if the mounting plate must be changed. |
| Cost | Varies by Kidde model. Battery-only maintenance costs less than replacing the complete alarm, while electrical modifications may add professional labor. |
Warning: If the detector is sounding its carbon monoxide alarm or anyone in the home has possible CO-poisoning symptoms, do not begin by removing or disabling the alarm. Move everyone to fresh air and contact emergency services. Do not re-enter until emergency responders say it is safe.
Do You Need a New Battery or a New Alarm?
Before removing anything, determine why the Kidde detector needs attention. A low-battery warning, an end-of-life warning, a malfunction, and an actual carbon monoxide alarm require different responses.
- Low-battery warning: If the model has a replaceable backup battery, install only a battery approved for that specific alarm.
- Sealed backup battery: Do not attempt to open or replace a factory-sealed battery. Current Kidde hardwired products include models with sealed 10-year backups.
- End-of-life warning: Replace the entire detector. A fresh battery does not renew an expired CO sensor.
- Failed test or persistent malfunction: Check the model’s troubleshooting instructions and replace the alarm if the fault cannot be cleared as specified by Kidde.
- CO alarm signal: Leave the home and follow emergency procedures rather than treating it as a maintenance alert.
Kidde explains that carbon monoxide alarm life varies by model and that an end-of-life condition requires replacement of the detector rather than another battery change. See Kidde’s carbon monoxide alarm replacement guidance.
[Amazon Products Picked for You]
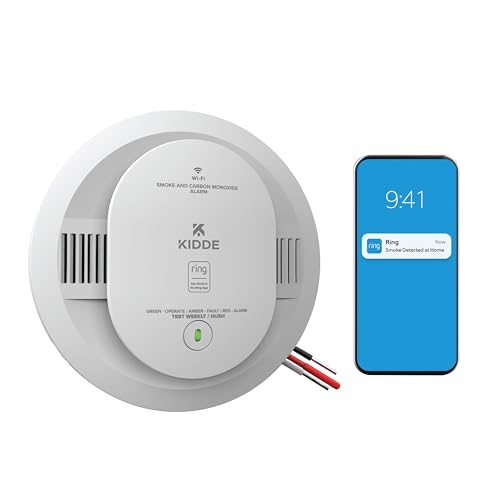
Double the Detection: Alerts you to both smoke and carbon monoxide (CO)

First Alerts Precision Detection advanced sensing technology complies with new industry standards to reduce cooking nuisance alarms and provides early warning in the event of a home fire emergency

First Alert's Precision Detection advanced sensing technology complies with new industry standards to reduce cooking nuisance alarms and provides early warning in the event of a home fire emergency
Find Your Kidde Model Number
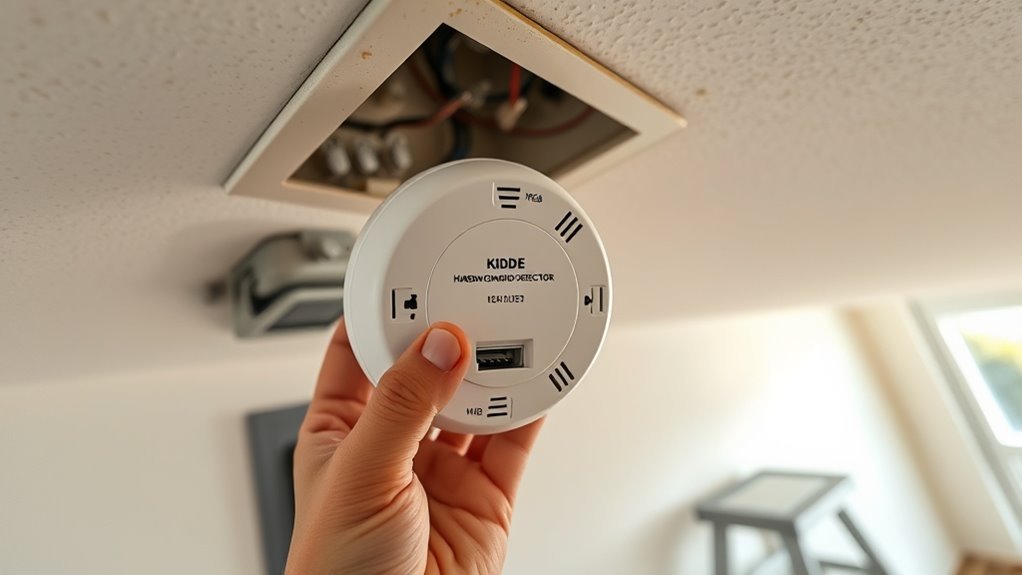
The model number is usually printed on the product label on the back or side of the alarm. That label may also show the manufacture date, electrical rating, approved battery information, and other model-specific instructions.
If the label cannot be read while the alarm is mounted, switch off the alarm circuit at the breaker before removing a hardwired unit. Most Kidde alarms release from the mounting plate by turning in the direction marked on the unit or mounting plate, often counterclockwise, but tamper-resistant models can use an additional pin or locking tab.
The exact Kidde model number determines the correct battery, removal method, compatible replacement alarms, warning patterns, and installation procedure.
Use the number to locate the correct product documentation. Kidde’s battery-replacement guidance specifically recommends identifying the model because battery procedures differ between alarms.
Pro Tip: Photograph the old alarm’s model label, manufacture date, connector, and mounting plate before buying the replacement. The photos make it easier to compare compatibility without repeatedly removing the old unit.
Turn Off Power and Remove the Alarm
Once the replacement work is ready to begin, locate the breaker that supplies the alarm circuit and switch it off. Do this before loosening a hardwired detector or unplugging its electrical connector.
| Step | Action |
|---|---|
| 1 | Turn off the breaker supplying the hardwired alarm circuit. |
| 2 | Follow the OFF arrow or model instructions to release the alarm from its mounting bracket. |
| 3 | Support the alarm while locating its plug-in or quick-connect harness. |
| 4 | If the model uses a removable harness, release its locking clip and unplug the connector from the alarm without pulling on the wires. |
If the alarm will not rotate, check for a tamper-resistant locking pin or tab rather than forcing it. If removing the replacement requires opening the electrical box, altering wire connectors, splicing conductors, or changing fixed household wiring, stop unless you are qualified to perform that electrical work.
Warning: A hardwired alarm is connected to household mains power. Turning off the breaker is essential. If you cannot confidently identify the correct circuit, verify that it is de-energized, or complete required fixed-wiring changes safely, use a qualified electrician.
[Amazon Products Picked for You]

BRK's Precision Detection advanced sensing technology reduces cooking nuisance alarms and delivers early warning
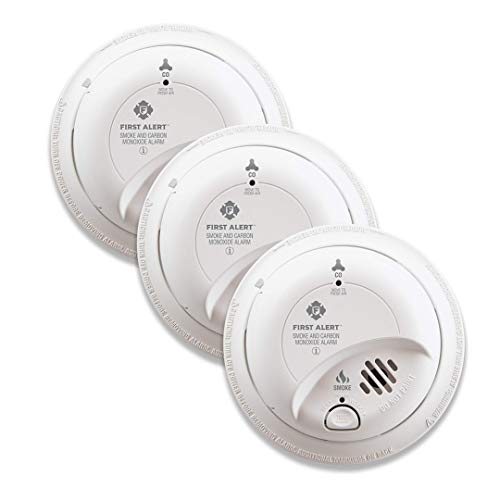
Keep your family safe with this 3-pack of hardwired smoke and carbon monoxide alarm; The battery backup means constant monitoring, even if there's a power failure

WIRED OR WIRELESS CONNECTION - This smoke and carbon monoxide detector can be hardwired or wirelessly connected to up to 12, so when one alarm is triggered, they all sound and notify everyone of the emergency.
Choose a Compatible Kidde Replacement
Do not select a replacement solely because its plug looks similar. Interconnected alarms communicate through the interconnect circuit, and Kidde states that its alarms are listed for use only with compatible models identified in the applicable product documentation.
Search the old model number in Kidde’s alarm replacement guide. If the home has interconnected alarms, also check the new model’s user guide or compatibility guide before installation.
Kidde’s interconnection guidance warns that unapproved combinations have not been tested as a complete interconnected system. That matters even when a replacement appears mechanically similar.
Note: A new alarm may use a different mounting plate or approved adapter. Use only the mounting hardware, connector, or adapter specified for that replacement model. Do not modify a connector simply to make an incompatible alarm fit.
[Amazon Products Picked for You]

6 pack of hardwired smoke alarms, includes battery backup for power outages

First Alert's Precision Detection advanced sensing technology complies with new industry standards to reduce cooking nuisance alarms and provides early warning in the event of a home fire emergency.

SMOKE DETECTION: Model 20SA10 features advanced sensing technology that detects smoke over 25% faster*; sounds a loud 85-decibel alarm with red LED light for clear visual warnings; suitable for homes
Install the Correct Backup Battery
If the Kidde model has a user-replaceable backup battery, install the exact battery type approved in its product label or user guide. If the replacement alarm has a sealed 10-year backup battery, there is no routine battery to remove or replace.
Kidde currently sells hardwired alarms with both designs. For example, some models use replaceable AA backup batteries, while others use a sealed 10-year backup battery. That is why the model number must be confirmed before following battery instructions.
Backup Battery Type
A backup battery allows an applicable hardwired alarm to continue operating during a power outage. The approved type can vary by model, so do not assume that any AA, 9-volt, lithium, or alkaline battery is acceptable simply because it physically fits.
For a model with a replaceable battery:
- Open the battery compartment according to the user guide.
- Remove the old battery without bending or damaging the contacts.
- Check the compartment for corrosion, contamination, or damaged terminals.
- Install an approved replacement battery with the positive and negative ends aligned correctly.
- Close the compartment completely.
- Follow the model’s instructions for testing on backup power if that procedure is specified.
Kidde recommends checking the alarm label or owner’s manual for the specific battery type rather than substituting an unapproved battery.
Battery Replacement Timing
For applicable Kidde alarms with replaceable backup batteries, replace the battery at the interval given in that model’s manual and whenever the low-battery warning occurs. Kidde currently recommends six-month replacement for several replaceable-battery CO and combination-alarm designs.
A clock change can serve as a convenient reminder in locations that observe daylight saving time, but the manufacturer’s required interval and the alarm’s low-battery warning take priority.
A sealed backup battery is different: do not attempt to open the alarm to replace it. Replace the complete alarm when its specified service life ends or when its end-of-life signal requires replacement.
Reattach the Alarm and Restore Power
After confirming that the replacement alarm is compatible, follow its installation guide. A compatible replacement may reuse an approved existing connector or adapter, while another model may require the mounting plate supplied with the new alarm.
Reattach Alarm Properly
- Confirm that the correct backup battery is installed if the model uses a replaceable battery.
- Connect the approved quick-connect harness or manufacturer-specified adapter firmly to the alarm.
- Keep wires inside the electrical box or mounting area so they are not pinched between the alarm and bracket.
- Align the alarm with the approved mounting plate.
- Rotate or lock the alarm into place according to the markings and user guide.
- Check that the unit sits securely and that no part of the housing is hanging loose.
If the new mounting plate cannot be installed without changing the electrical box or fixed wiring, use the replacement manual’s directions and obtain qualified electrical help when necessary.
Restore Power Safely
Once the alarm is fully mounted and its connector is secure, return to the electrical panel and restore power at the breaker.
Check the alarm’s normal-power indicator according to its manual. Many hardwired Kidde alarms use a green indicator to show AC power, but LED behavior is model-specific and should not be assumed from color alone.
Do not rely on a startup chirp as the only proof of correct installation. Proceed to the manufacturer’s Test procedure.
Test the Alarm and Check for Warnings
Test the detector immediately after installation and then at the interval specified by its user guide. The U.S. Consumer Product Safety Commission recommends monthly CO-alarm testing, while a particular Kidde model may specify additional or more frequent checks.
- Make sure AC power has been restored.
- Press or press-and-hold the Test/Test-Hush button exactly as the model instructions specify.
- Listen for the expected alarm sequence and voice notification, if the model has voice alerts.
- If the alarms are hardwired together, confirm that interconnected units respond as the applicable Kidde manual says they should.
- Check for persistent low-battery, malfunction, or end-of-life indications after the test finishes.
Note: According to the CPSC, the Test button verifies operation of the alarm circuitry; it does not test the accuracy of the carbon monoxide sensor by exposing it to CO. Do not use vehicle exhaust, combustion gases, or another improvised CO source to test the detector.
Understand Chirps, Alerts, and Digital Displays
A maintenance chirp is not the same as a carbon monoxide alarm. Because Kidde warning patterns differ among generations and models, use the product label and user guide to interpret the exact sound, LED, voice message, or display code.
Typical situations include:
- Low battery: Replace an approved user-replaceable battery if the model allows it.
- End of life: Replace the entire alarm. Changing the battery does not renew the CO sensor.
- Malfunction or error: Follow the model’s reset/troubleshooting procedure and contact Kidde if the fault returns.
- CO alarm: Treat the alarm as a potential carbon monoxide emergency and leave for fresh air.
A digital display may show a CO reading, peak reading, status code, or error code. A number appearing on the display is therefore not, by itself, the same thing as the alarm entering its emergency alarm state. Use the model’s manual to interpret the reading.
What to Do If the Carbon Monoxide Alarm Sounds
Never ignore an actual carbon monoxide alarm. The U.S. Consumer Product Safety Commission advises occupants to move outside to fresh air and call emergency services or the fire department.
- Get everyone out to fresh air.
- Call 911 or the appropriate local emergency service from outside.
- Account for everyone in the home.
- Do not re-enter until emergency responders say it is safe.
- If an appliance or other CO source is identified, do not use it again until it has been inspected and corrected by a qualified professional.
Kidde provides similar instructions in its CO alarm response guidance.
Check Your Home’s CO Alarm Coverage
Replacing one detector is also a good time to confirm that the home still has adequate CO-alarm coverage. CPSC recommends battery-operated CO alarms or alarms with battery backup on every level of the home and outside sleeping areas. Interconnected alarms provide an additional advantage because an alarm originating in one area can alert occupants elsewhere in the home.
Follow the new alarm’s placement instructions and applicable local building or fire-code requirements. Avoid relocating a detector simply because a new mounting point is more convenient.
Contact Kidde Support for Help
If the replacement model, warning pattern, battery specification, connector, or interconnection compatibility is unclear, contact Kidde before improvising a solution.
Have the following information available:
- model number;
- manufacture date;
- assembly or product number if shown;
- displayed error code, if any;
- description of the chirp or alarm pattern;
- status-light behavior; and
- models of other alarms connected to the same interconnect system.
Kidde’s product and support pages provide manuals, compatibility information, replacement-model guidance, and troubleshooting documents. If the problem involves household wiring rather than the alarm itself, use a qualified electrician rather than altering the circuit by trial and error.
Frequently Asked Questions
How do you replace a hardwired carbon monoxide detector?
Turn off the detector circuit at the breaker, remove the old alarm from its bracket according to its manual, unplug the approved quick-connect harness if equipped, confirm that the new alarm is compatible with the existing system, connect and mount the replacement, restore power, and perform the manufacturer’s test procedure. Use an electrician if fixed wiring must be altered.
How do you remove a hardwired Kidde smoke detector?
Shut off the alarm circuit first. Most Kidde hardwired alarms release from their mounting plate by rotating in the direction marked OFF, often counterclockwise. Some models have a tamper pin or locking tab. Once released, support the alarm and disconnect its quick-connect harness as directed by the specific user guide.
How do you remove a Kidde carbon monoxide detector from the wall?
For a hardwired model, turn off breaker power before removing it. Follow the OFF arrow or removal directions for that model, release any tamper lock, rotate the unit from its mounting plate, and unplug the approved connector if required. Do not pull on the electrical wires themselves.
How do you install a Kidde wired smoke and carbon monoxide detector?
Turn off the alarm circuit, verify the new Kidde unit is approved for the existing interconnect system, install the specified mounting plate and connector, attach the alarm securely, restore AC power, and run the model’s Test procedure. If installation requires altering fixed household wiring, use a qualified electrician.
Can you replace a hardwired Kidde alarm with any hardwired alarm?
No. Physical fit alone does not establish compatibility. Kidde says interconnected alarms should be used only with models listed as compatible in the applicable user guide or compatibility documentation. Check the old model number and the replacement guide before buying or connecting another unit.
Why is my Kidde alarm still chirping after I replaced the battery?
A continuing chirp can indicate an end-of-life condition, malfunction, incorrect battery, poor battery connection, or another model-specific warning. Check the exact chirp pattern and display code in the user guide. If the alarm has reached end of life, replace the entire detector rather than repeatedly changing batteries.
Sources
- Kidde — Carbon Monoxide Alarm Replacement — end-of-life guidance and alarm replacement timing.
- Kidde — Carbon Monoxide and Combination Alarm Battery Replacement — model identification, approved battery replacement, and maintenance guidance.
- Kidde — Alarm Replacement Guide — finding replacement models for existing or discontinued alarms.
- Kidde — Interconnecting Alarm Compatibility — compatibility requirements for interconnected hardwired alarms.
- U.S. Consumer Product Safety Commission — Carbon Monoxide Fact Sheet — CO alarm testing, placement, replacement, and emergency-response guidance.
- Kidde — What to Do When a Carbon Monoxide Alarm Sounds — emergency actions when a CO alarm activates.
Conclusion
Changing a Kidde hardwired carbon monoxide detector safely starts with identifying the exact model and determining whether the problem calls for a backup-battery change or replacement of the entire alarm. Shut off breaker power before removing a hardwired unit, use only a compatible replacement, and avoid modifying fixed wiring unless you are qualified to do so.
After the replacement is mounted, restore power and perform the model’s specified test. A low-battery warning, end-of-life warning, malfunction alert, and actual CO alarm are not interchangeable, so use the alarm’s manual to identify each signal. Most importantly, if the detector is actively warning of carbon monoxide, leave the home and contact emergency services rather than disconnecting the alarm.
