Affiliate disclosure: This page may contain affiliate links. If you buy through a qualifying link, we may earn a commission at no extra cost to you.
Last updated: September 22, 2026
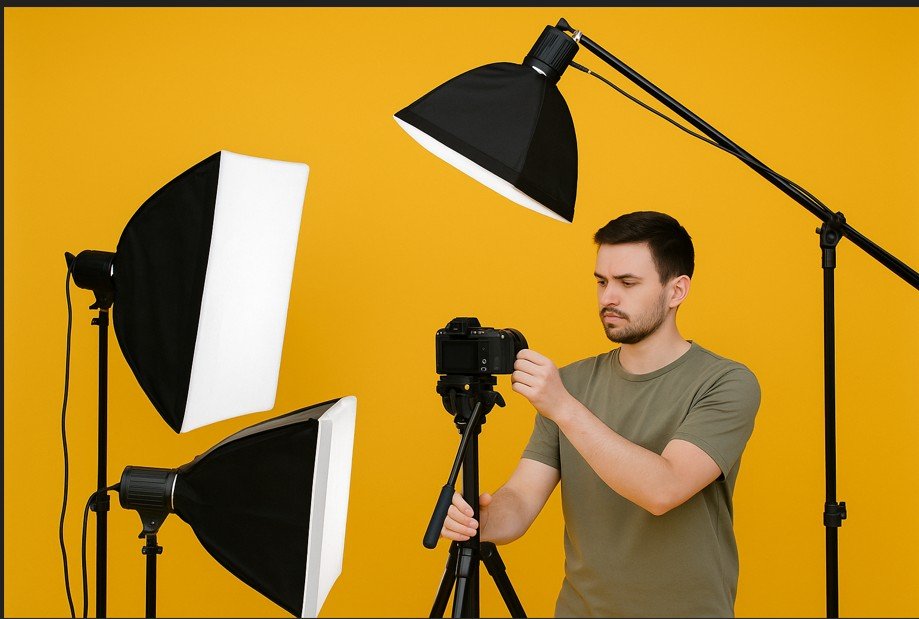
A 3 light studio setup, also called three-point lighting, uses a key light to shape and expose your face, a weaker fill light to control shadows, and a back light to separate you from the background. For a YouTube talking-head video, start with the key about 30 to 45 degrees off the camera axis and slightly above eye level, add only enough fill to keep shadow detail, then place a controlled back light behind and above you.
The exact distance and brightness are not fixed. Your modifier size, room, camera settings, glasses, wall color, and fixture output all change the result. The goal is to understand what each light does, adjust one light at a time, and check the image on your camera rather than copying a rigid measurement.
Quick Answer
Place the key light slightly above eye level and roughly 30 to 45 degrees to one side of the camera. Put the fill on the opposite side and keep it visibly weaker than the key. Place the back light behind and above the subject, aimed at the hair or shoulders without shining into the lens. Then record a short test clip and adjust one light at a time.
Key Takeaways
- The key light is the main source and controls most of the face shape and exposure.
- The fill light controls how dark the shadow side looks; it should not compete with the key.
- The back light adds separation, but it should stay subtle enough to avoid a bright halo or lens flare.
- Light softness depends mainly on the apparent size of the source: a large modifier close to the subject generally looks softer than the same modifier far away.
- Three-point lighting describes three lighting jobs. A reflector, wall, window, or practical light can sometimes replace a dedicated fixture.
Placement at a Glance
| Key Light | Start about 30–45° off the camera axis and slightly above eye level. Aim it down toward the face. |
| Fill Light | Place it opposite the key, usually nearer the camera axis, and keep it weaker so some facial shape remains. |
| Back Light | Place it behind and usually above the subject. Aim it at the hair, shoulders, or upper back while keeping it out of the camera lens. |
| Daylight-Style Starting Point | Around 5500–5600K is common, but match the main lights to each other and set white balance for the actual lighting in the room. |
What Is a 3 Light Studio Setup?
A 3 light setup uses three lighting roles:
-
Key Light: The main light. It establishes the direction, overall face exposure, and most of the visible highlights and shadows.
-
Fill Light: A weaker light or reflected source that lifts the shadows created by the key without removing all contrast.
-
Back Light (Hair/Rim/Edge Light): A light from behind the subject that creates separation between the subject and the background.
The setup is a starting framework rather than a rigid formula. A 45-degree key position is common, but you can move the key closer to the camera for a flatter look or farther to the side for stronger facial shadow and contrast.
Why Does Three-Point Lighting Work?
Three-point lighting gives you separate control over three different parts of the image. The key shapes the subject, the fill controls shadow depth, and the back light controls separation from the background. That makes it easier to correct one problem without changing everything else.
A single light can still produce excellent video. The advantage of the three-point framework is control. You can keep a soft key on the face, adjust only the shadow side with fill, and add just enough rim light to keep dark hair or clothing from blending into a dark background.
Why it matters: Adobe’s basic continuous-lighting guidance uses the same classic pattern: a key around 45 degrees, fill from the opposite side when needed, and back light for subject separation. See Adobe’s lighting guide.
What Do You Need?
A basic setup can include:
-
One main continuous key light
-
One fill light or white reflector
-
One small back light
-
Stable light stands or tripods
-
A softbox, umbrella, or purpose-built diffusion modifier for the key
-
A camera or phone with a live preview
You can buy a complete 3 light studio lighting kit or build the setup from separate fixtures. If you are comparing complete packages, see the 3 light studio lighting kit comparison.
[Amazon Products Picked for You]

【MULTIPLE-USE LED LIGHTING SET】 The small LED panel light (5.73×3.78 inches/14.5× 9.6 centimeters) can be 180 degree adjustable, meeting your different demands on suitable shooting angle; Designed with convenient USB plug, you can plug it in your desktop PC, mobile power, charging plug or your USB socket at any time you want

【Rich Package Contents]】2* 16"x16" softbox, 1* 20"x20"octa softbox, 3* 50W LED bulb, 3* 17"-63"(43-160cm) light stand, 1* 29.5"(75cm) boom arm with sandbag & hook, 1* sandbag, 1* remote control, 7* Velcro cable ties, 1* carry bag. If you have any questions about our soft box lighting set, please contact us, we will reply you within 24 hours.

Complete Studio Setup: The kit contains 2pcs 20" x 28"/50cm x 70cm Softbox +1pc 28'' /70cm Octa Softbox+ 3pcs 85W 2700-6400K 100V-240V LED Light Bulb+3pcs Remote + 3pcs 79"/200cm 4-Leg Heavy-Duty Light Stand+1pc Boom +1pc Oxford Cloth Carrying Bag for versatile photography and video studio lighting needs.
Do You Need Three Separate Lights?
No. Three-point lighting describes three jobs, not three mandatory purchases. A single softened key light can provide the main illumination, while a white reflector or foam board bounces some of that light into the shadow side as fill. A window, small LED, or controlled room light behind you can sometimes provide separation.
If your budget is limited, put the most effort into the key light first. A well-positioned, softened key plus a reflector usually gives a more useful result than three weak lights placed without a clear purpose.
Budget setup: Use one soft key light, a white reflector opposite the key, and natural or practical background separation only if it improves the shot.
Step 1: Set Up the Key Light
Place the key light roughly 30 to 45 degrees to one side of the camera and slightly above eye level. Angle it down toward the face. This is a starting point, not a fixed rule: watch the nose, cheek, eye, and chin shadows in the camera preview and adjust until the face has shape without distracting dark areas.
If you want soft light for a talking-head video, use a large modifier such as a softbox or diffusion panel. A larger source that appears large from the subject’s position creates softer-edged shadows. Moving a softened source closer can make it appear softer, but you may need to reduce its brightness to keep the face correctly exposed.
If the face is too bright, dim the light first when possible. If the fixture cannot dim, you can move it back, but remember that greater distance also makes the modifier appear relatively smaller and may make the shadows harder. Make one change at a time and check the camera preview.
Pro Tip: Turn on only the key light first. Set its position, softness, and exposure before adding fill or back light.
Step 2: Add the Fill Light
The fill goes on the opposite side of the key. Its purpose is to control how dark the shadow side becomes, not to make both sides of the face equally bright.
Start with the fill turned off. Watch the darker side of the face, then slowly increase the fill until important facial detail becomes visible while the key side still looks brighter. If the face becomes evenly lit from both sides, reduce the fill.
You can soften a powered fill with a suitable modifier, but a white reflector or bounce board is often enough. Place it opposite the key and adjust its distance or angle until it returns the amount of light you want.
Avoid placing ordinary cloth directly over or close to a hot fixture. Use purpose-built diffusion material or modifiers approved for the light you are using.
Step 3: Set Up the Back Light
Place the back light behind the subject, usually above head level and to one side. Aim it toward the hair, shoulders, or upper back so it creates a controlled edge that separates the subject from the background.
The back light does not need to be the brightest light in the setup. If it creates a white halo, hot spot, haze, or flare, dim it, change its angle, move it, or use barn doors, a grid, or another appropriate light-control accessory.
Always check the actual camera frame. A back light can look fine to your eyes but still shine directly into the lens or reveal the light stand at the edge of the shot.
Warning: Keep lights, cords, stands, and counterweights out of walkways. Secure loose cables and keep hot fixtures away from curtains, paper, ordinary fabric, and other heat-sensitive materials.
Common Lighting Mistakes to Avoid
-
Too much output at close range: A close soft source can look excellent, but reduce its power if the face clips or develops bright hot spots.
-
Moving a modifier far away to make it softer: Greater distance usually makes the source appear smaller and the light harder.
-
Key light too low or too high: A low key can create unnatural upward shadows; an excessively high key can darken the eye sockets.
-
Small bare source when you want a soft look: Use a larger modifier or diffusion instead of assuming every bare LED will flatter a face.
-
Fill light too bright: The face can lose shape when the fill competes with the key.
-
Back light aimed toward the camera: This can create flare, haze, reduced contrast, or a visible bright spot.
Change only one variable at a time. That makes it much easier to see whether brightness, angle, height, distance, or diffusion actually solved the problem.
How Do You Choose the Right Lights?
For YouTube video, prioritize control and consistency rather than wattage alone. Useful decision factors include:
-
Dimming control: Smooth brightness adjustment makes balancing key and fill much easier.
-
Color temperature: A fixed daylight fixture can work in a controlled room; bi-color fixtures are easier to match to changing environments.
-
Color quality: Look for published CRI/TLCI or similar color-rendering specifications from the manufacturer.
-
Published output: Lux measurements at a stated distance are more useful for comparing usable brightness than wattage alone.
-
Modifier compatibility: Check whether the fixture supports a softbox, umbrella, grid, Bowens-mount modifier, or another system you plan to use.
-
Noise: Fan-cooled lights can matter when a microphone is close to the fixture.
-
Power options: Decide whether you need AC-only operation or battery support for location work.
-
Remote control: App or wireless control can save time when you film alone.
Softbox kits remain practical for fixed home studios. LED panels and COB lights offer faster brightness and color control. For a direct comparison, see Softbox vs. LED Panels for Video Production.
[Amazon Products Picked for You]

【Introducing NEEWER BASICS】 Simple and practical, NEEWER BASICS is an economical product line that focuses on essential functions and designs, without unnecessary extras and materials.
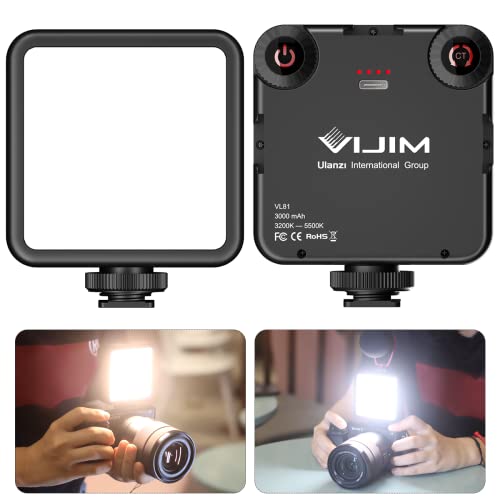
81 Beads Fill Light with Softbox: The VL-81 LED video light is a upgraded version of VL49 2000mah led video light. It comes with 81 beads, CRI95 + 3200k-5600k, brighter, bigger angle. Softbox design, not dazzling

【70W Output Versatile LED Video Light】 With 70W output power and 34000lux@1m maximum illuminance, this CB60B bi color continuous light (US Plug) works perfectly as a fill light or key light for videography, weddings, YouTube/TikTok videos, filmmaking and live streaming. Built with a robust aluminum alloy shell and small enough to carry around for quick lighting. Supports OTA firmware updates
Soft Light vs. Hard Light
Soft light comes from a source that appears large relative to the subject. It creates gradual shadow edges and can make facial texture and transitions look less harsh. A large softbox, umbrella, diffusion panel, or bounced light can create this effect.
Hard light comes from a relatively small source and creates sharper shadow edges and stronger contrast. Hard light is not automatically bad; it can be useful for dramatic or stylized scenes. It is simply less forgiving when your goal is a soft talking-head look.
If your shadows are too hard, increase the apparent size of the source by using a larger modifier, adding suitable diffusion, or moving the softened source closer while reducing output as needed. Moving the same modifier farther away generally makes it appear smaller and therefore harder.
How Does Room Type Affect the Setup?
The room changes how much light bounces, how easy it is to control the background, and how much space you have for modifiers.
Small Rooms
White or light-colored walls can bounce key and fill light back toward the subject, reducing contrast. Start with lower output, keep the key controlled with a softbox or grid when available, and watch the shadow side of the face. If the image becomes too flat, reduce fill and control spill rather than adding more light.
Dark Rooms
A dark room absorbs more light, so the background can disappear quickly. Increase the key output only as much as needed for a clean exposure, then decide whether you want the background dark or whether it needs a separate low-powered background light. Do not add a fourth light automatically; use it only when the background needs independent control.
Rooms With Sunlight
Window light changes with clouds and time of day. For repeatable YouTube videos, block or control the daylight when possible. If you intentionally mix window light with studio lights, match the fixtures as closely as possible to the current daylight and set white balance for the resulting scene rather than assuming one fixed Kelvin value.
How High and How Far Should the Lights Be?
There is no single correct distance because fixture output and modifier size vary. Use these relative starting points:
-
Key light: Slightly above eye level, about 30–45 degrees off the camera axis. Move it close enough for the modifier to appear large and soft, then dim to the correct exposure.
-
Fill light: Opposite the key, often nearer the camera axis. Adjust brightness or reflector position until shadow detail is visible without making both sides equally bright.
-
Back light: Behind and usually above the subject, aimed toward the hair or shoulders and kept out of the lens.
Your room size, wall color, modifier size, fixture output, framing, glasses, and desired contrast all affect the final position. Use the camera image as the deciding reference.
What Color Temperature Should You Use?
Around 5500–5600K is a common starting point for a daylight-style studio look, but matching the lights to each other is more important than using one exact number.
Set your key and fill to the same color temperature unless you intentionally want a color contrast. Then set or lock the camera white balance for the actual lighting. Automatic white balance can change during a recording if the scene changes, which may cause visible color shifts between clips.
Avoid accidental mixtures such as a daylight key combined with warm ceiling bulbs. If warm practical lamps are part of the background design, keep them from spilling heavily onto the face unless the mixed-color look is intentional.
Power Supply Tips
Read the voltage and frequency rating printed on the fixture or its power supply before use. Do not assume every US-market light is 120V-only or every imported light is suitable for 220–240V power.
Many modern video lights use universal supplies. For example, Godox lists the SL60IID for 100–240V AC input. Other lighting kits may have different requirements, so check the exact model rather than relying on the brand name.
A plug adapter changes the physical plug shape; it does not necessarily convert voltage. Use the manufacturer-specified power supply and suitable electrical accessories. Keep cables organized and avoid overloading outlets or extension leads.
App Control and Wireless Options
Wireless control is useful when you film alone because it lets you adjust a light while staying in front of the camera and watching the preview.
Current examples include the amaran F22x, which supports Sidus Link control, and the amaran P60c, which supports app control for brightness and color settings.
App control is convenient, but it should not be the first buying criterion. Light quality, usable output, modifier compatibility, power options, and physical placement matter more to the final image.
[Amazon Products Picked for You]

【Full RGB Color Output】 This handheld light features premium LEDs housed in a curved diffuser with high light transmission, providing soft, evenly distributed illumination with up to 1730lux/0.5m. It offers a wide 2500K–10000K color temperature range with ±50 GM correction for fine tuning. The advanced RGBWW mixing technology blends red, green, blue, cool white, and warm white LEDs to deliver a full spectrum output. With a CRI of 97+ and TLCI of 98+, it ensures highly accurate color reproduction

This controller also works with Nintendo Switch 2 - C Button not available

Help protect your home day or night with Blink Wired Floodlight Camera — a smart security camera with 2600 lumens of LED lighting, enhanced motion detection, and a built-in security siren.
How Should You Test the Setup?
Build the lighting in order so you can see what each source changes:
-
Set the camera position and final framing.
-
Turn on only the key light and adjust its angle, softness, and exposure.
-
Add the fill and raise it only until the shadow side has the amount of detail you want.
-
Add the back light and check the hair, shoulders, background separation, and lens flare.
-
Record a short test clip and watch it on the screen you normally use for editing.
-
Fix one problem at a time, then record another short test.
Do not rely only on how the room looks to your eyes. The camera may reveal clipped highlights, deep shadows, glare, color casts, flicker, or flare that are less obvious while standing on set.
Filming Tips With a 3 Light Setup
-
Place your camera and frame the shot before finalizing the lights.
-
Use tape to mark the chair, tripod, and light-stand positions once the setup works.
-
Turn off uncontrolled room lights unless they are intentionally part of the scene.
-
Keep the subject position consistent so the lighting ratio does not change between takes.
-
Take a phone photo of the finished setup so you can rebuild it later.
Repeatability is more useful than chasing a different lighting style for every recording. Once you find positions that work for your face, room, and camera, save them.
Common Problems and Fixes
-
Face looks flat → Reduce the fill or move it closer to the camera axis so it lifts shadows without creating a competing direction.
-
Two obvious facial shadows → The fill may be too strong or too directional. Reduce it or use a reflector.
-
Dark eye sockets → Lower the key slightly or make the source larger and softer.
-
Glare on glasses → Raise or move the key farther to the side until the reflection travels away from the camera. Recheck after the subject moves their head.
-
Skin color looks wrong → Match the key and fill color temperature, reduce unwanted ambient spill, then set or lock white balance for the scene.
-
Bright forehead or nose → Reduce key output, soften the source, or change its angle while watching highlight detail.
-
Harsh back-light halo → Dim the back light, move it, or control its beam with a grid, barn doors, or other suitable modifier.
-
Background looks too dark → Decide whether darkness is intentional. If not, add controlled background light or allow carefully controlled spill rather than moving the subject against the wall by default.
-
Video looks noisy → Improve the light reaching the subject and correct exposure before simply raising ISO.
-
Video flickers → Check the light itself, dimming mode, mains frequency, frame rate, and shutter speed. Some LED fixtures behave differently at certain dimming levels.
Best Camera Settings to Check
Your lighting setup works best when the camera is not changing exposure and color unpredictably during the take. Manual or locked settings are useful when your camera or phone app supports them.
-
White balance: Set or lock it for the actual lighting so color does not drift during the recording.
-
Exposure: Keep facial highlights below clipping. Use a histogram, waveform, or zebra display if your camera provides one.
-
ISO: Use the lowest practical value that still gives correct exposure after your light, aperture, and shutter settings are established. Do not deliberately underexpose just to keep ISO low.
-
Focus: Confirm focus on the eyes or face before recording, or use reliable face/eye autofocus when appropriate.
-
Frame rate and shutter: A common starting guideline is a shutter speed near twice the frame rate, such as about 1/50 second for 24p or 1/60 second for 30p. Indoors, test for flicker and adjust when necessary.
For a manufacturer explanation of frame rate, shutter speed, ISO, flicker, and white balance, see Sony’s movie-recording settings guide.
Upgrading Your Setup Over Time
Upgrade based on the problem you need to solve rather than buying more lights simply because they are more expensive.
-
Budget home studio: A basic softbox kit can provide a large source and simple continuous light if you have enough floor space.
-
COB key light: The Godox SL60IID is a 70W daylight COB fixture with 0–100% dimming and a Bowens mount, making it useful with larger modifiers.
-
Flexible placement: The amaran F22x is a flexible 2×2 light mat with a 2500–7500K range and app control, useful where a rigid fixture is difficult to place.
-
RGB color control: The amaran P60c is a 60W RGBWW panel with a 2500–7500K range and app control, useful when you need colored accents or adjustable CCT.
See the full comparison:
👉 3 Light Studio Lighting Kit Comparison
Repeatable Setup Checklist
-
Frame the camera first
-
Set and soften the key light
-
Add only enough fill to control the shadows
-
Add subtle back-light separation
-
Match the main light color temperatures
-
Set or lock white balance and exposure
-
Record a short test clip
-
Check glasses, skin highlights, eye shadows, flare, noise, and flicker
-
Mark the successful light and subject positions
Frequently Asked Questions
What are the three lights in a 3 light studio setup?
The three roles are the key light, fill light, and back light. The key provides the main direction and exposure, the fill controls the shadows created by the key, and the back light separates the subject from the background.
Do you need three separate lights for three-point lighting?
No. A reflector can provide fill without a second powered light, and a window or existing controlled light can sometimes create back-light separation. The three-point concept describes three lighting functions rather than three mandatory fixtures.
Where should the key light be placed?
Start with the key about 30 to 45 degrees to one side of the camera and slightly above eye level, angled down toward the face. Adjust the exact position while watching the shadows in the camera preview.
How bright should the fill light be?
The fill should usually be weaker than the key. Start with it off, then raise it until the shadow side of the face has enough detail while the key side still looks brighter and gives the face shape.
What color temperature is best for YouTube lighting?
Around 5500–5600K is a common daylight-style starting point, but there is no single required Kelvin setting. Keep the key and fill consistent and set the camera white balance for the actual lighting in the room.
How do you reduce glare on glasses?
Change the angle rather than only reducing brightness. Raise the key or move it farther to the side until its reflection no longer bounces from the glasses into the camera, then check the result while the subject makes normal head movements.
Final Takeaway
A reliable 3 light studio setup is less about owning exactly three fixtures and more about controlling three jobs: shape the face with the key, control shadow depth with the fill, and create separation with the back light. Start with the key, add the other lights one at a time, and let the camera preview—not a fixed distance or brightness number—tell you when the setup is balanced.
✅ If you are choosing equipment rather than learning placement, see the related 3 light studio lighting kit comparison.

2 thoughts on “How to Set Up a 3 Light Studio for YouTube Videos: A Beginner’s Guide”