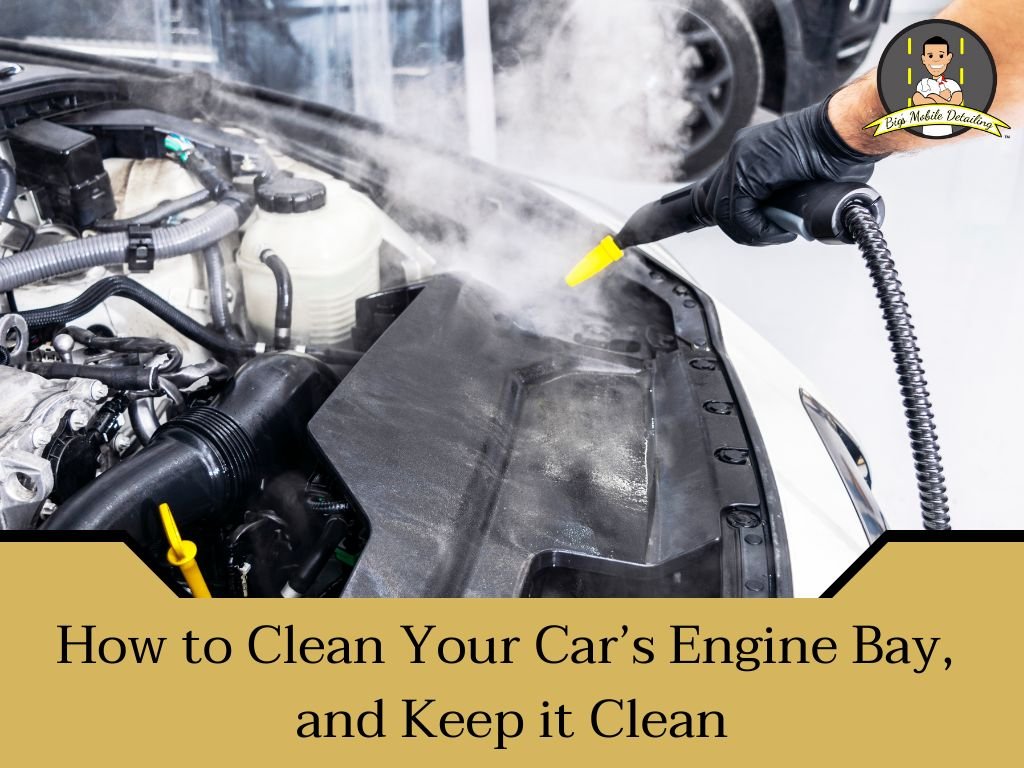
To clean a car engine bay safely, work only on a fully cool, switched-off vehicle. Check the owner’s manual first, remove loose debris, protect any components the manufacturer says must stay dry, use an automotive-safe cleaner, agitate with soft brushes, rinse only if the vehicle allows it, and dry the bay completely before starting the car.
A clean engine bay makes fresh leaks, worn hoses, loose clamps, damaged wiring, corrosion, and fluid residue easier to see. It can also remove leaves, oily film, and dirt that create odors or hide maintenance problems.
This guide shows you how to clean a car engine bay with a low-moisture, safety-first method. You’ll also learn when to skip rinsing, why high-pressure water is risky, what to do around electrical parts, and how the process changes for hybrid or electric vehicles.
Last updated: September 11, 2026
Quick Answer
To clean a car engine bay, first check your owner’s manual. With the vehicle fully cool and switched off, remove loose debris, protect manufacturer-identified sensitive areas, apply an automotive-safe cleaner, scrub gently, and wipe away grime. Use only a light, low-pressure rinse if your vehicle’s guidance allows water in the engine compartment, then dry everything thoroughly. Never pressure-wash the bay or spray a hot or running engine.
Key Takeaways
- Always clean the engine bay only when the engine is cool to the touch.
- Check the owner’s manual before using water; keep spray away from electrical/electronic parts and any intake opening, and protect the components your manufacturer identifies.
- Use an engine-safe degreaser, soft brushes, microfiber towels, and low-pressure water.
- Dry the engine bay completely to reduce the risk of corrosion and electrical trouble.
- Avoid pressure washers, harsh household cleaners, frequent unnecessary wet washes, and soaking the engine bay.
At a Glance
| Time Required | 30 to 60 minutes, plus drying time |
| Difficulty | Easy to moderate |
| Tools Needed | Gloves, safety glasses, soft brushes, microfiber towels, protective covers as needed, automotive-safe cleaner, spray bottle or pump sprayer, and optional gentle airflow; use a hose only if the owner’s manual allows rinsing |
| Cost | Low if you already have basic cleaning supplies |
How To Clean A Car Engine Bay Safely In 8 Steps
The safest process is controlled and vehicle-specific. Some manufacturers permit careful rinsing with protected components, while others warn against water in the engine compartment. Your owner’s manual takes priority over any general detailing guide.
- Cool and secure the vehicle. Park on level ground, switch the vehicle off, remove the key or keep the smart key away from the car, and wait until the engine bay is fully cool.
- Read the owner’s manual. Check the cleaning section for warnings about water, battery disconnection, engine covers, ignition parts, hybrid systems, or other model-specific components.
- Remove dry debris first. Vacuum or brush away leaves, grit, and dust, especially around the cowl, hood hinges, and drain channels.
- Protect sensitive areas. Keep cleaner and water away from open air intakes, exposed connectors, ignition components, control modules, and any parts your manufacturer says to cover or avoid.
- Apply compatible cleaner in small sections. Use an automotive engine-bay cleaner or degreaser exactly as the label directs. Do not let it dry on the surface.
- Agitate gently. Use soft detailing brushes and microfiber towels around plastic covers, painted metal, hoses, brackets, and accessible surfaces.
- Wipe or rinse with minimal water. Near sensitive areas, wipe with damp microfiber towels. If your vehicle allows rinsing, use a gentle, low-volume flow and never a pressure washer.
- Dry, uncover, and inspect. Blot standing water, use gentle airflow where appropriate, remove every protective cover, and confirm the bay is dry before starting the vehicle. Then look for fresh leaks, damaged hoses, loose connections, or warning lights.
Hybrid/EV warning: Never touch orange or high-voltage-labeled cables, connectors, battery components, inverters, or power-control units. Some hybrid owner’s manuals also prohibit washing the engine compartment with water. Follow the exact manufacturer procedure for your vehicle.
Why Clean Your Engine Bay
A clean engine bay prevents debris buildup and makes routine inspections easier. Regular cleaning helps you spot leaks, cracked hoses, corrosion, loose connections, and worn parts before they become expensive repairs. It also helps maintain your car’s value by keeping visible components in better shape.
Cleaning your engine bay might seem like a task reserved for car enthusiasts, but it has value for every car owner. A clean engine bay is not only about appearance. It can also support easier maintenance, safer inspections, and better long-term care. Here’s why it matters.
Make Inspection And Maintenance Easier
A clean engine bay makes the area around belts, pulleys, hoses, clamps, wiring, and fluid reservoirs easier to inspect. Removing leaves and heavy grime also helps keep drain and cowl areas visible instead of hiding developing problems.
Engine-bay cleaning is not a performance modification. Do not expect extra horsepower or fuel economy from washing exterior engine surfaces. Its practical value is visibility: fresh leaks, corrosion, damaged insulation, and worn parts are easier to notice on clean, dry surfaces.
Prevent Corrosion
Corrosion is a quiet problem in neglected engine bays. Dirt, road salt, moisture, and spilled fluids can sit on metal parts and create conditions where rust forms faster. Rust does more than make the engine bay look old. It can weaken brackets, fasteners, clamps, and exposed metal surfaces.
If you drive in wet weather, near coastal air, or on salted roads, cleaning the engine bay becomes even more useful. Removing grime and drying the area well can help reduce moisture-related damage.
Identify Leaks And Issues Early
A clean engine bay makes leaks easier to see. Oil, coolant, brake fluid, power steering fluid, and washer fluid stains stand out much more clearly on clean surfaces. It is like finding a dropped item in a tidy room instead of a cluttered one.
After cleaning, check for fresh wet spots, strong smells, loose caps, cracked hoses, and white or green residue around coolant areas. These signs can help you address a small issue before it becomes a breakdown.
Boost Resale Value
Potential buyers often notice a clean engine bay. It can create a strong first impression and suggest that you have taken care of the vehicle. While it will not hide mechanical problems, a tidy engine bay can support the overall appearance of a well-maintained car.
If you plan to sell or trade in your vehicle, cleaning the engine bay before photos or inspections can help the car look more cared for. Just avoid using greasy dressings that make parts look artificially shiny or slippery.
Improve Safety
Safety may not be the first thing you think of when cleaning your engine bay, but it matters. Leaves, nesting material, oil residue, and debris can collect near hot engine parts. A clean bay also makes it easier to check brake fluid, coolant levels, battery terminals, and visible wiring.
Warning: Never clean a hot engine. Let it cool completely before spraying cleaner or water. Sudden temperature changes, steam, and hot metal can cause burns or damage.
Reduce Unpleasant Odors
A dirty engine bay can create strange smells that move into the cabin. Old oil residue, spilled fluids, wet leaves, and road grime can smell worse when the engine warms up. These odors are not just annoying. They may also point to a leak or buildup that needs attention.
Cleaning your engine bay is more than a cosmetic chore. It is a practical step that helps your car stay easier to inspect, safer to maintain, and better looking under the hood.
Essential Tools And Supplies
Cleaning your car engine bay requires the right tools and a vehicle-specific plan. Basic supplies include an automotive-safe cleaner or degreaser, soft brushes, microfiber cloths, gloves, safety glasses, and protective covers if your owner’s manual calls for them. Keep a spray bottle or pump sprayer available for controlled moisture; use a hose only when the manufacturer permits rinsing. Never blast the engine compartment with high-pressure water.
Having the right supplies before you start makes the job easier and safer. Whether you are a beginner or a car enthusiast, good preparation helps you clean more thoroughly without damaging the engine bay.
1. Safety Gear
Before you begin, gather your protective gear. Safety glasses help protect your eyes from splashes. Gloves protect your hands from degreaser, dirt, oil, and sharp edges. Long sleeves can also help if you are working around tight spaces.
Always work in a well-ventilated area. Many cleaners create fumes, especially when sprayed into a warm or enclosed space. If the smell feels strong, step away and allow the area to air out.
2. Basic Cleaning Tools
You will need a few simple cleaning tools. A soft-bristle brush works well for general scrubbing. A detailing brush or old toothbrush helps clean tight spots around caps, brackets, seams, and textured plastic covers.
Use microfiber cloths to wipe down surfaces and dry areas without leaving lint. Keep a bucket nearby for rinsing towels and brushes. A small trash bag is also useful for removing leaves, wrappers, and loose debris from the engine bay.
3. Degreaser
A good engine degreaser is one of the most useful products for this job. It breaks down oily grime, road film, and old residue. Choose a cleaner designed for automotive engine bays, and follow the label directions closely.
When practical, choose a water-based or biodegradable automotive cleaner and use only the amount needed. “Biodegradable” does not make oily wash water safe for storm drains, so contain dirty residue and follow local disposal rules. Avoid bleach, oven cleaner, gasoline, and strong household solvents because they can damage paint, rubber, plastic, coatings, labels, or electrical insulation.
4. Water Source And Hose
If your owner’s manual allows rinsing, use the least water needed to remove cleaner and loosened grime. A pump sprayer, spray bottle, or gentle hose flow gives better control than a high-pressure nozzle.
Do not force water into electrical or electronic components, ignition parts, air-intake openings, or sealed areas. Some manufacturers advise against water washing in the engine compartment altogether, so switch to the wipe-clean method when the manual is restrictive or unclear.
5. Engine Cover Or Plastic Bags
Protect only the areas that need protection for your vehicle. Common no-spray zones include open air-intake points, exposed connectors, ignition components, fuse or power-distribution boxes, control modules, and other components identified by the manufacturer. Some owner’s manuals specifically tell you what to cover; others tell you not to wash the engine compartment with water.
Use plastic bags or waterproof covers only where appropriate, and secure them so they cannot fall near belts or fans. A photo taken before masking helps you confirm that every temporary cover is removed before startup.
6. Vacuum Cleaner
A small vacuum removes loose leaves, dust, and dry grit before any cleaner or moisture is applied. That keeps dry debris from turning into muddy residue and reduces the amount of scrubbing needed later.
Vacuum around the cowl area, battery tray, corners, hood hinges, and open spaces where leaves collect. Avoid pulling on wires or hoses with the vacuum nozzle.
7. Compatible Plastic Or Rubber Protectant
After cleaning and drying, you can apply an automotive protectant only to surfaces the product label lists as compatible. A light, water-based dressing is often easier to control than spraying product throughout the bay. Apply it to a cloth or applicator first, then wipe away excess.
Do not put protectant on belts, pulleys, exhaust parts, sensors, electrical connectors, or any area where residue or a slippery film could create a problem. The goal is a dry-looking satin finish, not a wet or greasy coating.
Pro Tip: Take a quick photo of your engine bay before covering parts. It helps you remember where everything is and gives you a before-and-after comparison.
Pre-cleaning Preparations
Preparation determines how safely the job goes. Before starting, gather your tools, park in a safe area, let the vehicle cool fully, read the engine-compartment cleaning guidance in the owner’s manual, and check for leaks, damaged wiring, or other reasons to stop.
Park In The Right Place
Park the vehicle on a flat surface in a shaded, well-ventilated area. Shade helps prevent cleaner from drying too quickly on warm surfaces. A flat surface also keeps fluids and rinse water from running into one corner of the engine bay.
Avoid cleaning near storm drains when possible. Engine grime can contain oil and other residue. Use minimal water and wipe up heavy grease with towels before rinsing.
Let The Engine Cool
Make sure the engine bay is fully cool to the touch before you begin. A warm surface can make cleaner dry too quickly, while hot metal can cause burns or create steam when contacted by water. Cooling time varies by vehicle, weather, and recent driving, so do not rely on a fixed number of minutes.
Remove Loose Debris
Remove leaves, twigs, dust, and loose dirt before using any liquid. Use your hands, a soft brush, or a vacuum. Pay close attention to the cowl area below the windshield because leaves often collect there.
This step makes the rest of the cleaning process easier. It also prevents debris from washing into tight spaces where it may be harder to remove.
Safety Precautions
Wear gloves to protect your hands from chemicals and sharp edges, and use safety goggles to shield your eyes from splashes. Work in a well-ventilated area and follow the cleaner label for ventilation and protective-equipment requirements. Keep ignition sources away from flammable residues or products.
Do not smoke while cleaning the engine bay. Avoid open flames and sparks. If you see damaged wiring, heavy fuel smell, or active fluid leaks, stop and have the vehicle inspected before cleaning.
Protecting Sensitive Components
Engine compartments contain electrical, intake, ignition, and control components that vary by model. Follow the owner’s manual rather than a universal cover list. Keep water and cleaner away from open intakes, exposed electrical connections, ignition parts, and any component the manufacturer identifies as water-sensitive.
Inspect for cracked or brittle insulation, loose connectors, damaged hoses, strong fuel odor, or active leaks before starting. If you find damaged wiring or high-voltage components you are not trained to work around, skip wet cleaning and have the vehicle inspected.
Degreasing The Engine Bay
Degreasing is one of the main steps in cleaning your car’s engine bay. It removes built-up grease, oil residue, and grime from surfaces. This helps the engine bay look better and makes future inspections easier.
Before starting, ensure your engine is cool. This prevents burns and improves safety. Once the sensitive areas are covered, you can begin degreasing in a controlled way.
Choosing The Right Degreaser
Use a degreaser or cleaner labeled for automotive engine-bay use and check its material restrictions before application. The right product should loosen oily grime without requiring aggressive scrubbing, but compatibility still depends on the surface and the label directions.
Avoid strong household chemicals. They may damage paint, plastic, rubber, labels, coatings, and electrical insulation. A water-based or biodegradable automotive product may be preferable when it is compatible with the surfaces you are cleaning, but still follow the label and contain oily residue.
Applying The Degreaser
Start by confirming that the manufacturer-identified sensitive areas are protected and that no temporary cover can contact a belt or fan. Keep cleaner away from open air intakes, exposed electrical or ignition parts, and high-voltage components. Shake or dilute the degreaser only if the product label directs you to do so.
Spray the degreaser on greasy areas rather than soaking the entire engine bay. Let it sit for the time recommended on the label. This gives it time to break down grime. Do not let the degreaser dry completely on surfaces.
Use a soft brush to scrub stubborn spots. Work gently around hoses, wiring, labels, and clips. Rinse with low-pressure water, making sure no degreaser remains. Repeat if necessary for tough spots.
Note: Always follow the instructions on the product label. Different degreasers have different dwell times, dilution needs, and surface warnings.
Cleaning Techniques
Cleaning your car’s engine bay can feel intimidating, but the right techniques make it manageable. Proper cleaning helps the engine bay look better while reducing the chance of damage. The key is to use gentle tools, controlled water, and careful drying.
Brushing And Scrubbing
Start with a soft brush. It helps remove loose dirt and debris without scratching surfaces. Use a toothbrush or small detailing brush for tight spots around caps, brackets, seams, and textured plastic.
Scrub gently to avoid damaging wires, labels, rubber parts, or connectors. A mild soapy water solution can help on lightly soiled areas. For oily spots, use engine-safe degreaser instead of dish soap or harsh cleaners.
Can You Rinse An Engine Bay With Water?
If the cleaner requires rinsing and your owner’s manual permits it, use a pump sprayer, spray bottle, or gentle hose flow. High-pressure water can force moisture past seals and into electrical or electronic components.
Use minimal water and direct it away from intake openings, ignition parts, connectors, control modules, and other no-spray areas. If your manual warns against engine-compartment water washing, do not rinse; lift the cleaner and grime with damp microfiber towels instead. Remove temporary covers only after the surrounding area is dry enough that trapped water will not spill onto protected parts.
Can You Clean An Engine Bay Without Water?
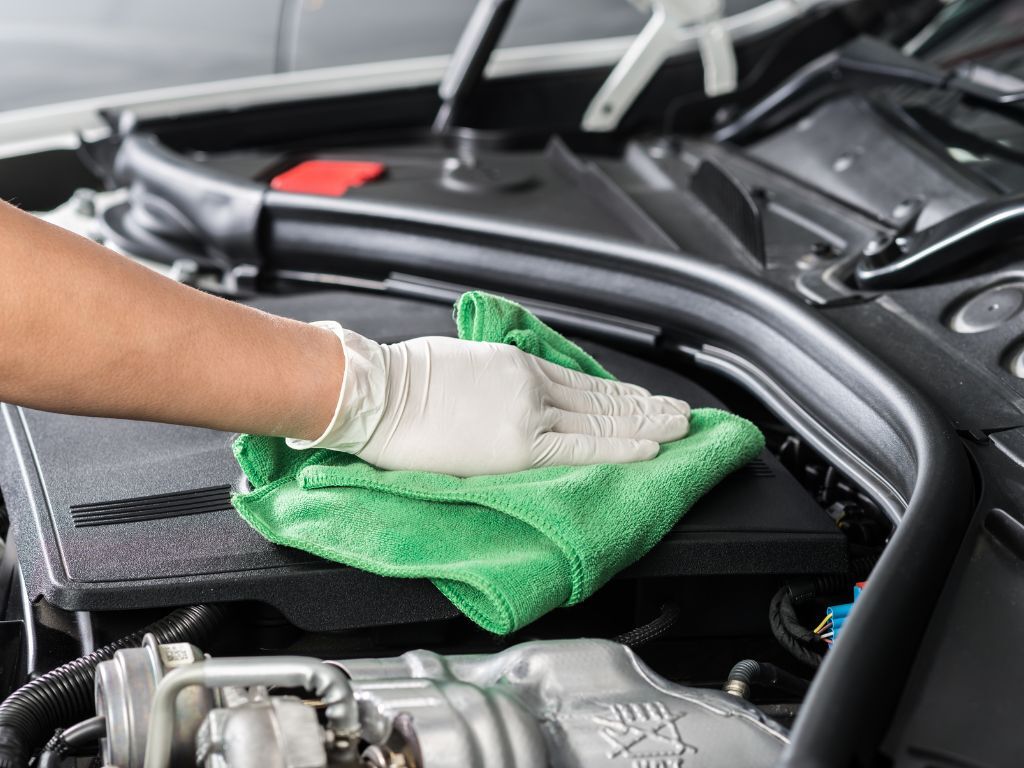
If your engine bay has many exposed connectors or you feel unsure about rinsing, use a wipe-clean method. Spray cleaner onto a microfiber towel or brush instead of directly onto the engine. Wipe the dirty area, then follow with a damp towel and a dry towel.
This method takes longer, but it gives you more control. It is the preferred fallback when the owner’s manual restricts engine-compartment water washing, when the bay has exposed or modified wiring, or when you are unsure whether a component can be rinsed safely.
Credit: bigsmobile.com
Drying The Engine Bay
Dry the engine bay as carefully as you cleaned it. Remove standing water from accessible surfaces and crevices so moisture is not left around metal, connectors, seams, or covers where it can contribute to corrosion, staining, or electrical problems.
Use towels first, then gentle airflow where appropriate, and allow extra open-hood drying time before startup.
Air Drying
Air drying is gentle, but it should not be the only drying step when water is pooled in seams or around components. First blot accessible moisture with microfiber towels, then leave the hood open in a well-ventilated area so residual dampness can evaporate.
Do not use engine heat as a shortcut while electrical areas are still wet. Air drying works best after standing water has already been removed with towels or carefully directed, moderate airflow.
Using Compressed Air
Using compressed air offers precision. It reaches tight spots where water might hide, such as around bolts, seams, connectors, and plastic covers. Compressed air tools can quickly blow away moisture from crevices.
Keep a safe distance from delicate parts. Use moderate air pressure and avoid blasting directly into connectors, sensors, or seals. Move air across the surface rather than forcing it into one spot.
Using Microfiber Towels
Microfiber towels are ideal for the final drying pass. Pat and wipe plastic covers, painted areas, hoses, and accessible metal surfaces. Use several towels if needed so you are not spreading moisture around.
After drying, remove the plastic bags from protected components. Check that no water has collected under the covers. Then leave the hood open for a little longer to let remaining moisture evaporate.
Detailing For A Polished Look
Detailing comes after the bay is clean and fully dry. At this stage, the useful work is selective: remove remaining residue, restore compatible plastic or metal surfaces where appropriate, and keep every belt, pulley, connector, sensor, and hot exhaust surface free of dressing.
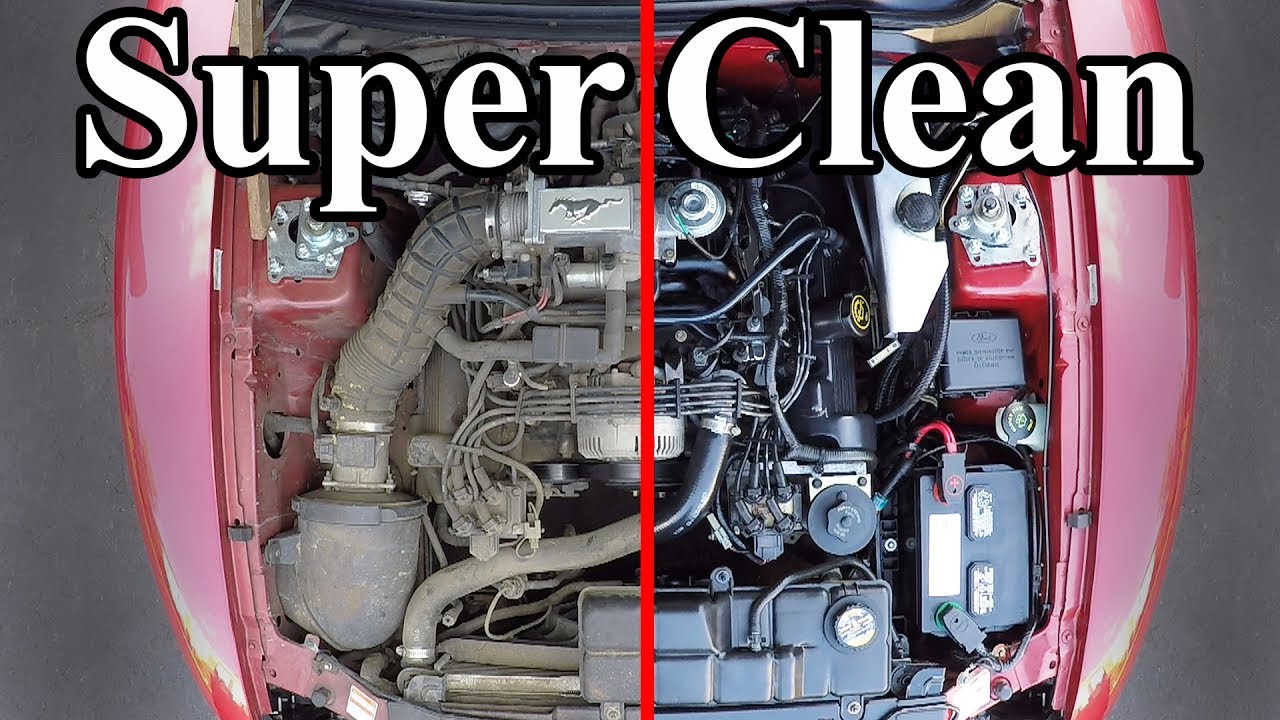
A clean, mostly satin engine bay is easier to inspect than one coated in glossy product. Use finishing products sparingly so fresh leaks and residue remain visible.
Polishing Metal Components
Metal components in your engine bay can lose their shine over time due to dust, oxidation, and grime. You can restore some of their appearance with a suitable metal polish. First, apply a small amount of polish using a clean microfiber cloth.
Use polish only on bare or polish-safe metal surfaces identified by the product label. Coated, anodized, painted, plated, or textured parts can react differently. Apply a small amount to an inconspicuous area first, then buff with a clean microfiber cloth if the surface is compatible.
Do not polish hot parts, belts, pulleys, electrical connectors, or painted warning labels. If you are unsure about a surface, test a small hidden area first.
Cleaning Plastic Surfaces
Plastic surfaces require a gentler approach. Use a non-abrasive cleaner to avoid staining or dulling them. Spray the cleaner onto a cloth or brush, then wipe plastic parts such as the fuse box cover, engine cover, and air filter housing.
If you want a finished look, apply a plastic protectant that specifically lists the surface as compatible. Put it on a cloth or applicator rather than spraying across the engine bay, then wipe away excess so the finish stays dry and non-greasy.
Conditioning Rubber Hoses
Rubber hoses can collect dust and residue. Wipe them with a damp microfiber cloth and inspect them while you work. Look for cracks, swelling, soft spots, or loose clamps.
If you use a rubber-safe protectant, apply it sparingly and wipe away any extra. Do not spray protectant onto belts, pulleys, or moving parts.
Credit: www.youtube.com
Maintenance Tips
Keeping the engine bay inspectable does not require frequent wet washing. Regularly remove dry debris, wipe fresh spills, and look for leaks or damaged components. Deep cleaning is needed only when grime, salt, mud, or oily residue makes inspection difficult.
When Should You Clean The Engine Bay?
There is no universal engine-bay cleaning interval. Manufacturer guidance and driving conditions differ, and some owner’s manuals specifically advise avoiding frequent engine washes. Inspect the bay during routine maintenance and clean when buildup actually needs removal.
Vehicles exposed to heavy dust, mud, road salt, leaf debris, or fluid leaks may need attention sooner. Most between-cleaning maintenance can be dry: vacuum leaves, wipe accessible covers, and check for fresh leaks rather than repeatedly soaking the engine compartment.
Spot Cleaning
Spot clean your engine bay when you notice spills or leaks. Use a mild cleaner to remove small spots before they spread or bake onto warm surfaces. This prevents buildup and keeps the engine looking newer.
After spot cleaning, check whether the stain returns. If fresh fluid appears again, you may have an active leak that needs attention.
Quick Inspection After Cleaning
After the engine bay is clean and dry, do a short inspection. Look for loose caps, low fluid levels, cracked hoses, corrosion on battery terminals, and damp spots under fluid reservoirs.
Start the engine only after everything is dry and all plastic covers have been removed from protected areas. Let the vehicle idle for a few minutes, then check again for unusual smells, warning lights, or fresh leaks.
Common Mistakes To Avoid
The biggest avoidable risks are using the wrong procedure for your vehicle, applying high-pressure water, spraying a hot or running engine, and leaving moisture where the manufacturer says it should not go. Start with the owner’s manual, use the least aggressive cleaning method that works, and dry the bay carefully.
Cleaning your car’s engine bay can enhance its appearance and make inspections easier. But common mistakes can cause damage. Knowing what to avoid helps you clean with more confidence.
1. Using High-pressure Water
High-pressure water can harm sensitive engine parts. It may force water into areas where it should not go, including connectors, fuse boxes, seals, and sensors. Use gentle water flow instead.
2. Ignoring Electrical Components
Do not assume every engine bay uses the same protection plan. Follow the owner’s manual and keep cleaner or water away from electrical/electronic parts, ignition components, open intakes, and any model-specific no-spray areas. Use temporary covers only where appropriate and remove every cover before startup.
3. Using Harsh Chemicals
Some cleaning agents are too strong for your engine bay. They can strip paint, stain plastic, dry out rubber, or damage labels. Choose products designed for engine cleaning and follow the instructions.
4. Cleaning A Hot Engine
Never clean an engine that is still hot. Rapid cooling can stress some parts, and steam can burn your skin. Wait until the engine is cool to the touch.
5. Not Drying Thoroughly
Leaving moisture can lead to corrosion, water spots, or electrical issues. Use microfiber towels, compressed air, or a blower to dry all areas after cleaning. Pay special attention to tight spaces and connectors.
6. Over-soaking The Engine
Excess water can damage engine parts. Avoid soaking the engine bay. Use a damp cloth, controlled spray, or gentle rinse instead of pouring water over everything.
7. Forgetting To Check For Leaks
Inspect the engine bay for leaks after cleaning. Cleaning can reveal hidden issues. Fresh stains after cleaning are easier to trace and can help you catch problems early.
8. Neglecting Safety Measures
Wear gloves and goggles during cleaning. Safety should always be a priority. Use tools that protect your hands and eyes, and avoid breathing strong chemical fumes.
9. Applying Too Much Dressing
Too much dressing can leave a greasy finish that attracts dust. It can also make hoses and plastic look unnaturally wet. Apply protectant lightly and wipe away extra product.
10. Spraying The Air Intake
Avoid spraying water or cleaner directly into the air intake. Water entering the intake system can create serious problems. Cover the opening before cleaning and remove the cover only when the area is dry.
Avoid these common mistakes to keep your engine bay clean and safe. Proper cleaning helps your car look better and makes routine checks easier.

Credit: www.youtube.com
Related Guides
Frequently Asked Questions
What tools are needed to clean an engine bay?
To clean your car’s engine bay, you need gloves, safety glasses, microfiber cloths, soft brushes, an automotive-safe cleaner or degreaser, and protective covers if your owner’s manual calls for them. Use a spray bottle, pump sprayer, or gentle hose flow only when the manufacturer permits rinsing. Do not use a pressure washer.
How often should you clean the engine bay?
There is no universal schedule. Inspect the engine bay during routine maintenance and clean it when leaves, dust, road salt, mud, or oily residue starts to hide components or hold moisture. Some manufacturers advise avoiding frequent engine washes, so use dry debris removal and spot cleaning whenever a full wet clean is unnecessary.
Can you use water to clean the engine bay?
Sometimes, but the owner’s manual decides. Some manufacturers allow careful rinsing with specific parts protected, while others warn against water washing in the engine compartment. If rinsing is permitted, use minimal, low-pressure water and keep it away from electrical/electronic parts, ignition components, and intake openings. If the manual is restrictive or unclear, use damp microfiber towels instead.
Is it safe to clean an engine bay yourself?
Yes, if the vehicle manufacturer permits the procedure and you can identify the areas that must stay dry. Work on a cool, switched-off vehicle, use compatible products, start with a wipe-clean method, and dry thoroughly. Stop if you find damaged wiring, a strong fuel smell, active leaks, or high-voltage components you are not trained to work around.
Should you disconnect the battery before cleaning?
Do not disconnect the battery automatically. Check the owner’s manual first because modern vehicles can require model-specific shutdown, memory, security, or relearn procedures. If the manufacturer calls for disconnection, follow its exact terminal order and reconnection steps. A 12-volt battery disconnection also does not make hybrid high-voltage components safe to touch.
Can engine bay cleaning cause problems?
Yes. Problems can occur if high-pressure water is forced into connectors or ignition parts, the intake is sprayed, incompatible chemicals are used, high-voltage components are disturbed, or the vehicle is started while critical areas are still wet. Owner-manual guidance, low-moisture cleaning, and thorough drying reduce the risk.
Can you clean an engine bay without water?
Yes. For light dust, film, and routine upkeep, spray a compatible cleaner onto a microfiber towel or detailing brush, work one small section at a time, wipe away the grime, then finish with a lightly damp towel and a dry towel. A low-moisture method is especially useful when the owner’s manual restricts engine-compartment rinsing.
Can you pressure-wash a car engine bay?
A pressure washer is not the safe default. High-pressure water can be driven past seals or into electrical, electronic, ignition, and intake areas, and some manufacturers explicitly warn against high-pressure engine-compartment washing. Use a wipe-clean method or a gentle, low-volume rinse only when your owner’s manual allows it.
Is engine-bay cleaning different on a hybrid or EV?
Yes. Hybrid and electric vehicles can have high-voltage cables, inverters, power-control units, battery components, and other parts that require special precautions. Never touch orange or high-voltage-labeled components, and never assume disconnecting the 12-volt battery makes the high-voltage system safe. Follow the manufacturer’s instructions exactly.
Conclusion
Cleaning your car engine bay is most useful when it leaves the area clean, dry, and easy to inspect. The goal is not frequent washing or extra shine; it is controlled grime removal that helps you notice leaks, corrosion, damaged hoses, loose connections, and other visible problems.
Start with your owner’s manual, use the least water your vehicle and cleaner require, and choose a wipe-clean method whenever you are uncertain about rinsing. Soft brushes and microfiber towels do most of the work. Dry the bay thoroughly before startup and remove every temporary cover from the engine compartment.
If you find damaged wiring, a fuel smell, an active leak, persistent warning lights, or unfamiliar high-voltage components, stop cleaning and arrange proper diagnosis. A safe engine-bay detail should make maintenance easier, not create a new problem.
Sources
- Ford Owner’s Manual — Cleaning the Engine Compartment — supports cooling the engine, avoiding washing while it is running, protecting specified components, using approved cleaner, and avoiding frequent engine washes.
- Hyundai Owner’s Manual — Exterior Care — warns that water washing in the engine compartment can damage electrical circuits and that high-pressure washing should be avoided.
- Hyundai 2026 Hybrid Vehicle Components — supports the warning not to touch orange or high-voltage-labeled components, cables, or connections.
- NIOSH Personal Protective Equipment Guidance — supports selecting protective gear such as gloves and eye protection for chemical and physical hazards.
- OSHA Hazard Communication — supports reading chemical labels, hazard statements, precautions, and safety information.
- EPA Stormwater Best Management Practice — Vehicle Maintenance and Washing — supports minimizing detergent use and keeping contaminated wash water away from storm drains.