Installing LED lights in your car can improve visibility, reduce power draw, and give your vehicle a cleaner, more modern look. The job can be simple when you replace existing bulbs, but it becomes more technical when you add new LED strips, accent lights, switches, or wiring. Before you start, choose compatible lights, plan a safe power source, disconnect the battery, and make sure any exterior lighting follows road-use rules in your area.
Quick Answer
To wire LED lights in a car, choose lights that fit your vehicle, disconnect the battery, mount the LEDs securely, connect the positive wire to a fused power source, connect the ground wire to clean metal, add a switch if needed, then test the lights before reassembling panels.
Key Takeaways
- LED lights in your car can improve visibility, safety, and aesthetics when you choose the right type for the job.
- Brightness, color temperature, bulb size, wiring needs, and vehicle compatibility matter before you buy.
- Always disconnect the battery before wiring, and use a fused circuit to help protect the vehicle’s electrical system.
- Mount and route wires carefully so they do not rub against sharp metal, hot surfaces, pedals, seat tracks, or moving parts.
- Test and adjust your LED lights before driving, especially headlights or exterior lights that may affect other drivers.
At a Glance
| Time Required | 15 to 45 minutes for simple bulb swaps; 1 to 3 hours for LED strips, switches, or custom wiring. |
| Difficulty | Easy for plug-in replacement bulbs; moderate for hardwired accent lights or added switches. |
| Tools Needed | Screwdrivers, pliers, trim tool, wire strippers, crimp connectors or soldering supplies, electrical tape, heat shrink tubing, test light or multimeter, zip ties, fuse tap, and a properly rated fuse. |
| Cost | Varies by light type, brand, wiring kit, and whether you install the lights yourself or hire a professional. |
Why Install LED Lights in Your Car?
The decision to install LED lights in your car can come from several needs. You may want brighter lighting, a cleaner cabin look, better nighttime visibility, or a lower power draw than older incandescent bulbs. LEDs use less energy than traditional bulbs, which can reduce strain on the vehicle’s electrical system when the installation is done correctly.
This lower power use can help when you run interior lights, cargo lights, or accent lights for longer periods. It does not mean LEDs will create major fuel savings on their own, but they can be more efficient and longer lasting than many older lighting options.
LEDs also offer clearer light output. That can help you see switches, floor areas, cargo spaces, and the road more easily, depending on the type of light you install. For headlights, the goal should always be safe, controlled beam output rather than the brightest bulb you can find.
Additionally, many drivers appreciate the modern and stylish look that LED lights bring to their vehicles. They allow for customization that reflects personal style while also improving function when installed safely.
Warning: Exterior LED lights can be restricted by color, brightness, placement, and road-use rules. Avoid red or blue forward-facing accent lights, flashing lights, and headlight bulbs that are not legal for your vehicle’s housings.
Choosing the Right LED Lights for Your Car
Selecting the appropriate LED lights for your vehicle starts with the application. Headlights, fog lights, taillights, brake lights, turn signals, dome lights, map lights, trunk lights, under-dash lights, and accent strips all serve different purposes. Each type needs the correct size, connector, brightness level, and heat management.
Headlights are the one place where fitment matters most, because the bulb has to sit at the same focal point as the halogen it replaces or the beam scatters. Kits sold for a specific truck take that guesswork out — see our picks for LED headlight kits made for the 2005 F-150.
Each type serves a distinct purpose and comes with different specifications. For headlights, check the bulb size in your owner’s manual or a reliable bulb-fitment guide. You should also consider lumens, color temperature, beam pattern, cooling design, and whether the bulb is designed for your specific housing type.
A color temperature near 5000K to 6000K often looks bright white and close to daylight. Very blue lights may look stylish, but they can create glare and reduce useful visibility in rain, fog, or snow. For interior lighting, warm white can feel softer, while cool white can make the cabin look more modern.
Compatibility matters as much as brightness. Not all LED lights fit every make and model. Some vehicles use computer-controlled lighting systems that may show bulb-out warnings, flickering, hyper-flashing turn signals, or error messages after an LED swap. In those cases, you may need CANbus-compatible bulbs, resistors, or a different product designed for your vehicle.
Quality also matters. Choose LED lights with strong heat control, stable drivers, water resistance where needed, and clear installation instructions. Low-quality lights may flicker, overheat, fail early, or create glare. If you are shopping for LED lights, compare fitment, reviews, warranty details, and whether the lights are intended for road use or off-road/show use only.
[Amazon Products Picked for You]

【Perfect Beam Focus】Termitor Upgraded H11/H9/H8 9005/HB3 Light Bulbs Combo or Electronic Flashers feature an ultra-thin 0.03-inch chip pitch, significantly enhancing beam focusing performance. They project a concentrated, precise beam that forms a super-focused light pattern with no dark zones or shadows, effectively eliminating glare for oncoming vehicles. This ensures a wider and longer nighttime field of vision, enhancing driving safety.

【2000% Brighter Than Origin】S6Pro - Top Automotive-Grade chips with 96000LM per pcs, 6500K cool white. Super focused beam pattern design provides wider and farther lighting range which is 20 times brighter than your original bulb

【900% Brighter - S1 Pro Bulbs】The SEALIGHT 9005 H11 bulbs combo feature 16pcs high-performance chips, delivering up to 8 times the brightness than stock bulbs. Upgrade your nighttime driving experience by replacing dim, narrow stock bulbs with SEALIGHT 9005/HB3 H11/H9/H8/H16 LED Bulbs Combo. Enjoy crystal-clear 6500K cool white light that cuts through the dark, giving you way better visibility for safer night drives
Check Legal and Safety Rules First
Before installing exterior LEDs, check the rules that apply where you drive. Headlights, brake lights, turn signals, reverse lights, and marker lights perform safety functions, so changing them can affect road legality and vehicle inspection results.
Headlight upgrades need extra care. A bulb that fits the socket may still create an unsafe beam pattern if the reflector or projector was not designed for that LED bulb. Poor beam control can blind oncoming drivers, even when the light looks impressive from behind the wheel.
Accent lighting also needs caution. Many areas restrict certain colors on public roads, especially red, blue, or flashing lights that can be confused with emergency vehicles. Interior lights should not distract the driver or reflect on the windshield at night.
Note: If a product says “off-road use only,” do not use it as a road-going headlight, brake light, turn signal, or other required safety light.
Preparing Your Car for LED Light Installation

Before you begin the installation, prepare the vehicle and the work area. Gather all necessary tools and materials, which may include screwdrivers, pliers, a trim removal tool, wire strippers, electrical tape, heat shrink tubing, zip ties, a multimeter, fuse taps, connectors, and the LED lights themselves.
Work in a dry, well-lit area where you can open doors, access panels, and keep small clips or screws organized. Park the car on a flat surface, turn off the engine, remove the key, and let hot parts cool before touching light housings near the engine bay.
Disconnecting the battery is a critical step. Remove the negative battery terminal before handling wiring, sockets, or exposed connectors. This lowers the risk of electrical shorts, blown fuses, or accidental shocks while you work on the lighting system.
Once the battery is disconnected, locate the areas where you will install the LED lights. For replacement bulbs, this may mean removing lens covers, headlight dust caps, trunk panels, or interior light housings. For LED strips, plan the route before sticking or fastening anything in place.
[Amazon Products Picked for You]

Universal fit: Compatible with all automobiles, boats and devices equipped with a 12 volt power source

Product Includes: 42PCS LED interior car lights in 6 different sizes, including T10, 31mm, 36mm, 41mm, and other sizes, to meet various needs for car interior lighting.

【High Bright & Uniform】The Dream+color Acrylic Car Ambient Interior Lighting have super bright LED and acrylic lens and contains 6 LED strips (4*29.5inch+1*43.3inch+1*14inch), also comes with 1 main controller and 4 sub controllers,and can be flexibly installed on any car by DIY without disorganized, which is plug and play, and this acrylic light evenly spread over the lamp strip is brighter, more uniform and softer than other optical fiber lamps that rely on only one LED.
Materials Needed to Wire LED Lights in a Car
The materials you need depend on whether you are replacing bulbs or adding new lights. A simple dome light replacement may only require the correct LED bulb and a trim tool. A custom accent light installation may need a full wiring kit.
- LED bulbs or LED light strips: Choose the correct size, color, voltage, and use type.
- Power source: Use a suitable existing circuit, fuse box connection, accessory power circuit, or battery connection with an inline fuse.
- Ground connection: Use clean, bare metal with a secure bolt or factory ground point.
- Switch: Add a switch if you want manual control instead of tying the lights to an existing circuit.
- Fuse or fuse tap: Protect the circuit with the correct fuse rating for the load.
- Wire connectors: Use automotive-rated crimp connectors, solder, or plug-in harnesses where suitable.
- Electrical tape and heat shrink tubing: Insulate connections and protect them from moisture or vibration.
- Zip ties or clips: Secure wiring away from moving parts, pedals, seat rails, and heat sources.
- Multimeter or test light: Confirm power, ground, and switched circuits before connecting.
Pro Tip: Test-fit LED strips before removing adhesive backing. Once the adhesive touches dusty plastic, carpet, or textured trim, it may not hold well.
[Amazon Products Picked for You]
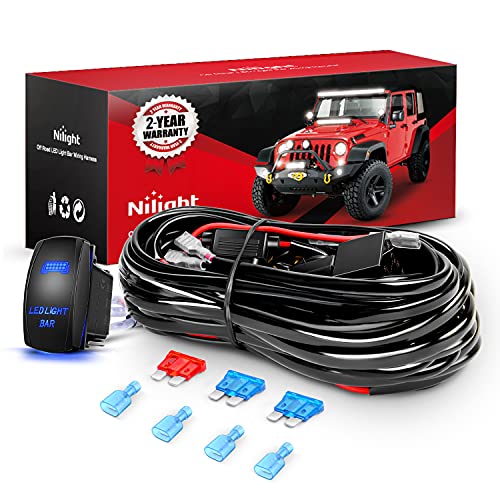
Two Available leads: 12 feet extendable wiring harness, two Sets of light output connectors for dual light fixtures less than 180W

Heavy-duty harness: 16AWG stranded wire, up to 540W load capacity. 180W per circuit, each switch controls a circuit. The harness is protected by power relay and inline blade fuse as the first Line of defense against overcurrent and short circuits.

12ft wiring harness: more than 12ft of wiring from the switch to lights, has also been extendable, run the harness to your desired lighting location
Step-by-Step Guide to Installing LED Lights in Your Car
| Steps | Details |
|---|---|
| Step 1 | Gather all necessary tools and materials. |
| Step 2 | Locate the interior and exterior lights to be replaced. |
| Step 3 | Remove the old light bulbs carefully. |
| Step 4 | Install the LED lights in place of the old bulbs. |
| Step 5 | Test the new LED lights to ensure they are working properly. |
| Step 6 | Secure any loose wiring and reassemble any removed parts. |
The installation process varies depending on the type of light. Replacing a bulb is usually faster than adding a new LED strip or switch. Still, most LED installations follow the same basic flow: access the light area, remove the old light if needed, install the LED, wire it safely, test it, and reassemble the trim.
Step 1: Gather Your Tools and Confirm Fitment
Start by confirming the bulb size, connector type, voltage, and installation location. Read the LED product instructions before you take the car apart. Some LED bulbs have polarity, which means they only work when the positive and negative sides match the socket correctly.
If you are wiring accent lights, check the length of the wire harness and the location of the controller or switch. Make sure the wires can reach the power source without stretching across sharp or hot areas.
Step 2: Disconnect the Battery
Turn the vehicle off and disconnect the negative battery cable. Keep the cable away from the terminal while you work. This step is simple, but it protects both you and the vehicle’s electrical system.
If your vehicle has security codes, memory settings, or special battery reset steps, review the owner’s manual before disconnecting the battery. Some newer vehicles may need extra care after battery disconnection.
Step 3: Remove the Old Bulb or Open the Mounting Area
For headlight or taillight bulbs, access the housing from the engine bay, trunk, or wheel-well area. Remove dust caps, clips, or screws only as needed. Avoid pulling wires hard because small connectors can break.
For interior lights, use a plastic trim tool instead of a metal screwdriver whenever possible. This helps prevent scratches on lenses, trim panels, or soft-touch surfaces.
Step 4: Install the LED Light
Insert the LED bulb into the socket or place the LED strip in the planned mounting area. Make sure replacement bulbs sit fully and evenly in the housing. A loose bulb can flicker, fall out, or create a poor beam pattern.
Ensure that the LED fits snugly and securely. Improper installation can cause flickering, poor light output, overheating, or early failure.
For adhesive LED strips, clean the mounting surface first. Dust, oil, and dashboard protectants can weaken adhesive. Press the strip firmly in place and avoid bending it tighter than the product instructions allow.
Step 5: Wire the Lights Safely
If you are simply replacing a bulb, the socket provides power and ground. If you are adding new lights, connect the positive wire to a suitable fused power source and connect the ground wire to a clean metal ground point.
Use a switch if you want manual control. If you want the lights to turn on with the doors, headlights, or accessory power, identify the correct circuit with a multimeter instead of guessing by wire color.
Step 6: Test Before Reassembly
Reconnect the battery and test the lights before you put panels back. Check brightness, flicker, polarity, switch function, dimming behavior, and whether the vehicle shows warning messages.
If the light does not turn on, disconnect the battery again before making changes. Then check the fuse, ground, connector, polarity, and power source.
Step 7: Secure Wiring and Reassemble the Vehicle
Once everything works, secure wires with zip ties or clips. Keep wiring away from pedals, steering parts, seat tracks, airbags, hinges, exhaust heat, sharp brackets, and moving panels.
Reinstall all covers, trim pieces, screws, and clips. Make sure weather seals and dust caps sit correctly, especially around headlights and exterior housings.
Wiring and Connecting Your LED Lights
Wiring is one of the most important parts of installing LED lights in your car, especially when you add new fixtures instead of replacing existing bulbs. A safe connection helps prevent shorts, flickering, blown fuses, melted wiring, and battery drain.
Begin by identifying where you will draw power for the new lights. Common options include an existing light circuit, an accessory fuse, or a direct battery connection with an inline fuse. For most interior accent lights, an accessory-switched circuit is often better than constant battery power because it turns off with the vehicle.
When connecting wires, use appropriate connectors and make sure all connections are secure. Soldering can provide a strong connection when done correctly, but automotive-rated crimp connectors can also work well. Cover exposed wire with heat shrink tubing or quality electrical tape to protect against shorts.
If your installation involves several lights or a higher current draw, consider using a relay. A relay allows a low-current switch to control a higher-current circuit more safely. This can help protect switches and reduce strain on factory wiring.
How to Choose a Power Source
The right power source depends on how you want the LEDs to behave. Constant power keeps lights available even when the car is off, but it can drain the battery if you forget to switch them off. Accessory power turns the lights on only when the key or start button is in the accessory or run position.
A fuse tap can make a clean connection at the fuse box when used correctly. Choose a circuit that matches your purpose and does not control critical safety systems. Avoid tapping airbag, ABS, engine control, or other essential circuits.
How to Ground LED Lights
A weak ground can cause flickering, dim lights, or lights that do not work at all. Use clean, bare metal for the ground connection. Scrape away paint only where appropriate, use a secure bolt, and protect the area from corrosion if exposed to moisture.
Factory ground points are often the best option when accessible. Do not ground lights to loose trim screws, painted brackets, or parts that move.
Why a Fuse Matters
A fuse protects the wiring if a short occurs. Without a fuse, a damaged wire can overheat and create a fire risk. The fuse should sit close to the power source and match the wire size and light load.
Do not install a larger fuse just because a smaller one blows. A blown fuse means something needs inspection, such as a short, wrong connection, damaged insulation, or too much load on the circuit.
Warning: Never run unfused power wires through the vehicle. If a positive wire rubs through its insulation and touches metal, it can short and overheat quickly.
Testing and Adjusting Your LED Lights

Once your LED lights are installed and wired correctly, testing them is a critical step before you drive. Start by reconnecting the car battery and turning on the lights. Check that every light illuminates as expected and responds to the correct switch, door, or circuit.
If any lights flicker, stay dim, or do not turn on, check the wiring before reassembling the vehicle. Look for loose connectors, poor grounds, reversed polarity, damaged wires, blown fuses, or circuits that do not provide power when you expect them to.
Adjusting your LED lights may also be necessary. For headlights, beam aim matters as much as brightness. Lights aimed too high can blind oncoming traffic. Lights aimed too low can limit your view of the road. Many vehicles have adjustment screws on their headlight assemblies that allow fine-tuning.
For interior or accent lighting, test the lights at night from the driver’s seat. Make sure they do not reflect on the windshield, distract your eyes, interfere with pedals, or create glare on screens and mirrors.
Troubleshooting Common LED Light Problems
LED lights can fail to work correctly for several reasons. Most problems come from fitment, polarity, weak ground connections, low-quality connectors, or vehicle computer compatibility. Use the symptoms below to narrow down the issue.
LED Lights Do Not Turn On
Check the fuse, battery connection, switch position, power source, and ground. If the bulb is polarity-sensitive, remove it, rotate it if the socket allows, and test again. Use a multimeter to confirm power and ground before replacing parts.
LED Lights Flicker
Flickering may come from loose connections, unstable voltage, weak ground, poor-quality LEDs, or a vehicle lighting system that needs CANbus-compatible bulbs. Recheck every connector and confirm the lights match your vehicle’s electrical setup.
Turn Signals Flash Too Fast
Fast flashing, often called hyper-flashing, can happen when LED turn signal bulbs draw less power than original bulbs. Some vehicles need an LED-compatible flasher relay or properly installed load resistors. Resistors can get hot, so mount them away from plastic, carpet, wiring, and painted surfaces.
Dashboard Shows a Bulb Warning
Some vehicles monitor bulb resistance. LED bulbs may trigger a warning even when the light works. Vehicle-specific CANbus bulbs or approved adapters may solve the issue, but avoid bypassing warning systems in a way that hides real lighting failures.
Headlights Look Bright but Do Not Light the Road Well
This often means the beam pattern is poor or the bulbs are not seated correctly. Recheck bulb orientation, housing fit, and headlight aim. If the light scatters instead of forming a clean beam, switch to a better-matched lighting option.
Maintenance and Care for Your LED Lights
Maintaining your LED lights helps protect brightness, appearance, and long-term reliability. LEDs usually last longer than older incandescent bulbs, but heat, moisture, vibration, and poor wiring can still shorten their life.
Inspect your lights regularly for flickering, dimming, water inside housings, loose strips, exposed wires, or damaged connectors. Fix small issues early before they create bigger electrical problems.
Dust and grime can accumulate on both exterior and interior lights over time, which can reduce brightness and make the lights look dull.
Use a soft cloth and mild cleaning solution to wipe lenses and light surfaces. Avoid harsh chemicals that can haze plastic lenses or damage LED strip coatings. For headlights that become cloudy or yellowed, a headlight restoration kit can improve visibility and appearance.
Also check mounting points. Adhesive strips can loosen in heat, cold, or humidity. If a strip starts to sag, secure it before it touches pedals, seat rails, or moving trim.
Benefits of Installing LED Lights in Your Car
The advantages of installing LED lights in your vehicle extend beyond style. Good LED upgrades can improve visibility, reduce power draw, brighten interior spaces, and make the vehicle feel newer. They can also reduce the need for frequent bulb replacements when you choose quality parts.
One major benefit is longevity. LEDs are designed to last longer than many traditional bulbs, although real lifespan depends on heat control, build quality, wiring, and use. A cheap LED installed in a hot or poorly ventilated housing may fail sooner than expected.
LEDs can also improve illumination quality. Bright cabin lights make it easier to find items at night. Better cargo lights help when loading gear. Proper exterior lights can improve visibility for drivers, pedestrians, and other road users.
Many drivers also choose LEDs for style. Interior accent lights, footwell lights, trunk lights, and license plate lights can create a modern look without major changes. The key is to balance appearance with safety, legality, and clean installation.
Common Mistakes to Avoid
Several mistakes can turn a simple LED upgrade into an electrical problem. Avoid rushing through the job, skipping the fuse, using poor connectors, or assuming every bulb that fits the socket is safe for road use.
- Skipping the battery disconnect: This increases the risk of shorts while you work.
- Using the wrong bulb size: A loose or forced bulb can damage the socket or housing.
- Choosing lights that are too bright: Excess brightness can create glare and reduce safety.
- Ignoring heat: LED drivers and resistors can get hot, especially in enclosed areas.
- Leaving wires unsecured: Loose wires can rub, rattle, snag, or short.
- Tapping critical circuits: Avoid airbag, ABS, engine, and safety-related wiring.
- Using household connectors: Automotive wiring needs connectors that handle vibration and temperature changes.
- Forgetting exterior lighting laws: Not every color or lighting style is legal on public roads.
When to Get Professional Help
You can handle many simple LED bulb swaps at home, but some jobs deserve professional help. Get help if you are uncomfortable with wiring, if the vehicle uses complex computer-controlled lighting, or if the installation requires removing major panels.
Professional installation also makes sense for headlights, high-output light bars, underbody lights, multi-zone controllers, or any wiring that connects directly to the battery. A trained installer can route wires safely, choose the right fuse protection, and reduce the chance of electrical issues.
If your vehicle is under warranty, check whether modifications could affect coverage. Poor wiring, cut factory harnesses, or overloaded circuits may create problems that a warranty does not cover.
Related Reading
If you are looking to enhance the ambiance of your car with LED lights, you may also be interested in learning how to prevent pancake sticking in a pan. Check out this helpful article on tips for preventing pancake sticking in a pan to ensure your cooking experience is smooth and enjoyable.
Related Guides
Frequently Asked Questions
What are LED lights in a car?
LED lights in a car are light-emitting diodes used for illumination. They can appear in headlights, taillights, turn signals, dome lights, trunk lights, footwell lights, accent strips, and other areas. They are popular because they can be efficient, bright, compact, and available in many colors.
Why would someone want to wire LED lights in their car?
People may want to wire LED lights in their car for aesthetics, better cabin visibility, cargo lighting, safer nighttime access, or a custom look. Exterior lights may also improve visibility when they are legal, correctly aimed, and designed for the vehicle.
What are the steps to wire LED lights in a car?
The steps usually include choosing compatible LEDs, gathering tools, disconnecting the battery, planning the installation, mounting the lights, connecting the positive wire to a fused power source, grounding the negative wire to clean metal, adding a switch if needed, testing the lights, and securing the wiring.
What materials are needed to wire LED lights in a car?
Materials may include LED light strips or bulbs, a power source such as the battery or fuse box, a fuse tap or inline fuse, wire connectors, a switch, ground wire, electrical tape, heat shrink tubing, zip ties, and a test light or multimeter.
Are there any safety considerations when wiring LED lights in a car?
Yes. Disconnect the battery before installation, use the correct wire size, protect the circuit with a fuse, secure all wiring, insulate exposed connections, avoid safety-critical circuits, and keep wires away from heat, pedals, airbags, seat tracks, and moving parts.
Can LED lights be wired to the car’s existing lighting system?
Yes, LED lights can be wired to the car’s existing lighting system in some cases, but you must confirm that the added load does not exceed the circuit’s capacity. For added accent lights, a separate fused power source is often safer and cleaner.
Do LED lights drain a car battery?
LEDs usually draw less power than many traditional bulbs, but they can still drain a battery if wired to constant power and left on. Use accessory-switched power, a timer, or a manual switch with care if you install custom lights.
Why do my LED lights flicker after installation?
Flickering can come from reversed polarity, a loose connector, a poor ground, unstable voltage, a weak LED driver, or vehicle computer compatibility issues. Check the ground and connections first, then confirm whether your vehicle needs CANbus-compatible LEDs.
Sources
- National Highway Traffic Safety Administration: Lighting — supports the importance of vehicle lighting safety and compliant exterior lighting.
- 49 CFR § 571.108, Lamps, Reflective Devices, and Associated Equipment — supports U.S. federal lighting equipment requirements.
- U.S. Department of Energy: LED Lighting — supports general LED efficiency and longevity benefits.
- Insurance Institute for Highway Safety: Headlight Ratings — supports the importance of headlight performance, beam control, and nighttime visibility.
