Last updated: September 19, 2026 — current-model, battery-location, safety, reset, and recycling guidance rechecked.
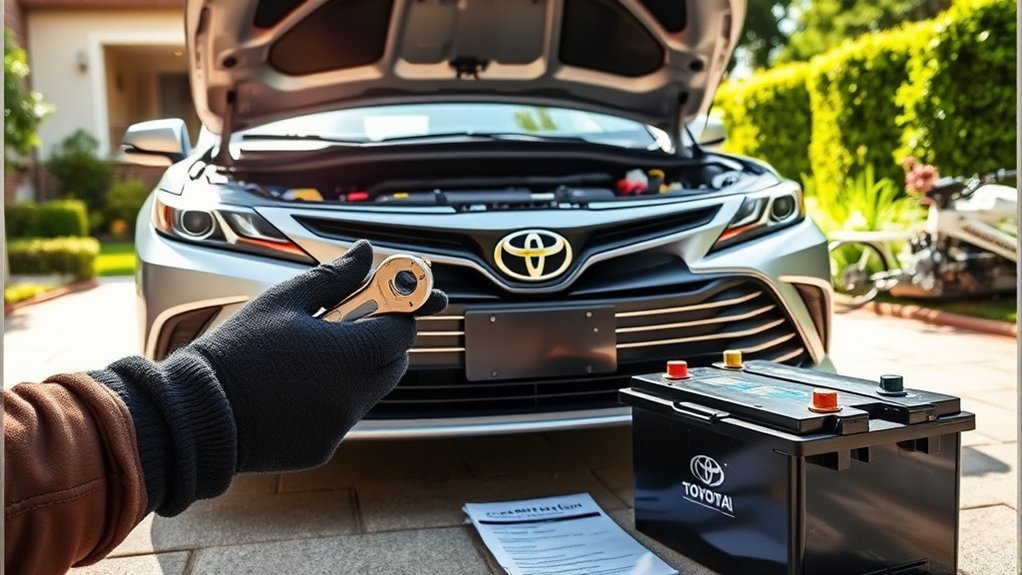
To replace a Toyota Camry’s 12V battery safely, first identify the exact model year and powertrain because battery location, fitment, venting, and post-installation steps are not universal. The 2026 U.S. Camry lineup is all-hybrid, and Toyota’s 2025 Camry manual places its 12V auxiliary battery on the right side of the trunk. Earlier non-hybrid Camrys commonly use an under-hood battery. In every case, verify the battery by VIN, owner’s manual, and original label before disconnecting anything.
Quick Answer
Verify the exact battery by model year, powertrain, VIN, and original label. Turn the vehicle fully off, wear eye protection, allow the vehicle electronics to shut down as directed for that model, disconnect the negative terminal first, and then remove the positive terminal, hold-down, and vent hose if equipped. Secure the replacement, restore required venting, and reconnect positive first and negative last.
Key Takeaways
- Do not buy a battery by voltage alone; case size, capacity, CCA, chemistry, terminal layout, hold-down fit, and venting must match.
- Remove the negative cable first and reconnect it last to reduce the risk of a tool shorting the positive terminal to the vehicle body.
- A hybrid’s 12V auxiliary battery is separate from its high-voltage traction battery. Do not touch orange cables or high-voltage components.
- There is no single Camry “computer reset” that applies to every model year. Some systems may require model-specific initialization after power loss, so follow the exact owner’s or repair manual.
- Return the old lead-acid battery to a battery retailer or approved recycling facility.
At a Glance
| Time Required | Varies by model year, battery access, corrosion, and whether trunk trim or venting hardware must be removed |
| Difficulty | Basic to moderate for an accessible 12V battery; trunk-mounted auxiliary batteries and hybrids require extra attention to venting and high-voltage boundaries |
| Tools Needed | Correct sockets or wrenches, safety glasses, gloves, terminal brush, shop towels, and battery terminal protectant |
| Cost | Varies by model, battery type, warranty, market, core charge, and whether professional installation is required |
Warning: Automotive batteries can contain corrosive sulfuric acid and release explosive hydrogen gas. Work in a ventilated area, wear eye protection, remove metal jewelry, and keep flames, cigarettes, sparks, and metal tools away from unintended terminals. Do not work on a battery that is leaking, smoking, frozen, badly swollen, cracked, or unusually hot.
Where Is the 12V Battery in a Toyota Camry?
The location changes by generation and powertrain. Toyota’s 2025 Camry owner’s manual places the 12V auxiliary battery on the right side of the trunk, while earlier conventional Camrys commonly use an under-hood starting battery. Toyota also describes the 2026 U.S. Camry as an all-hybrid model, so current owners should treat the 12V battery as an auxiliary battery that is separate from the high-voltage traction battery.
| Camry version | 12V battery guidance |
|---|---|
| 2025–2026 U.S. Camry | All-hybrid lineup. The 2025 manual places the auxiliary 12V battery on the right side of the trunk. Confirm the exact 2026 battery specification and venting arrangement in the current manual before service. |
| Earlier non-hybrid Camry | Commonly uses an under-hood 12V starting battery. Group size, CCA, terminal layout, and hold-down fit still vary by year and engine. |
| Earlier Camry Hybrid | Uses a separate 12V auxiliary battery in addition to the high-voltage traction battery. Location and venting vary by generation, so use the exact model-year manual. |
This guide covers only the serviceable 12V battery. It does not describe removal or service of the hybrid traction battery, orange high-voltage cables, inverter, or service disconnect.
Confirm the Correct Battery Before You Begin
Start with your Camry’s model year, powertrain, market, and VIN. Use the existing battery label and the Toyota owner’s manual portal to confirm the correct replacement.
For year-by-year fitment context, see our Toyota Camry battery group size guide. Use that as a starting point only; the VIN, original battery label, and Toyota manual should control the final purchase decision.
The replacement must match all applicable requirements:
- Nominal voltage: 12 volts.
- Case size: The battery must fit the tray and factory hold-down securely.
- Terminal position and polarity: The positive and negative posts must be in the correct locations so the cables reach without stretching or crossing.
- Capacity and CCA: Use ratings equal to or greater than the minimum specified by Toyota for the exact model.
- Battery construction: Match the required conventional flooded, enhanced flooded, AGM, or other specified design.
- Venting: A battery installed in the trunk or passenger-compartment area must have the correct vent ports, exhaust-hose connection, and unused-port plug.
- Handle and hold-down design: The battery must be safe to lift and compatible with the original clamp or bracket.
For example, the 2025 Camry owner’s manual locates the 12V battery on the right side of the trunk and specifies a correctly fitted exhaust hose and vent plug. The 2024 conventional Camry manual describes a different battery arrangement and battery-selection requirements.
Editorial basis: This guide synthesizes Toyota owner-manual procedures and published battery-safety guidance. It does not claim hands-on testing across every Camry generation, so model-specific instructions take priority whenever they differ from this overview.
Pro Tip: Photograph the original battery label, terminal orientation, hold-down, cable routing, and any vent hose before removing parts. These photos provide a reliable reference during installation.
What Are the Signs Your Toyota Camry Battery Needs Replacement?
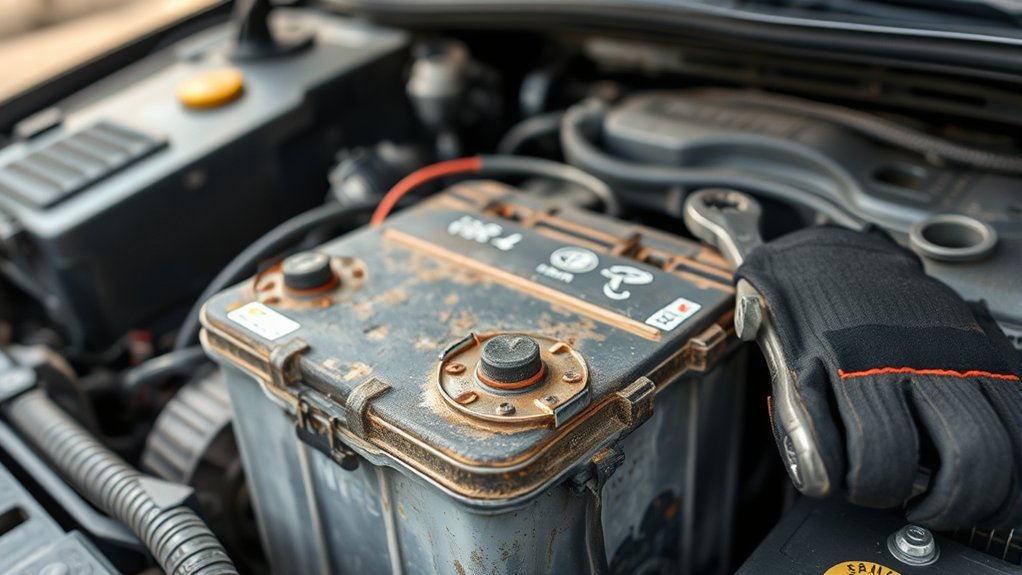
A weak 12V battery may cause one or more of the following symptoms:
- Slow engine cranking on a conventional Camry.
- Clicking, buzzing, or repeated unsuccessful starting attempts.
- A hybrid system that does not enter READY mode.
- Dim or flickering headlights and interior lights.
- Low-voltage, charging-system, or battery-related warning messages.
- Intermittent electronic malfunctions that appear when starting.
- White, blue, or green corrosion around the terminals.
- A loose terminal, damaged cable, cracked case, bulging case, or leaking electrolyte.
- A sharp sulfur or rotten-egg odor near the battery.
A check-engine light by itself does not prove that the battery needs replacement. Have the battery tested and inspect the charging system before buying a new one, especially if the current battery is relatively new.
AAA says automotive batteries commonly last about three to five years, while heat, short trips, storage, electrical drain, and charging-system condition can shorten or extend service life. See AAA’s battery-life guidance.
Battery age is therefore a reason to increase testing—not proof that replacement is automatically required. Hot weather accelerates internal degradation, while cold weather can expose a battery that has already lost capacity.
Tools and Supplies You’ll Need
- Vehicle-correct replacement battery: Confirmed by VIN, manual, and original label.
- Socket and wrench set: A 10mm tool is common on many Camrys, but verify every terminal and hold-down fastener before starting.
- Extension and ratchet: Helpful for recessed hold-down hardware.
- Safety glasses: Required protection against corrosion debris or electrolyte.
- Chemical-resistant or nitrile gloves: To reduce skin contact with contaminants.
- Battery terminal brush or cleaner: For the disconnected cable clamps and battery tray.
- Shop towels: For cleaning and drying the work area.
- Terminal protectant: Applied to the exterior of the completed connection.
- Trim-removal tool: Only when required to remove a trunk-side battery cover without damaging clips.
Note: Terminal and hold-down torque specifications vary. Use the repair information for the exact model year rather than guessing or overtightening a soft lead battery post.
Shutdown timing: Do not assume one waiting period applies to every Camry. Some Toyota repair procedures specify a delay after the ignition or power switch is turned off before the negative cable is disconnected. Follow the exact model-year procedure and wait for displays, relays, and other electrical activity to stop.
How to Remove the Old Battery
- Park safely. Place the Camry on a flat surface, select Park, apply the parking brake, and switch off all lights and accessories.
- Shut the vehicle down completely. Turn the engine or hybrid system off. Remove the key, or move the smart key several feet away so the vehicle does not wake up while you work.
- Allow the electronics to finish shutting down. Wait until displays, fans, relays, and other electrical activity have stopped before disconnecting the battery.
- Locate the correct 12V battery. Open the hood on models with an under-hood battery, or remove the specified trunk-side cover on models with a rear auxiliary battery.
- Identify hybrid hazards. On a hybrid, do not touch orange cables, the traction-battery service disconnect, inverter components, or high-voltage connectors. The procedure here applies only to the 12V auxiliary battery.
- Record the installation. Photograph the cable positions, battery orientation, hold-down, covers, vent hose, and vent plug.
- Disconnect the negative terminal first. Loosen the clamp at the battery’s negative post, lift it off, and position it so it cannot spring back into contact. Do not substitute an unsuitable body-side ground connection for the specified battery-terminal disconnection.
- Disconnect the positive terminal. Open the protective cover, loosen the clamp, remove it from the positive post, and keep the cable away from metal surfaces.
- Detach the vent hose if equipped. Carefully remove the hose from the battery’s vent port. Retain any elbow, adapter, or unused-port plug required for the replacement.
- Remove the hold-down. Support the bracket while removing its fasteners so it does not fall into the engine compartment or trunk cavity.
- Lift the battery upright. Use its handle when provided. Batteries are heavy; maintain a firm grip and do not tilt a conventional flooded battery.
Warning: Stop if severe corrosion has damaged a cable, terminal, battery tray, sensor, hold-down, or body connection. Stop immediately if you find fluid leakage or if replacing the 12V battery would require moving hybrid high-voltage parts.
Installing Your New Toyota Camry Battery
Compare the old and new batteries side by side before installation. Confirm the case dimensions, post locations, polarity markings, vent ports, capacity label, and battery type.
- Inspect the battery tray, hold-down, cables, and clamps for corrosion, cracking, or looseness.
- Clean the disconnected cable clamps and tray with an appropriate battery-terminal cleaner. Keep liquid and debris out of battery openings and electrical connectors.
- Dry all cleaned parts completely.
- Place the new battery upright in the tray with its terminals facing the same direction as the original.
- Install and tighten the factory hold-down to the model-specific specification.
- Confirm that the battery cannot slide, rock, or contact nearby trim or wiring.
- Reconnect the exhaust hose and install the unused vent-port plug when required.
- Connect the positive terminal first and reinstall its protective cover.
- Connect the negative terminal last.
- Check that both clamps are fully seated and cannot rotate by hand.
- Apply a light coating of terminal protectant to the outside of the completed connections.
- Reinstall all battery covers, trunk trim, clips, and access panels.
Terminal Connections Sequence
During removal, disconnect negative first and positive second. During installation, connect positive first and negative last.
The sequence reduces short-circuit risk. With the negative cable disconnected, accidentally touching body metal with a tool while working on the positive terminal is less likely to complete a circuit through the vehicle.
Do not reverse the battery polarity. If a terminal has been connected to the wrong post, stop immediately and do not attempt to start the vehicle. Reverse polarity can damage fuses and electronic modules.
Battery Alignment and Security
The hold-down should secure the battery without crushing or distorting its case. Check that:
- The battery sits flat in the tray.
- The hold-down contacts the intended reinforced areas.
- The cables reach naturally without pulling on the posts.
- The positive terminal cover closes fully.
- No cable rubs against a sharp bracket or movable component.
- A trunk-mounted battery’s vent hose is not pinched or kinked.
After tightening the hold-down, apply gentle pressure to the battery. It should not shift within the tray.
Corrosion Prevention Measures
Corrosion prevention begins with clean, properly fitted connections:
- Do not install a clamp over visible corrosion.
- Do not place a thick layer of grease between the post and clamp.
- Seat and tighten the clean connection first.
- Apply protectant around the outside of the assembled terminal.
- Keep the battery top clean and dry.
- Replace missing terminal covers and repair damaged cable insulation.
What to Do After Installing the Battery
- Remove every tool, loose fastener, rag, and packaging item from the engine compartment or trunk.
- Make sure the battery cover and positive-terminal cover are installed.
- Start the engine or place the hybrid system in READY mode.
- Observe the instrument panel for persistent battery, charging, steering, brake, hybrid-system, or other warning messages.
- Confirm that headlights, power windows, locks, climate controls, audio, and other major electrical functions operate.
- Restore the clock, audio presets, seat memory, and user preferences if they were lost.
- Perform only the initialization procedures listed in the owner’s manual for the exact model year.
- Test the battery and charging system if the previous battery failed unexpectedly or the replacement becomes discharged again.
There is no universal Toyota Camry computer reset that requires disconnecting the new battery for another ten minutes. However, power loss can clear stored information, and some model years or equipped systems may require initialization or calibration. Use the exact owner’s manual or Toyota repair information for the vehicle rather than a generic “relearn” sequence.
Pro Tip: Recheck the terminal clamps and battery hold-down after the first drive. A clamp that was not fully seated may loosen after vibration and cause intermittent starting or warning-light problems.
Troubleshooting Common Battery Replacement Issues
Vehicle Does Not Start or Enter READY Mode
- Confirm that the positive and negative clamps are on the correct posts.
- Check that both terminal clamps are fully seated and tight.
- Verify that the replacement battery is charged.
- Inspect relevant main fuses if reverse polarity or a major spark occurred.
- On a hybrid, follow the model-specific starting procedure and confirm the brake pedal is firmly depressed.
- Stop repeated starting attempts if cables become warm, smoke appears, or warning messages multiply.
Warning Lights Remain On
A temporary low-voltage event may set warning messages. Turn the vehicle fully off, restart it normally, and check the owner’s manual. Persistent brake, steering, airbag, charging, or hybrid-system warnings require diagnosis rather than assumptions about “relearning.”
Power Windows or Other Automatic Features Do Not Work Normally
Some model years may require initialization after power loss. Use only the sequence stated in the exact owner’s manual. Do not repeatedly disconnect the battery in an attempt to force a reset.
There Is an Odor Near a Trunk-Mounted Battery
Turn the vehicle off, avoid sparks, ventilate the area, and inspect the battery vent hose and unused-port plug without leaning over the battery. Do not operate the vehicle if the battery is hot, leaking, swollen, or producing a strong sulfur odor.
The New Battery Becomes Discharged Again
The battery may not be the root cause. Possible issues include:
- A conventional Camry charging-system fault.
- A hybrid DC-to-DC charging fault.
- A parasitic electrical draw while parked.
- Loose or damaged battery cables.
- Frequent short trips or extended storage.
- Accessories that remain powered after shutdown.
- An incorrect or under-capacity replacement battery.
Have the battery, charging system, and key-off current draw tested instead of replacing the battery repeatedly.
How to Keep Your New Battery in Top Shape
Regular Performance Checks
Inspect the battery during routine maintenance and before periods of extreme heat, cold, or long-distance travel. Check for:
- Slow starting or difficulty entering READY mode.
- Loose terminal clamps.
- Corrosion around the posts or cable ends.
- A damaged case or hold-down.
- A disconnected or kinked vent hose.
- Low-voltage messages or unexplained electronic faults.
Once the battery is roughly three years old, periodic testing becomes increasingly useful. Replacement should be based on test results, condition, climate, and reliability needs rather than age alone.
Clean Terminals When Needed
Do not clean a connected battery with metal tools that could bridge the terminals. If corrosion is present, switch the vehicle off, disconnect the battery in the correct order, and use a suitable terminal-cleaning product.
Dry the parts, reconnect them correctly, and apply protectant to the exterior. Investigate recurring heavy corrosion because it may indicate a loose connection, damaged seal, overcharging condition, or battery problem.
Monitor Battery Age and Vehicle Use
Record the installation date and keep the purchase receipt. Battery life is affected by:
- High under-hood or ambient temperatures.
- Repeated short trips.
- Long periods without driving.
- Frequent accessory use while the engine or hybrid system is off.
- Parasitic electrical draw.
- Charging-system condition.
For extended storage, use only a smart battery maintainer that is compatible with the battery chemistry and follow the maintainer and vehicle instructions. Do not use an unregulated charger or charge a battery in a poorly ventilated enclosed space.
Transport and Recycle the Old Battery Safely
Keep the old battery upright in a rigid container or battery box during transport. Prevent it from tipping, and cover the terminals so loose metal objects cannot bridge them.
Return the battery to the retailer that sold the replacement or take it to an approved lead-acid battery or household hazardous-waste collection facility. The U.S. Environmental Protection Agency advises returning lead-acid batteries to a retailer or approved collection program rather than putting them in household trash or municipal recycling bins.
Frequently Asked Questions
Can I replace a Toyota Camry 12V battery myself?
Yes, when the battery is accessible, undamaged, and clearly identified, and you can follow the exact model-year instructions. Professional service is safer when the battery is leaking, heavily corroded, difficult to access, next to high-voltage components, or requires trim and equipment you cannot confidently handle.
Where is the 12V battery on a 2025 or 2026 Toyota Camry?
The 2025 U.S. Camry owner’s manual places the 12V auxiliary battery on the right side of the trunk. Toyota’s 2026 U.S. Camry lineup is also all-hybrid, but confirm the exact 2026 location, battery specification, vent hose, and access procedure in the current owner’s manual before service.
How do I reset a Camry computer after changing the battery?
There is no universal ten-minute reset. Reconnect the battery correctly, start the vehicle normally, restore lost settings, and complete only the initialization or calibration procedures listed for the exact model year and equipment. Persistent warning lights should be diagnosed rather than treated with repeated battery disconnections.
How is a Toyota Camry Hybrid 12V battery replacement different?
The auxiliary battery may be behind a trunk-side cover rather than under the hood. It may require a specific central-degassing or vented design, exhaust hose, and unused-port plug. Keep the power switch off, move the smart key away, and do not touch orange high-voltage cables or traction-battery components.
Does a Camry need to be reprogrammed after changing the battery?
Routine replacement usually does not require general vehicle reprogramming. Some stored settings may be lost, and specific systems may need initialization. Module programming or scan-tool procedures should be performed only when required by the exact Toyota repair information or a diagnosed fault.
What battery size does a Toyota Camry use?
There is no single battery size for every Camry. Requirements vary by year, engine, hybrid equipment, trim, market, and factory configuration. Match the owner’s manual and original label, or use a VIN-based Toyota or reputable battery fitment catalog.
Why did my new Camry battery die again?
Repeated discharge can result from a loose connection, faulty charging system or hybrid DC-to-DC converter, parasitic draw, prolonged storage, frequent short trips, powered accessories, or an incorrect replacement battery. Test the complete electrical system before replacing the battery again.
Conclusion
Replacing a Toyota Camry’s 12V battery safely starts with identifying the exact model year and powertrain. Current 2025–2026 U.S. Camrys are all-hybrid, while earlier Camrys can use different under-hood or auxiliary-battery layouts. Match the replacement battery’s physical, electrical, and venting requirements, disconnect negative first, reconnect positive first and negative last, and perform only the initialization steps specified for the exact vehicle.
Stop and obtain professional help when the battery is damaged, high-voltage components obstruct access, cable corrosion is severe, warning lights persist, or the replacement battery becomes discharged again.
Sources
- Toyota Manuals and Warranties — model-year owner manuals and vehicle-specific procedures.
- Toyota 2026 Camry — current U.S. Camry lineup and all-hybrid powertrain context.
- Toyota 2025 Camry Owner’s Manual, OM06266U — trunk battery location, battery specifications, terminal order, vent hose, precautions, and initialization.
- Toyota 2024 Camry Owner’s Manual, OM06291U — conventional Camry battery inspection, replacement specifications, safety, and reconnection behavior.
- AAA: How Long Do Car Batteries Last? — battery lifespan and climate effects.
- U.S. EPA: Used Household Batteries — lead-acid battery handling and recycling guidance.
- OSHA Battery and Battery-Charging Standard — protective equipment and acid-handling safety principles.
