
Using an Instant Pot feels intimidating at first, but the basic process is simple once you know the parts, safety checks, and pressure release options. Start with the water test, learn how to seal the lid, use enough liquid, choose the right cooking program, and release pressure safely. After one or two easy recipes, the buttons and sounds will feel much less confusing.
Last updated: July 1, 2026
Quick Answer
To use an Instant Pot, add food and enough thin liquid, lock the lid, set the steam release to the sealed position if your model requires it, choose a cooking program, set the time, and press Start. When cooking ends, use natural release or quick release based on the recipe.
Key Takeaways
- Always place the stainless steel inner pot inside the cooker base before adding food or liquid.
- Pressure cooking needs thin, water-based liquid so the cooker can build steam.
- Natural release works best for soups, beans, grains, and foamy foods; quick release works best for delicate foods like vegetables.
- Keep your hands, face, cabinets, and towels away from the steam release area.
- Use a food thermometer for meat, poultry, seafood, casseroles, and leftovers.
At a Glance
| Time Required | 10 to 15 minutes for setup and the water test; recipe times vary |
| Difficulty | Beginner-friendly |
| Tools Needed | Instant Pot, inner pot, lid, sealing ring, trivet, measuring cup, oven mitt, long-handled utensil, food thermometer |
| Cost | No extra cost if you already own the cooker; optional accessories vary |
What Is an Instant Pot?
An Instant Pot is an electric multi-cooker. Most models can pressure cook, slow cook, sauté, steam, warm food, and cook rice. Some models also include yogurt, sous vide, air fry, or bake-style programs. Because features vary, check your model name and manual before using a new setting.
The most popular beginner function is pressure cooking. The cooker traps steam inside a sealed pot, which raises pressure and cooks food faster than many stovetop methods. The display may show “On,” “Preheating,” or a moving progress indicator before the timed cooking begins.
Why Beginners Like It
- It saves active cooking time: You do not need to stir a pot on the stove once pressure cooking starts.
- It keeps cooking contained: The lid locks while the cooker is pressurized.
- It handles many simple meals: Rice, beans, soups, stews, eggs, shredded chicken, and one-pot dinners are common beginner recipes.
- It reduces cleanup: Sautéing and pressure cooking can happen in the same inner pot.
Note: “Instant Pot” is a brand name, not one single appliance. Button names, lid styles, steam release parts, and minimum liquid amounts can differ by model. Use this guide with your official manual.
Essential Components
Before you cook, learn the parts you will touch most often. This helps you use the Instant Pot safely and fix small issues before they become frustrating.
Main Parts
- Cooker base: The outside unit with the heating element and control panel. Never pour food or liquid directly into this base.
- Inner pot: The removable stainless steel pot where food and liquid go.
- Lid: The locking top that seals the cooker during pressure cooking.
- Sealing ring: The silicone ring under the lid. It must sit evenly in place for pressure cooking.
- Float valve: A small pin that rises when pressure builds and drops when pressure has released.
- Steam release valve or switch: The part that controls whether steam stays inside or vents out.
- Control panel: The buttons or dial used to choose a function, adjust time, and start or cancel cooking.
Helpful Accessories
Your Instant Pot may include a trivet, measuring cup, rice paddle, or condensation collector. The trivet keeps food above the liquid for steaming and pot-in-pot cooking. A steamer basket, silicone egg rack, extra sealing ring, and 7-inch cake pan can help later, but you do not need them for your first meal.
Getting Started
Getting started with an Instant Pot can feel overwhelming because the appliance has several buttons. Focus on setup, the water test, and one simple pressure-cooking recipe first. You can explore the extra programs later.
Unboxing and Setup
- Remove all packaging, stickers, inserts, and protective materials from the cooker.
- Place the cooker base on a flat, stable, heat-safe counter with open space above it.
- Wash the inner pot, lid, sealing ring, trivet, and removable accessories with warm, soapy water.
- Dry the parts fully before reassembling them.
- Install the sealing ring under the lid. It should sit snugly and evenly.
- Place the inner pot inside the cooker base before adding anything.
- Plug the cooker into a grounded outlet. If your model has a detachable cord, make sure it is firmly attached.
Run the Initial Water Test
The water test helps you learn the sounds, buttons, pressure build, and pressure release before food is involved.
- Pour 2 to 3 cups of water into the inner pot, depending on your model’s manual.
- Lock the lid into place.
- Set the steam release to the sealed position if your model has a manual sealing control.
- Select Pressure Cook or Manual, choose High Pressure, and set 5 minutes.
- Press Start if your model requires it.
- Wait while the cooker preheats and builds pressure. The timed countdown starts after pressure is reached.
- When the timer ends, use quick release for this water test. Turn or press the steam release using a long-handled utensil and keep your hands away from the steam.
- Open the lid only after the float valve drops and the cooker allows the lid to turn.
Warning: Never force the lid open. If the float valve is raised or the lid resists, the cooker may still be pressurized. Wait until pressure releases fully.

Credit: kristineskitchenblog.com
How to Pressure Cook Step by Step
Pressure cooking is the function most beginners want to learn first. Use this basic flow for soups, rice, beans, eggs, chicken, and many one-pot meals.
- Add liquid first: Use thin, water-based liquid such as water, broth, or stock. Thick sauces alone can scorch.
- Add food: Place food in the liquid or on the trivet, depending on the recipe.
- Check the fill line: Do not fill past the maximum pressure-cooking line. Use less space for foods that foam or expand, such as beans, grains, pasta, and oatmeal.
- Lock the lid: Turn the lid until it locks. Some newer models have different lid-lock systems, so follow your manual.
- Seal the vent: If your model has a Sealing/Venting valve, set it to Sealing before pressure cooking.
- Choose the program: Select Pressure Cook or Manual, then set pressure level and cooking time.
- Wait for pressure: The cooker must preheat before the countdown begins. This can take several minutes.
- Release pressure: Use natural release, quick release, or a timed natural release based on the food.
- Open carefully: Tilt the lid away from your face so trapped steam escapes safely.
How Much Liquid Should You Use?
Use the amount of liquid listed in your recipe or official manual. Many basic pressure-cooker recipes use at least 1 cup of thin liquid, but some models and larger recipes require more. Foods that absorb liquid, such as rice, beans, oats, and pasta, need enough liquid for both steam and cooking.
Why Cook Time Is Not Total Time
If a recipe says “5 minutes,” that usually means 5 minutes under pressure. The total time also includes preheating, pressure building, and pressure release. A simple chicken recipe with a short cook time may still take 20 to 30 minutes from start to finish.
The countdown begins after the Instant Pot reaches pressure, not the moment you press Start.
Basic Cooking Functions
Your model may include many programs, but beginners only need a few at first. Learn these core functions before trying advanced settings.
Pressure Cooking
Pressure cooking uses steam pressure to cook food quickly. It works well for rice, beans, soups, stews, eggs, shredded chicken, potatoes, and tough cuts of meat. Add enough thin liquid, lock the lid, seal the vent if needed, and choose the cook time.
Sautéing
The sauté function works like a small stovetop burner inside the inner pot. Use it to soften onions, bloom spices, brown meat, or reduce sauce. After sautéing, scrape the browned bits from the bottom with broth or water before pressure cooking. This step helps prevent a burn warning.
Slow Cooking
The slow cook setting mimics a slow cooker. It works for soups, braises, and casseroles that need gentle heat for several hours. Use a glass lid if your model supports it, or use the pressure-cooking lid without sealing pressure if your manual allows that setup.
Steaming
Steaming uses water below the trivet or steamer basket. It works well for broccoli, carrots, potatoes, eggs, fish, and dumplings. Quick release often helps prevent delicate vegetables from overcooking.
Keep Warm
Keep Warm holds cooked food after a program ends. It is useful for short holding times, but it is not a cooking function. For safety, reheat leftovers to the proper internal temperature before holding them warm.
Pressure Release Methods
Pressure release affects safety, texture, and mess. Choosing the wrong release method can make food spray from the vent, overcook vegetables, or dry out meat.
Natural Release
Natural release means you leave the cooker alone after cooking ends. Pressure drops slowly as the cooker cools. Use natural release for soups, stews, beans, grains, oatmeal, pasta dishes, large cuts of meat, and foods that foam or expand.
Quick Release
Quick release means you manually vent steam right after cooking. Use it for foods that overcook quickly, such as tender vegetables, shrimp, fish, and some egg recipes. Stand to the side and use a long-handled utensil if your valve design requires turning.
Timed Natural Release
Timed natural release means you wait for a set time, often 5 to 15 minutes, then quick release any remaining pressure. This works well for chicken breasts, rice, and recipes that need a short rest but not a full natural release.
Warning: Do not use quick release for fatty, oily, thick, high-starch, or foamy foods such as chili, congee, oatmeal, pasta, beans, grains, and thick soups. These foods can sputter through the steam release.
:max_bytes(150000):strip_icc()/__opt__aboutcom__coeus__resources__content_migration__simply_recipes__uploads__2018__12__Guide-to-Instant-Pot-2-008210bb946a4ffa904effe0263c957f.jpg)
Credit: www.simplyrecipes.com
Safety Tips
Using an Instant Pot is safe when you follow the manual, use enough liquid, avoid overfilling, and respect hot steam. These habits matter most when you are learning.
- Always use the inner pot: Never put food or water directly into the cooker base.
- Check the sealing ring: Make sure it is clean, flexible, and seated correctly before pressure cooking.
- Do not overfill: Stay below the maximum pressure-cooking line and use extra space for foods that expand.
- Use thin liquid: Water, broth, and stock help build steam. Thick sauces should sit on top or be added after cooking when possible.
- Keep clear of steam: Steam can burn skin quickly. Keep your face, hands, cabinets, and dish towels away from the vent.
- Use a thermometer: Poultry should reach 165°F, leftovers should reach 165°F, and fish should reach 145°F or cook until opaque and flaky.
- Clean after every use: Wash the inner pot, wipe the rim, clean the sealing ring, and check the steam release parts for food debris.
- Replace worn parts: Replace the sealing ring if it is stretched, cracked, sticky, torn, or holding strong odors.
Pro Tip: Keep two sealing rings if you cook both sweet and savory foods. One ring can hold soup, chili, or curry smells and transfer them to desserts or yogurt.
Foods to Avoid or Handle Carefully
Some foods do not work well under pressure unless you use a tested recipe. Avoid deep frying in an Instant Pot, and do not use it for pressure canning unless your specific model and manual clearly approve that use.
- Dairy: Milk, cream, and cheese can curdle under pressure. Stir them in after cooking.
- Thick sauces: Tomato sauce, cream sauce, and gravy can scorch if they sit on the bottom. Add thin liquid first and layer thick sauces on top.
- Pasta: Pasta can foam and turn mushy. Use a tested recipe and avoid quick release if the pot is full or foamy.
- Delicate vegetables: Broccoli, asparagus, and zucchini cook fast. Use short times and quick release.
- Breaded or crispy foods: Pressure cooking adds moisture, so it will not keep breading crisp.
- Large frozen blocks of food: They may cook unevenly. Separate pieces when possible and verify doneness with a thermometer.
Simple Recipes for Beginners
Start with forgiving foods that help you learn pressure, liquid, and release timing. Save yogurt, cheesecake, and layered meals for later.
Good First Foods
| Food | Why It Helps Beginners | Release Method |
| Water test | Teaches sealing, pressure build, countdown, and venting | Quick release |
| Hard-boiled eggs | Easy, low mess, and great for learning timing | Quick release or timed natural release |
| White rice | Shows how grains absorb liquid | Natural release for 10 minutes, then vent |
| Chicken soup | Forgiving, comforting, and easy to season | Natural release |
| Shredded chicken | Useful for tacos, salads, rice bowls, and soup | Timed natural release |
One-Pot Meals
One-pot meals are a great starting point because they limit cleanup. Chicken and rice, taco bowls, lentil soup, and simple pasta recipes can work well when you follow a tested recipe. Add thin liquid first, avoid stirring thick sauces into the bottom, and release pressure according to the recipe.
Soups and Stews
Soups and stews are beginner-friendly because they already contain enough liquid. Try chicken noodle soup, vegetable soup, beef stew, lentil soup, or chili. Use natural release for thick, starchy, or foamy recipes so hot liquid does not spray from the vent.
Troubleshooting Common Issues
Small problems are normal when you are learning. Most issues come from a loose sealing ring, not enough liquid, food stuck to the bottom, overfilling, or using the wrong release method.
| Problem | Likely Cause | What to Do |
| Lid will not close | Sealing ring is loose, lid is misaligned, or float valve is stuck | Remove the lid, check the ring, clean the float valve area, and try again |
| Steam leaks from the side | Sealing ring is missing, stretched, dirty, or not seated | Cancel cooking, cool the cooker, reseat or replace the ring, then restart |
| Burn warning | Food is stuck on the bottom, sauce is too thick, or liquid is too low | Cancel, release pressure safely, scrape the bottom, add thin liquid, and restart if the food is safe |
| Food is undercooked | Pieces are too large, frozen food is clumped, or cook time is too short | Add a little liquid if needed, reseal, and cook for a few more minutes |
| Control panel will not turn on | Power cord is loose or outlet has no power | Check both ends of the cord, test the outlet, and review your manual if it still fails |
Error Codes
Error messages vary by model. A “Lid” message usually means the lid is not locked correctly for the selected program. A burn or overheat message usually means the cooker detected too much heat at the bottom. Cancel the program, release pressure safely, and inspect the food before restarting.
Burn Warning
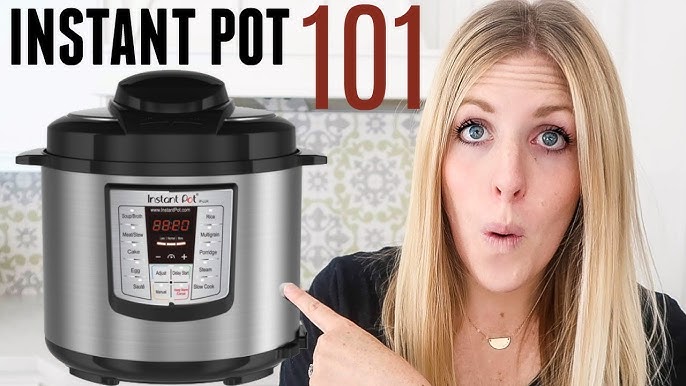
The burn warning is a safety feature, not a sign that dinner is ruined. It often happens after sautéing if browned bits stay stuck to the bottom. Deglaze with broth or water before pressure cooking, and avoid mixing thick tomato sauce, cream sauce, or gravy into the bottom layer.
Credit: www.youtube.com
Cleaning and Maintenance
Clean the Instant Pot after every use so odors, food debris, and pressure problems do not build up.
- Wash the inner pot with warm, soapy water or according to your manual.
- Remove and wash the sealing ring. Let it dry before reinstalling.
- Wipe the cooker base with a damp cloth. Never submerge the base in water.
- Check the steam release valve, float valve, anti-block shield, and lid rim for food debris.
- Dry all parts before storing the lid upside down or slightly open to reduce odors.
- Inspect the sealing ring regularly and replace it if it is damaged, stretched, or no longer seals well.
Advanced Techniques
Once you feel comfortable with basic pressure cooking, try advanced techniques one at a time. Do not learn them all in one day.
Yogurt Making
Some Instant Pot models include a yogurt program. The basic process is to heat milk, cool it to the starter-friendly temperature, mix in yogurt starter, and incubate it for several hours. Use a tested recipe and a clean inner pot because yogurt depends on temperature control and clean equipment.
Pot-in-Pot Cooking
Pot-in-pot cooking means placing food in a heat-safe container on the trivet with water underneath. This works well for rice bowls, oatmeal, reheating leftovers, steamed desserts, and foods that might scorch directly on the bottom.
Baking-Style Recipes
You can make moist cakes, cheesecakes, and bread puddings in some Instant Pot models, but pressure cooking is not the same as dry oven baking. Use a pan that fits, add water below the trivet, cover the pan if the recipe says so, and expect a soft, steamed texture.
Related Guides
Frequently Asked Questions
How do you use an Instant Pot step by step?
Add thin liquid and food to the inner pot, lock the lid, seal the vent if your model requires it, choose Pressure Cook or another program, set the time, and start. When cooking ends, release pressure naturally or manually based on the recipe, then open the lid away from your face.
What is the best first thing to cook in an Instant Pot?
The water test should be first because it teaches you how pressure builds and releases. For your first food recipe, try hard-boiled eggs, white rice, chicken soup, or shredded chicken because they are simple and forgiving.
What foods should not be cooked in an Instant Pot?
Do not deep fry in an Instant Pot, and avoid pressure canning unless your exact model and manual approve it. Dairy, crispy breaded foods, delicate vegetables, pasta, and thick sauces need special handling because they can curdle, soften, foam, burn, or overcook.
What is the 5-5-5 method for Instant Pot eggs?
The 5-5-5 method means 5 minutes of pressure cooking, 5 minutes of natural release, and 5 minutes in an ice bath. Egg size, altitude, and model can affect results, so adjust the timing if your yolks are too soft or too firm.
How do I know when the Instant Pot is safe to open?
The cooker is safe to open only after pressure has fully released. On many models, the float valve drops when pressure is gone. If the lid resists, do not force it. Wait longer and check your manual.
Why does my Instant Pot say burn?
A burn message usually means the bottom of the pot is too hot. This can happen when food is stuck after sautéing, liquid is too low, sauce is too thick, or ingredients are layered incorrectly. Cancel, release pressure safely, scrape the bottom, add thin liquid, and restart if the food is still safe.
Can I leave the kitchen while the Instant Pot cooks?
You do not need to stir while pressure cooking, but stay nearby while learning. Make sure the cooker is on a stable counter, the vent area is clear, the lid seals correctly, and the appliance reaches pressure normally before you step away.
Conclusion
Using an Instant Pot becomes easier when you follow the same basic routine every time: check the parts, add the inner pot, use enough thin liquid, lock the lid, choose the right function, and release pressure safely. Start with the water test and one easy recipe. Then build confidence with rice, soup, eggs, chicken, and simple one-pot meals.
The most important beginner habit is patience. Wait for pressure to build, wait for pressure to release, and never force the lid open. Once you understand those basics, the Instant Pot can make everyday cooking faster, cleaner, and less stressful.
Sources
- Instant Pot Frequently Asked Questions — pressure release safety, sealing ring care, troubleshooting, and model guidance.
- Instant Pot Product Manuals — official manuals by appliance and model.
- Instant Pot Multi-Cooker Product Manuals — model-specific multi-cooker manual links.
- Instant Pot Cooking Time Tables — official cooking-time examples for multi-cooker foods.
- FoodSafety.gov Safe Minimum Internal Temperatures — food thermometer and safe internal temperature guidance.

