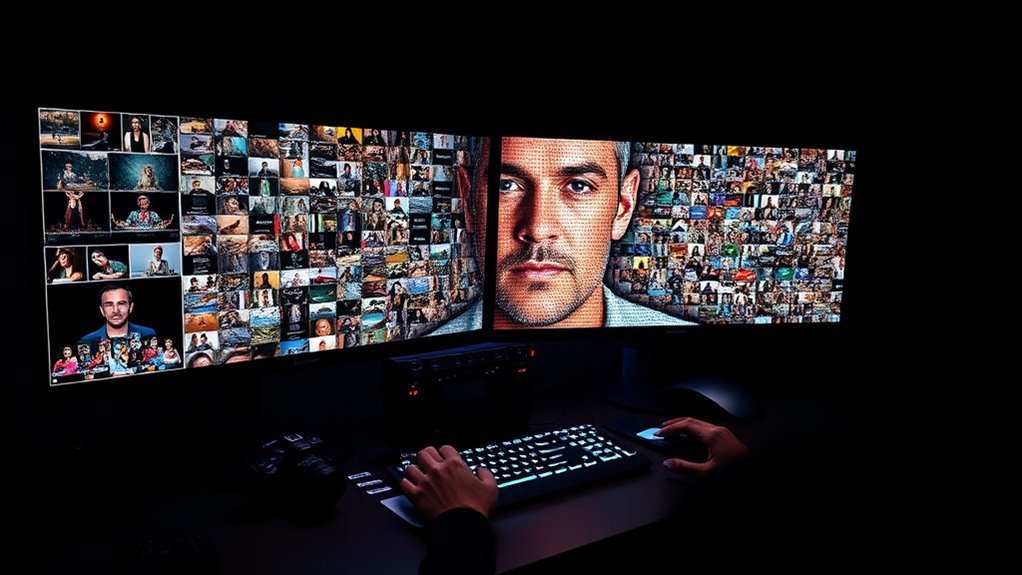
Image mosaic software turns a library of smaller photos into a larger target image for campaigns, events, wall art, and collaborative visual projects. The best tools automate tile matching while still giving users control over tile size, repetition, cropping, color matching, branding, and output quality. Commercial teams should also consider licensing, privacy, moderation, and final print or display requirements before choosing a platform.
Quick Answer
Image mosaic software creates one recognizable picture from many smaller photo tiles. Choose software based on tile controls, output size, commercial licensing, privacy, and whether you need a static print or a live interactive mosaic. Do not confuse photomosaic creation with panorama stitching, which joins overlapping photographs into one continuous scene.
Key Takeaways
- Image mosaic software uses many small tile photos to recreate a larger target image through automated color, tone, and placement matching.
- Photo mosaics are different from panorama stitching: mosaics use tile images, while stitching aligns overlapping photographs into one continuous scene.
- Commercial teams should compare tile controls, output size, licensing, privacy, collaboration, moderation, and branding features.
- JPEG, PNG, and TIFF can all be useful outputs, but the best format depends on the software and whether the mosaic is intended for web, transparency, editing, or print.
- For printed work, plan around final pixel dimensions and viewing distance instead of assuming that changing a file to “300 DPI” will create additional detail.
What Is Image Mosaic Software?
Image mosaic software is a digital tool that assembles many smaller photographs into one larger composite image. From a distance, the viewer sees the main picture; up close, the individual tile photos remain visible.
A photomosaic uses many individual images as visual tiles so their combined colors, tones, and placement recreate a larger target image.
A typical workflow starts with a recognizable target image and a library of smaller photographs. Dedicated photomosaic software analyzes the target and selects or positions tile images according to color, brightness, shape, or other matching rules. Current tools such as TurboMosaic document controls for tile pictures, color matching, and different tile shapes.
The software may also provide controls for spacing, tile size, orientation, cropping, repeated images, source-image blending, or color enhancement. The exact features vary considerably, so software should be evaluated against the intended project rather than by the word “mosaic” alone.
Image mosaics can be delivered as digital files, prints, large wall displays, animations, or interactive installations. Some commercial event systems accept photos from guests in real time and add them to a growing mosaic during an event.
The practical advantage is automation: instead of manually positioning hundreds or thousands of images, the software performs the initial matching and layout while the user reviews the creative and technical result.
Photo Mosaic vs Photo Stitching vs Collage
These three processes are often described with the same language, but they solve different problems.
| Technique | What It Does | Typical Use |
|---|---|---|
| Photo mosaic | Uses many smaller photos as tiles to recreate a larger target image. | Campaign art, event walls, gifts, displays |
| Photo stitching | Aligns and blends overlapping photographs into one continuous scene. | Panoramas, architectural views, landscapes |
| Photo collage | Places multiple photographs together without requiring them to reconstruct another image. | Mood boards, social graphics, memory layouts |
Adobe’s Photomerge documentation, for example, describes stitching photographs that contain overlapping content. That is different from a photomosaic generator that selects many independent tile photographs according to their visual relationship with a target image.
Note: Before comparing software, identify which of these three outputs you actually need. A strong panorama program may be a poor choice for a tile-based photomosaic, and a dedicated photomosaic generator may not stitch overlapping landscape photographs.
Why Commercial Teams Use Image Mosaics
Commercial teams use image mosaics to bring product, event, employee, customer, or community photographs into one coordinated composition. The format can communicate both the main campaign image and the individual contributions behind it.
Mosaics can also support visual collaboration because many people can contribute source photographs while the finished asset remains organized around one recognizable design.
For displays and campaigns, a high-resolution mosaic can work as a large visual centerpiece while rewarding closer viewing with individual images.
Brand Storytelling Power
A well-designed mosaic can combine a brand’s products, events, employees, customers, or community moments into a single visual narrative. The large target image communicates the primary message first, while individual tiles provide additional detail for viewers who look more closely.
User-generated images can make the piece feel more participatory because customers, attendees, or employees can see their contributions inside the finished composition. The effect is especially useful when participation itself is part of the campaign concept.
| Use Case | Story Effect | Practical Goal |
|---|---|---|
| Events | Collective memory | Show participant contributions |
| Customers | Community participation | Connect people to the campaign |
| Campaigns | Unified visual theme | Maintain recognizable creative direction |
For digital campaigns, interactive mosaics can also give viewers a reason to zoom, search, submit, or explore individual tiles instead of viewing only a static hero image.
Fast Visual Collaboration
Image mosaics support visual collaboration by turning many separate contributions into one structured output.
Teams can gather employee, customer, event, or campaign photos and let the software perform the initial placement. This reduces the manual work required to position hundreds of individual images.
For meetings and creative reviews, a generated mosaic can become a shared reference point. Teams can adjust the target image, tile size, crop behavior, repetition rules, or color treatment and quickly compare different versions.
- A wall of participant photographs forming a campaign logo
- Employees submitting pictures for an anniversary mosaic
- A live display updating as event guests contribute photos
High-Impact Campaign Assets
Image mosaics can create distinctive campaign assets because they work at two viewing distances: the audience first recognizes the large image, then discovers the smaller photographs that construct it.
Commercial teams can use the format for product launches, anniversaries, conferences, employee programs, fundraising campaigns, or community projects.
At live events, some platforms accept participant photos through QR codes, upload forms, photography stations, or social submissions and add approved images to the mosaic as it develops. Picture Mosaics, for example, documents real-time capture, uploads, and moderated submissions for its event system.
Customization tools can also help maintain logos, approved colors, visual spacing, and other brand elements across different versions of a mosaic.
Warning: Do not assume that receiving or possessing a participant’s photograph automatically gives your organization unrestricted commercial rights to reuse it. Establish appropriate submission terms, permissions, licenses, privacy practices, and content-moderation rules before using customer or attendee photos in public campaigns.
How to Choose Image Mosaic Software
Choosing image mosaic software requires more than checking whether it can automatically arrange pictures. The right tool depends on whether the final project is a personal print, commercial campaign, large wall installation, live event, or interactive web experience.
Start with the expected output size and number of tile images. Then compare controls for tile dimensions, repeated photographs, cropping, spacing, color matching, target-image blending, custom shapes, and final export dimensions.
A clear interface is valuable for occasional users, while advanced controls matter more for high-resolution commercial work. Tutorials, documentation, responsive support, and the ability to preview changes without repeatedly rebuilding an entire project can also shorten production time.
Tutorials and good documentation reduce the learning curve, but output limits, licensing, privacy, and tile controls usually matter more than the number of templates.
For teams, evaluate collaboration and brand controls as well. For event use, look for upload workflows, moderation, contributor permissions, display options, and the ability to handle the expected number of participants.
Pricing should be compared with licensing terms rather than subscription cost alone. A cheap personal-use license may not cover a commercial campaign, client project, public installation, or downloadable high-resolution file.
| Check | Why It Matters |
|---|---|
| Maximum output dimensions | Determines whether the final file is large enough for print or display. |
| Tile-size controls | Balances target-image accuracy against visibility of individual photos. |
| Repeat limits | Prevents a small number of images from dominating the design. |
| Crop/orientation controls | Helps protect faces and important subjects inside tiles. |
| Commercial licensing | Determines whether the output may be used for client or brand work. |
| Local vs cloud processing | Affects privacy, upload time, and handling of customer photos. |
| Live moderation | Important when public submissions appear at an event or online. |
| Export formats | Affects web delivery, transparency, editing, and print workflows. |
Choose the Right Software for the Job
No single program is best for every type of mosaic project. The most useful comparison is based on the actual output.
- Dedicated tile-based photomosaics: A purpose-built tool such as TurboMosaic is designed around selecting a main image, adding tile photographs, matching them, and generating a photomosaic.
- Live commercial and interactive mosaics: Platforms such as Picture Mosaics provide submission, display, interactive, and event-oriented workflows.
- Panorama stitching: Adobe Photoshop Photomerge is designed to align and blend overlapping photographs into panoramas and other continuous compositions.
- Collages: Photoshop and many design applications can position multiple photos as separate layers or inside predefined layouts without using them as photomosaic tiles.
- Astronomical panel mosaics: PixInsight includes specialized image-registration tools for joining deep-sky imaging panels and correcting distortions.
Note: Microsoft Image Composite Editor, commonly called Microsoft ICE, was once popular for panorama stitching, but it is retired and no longer has an official current Microsoft download. It should not be presented as a supported 2026 recommendation.
How to Create a Photo Mosaic in Image Mosaic Software
Creating a photomosaic normally starts with one target image and a larger collection of smaller photographs that will become the visual tiles.
At a Glance
| Time Required | About 15–60 minutes for a basic project; large libraries and commercial reviews may take longer. |
| Difficulty | Beginner to intermediate |
| Tools Needed | Target image, tile-photo library, photomosaic software, and enough storage for the final high-resolution file |
| Cost | Varies from free or trial-based tools to paid desktop, commercial, print, and event platforms. |
- Choose a clear target image. A simple subject with recognizable shapes, strong tonal separation, and limited tiny detail generally translates more clearly into mosaic form.
- Collect the tile photographs. Use a varied library with enough colors, brightness levels, and subjects to give the matching algorithm useful choices.
- Import both sets of images. Load the target image separately from the tile library so the software knows which image it is recreating.
- Set the tile size and shape. Smaller tiles usually reproduce the target more accurately, while larger tiles make the individual photographs easier to recognize.
- Control repetition and cropping. Limit how frequently the same image can appear and review crops that cut through faces or important objects.
- Adjust color matching carefully. Some applications can alter tile brightness or color to strengthen the main image. Heavy adjustment makes the target clearer but can make individual photographs look less natural.
- Generate and inspect a preview. Check the mosaic both zoomed out and zoomed in. A successful result should read clearly at both levels.
- Export at the required pixel dimensions. Base the final file size on the intended screen, print dimensions, printer requirements, and viewing distance.
Pro Tip: Generate several previews with different tile sizes before committing to a large export. The smallest tile setting is not automatically the best—the design must preserve both the target image and the readability of the individual photographs.
Prepare Photos for Better Mosaic Results
A recognizable target image makes the finished mosaic easier to read. Strong edges, a clear subject, and useful contrast often work better than a crowded scene filled with tiny details.
The tile library should contain a broad mix of supporting images. Diversity in brightness, dominant color, orientation, faces, backgrounds, and subject matter gives the software more options when matching different regions of the target.
High-resolution tile images are useful when individual tiles will be printed large enough to inspect closely. However, the final mosaic’s actual pixel dimensions matter more than simply changing a resolution number in the file metadata.
Automatic arrangement tools can place tiles with controlled spacing, orientation, cropping, and repetition. Review those decisions rather than accepting the first generated result automatically.
For close-view printed output, Adobe recommends around 300 PPI for high-quality printing unless the printer specifies another requirement. Large-format graphics viewed from farther away may work at a lower effective PPI, so always plan around final physical dimensions and expected viewing distance.
- A clear central target image surrounded by varied source photographs
- Tile photos covering a useful range of light and dark tones
- Clean spacing and sensible cropping that keep individual subjects recognizable
Customize Branding, Layouts, and File Types
Commercial image mosaic software may support brand consistency through logos, approved colors, overlays, custom shapes, and predefined output dimensions. These features are most useful when several versions of the same campaign asset must remain visually consistent.
Layout controls may include square, rectangular, circular, hexagonal, or custom tile patterns as well as controls for spacing, cropping, repetition, and target-image blending.
Export choices vary by application. JPEG, PNG, and TIFF are common raster formats, but the appropriate choice depends on where the finished mosaic will be used.
Brand Kit Consistency
A brand kit or controlled asset set helps keep logos, colors, fonts, overlays, and approved imagery consistent from one mosaic to another.
For teams, consistency also depends on workflow. Use an approved target image, the correct logo file, documented color values, and consistent output dimensions so separate team members do not produce noticeably different versions.
- A tile grid framed by approved brand colors
- A logo positioned consistently across campaign versions
- Organized folders containing approved tile images and final exports
Flexible Layout Options
Flexible layout settings allow the same photo library to support different projects without forcing every mosaic into an identical rectangular grid.
Depending on the software, users may be able to adjust tile dimensions, shape, spacing, crop behavior, orientation, repetition, target-image strength, or the amount of color correction applied to each tile.
Templates can speed up recurring projects, while manual controls remain important when faces, logos, products, or other recognizable details must not be cropped poorly.
AI-assisted or algorithmic matching can improve placement efficiency, but the final preview still needs human review. An arrangement that scores well mathematically can contain awkward crops, repeated faces, inappropriate event submissions, or brand elements in undesirable positions.
Export File Choices
Export format should be selected according to delivery requirements rather than habit. Adobe’s current image-format documentation illustrates the practical differences among common raster formats.
| Format | Useful For | Main Consideration |
|---|---|---|
| JPEG | Web delivery, previews, photographs, smaller files | Uses lossy compression and does not support transparency. |
| PNG | Web graphics and projects needing transparency | Lossless but may produce larger files than JPEG for photographic content. |
| TIFF | High-quality editing, interchange, and many print workflows | Can preserve high-quality image data but may create very large files. |
Some software also exports PSD, PDF, WebP, video, interactive web content, or proprietary project files. Keep an editable master when the workflow supports one, then generate delivery copies for the web, client, printer, or display system.
- A mosaic with a controlled logo placement
- A high-resolution print file prepared to the printer’s specifications
- Separate optimized files for web, display, and production use
Print or Display Your Mosaic
Once the mosaic is complete, the presentation medium determines how much detail the file needs. A close-view print requires finer image detail than a very large display intended to be viewed across a room.
Photo mosaics can be printed on canvas, photographic paper, acrylic, aluminum, or other materials. Each surface changes perceived sharpness, contrast, glare, texture, and color, so the print provider’s specifications should take priority over a generic resolution rule.
| Medium | Typical Visual Character | Common Use |
|---|---|---|
| Canvas | Textured and softer | Homes, gifts, decorative walls |
| Acrylic | Glossy and vivid | Displays and galleries |
| Aluminum | Clean and modern | Offices and commercial spaces |
For digital use, optimize a separate copy for the actual display dimensions instead of serving the enormous print master to every viewer. Interactive web mosaics may also need zooming or tile-loading systems so viewers can explore individual photos without downloading one extremely large raster file at once.
Frame style, physical size, lighting, and expected viewing distance should be considered together. A mosaic designed to be inspected from 12 inches away needs different tile and resolution choices from one mounted high on an event wall.
Fix Blurry, Repeated, or Misaligned Tiles
Blurry, repetitive, muddy, or awkward-looking tiles usually come from source quality, output dimensions, crop settings, an undersized tile library, or overly aggressive color adjustment.
| Problem | Likely Cause | Fix |
|---|---|---|
| Blurry tiles | Low-resolution source photos or an undersized final export | Use larger source files and export enough pixels for the intended print size. |
| Too many repeated photos | Small tile library or loose repetition rules | Add more varied photos or reduce the allowed repeat frequency. |
| Faces cropped badly | Automatic center cropping | Change tile aspect ratio, crop mode, or manually review important images. |
| Target image is hard to recognize | Target is too detailed, tiles are too large, or matching is weak | Use a simpler target, smaller tiles, stronger matching, or moderate source-image blending. |
| Tiles look unnaturally tinted | Excessive color enhancement | Reduce color overlays and rely more on naturally matching tile photos. |
| Grid looks misaligned | Spacing, crop, orientation, or layout settings | Reset the layout, use snapping or consistent tile dimensions, and regenerate the preview. |
Color and brightness should be reviewed across the entire composition as well as tile by tile. Large differences between neighboring cells can produce a noisy surface even when the target image remains technically recognizable.
- A crisp tile grid with consistent spacing
- Distinct photographs replacing obvious repeated images
- Balanced color treatment that preserves both the target and individual tiles
Advanced functions such as tile reshuffling, crop adjustment, source-image blending, and color matching can improve the result, but each should be used conservatively enough that the smaller photographs still look intentional.
Check Photo Rights, Privacy, and Moderation
Commercial photo mosaics frequently use employee, customer, fan, or attendee photographs. That creates a rights-management issue that does not exist when every image comes from the brand’s own licensed library.
The U.S. Copyright Office explains that copyright in an original photograph generally belongs to its creator and includes rights such as reproduction, adaptation, distribution, and public display. A company therefore should not assume that possession of a photograph automatically provides unrestricted commercial-use rights.
For user-submitted campaigns, provide clear submission terms describing how photographs may be used. Follow applicable privacy requirements, avoid requesting unnecessary personal information, and provide a moderation process when public submissions can appear automatically.
Live-event systems should also be tested before launch. Verify the submission queue, moderation controls, display delay, network requirements, backup workflow, and what happens if inappropriate or duplicate content is submitted.
Frequently Asked Questions
What is the best software to stitch photos together?
For conventional panorama stitching, Adobe Photoshop Photomerge is a current option that aligns photographs with overlapping content and provides Perspective, Cylindrical, Spherical, Collage, and Reposition layouts. Photo stitching is different from creating a tile-based photomosaic, so dedicated mosaic software should be used when the goal is to recreate one target image from many smaller photographs.
How do I stitch multiple photos together?
For a panorama, capture photographs with overlapping scene content, keep the viewpoint and exposure as consistent as practical, then use stitching software to align and blend the overlapping regions. In Photoshop, this workflow is handled through File > Automate > Photomerge. For a photomosaic, use a target image plus a separate library of tile photographs instead.
What is it called when you stitch images together?
Combining overlapping photographs into one continuous scene is commonly called photo stitching or panorama stitching. A photomosaic is different: many independent photographs are used as tiles to recreate a larger target image. A collage simply arranges multiple photographs together and does not require either overlap matching or a target-image reconstruction.
What is the best software for photo mosaics?
There is no single best program for every project. TurboMosaic is a purpose-built example for generating tile-based photomosaics, while Picture Mosaics focuses heavily on commercial, interactive, and live-event workflows. Compare output dimensions, tile controls, repetition settings, commercial licensing, privacy, moderation, and export options before choosing.
Does a photo mosaic need to be 300 DPI?
Not exactly. Image resolution is normally discussed in pixels per inch, or PPI. Around 300 PPI is a strong target for high-quality prints viewed closely, but large-format work viewed from farther away can often use a lower effective PPI. The required pixel dimensions depend on the final print size, viewing distance, and printer specifications.
Can a business use customer photos in a commercial mosaic?
A business should obtain appropriate rights or permission rather than assuming that possession of a photo grants unrestricted commercial use. Use clear submission terms for user-generated campaigns and consider copyright, privacy, publicity rights, platform rules, and moderation requirements applicable to the project and jurisdiction.
Conclusion
Image mosaic software gives commercial teams and individual creators a practical way to transform many photographs into one coordinated visual asset. Strong results depend on choosing the correct type of software, preparing a varied tile library, controlling repetition and cropping, and exporting enough real pixel data for the intended display or print size.
The most important distinction is simple: a photomosaic uses many photographs as tiles, while photo stitching blends overlapping images into a continuous scene. Keeping those workflows separate makes software selection, troubleshooting, and production much easier. Commercial projects should also account for licensing, contributor permissions, privacy, moderation, and the requirements of the final output medium.
Sources
- Adobe Photoshop — Create Panoramic Images with Photomerge — explains current panorama-stitching and overlapping-image workflows.
- Adobe Photoshop — Change Print Dimensions and Resolution — supports the PPI and print-resolution guidance.
- Adobe Photoshop — Image File Formats — supports JPEG, PNG, TIFF, compression, and format guidance.
- U.S. Copyright Office — What Photographers Should Know About Copyright — supports the commercial-photo rights and permission guidance.
- TurboMosaic — Photo Mosaic Software — documents a current dedicated tile-based photomosaic workflow and tile controls.
- Picture Mosaics — Live Mosaic Platform — documents real-time photo submissions, interactive event workflows, and moderation.

