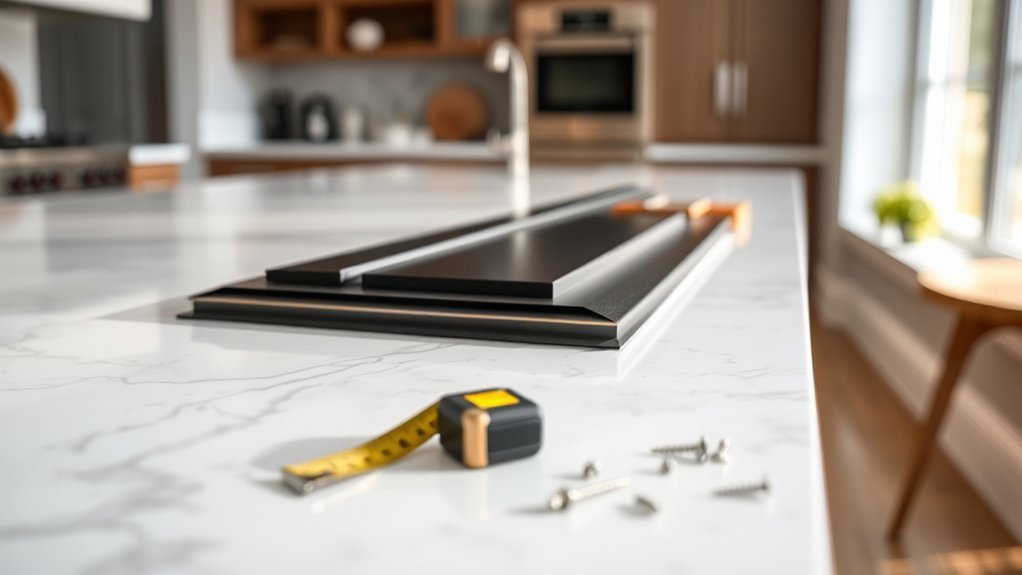
Countertop trim can do more than make a kitchen look finished. Depending on the product, it can protect an exposed countertop edge, cover a transition, or help close a narrow gap where a countertop meets a backsplash, wall, or fixture. The key is choosing the right type of trim for the job, preparing the surface correctly, and following the countertop and trim manufacturers’ instructions.
Quick Answer
Choose countertop trim by first identifying its job: rigid edge profiles protect and finish exposed edges, while flexible or self-adhesive trim covers narrow joints and gaps. Match the trim to the countertop material, gap size, moisture exposure, and cleaning needs. For adhesive trim, installation quality depends heavily on a clean, dry, compatible surface.
Key Takeaways
- Do not treat countertop edge trim, tile profiles, wood edging, caulk, and flexible gap trim as interchangeable products.
- Measure the edge or gap and confirm surface compatibility before buying trim.
- Moisture-resistant trim can help protect vulnerable joints, but it cannot fix a plumbing leak or persistent moisture problem.
- Self-adhesive trim is often DIY-friendly; fabricated stone edges, tile profiles, damaged substrates, and complex sink areas may require professional work.
- Cleaning and maintenance should follow the requirements of both the trim material and the countertop beneath it.
Understanding the Importance of Counter Trim in Your Kitchen
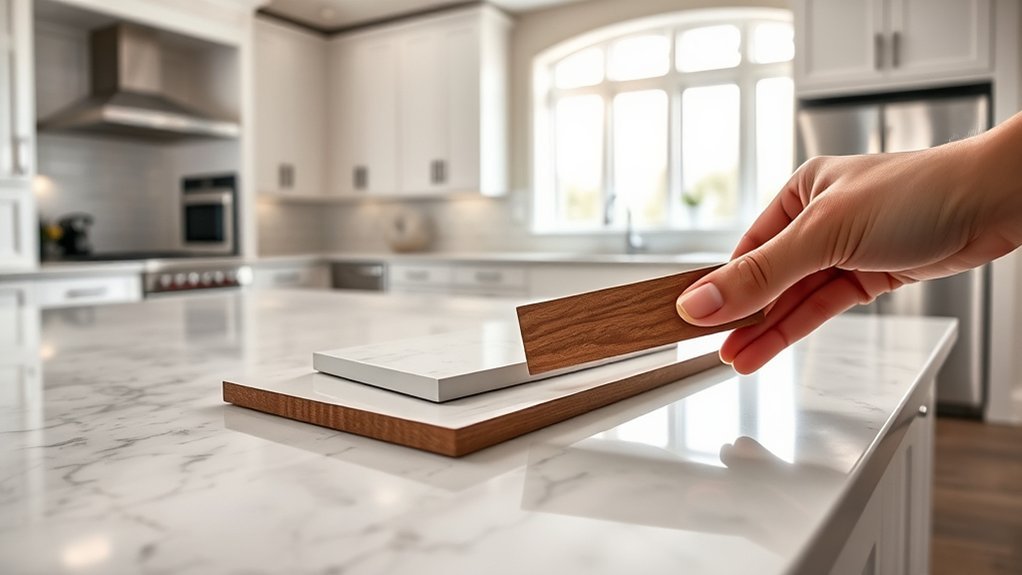
Counter trim plays both a functional and visual role in kitchen design, but the term can describe several different products. A countertop edge profile finishes or protects an exposed edge. A wood or metal edging strip may create a decorative border. A flexible gap trim can cover a narrow joint between a countertop and another surface.
Rigid countertop profiles are commonly used to protect exposed tile or countertop edges from chipping while creating a finished appearance. For example, LATICRETE countertop profiles are designed as decorative finishing and edge-protection systems.
Flexible trim serves a different purpose. It may bridge a small gap at a backsplash, wall, cabinet, appliance, or similar transition. Products such as InstaTrim use a flexible strip and pressure-sensitive adhesive rather than functioning as a fabricated countertop edge.
The right trim begins with the right job: protect an edge, finish a transition, or cover and help seal a narrow gap.
Wooden profiles also offer customization because they can be stained or painted to coordinate with cabinetry and other woodwork. However, wood near sinks or other wet areas needs an appropriate finish and ongoing maintenance because repeated moisture exposure can cause swelling, staining, or deterioration.
Properly installed gap trim may help limit water and debris from entering vulnerable joints. That can make cleaning easier and reduce persistent dampness, but trim should never be used to hide an active leak, damaged substrate, or existing mold.
Essential Features of Durable Counter Trim
Durability depends on the trim type, material, location, and installation. A product that works well along a dry decorative edge may be a poor choice for a joint beside a sink.
| Trim Type | Typical Use | Main Considerations |
|---|---|---|
| Flexible self-adhesive trim | Small gaps and transitions | Surface preparation, adhesive compatibility, moisture exposure, gap width |
| PVC or vinyl profile | Edges, corners, or gap finishing | Heat limits, cleaning requirements, appearance, fastening method |
| Wood trim | Decorative countertop edging | Finish quality, water exposure, movement, refinishing needs |
| Metal countertop profile | Tile or finished countertop edges | Profile size, substrate, installation system, scratch resistance |
| Stone or fabricated edge | Integrated countertop edge | Fabricator requirements, chip resistance, edge geometry, cost |
For moisture-prone areas, look for materials and adhesives that the manufacturer specifically approves for that environment. Do not assume a material is antimicrobial, waterproof, heat-resistant, food-safe, or suitable for every countertop unless the manufacturer documents that property.
Moisture and Mold Resistance: Why It Matters
Moisture resistance is especially important around sinks, backsplashes, dishwashers, and other locations where water can repeatedly reach a countertop joint.
The U.S. Environmental Protection Agency emphasizes that moisture control is the key to controlling indoor mold. Wet or damp materials should generally be dried within 24 to 48 hours, and the underlying source of unwanted water should be corrected.
Importance of Moisture Resistance
Water entering an unprotected joint can damage some substrates, finishes, adhesives, wood components, and cabinet materials. A correctly selected trim or sealant can help reduce water entry, but the entire joint system matters: the countertop, substrate, adhesive, trim, sealant, and surrounding surfaces all need to be suitable for the location.
Traditional caulk is still appropriate for many countertop joints when the countertop, sink, backsplash, or fixture manufacturer specifies it. Flexible trim should therefore be viewed as an alternative for suitable applications, not as a universal replacement for every sealant joint.
Mold Growth Prevention Techniques
Good mold prevention starts before trim is installed:
- Repair plumbing leaks and other moisture sources.
- Dry damp materials rather than covering them.
- Remove mold-contaminated material when it cannot be safely cleaned and dried.
- Keep countertop joints clean and inspect them for water intrusion.
- Use ventilation when cooking and dishwashing if excess humidity or condensation is a problem.
- Select trim and sealants that are suitable for wet or splash-prone locations.
InstaTrim currently describes certain flexible trim products as water-, mold-, and mildew-resistant. That is useful product information, but resistance should not be interpreted as a guarantee that mold cannot develop around the installation if moisture remains present.
Warning: Do not install decorative or adhesive trim over wet material, active mold, a plumbing leak, or deteriorated countertop substrate. Fix and dry the underlying area first.
Material Selection Considerations
Selecting the right material requires more than matching a color. Consider exposure to water, heat, cleaning chemicals, impact, movement, and UV light where applicable.
| Material | Strengths | Watch For |
|---|---|---|
| PVC / vinyl | Moisture resistance, easy cleaning, flexible options | Heat limits, adhesive compatibility, appearance |
| Treated or finished wood | Custom color, traditional appearance, repairable finish | Moisture movement, refinishing, swelling if poorly protected |
| Aluminum / metal | Rigid edge protection, clean modern appearance | Scratching, sharp cut edges, profile compatibility |
| Composite trim | Dimensional stability varies by product | Verify exact moisture, heat, VOC, and fastening specifications |
How to Choose Between DIY and Professional Installation?
The best installation route depends on the trim system rather than on a simple DIY-versus-professional rule.
- DIY is usually reasonable for simple self-adhesive gap trim when the substrate is sound, the joint is accessible, and the manufacturer permits the application.
- Professional help is worth considering for fabricated stone edges, difficult miters, tile-profile systems, structural substrate damage, large uneven gaps, and areas where a sink or plumbing connection is leaking.
- Check manufacturer requirements before modifying quartz, solid surface, laminate, stone, or butcher block because warranties and installation methods vary.
At a Glance
| Time Required | About 30–90 minutes for a straightforward adhesive-trim project, excluding repairs or drying time |
| Difficulty | Easy to moderate for flexible adhesive trim; higher for rigid or fabricated profiles |
| Tools Needed | Tape measure, pencil, cleaning supplies, scissors or manufacturer-approved cutting tool, and applicator if specified |
| Cost | Varies widely by trim material, length, profile, countertop type, and whether fabrication or professional labor is required |
How to Install Flexible Countertop Gap Trim
- Identify the joint. Confirm that the product is intended for the location and that no active leak or substrate damage is present.
- Measure the full run. Measure the length and maximum gap width at several points. Select a trim width that provides adequate contact on both adjoining surfaces.
- Check compatibility. Read both the trim instructions and countertop manufacturer’s care guidance, especially on sealed stone, finished wood, laminate, or specialty coatings.
- Remove old material when required. For InstaTrim specifically, the manufacturer says old silicone, silicone residue, wax, and oils must be removed before application.
- Clean and dry the surface. Adhesive trim performs best on a clean, dry, dust-free surface. Do not trap water beneath it.
- Dry-fit the strip. Position it before removing the liner so you can check alignment, corners, and cut length.
- Cut carefully. Use the tool recommended for the trim. Keep hands clear of sharp blades and freshly cut metal edges.
- Apply gradually. Peel the liner a short section at a time, position the trim, and press it firmly into place.
- Apply consistent pressure. Pressure-sensitive adhesives require good surface contact. Follow the product manufacturer’s application instructions.
- Inspect the full length. Check for lifted edges, stretching, misalignment, unsupported gaps, and areas where water could enter.
Pro Tip: Dry-fit the entire run before exposing adhesive. Small alignment errors become much harder to correct after a pressure-sensitive strip has been firmly pressed into place.
Note: InstaTrim specifically says not to stretch its flexible strip during installation because stretching can cause the end to pull back after placement.
Aesthetic Appeal: Choosing Colors and Finishes
Counter trim should look intentional rather than added as an afterthought. Compare it with the countertop, backsplash, cabinetry, flooring, appliances, and nearby hardware.
Wood trim can be stained or painted to coordinate with cabinetry. Metal profiles can echo stainless appliances, faucets, or cabinet hardware. Flexible trim is available in multiple colors, allowing it either to blend into the joint or create a visible border.
Finish also changes how trim reads visually. Glossy surfaces reflect more light and tend to appear more prominent, while matte finishes usually look quieter. Instead of relying on broad color rules, view samples under the actual kitchen lighting whenever possible.
The trim should also be proportionate. A thick, contrasting edge can become a design feature; a narrow matching strip is more discreet.
Common Mistakes to Avoid When Selecting Counter Trim
The most expensive mistakes often happen before installation. Matching appearance without checking function can lead to poor adhesion, water intrusion, premature wear, or an edge profile that simply does not fit the countertop system.
Inadequate Material Comparisons
Small samples can make color and texture easier to compare, but they do not show everything about a finished installation. Before buying, compare:
- Exact trim dimensions and gap coverage
- Countertop and substrate compatibility
- Water and heat exposure
- Cleaning requirements
- Scratch or impact resistance
- Corner and end treatment
- Adhesive, fastener, mortar, or sealant requirements
- Availability of matching replacement pieces
Overlooking Aesthetic Compatibility
A trim material can be technically suitable but visually distracting. Wooden trim may suit a traditional or warm kitchen but may look out of place beside a very minimal stone installation unless the contrast is deliberate. Likewise, mixing several unrelated edge treatments can make a small countertop appear busy.
Check both color and scale. Bulky trim can overwhelm a thin countertop, while very narrow trim may look undersized on a thick or strongly profiled edge.
Budgeting for Your Trim Project
A useful trim budget should include more than the strip or profile itself.
- Material: Include enough length for the entire run plus reasonable cutting waste.
- Corners and accessories: Some systems use corner pieces, end caps, applicators, fasteners, mortar, adhesive, or sealant.
- Surface preparation: Old material may need to be removed and damaged areas repaired.
- Tools: Rigid profiles can require more specialized cutting equipment than flexible trim.
- Finishing: Wood may require stain, paint, or a protective finish.
- Professional labor: Fabricated countertop edges, stone modification, tile work, and complex repairs can cost substantially more than a simple adhesive-strip project.
- Future maintenance: Consider how easily the trim can be cleaned, touched up, refinished, or replaced.
Rather than choosing strictly by purchase price, compare expected service life, maintenance, and the consequence of failure in a wet location.
Maintenance and Care: Keeping Your Trim Looking New
Regular cleaning and inspection help preserve both the appearance and function of countertop trim. Wipe dust, grease, and spills away with cleaning products that are compatible with both the trim and countertop.
Cleaning guidance should follow the most sensitive material in the joint—not simply the strongest cleaner available.
For many surfaces, a soft cloth and mild cleaning solution are safer starting points than abrasives. For example, Cambria recommends warm water, a soft cloth, and mild soap for routine cleaning of its quartz surfaces, while Formica cautions against abrasive pads and recommends protecting laminate from hot cookware.
Inspect trim periodically for:
- Lifted or curling adhesive edges
- Cracked or missing sealant
- Water staining
- Swollen wood
- Loose metal or tile profiles
- Chipped corners
- Recurring dampness or mold
If the surrounding joint repeatedly becomes wet, do not simply replace the trim. Find and correct the water source first.
For painted or stained wood trim, touch up damaged finishes before moisture can penetrate exposed wood. Oil-finished butcher-block surfaces require their own maintenance schedule; follow the countertop manufacturer rather than using a generic schedule.
Innovative Products: Exploring InstaTrim and Alternatives
Flexible self-adhesive trim provides another option for narrow countertop joints where the product is compatible with the surfaces and the location.
InstaTrim is one example. According to the manufacturer’s current instructions, installation involves cleaning and drying the surface, removing interfering silicone and residue, peeling the liner, positioning the strip, and pressing it firmly into place.
Innovative Products Overview
Products now available for countertop finishing include flexible adhesive strips, PVC profiles, metal tile-edge systems, wood edging, stone edge treatments, and conventional sealants. Each solves a different problem.
Flexible strips are attractive for DIY projects because they can require fewer tools. Rigid profiles can provide stronger mechanical edge protection. Conventional sealants remain important wherever the countertop or fixture manufacturer specifies a sealed joint.
Benefits of InstaTrim
InstaTrim’s advantages are primarily convenience and flexibility. The manufacturer describes the product as self-adhesive, water-resistant, and resistant to mold and mildew, with flexible wings that maintain contact with adjoining surfaces.
| InstaTrim Feature | Installation Consideration |
|---|---|
| Peel-and-apply design | The surface still requires careful preparation. |
| Pressure-sensitive adhesive | Firm, consistent pressure is required. |
| Flexible profile | Do not stretch the strip during installation. |
| Multiple colors and widths | Measure the joint and check color in the actual room. |
| Water-, mold-, and mildew-resistant product claim | Still correct leaks and ongoing moisture problems rather than relying on trim alone. |
The manufacturer’s instructions also state that InstaTrim will not adhere properly over existing silicone residue and that application surfaces need to be clean, dry, and free of dust, oils, and wax.
Warning: Removing old trim or silicone may involve sharp blades or solvents. Follow the trim manufacturer’s safety instructions, provide ventilation where required, keep solvents away from ignition sources, and confirm that any cleaner or solvent is safe for the countertop finish.
Alternative Trimming Solutions
Alternatives to flexible self-adhesive trim include:
- Flexible PVC or vinyl profiles: useful where moisture resistance and easy cleaning are priorities, provided the product is approved for the application.
- Wood strips: customizable and repairable but dependent on a durable finish in moisture-prone locations.
- Metal countertop and tile profiles: useful for protecting exposed edges and creating a defined architectural finish.
- Natural or engineered stone edges: fabricated as part of the countertop rather than applied as a flexible gap covering.
- Conventional sealant: still appropriate for many sink, backsplash, countertop, and fixture joints where the manufacturer specifies sealant.
- Foam-backed or compressible gap trim: potentially useful for certain transitions, but compatibility, cleaning, heat, and moisture ratings should be verified before use.
Final Thoughts: Making the Right Choice for Your Space
Start with the problem you need to solve. If an exposed tile edge needs protection, use a profile designed for that edge. If a narrow wall or backsplash gap needs a neat finish, flexible gap trim may be appropriate. If a sink, fixture, or countertop manufacturer requires sealant, follow that requirement rather than substituting decorative trim.
Check the trim against the countertop material, gap size, moisture exposure, cleaning routine, and desired appearance. Preparation is especially important for adhesive systems because residue, silicone, wax, oil, dust, or trapped moisture can reduce adhesion.
A good trim installation should look intentional, remain easy to clean, and protect rather than conceal the joint beneath it.
Frequently Asked Questions
What Is the Rule of 7 for Butcher Block?
There is no universal countertop-industry “Rule of 7” that requires every butcher block to be oiled weekly for a month and then monthly. Care schedules depend on the wood, finish, use, humidity, and manufacturer. John Boos, for example, recommends oiling its applicable wood surfaces at least monthly depending on use and household conditions, and more often when the wood appears dry.
What Type of Countertop Edge Is Best?
There is no single best edge for every countertop. Eased and rounded edges are simple and practical, while ogee, mitered, and other decorative profiles create a stronger visual statement. The available profiles, minimum edge radius, chip resistance, fabrication requirements, and cost depend on the countertop material and manufacturer.
What Not to Put on Kitchen Counters?
Follow the care instructions for your exact countertop material. Many manufacturers recommend using trivets or hot pads under hot cookware, avoiding harsh or abrasive cleaners, wiping up spills rather than allowing liquids to sit, and using cutting boards instead of cutting directly on the surface.
What Are Some Outdated Kitchen Countertop Colors?
Colors such as avocado green and harvest gold are strongly associated with earlier design eras, but “outdated” is subjective. A color that looks dated in one kitchen may work intentionally in a retro design. Choose countertop and trim colors based on the room, lighting, cabinetry, and the look you want rather than trends alone.
Can Flexible Countertop Trim Replace Caulk?
Sometimes, but not in every application. Flexible trim can cover suitable gaps and may provide a moisture-resistant transition, but sinks, countertop seams, backsplash joints, plumbing fixtures, or other installations may specifically require sealant. Follow the countertop, sink, fixture, and trim manufacturers’ requirements.
How Do I Know What Width of Counter Trim to Buy?
Measure the gap or exposed edge at several points, including the widest location. Choose a profile that fits the substrate and provides enough contact or coverage according to the manufacturer’s specifications. Do not rely only on the visible gap at one spot because walls and countertops are not always perfectly straight.
Sources
- U.S. Environmental Protection Agency — A Brief Guide to Mold, Moisture and Your Home — moisture control and mold-prevention guidance.
- InstaTrim — How to Apply InstaTrim — current surface-preparation and application instructions.
- InstaTrim — Flexible Trim Product Information — adhesive, resistance, and installation claims.
- LATICRETE — Wall and Countertop Profiles — rigid countertop edge-profile uses.
- John Boos — Block Care and Maintenance — butcher-block and wood-surface care guidance.
- Cambria — Quartz Product Care — cleaning, heat, and surface-care guidance.
Conclusion
Selecting countertop trim is less about finding one universally “best” product and more about matching the trim to the job. Rigid profiles can protect exposed edges, wood can create a custom decorative finish, and flexible adhesive trim can neatly cover suitable countertop gaps and transitions.
For the best result, measure carefully, confirm material compatibility, prepare the surface thoroughly, and address leaks or moisture problems before installation. Products such as InstaTrim can simplify certain DIY projects, while fabricated stone, tile-edge systems, damaged substrates, and critical wet-area joints may require a different product or professional installation.
Whichever trim you choose, proper preparation and routine inspection will do more for long-term appearance and durability than relying on a trim material alone.
