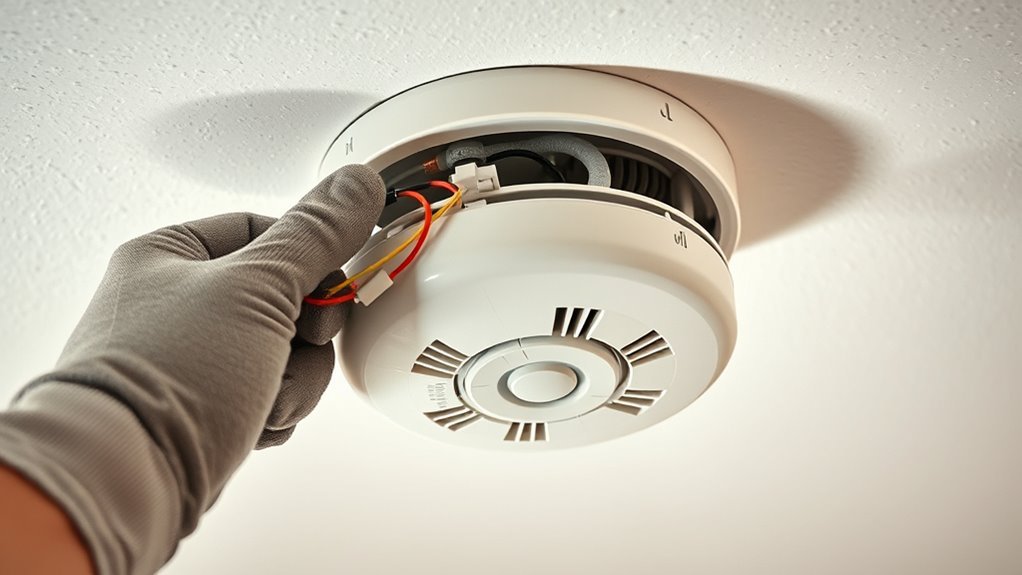
Removing an AC hard-wired Kidde smoke alarm is usually straightforward when the alarm uses Kidde’s standard twist-off mounting plate and quick-connect plug. The important part is doing the steps in the right order: identify the model, shut off the alarm circuit, release any tamper lock, rotate the alarm toward the OFF arrow, and disconnect the plug without pulling on the wires. If the job exposes fixed household wiring, stop and use a qualified electrician.
Quick Answer
Turn off the smoke-alarm circuit at the breaker, release any tamper pin or locking tab, then rotate the Kidde alarm counter-clockwise toward the OFF arrow. Support the alarm, squeeze the quick-connect locking arms, and pull the plug straight out. Do not disturb junction-box wiring unless you are qualified to do so.
Key Takeaways
- Turn off the correct breaker before removing an AC hard-wired alarm.
- Release an activated tamper pin or locking tab before forcing the alarm to rotate.
- Kidde’s general removal method is to rotate the alarm counter-clockwise toward OFF, then squeeze the quick-connector locking arms and unplug it.
- Do not use the alarm’s LED as proof that exposed electrical wiring is safe to touch.
- Do not leave required smoke-alarm coverage missing; reinstall or replace the alarm and test the system after power is restored.
- Hardwired smoke alarms should generally be replaced every 10 years, subject to the model’s instructions and local requirements.
At a Glance
| Time Required | About 5–15 minutes for alarm-only removal; replacement or electrical-box work can take longer. |
| Difficulty | Easy for a normal twist-off and quick-connect removal; professional help is appropriate if fixed wiring must be altered. |
| Tools Needed | Stable step ladder; long-nose pliers if the alarm has a tamper pin; flashlight; model manual. Electrical test equipment should be used only by someone who knows how to verify the circuit safely. |
| Cost | Usually $0 for simple removal if you already have the basic tools; replacement-alarm or electrician costs are additional. |
Warning: If the smoke alarm is sounding a full alarm and you do not know why, treat it as a possible fire. Get everyone outside and follow your emergency plan instead of removing or disabling the alarm. For nuisance alarms, first confirm there is no fire, then use the model’s Hush or troubleshooting procedure.
How to Remove an AC Hard-Wired Smoke Alarm
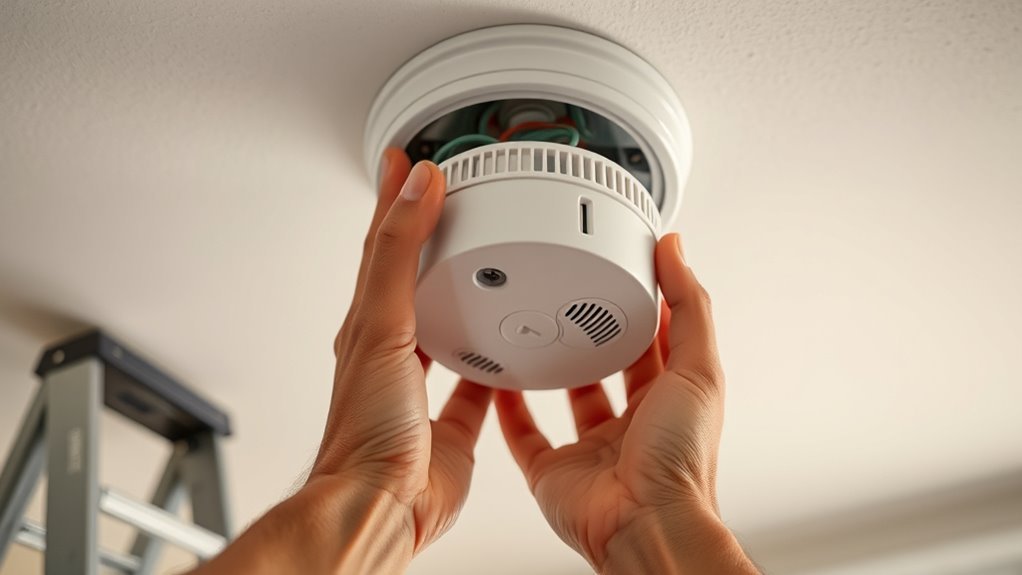
For most Kidde AC hard-wired alarms, the manufacturer’s general removal procedure is simple: release any tamper-resistant feature, rotate the alarm counter-clockwise in the direction of the OFF arrow, and disconnect the AC quick connector by squeezing its locking arms. The exact mechanism can differ by model, so check the model number on the alarm and use the matching manual whenever possible.
Kidde’s current smoke-alarm removal guidance describes the standard procedure for AC hard-wired and interconnected alarms.
- Identify the alarm. Check the model and confirm whether it has a tamper pin, locking tab, removable backup battery, or sealed battery.
- Turn off the correct circuit breaker. Do not rely on the alarm’s status light alone.
- Release the tamper feature if fitted. Remove a tamper pin with long-nose pliers or depress the model’s locking tab as directed.
- Rotate the alarm toward OFF. On Kidde’s standard design, this is counter-clockwise.
- Support the alarm and unplug the quick connector. Squeeze the locking arms on the connector and pull the connector body straight away from the alarm.
- Reinstall or replace the alarm promptly. Restore power and test the alarm system after the work is complete.
Pro Tip: Take a clear photo of the model label and connector before buying a replacement. Kidde has produced several hardwired families, and the mounting plate, battery design, and interconnect compatibility can vary.
Turn Off Power First
Before removing an installed AC hard-wired smoke alarm, switch off the appropriate breaker at the home’s service panel. Kidde specifically warns of electrical-shock risk and directs users to shut off power before removing an installed hardwired alarm.
Turning off the breaker may also remove AC power from other alarms sharing that circuit. Many hardwired alarms have backup batteries, so they may continue to operate on battery power while the breaker is off.
If the task is limited to unplugging the manufacturer’s quick connector from the alarm, follow the alarm manual. If removal exposes wire nuts, splices, damaged conductors, or other fixed wiring in the electrical box, stop rather than experimenting with household wiring. The U.S. Fire Administration states that hardwired smoke-alarm installation should be performed by a qualified electrician.
Power Disconnect Steps
- Locate the breaker that supplies the smoke-alarm circuit.
- Switch that breaker fully to the OFF position.
- Make sure no one restores the breaker while you are working.
- If the work could expose household conductors, have the circuit properly verified as de-energized before contact with those conductors.
- Proceed with the alarm’s tamper release, twist-off mechanism, and quick connector only after the circuit has been isolated.
Do not treat a dark LED as proof that exposed conductors are safe. An indicator lamp is only a status indicator; proper electrical testing is a separate safety step when fixed wiring is involved.
Safe Removal Checks
A brief check before removal can prevent most problems. Make sure the ladder is stable, your hands and work area are dry, and the correct breaker is off. Keep the alarm supported when it comes free from the mounting plate so its weight does not pull on the connector.
| Check | Purpose |
|---|---|
| Correct breaker switched off | Isolates the AC supply before removal. |
| Tamper feature identified | Prevents damage from forcing a locked alarm. |
| Stable ladder and dry work area | Improves control while working overhead. |
| No damaged or exposed fixed wiring | Signals whether a qualified electrician is needed. |
Disconnect the Quick Connect Harness
After the alarm has been released from its mounting plate, support it with one hand and locate the quick connector at the back or bottom of the unit. Kidde’s standard connector has locking arms on its sides.
- Confirm the breaker remains off.
- Grip the connector body rather than the individual wires.
- Squeeze the locking arms.
- Pull the connector straight away from the alarm.
Do not yank the wire bundle or pull hard on the individual conductors. The goal is to release the molded plug from the alarm, not to remove house wiring from the ceiling box.
If the connector design does not match Kidde’s general instructions, stop and consult the manual for that exact model.
Remove Tamper-Resistant Pins or Tabs
Kidde notes that some alarms use an optional tamper-resistant feature intended to prevent unwanted removal. If that feature is active, disengage it before trying to force the alarm off the mounting plate.
If the alarm uses a tamper-resist pin, Kidde instructs users to pull the pin from its hole with long-nose pliers. If it uses a locking tab, press the tab down while rotating the alarm in the direction of the OFF arrow.
Do not pry the alarm housing away from the ceiling or twist harder when a lock is still engaged. Forcing the alarm can break the trim ring, locking tab, connector, or alarm housing.
Note: Tamper hardware is model-dependent. If you cannot see how the alarm is locked, find the model number and check its manual before using a screwdriver or other tool on the housing.
Twist the Alarm Off the Mounting Plate
Once any tamper feature is released, hold the alarm securely and rotate it counter-clockwise toward the OFF arrow. Kidde uses this motion on its general AC hard-wired removal procedure to disengage the alarm from the trim ring or mounting plate.
- Support the alarm with one hand.
- Rotate toward OFF with steady pressure.
- Stop if the alarm barely moves; a tamper feature may still be engaged.
- Once the alarm comes free, lower it only far enough to reach the quick connector comfortably.
- Squeeze the connector’s locking arms and unplug it without pulling the wires.
If the alarm has a replaceable backup battery and you are servicing the unit, follow the model manual for battery removal or replacement. If it has a sealed 10-year battery, do not try to pry the battery out.
Check for Stuck Wiring or Locking Tabs
If the alarm will not come free, determine what is resisting before applying more force. Common causes include an engaged tamper lock, a connector that has not been fully released, paint or debris around the mounting plate, or a housing that has been overtightened.
A slight controlled movement can help identify whether the alarm is simply tight, but avoid aggressive twisting, prying, or pulling on the wiring.
Inspect Locking Tabs
Look closely around the alarm’s edge for the tamper-resist tab or pin. If a tab is engaged, press it as directed while rotating the alarm toward OFF. If a removable pin is installed, use long-nose pliers to pull it out carefully.
Clear only loose dust or debris that is preventing the latch from moving. Do not cut, drill, or break the alarm casing to defeat a lock.
Check Harness Connection
After the alarm has been twisted free, inspect the quick connector. Its locking arms must be compressed before the plug will release. A snug connector is normal and does not mean the house wiring itself should be pulled from the box.
If the connector is melted, cracked, corroded, or attached to visibly damaged conductors, stop using the alarm until the damaged equipment has been evaluated and repaired.
When reinstalling or replacing the alarm, use only a connector, adapter, and interconnection arrangement approved for the specific models involved. Kidde warns that using unspecified interconnect combinations can lead to nuisance alarms, failure to alarm, or equipment damage.
Free Stubborn Wiring
If the quick connector feels stuck, keep the alarm supported and make sure both locking arms are fully squeezed. Pull on the connector body with steady pressure instead of tugging individual wires.
- Confirm the breaker remains off.
- Check that the connector tabs are fully depressed.
- Look for corrosion, heat damage, cracked plastic, or trapped wiring.
- Apply only light, controlled pressure to the connector body.
- Stop if releasing the alarm would require disturbing wire nuts, splices, or fixed conductors in the electrical box.
Fixed-wiring repairs are different from unplugging an alarm. If the work reaches the junction-box wiring, use a qualified electrician.
What to Do If the Alarm Won’t Budge
If the Kidde alarm refuses to turn, first confirm you are rotating it toward the OFF arrow. Then look for a tamper pin or locking tab. These locks are designed specifically to stop the unit from being twisted off accidentally.
If the alarm rotates off the plate but seems tethered, the quick connector is probably still attached. Support the alarm, squeeze both locking arms on the connector, and pull the connector body straight out.
If paint has bridged the edge of the alarm or trim ring, carefully separate only the paint film without damaging the alarm or electrical box. Do not insert a metal tool into the alarm or electrical box while trying to pry the unit free.
If the mounting system looks different from Kidde’s standard arrangement, use the model-specific manual or contact Kidde support rather than forcing it.
Reinstall or Replace the Alarm Promptly
Removing the alarm also removes smoke detection at that location. Do not leave a required alarm disconnected after inspection or maintenance.
If the existing unit is still within its service life and has no fault, reinstall it according to its manual, reconnect the quick connector, secure it to the mounting plate, restore breaker power, and use the Test button to verify operation.
If the alarm is at the end of its service life, damaged, unreliable, or showing an end-of-life indication, replace it with a suitable current alarm. The U.S. Fire Administration recommends replacing hardwired smoke alarms every 10 years and testing alarms monthly.
A hardwired smoke alarm is not a permanent appliance: USFA guidance calls for replacing the entire alarm about every 10 years.
If several alarms are interconnected, restore the circuit and test the system according to the manufacturers’ instructions. A removed alarm no longer provides coverage at its location, and turning off a shared breaker may temporarily remove AC power from other alarms on that circuit.
Dispose of the Alarm and Battery Safely
Disposal depends on the alarm type, battery chemistry, manufacturer instructions, and local rules. Do not automatically treat every smoke alarm as hazardous waste, and do not take an ionization alarm apart.
The U.S. Environmental Protection Agency explains that intact ionization smoke alarms contain a very small sealed americium source and do not have special federal disposal instructions for household users. They may generally go in household trash, although a community may offer a separate collection or recycling program. Never dismantle the ionization chamber or try to remove the radioactive source.
Handle the battery separately according to its chemistry:
- Replaceable alkaline or zinc-carbon battery: check local recycling options. EPA notes that these may be accepted in household trash in many communities, although recycling is preferred where available.
- Lithium or rechargeable battery: do not place it in household trash or ordinary curbside recycling. Use an appropriate battery collection or household hazardous-waste program.
- Sealed battery built into the alarm: follow the alarm manufacturer’s end-of-life instructions rather than opening the alarm to remove it.
EPA recommends isolating terminals of lithium and other batteries that require special handling with non-conductive tape or placing each battery in a separate plastic bag before recycling.
Frequently Asked Questions
How Do I Remove the AC Connector From My Kidde Smoke Detector?
Turn off the correct breaker first. After releasing any tamper feature and rotating the alarm off its mounting plate, support the alarm and find the quick connector. Squeeze the locking arms on both sides of the connector and pull the connector body straight away from the alarm. Do not pull on the individual wires.
What Happens if I Remove a Hardwired Smoke Detector?
That alarm stops providing smoke detection at its location while it is removed. Switching off its breaker may also remove AC power from other alarms on the same circuit, although battery-backed units may continue operating on backup power. Reinstall or replace the alarm promptly and test the system after restoring power.
How Do You Stop a Hardwired Kidde Smoke Detector From Beeping?
First distinguish a periodic chirp from a full smoke alarm. A chirp can indicate a low backup battery, fault, Hush condition, or end of life. Replace a removable low battery when appropriate, clean and test the alarm according to its manual, and replace an end-of-life unit. Kidde also provides a reset procedure for applicable hardwired models. Do not leave the alarm disconnected merely to stop the sound.
How Do You Remove Hard-Wired Kidde Smoke Detectors?
Shut off the alarm circuit at the breaker, release any tamper-resistant pin or tab, rotate the alarm counter-clockwise toward the OFF arrow, then squeeze the quick-connector locking arms and unplug the connector. Follow the exact user guide for the model if its mounting or connector system differs.
Can I Leave a Hardwired Smoke Alarm Disconnected?
It should not be left disconnected as a permanent solution to chirping, nuisance alarms, or a failed unit. Removing it eliminates protection at that location and may leave the home short of required coverage. Correct the problem, reinstall a working alarm, or replace the unit as soon as possible.
Conclusion
To remove an AC hard-wired Kidde smoke alarm safely, start by turning off the correct breaker and checking for a tamper-resistant pin or tab. Release the lock, rotate the alarm counter-clockwise toward OFF, support it, and disconnect the quick connector by squeezing its locking arms. Never force a stuck alarm or pull on its wires. If the work exposes fixed household wiring, stop and use a qualified electrician. Afterward, reinstall or replace the alarm, restore power, and test the system so the home is not left without smoke protection.
Sources
- Kidde — How Do I Remove My Smoke Alarm? — manufacturer instructions for AC hard-wired alarm removal, quick connectors, and tamper-resistant features.
- Kidde — Nuisance or False Alarm Actions — hardwired alarm reset and troubleshooting procedure.
- Kidde — What Causes Consistent Chirping? — low battery, fault, Hush, and end-of-life chirp causes.
- U.S. Fire Administration — Smoke Alarms — testing, hardwired-alarm maintenance, placement, and 10-year replacement guidance.
- U.S. EPA — Americium in Ionization Smoke Detectors — safe handling and disposal guidance for ionization alarms.
- U.S. EPA — Used Household Batteries — disposal and recycling guidance by battery chemistry.

