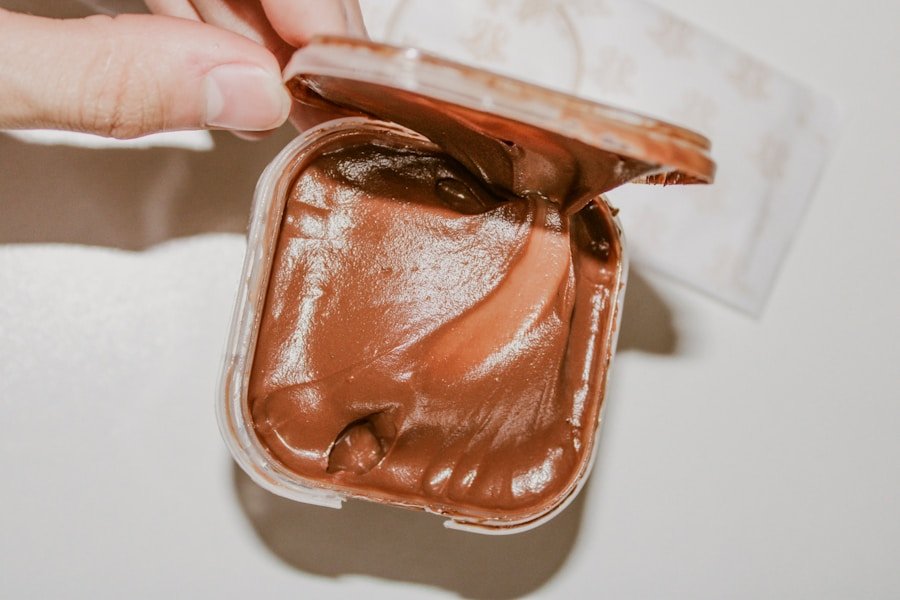
Melting chocolate sounds simple, but small details decide whether you get a smooth, glossy bowl or a thick, grainy mess. Chocolate needs gentle heat, dry tools, and steady stirring because cocoa butter and sugar react quickly to overheating and moisture. Once you learn the right method, you can melt chocolate for dipping fruit, coating cookies, making ganache, decorating cakes, or mixing into brownies with far more confidence.
Quick Answer
The best way to melt chocolate without burning it is to use low, gentle heat and stir often. A double boiler gives the most control, while the microwave works well when you heat in short 20- to 30-second bursts at reduced power. Keep all water and steam away from the chocolate.
Key Takeaways
- Use chopped chocolate bars, baking chocolate, or couverture for the smoothest melt.
- Keep heat low because chocolate can scorch quickly once it gets too hot.
- Use dry bowls, dry spoons, and careful steam control to prevent seizing.
- Remove chocolate from heat when a few small pieces remain, then stir until smooth.
- Reheat leftover melted chocolate slowly so it stays glossy and usable.
At a Glance
| Time Required | 5 to 10 minutes, depending on the amount and method |
| Difficulty | Easy, but it requires patience and close attention |
| Tools Needed | Heatproof bowl, dry spatula, knife, cutting board, double boiler or microwave-safe bowl |
| Cost | Only the cost of the chocolate you choose |
Why Properly Melted Chocolate Matters
Properly melted chocolate gives desserts a smoother texture, cleaner finish, and richer flavor. You can use it for dipping, coating, drizzling, molding, frosting, or mixing into batters. When chocolate melts evenly, it becomes fluid enough to coat ingredients without clumping, but thick enough to hold a beautiful finish.
Melting chocolate is not only about turning solid chocolate into liquid. The goal is to warm it gently so the cocoa butter softens without scorching the cocoa solids or drying out the sugar. If you rush the process, the chocolate may turn dull, grainy, stiff, or bitter.
Good technique also matters if you plan to temper chocolate. Tempering uses careful temperature control to help cocoa butter crystals set in a stable form. That gives finished chocolate a glossy surface, firm texture, and clean snap at room temperature. Even if you are not tempering, gentle melting still helps your chocolate taste and look better.
Choosing the Right Chocolate for Melting
Selecting the right chocolate makes the process easier before you even turn on the heat. Dark, milk, and white chocolate all melt differently because they contain different amounts of cocoa solids, cocoa butter, milk solids, and sugar.
Dark chocolate usually melts smoothly and gives desserts a deep, rich flavor. It works well for ganache, brownies, dipped fruit, truffles, and cake decorations. Milk chocolate has more sugar and milk solids, so it tastes creamier and sweeter. It also needs gentle heat because the dairy and sugar can scorch if you heat it too quickly.
White chocolate needs the most care. It does not contain cocoa solids, so it behaves differently from dark or milk chocolate. It is mostly cocoa butter, sugar, and milk solids, which means it can melt beautifully but burn or clump when overheated.
For best results, choose baking bars, couverture chocolate, or good-quality chocolate bars instead of standard chocolate chips when the recipe depends on a smooth melt. Many chocolate chips are made to hold their shape during baking, so they may not melt as evenly. If you use chips, choose a high-quality baking brand and stir patiently.
Note: If your chocolate lists cocoa butter near the top of the ingredient list, it usually melts more smoothly than products that rely heavily on vegetable oils or stabilizers.
Different Methods for Melting Chocolate
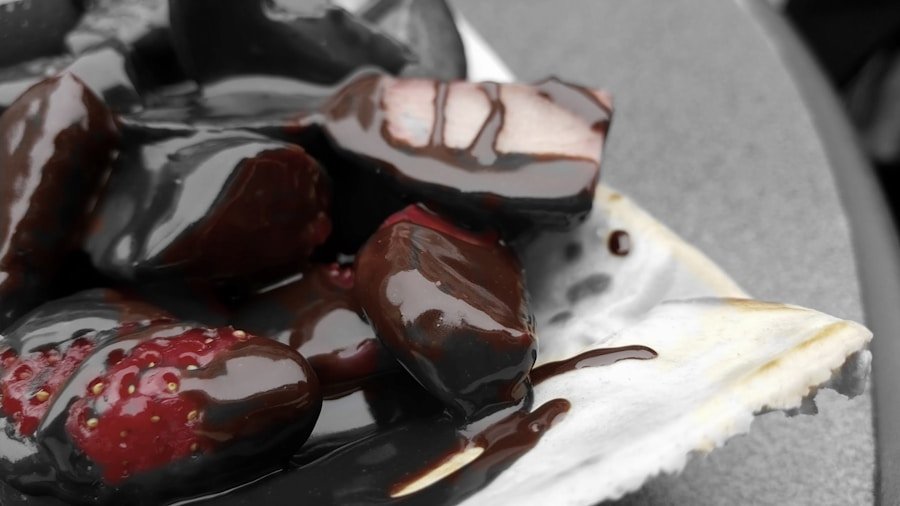
You can melt chocolate several ways, but the two most reliable methods are the double boiler and the microwave. Both methods work well when you use low heat, small chocolate pieces, and frequent stirring.
The double boiler method uses indirect heat. You place a heatproof bowl over a pot of gently simmering water, then stir the chocolate as it melts. The bowl warms slowly from the steam below it, which reduces the risk of scorching. This method gives you excellent control and works especially well for larger amounts of chocolate.
The microwave method is faster and convenient for small batches. You place chopped chocolate in a microwave-safe bowl and heat it in short intervals at reduced power, stirring after each round. This method works well, but it needs close attention because chocolate can burn in the microwave before it looks fully melted.
You can also melt chocolate with a slow cooker for large batches, such as when you are making candy for a party. Use the lowest heat setting and stir regularly. This method is slower, but it can keep chocolate warm for dipping once it has melted.
Tips for Melting Chocolate in a Double Boiler
| Tip | Description |
|---|---|
| Use a Heatproof Bowl | Place the chocolate in a dry heatproof bowl that fits snugly over the pot. |
| Simmering Water | Keep the water gently simmering, not boiling, so the chocolate warms slowly. |
| Stir Constantly | Stir often with a dry spatula to distribute heat and prevent hot spots. |
| Remove from Heat | Remove the bowl when the chocolate is almost melted, then stir until smooth. |
| Avoid Water Contact | Keep water, steam, and condensation out of the bowl because moisture can make chocolate seize. |
When using a double boiler, start by adding one to two inches of water to the bottom pot. Bring it to a gentle simmer, then lower the heat. The bowl should sit above the water without touching it. Direct contact with the water can make the bowl too hot and increase the risk of burning the chocolate.
Before you add the chocolate, wipe the bowl and spatula completely dry. Even a small splash of water can make melted chocolate tighten into a thick, grainy paste. Steam can cause the same problem, so avoid lifting the bowl too often while condensation is forming.
Chop the chocolate into small, even pieces before melting. Smaller pieces melt faster and more evenly than large chunks. Stir gently as the chocolate softens, scraping the sides and bottom of the bowl so no area overheats.
Once most of the chocolate has melted, remove the bowl from the heat. Keep stirring until the last small pieces melt from the residual warmth. This step helps prevent overheating and gives you a smoother finish.
Warning: Do not let the water boil hard under the bowl. Strong steam can enter the chocolate or heat the bowl too aggressively, which may cause seizing or scorching.
Tips for Melting Chocolate in the Microwave
Melting chocolate in the microwave is quick, but it works best when you use patience. Start by chopping the chocolate into small, even pieces. Place it in a clean, dry microwave-safe bowl. Glass or ceramic bowls usually work well because they heat evenly and are easy to stir in.
Set the microwave to low or medium power. If your microwave has a power setting, use about 50% power. Heat the chocolate for 20 to 30 seconds, then stop and stir. At first, the chocolate may not look melted, but stirring helps move the warm pieces around and prevents hot spots.
Continue heating in short intervals, stirring after each one. As the chocolate gets closer to melting, shorten the intervals to 10 to 15 seconds. Stop microwaving when only a few small lumps remain. Stir until the residual heat melts them completely.
This method prevents the chocolate from getting too hot. Chocolate can hold its shape even when it is warm, especially chips, so do not judge only by appearance. Stirring tells you more than looking.
Pro Tip: Melt chocolate before you prepare messy toppings or fillings. Once the chocolate is smooth, you can work quickly while it is still warm and fluid.
Common Mistakes to Avoid When Melting Chocolate

Several common mistakes can turn good chocolate into a lumpy or scorched mixture. The biggest mistake is using heat that is too high. Chocolate melts at a low temperature, so aggressive heat can burn it before you realize what happened. Burned chocolate often smells harsh, tastes bitter, and may turn thick or dry.
Another mistake is microwaving too long without stirring. The outside pieces may get very hot while the center still looks solid. Stirring spreads the heat and helps the chocolate melt evenly.
Moisture is another major problem. Wet bowls, damp spoons, steam, or a single drop of water can cause chocolate to seize. Seized chocolate becomes thick, dull, and grainy. It may still be usable in some batters or sauces, but it will not work well for smooth dipping or decorating.
Using low-quality chocolate can also create problems. Some candy coatings and low-cocoa products melt differently from real chocolate. They may be useful for specific projects, but they will not always give the same flavor or texture as baking chocolate or couverture.
Finally, avoid rushing the process. Chocolate rewards slow, careful handling. Low heat, dry tools, and steady stirring solve most melting problems before they start.
How to Fix Seized or Overheated Chocolate
If your chocolate seizes, do not throw it away immediately. First, decide what caused the problem. If water or steam entered the bowl, the chocolate may look stiff, grainy, and pasty. For some recipes, you can rescue it by stirring in a small amount of warm liquid, such as cream, milk, or water, one teaspoon at a time. This will not make it suitable for tempering or firm coating, but it can turn it into a sauce, glaze, or ganache base.
If the chocolate overheated and burned, it may not be worth saving. Burned chocolate often smells smoky or bitter and may have dry clumps. Adding fat or liquid can improve texture, but it will not remove the burnt flavor. In that case, starting over is usually the better choice.
If the chocolate is only too thick but not seized or burned, stir in a small amount of neutral fat, cocoa butter, or shortening. Add it gradually and stir well. This can loosen the texture for dipping or drizzling.
Using Melted Chocolate in Recipes
Melted chocolate is one of the most useful ingredients in baking and dessert making. You can dip strawberries, bananas, pretzels, cookies, marshmallows, or biscotti for simple treats that look polished. You can also drizzle it over cakes, brownies, ice cream, popcorn, or cupcakes for extra flavor and decoration.
Melted chocolate also adds richness to batters. Stir it into brownies, cakes, cheesecakes, puddings, or mousse for a deeper chocolate flavor. When combined with warm cream, it becomes ganache, which works as a glaze, filling, frosting, or truffle base.
You can use melted chocolate for decorative work too. Spread it thinly on parchment and break it into shards, drizzle it in thin lines over cookies, or pour it into molds for homemade candies. For a cleaner finish, let dipped or molded chocolate set on parchment paper in a cool room.
If you need a crisp, shiny coating that stays firm at room temperature, use tempered chocolate. If you are making a quick drizzle, sauce, or batter, simple melted chocolate is usually enough.
Storing and Reheating Melted Chocolate
Proper storage helps leftover melted chocolate stay usable. Let the chocolate cool slightly, then transfer it to an airtight container. Keep moisture out of the container because condensation can affect the texture when you reheat it.
If you plan to use it within a short time, store it at cool room temperature. For longer storage, refrigerate it in a sealed container. Before reheating refrigerated chocolate, let it sit at room temperature for a while so it warms gradually.
Reheat melted chocolate the same way you melted it the first time. Use a double boiler over gentle heat or microwave it at reduced power in short intervals. Stir often and stop heating before it looks fully melted. Residual heat will finish the job.
If the chocolate thickens after storage, stir in a tiny amount of cocoa butter, shortening, or warm cream, depending on how you plan to use it. Use cream if you want a sauce or ganache. Use cocoa butter or shortening if you need a looser dipping texture.
If you’re looking for ways to improve your kitchen skills, you may also be interested in checking out this article on the 5 Best Wall Art for Your Kitchen. Adding stylish decor to your cooking space can make the room more inviting while you practice techniques like melting chocolate, baking, and decorating desserts.
Related Guides
Frequently Asked Questions
What is the best method for melting chocolate without burning it?
The best method is gentle heating with frequent stirring. A double boiler gives you the most control because it uses indirect heat. The microwave also works well when you use reduced power, short intervals, and steady stirring.
How do you use a double boiler to melt chocolate?
Fill the bottom pot with one to two inches of water and bring it to a gentle simmer. Place chopped chocolate in a dry heatproof bowl over the pot, making sure the bowl does not touch the water. Stir until the chocolate is almost melted, then remove it from the heat and keep stirring until smooth.
What is the best way to melt chocolate in the microwave?
Place chopped chocolate in a dry microwave-safe bowl. Heat it at about 50% power for 20 to 30 seconds, then stir. Repeat with shorter intervals as it softens. Stop when a few small lumps remain and stir until fully smooth.
Why is it important to melt chocolate slowly and gently?
Chocolate can scorch, thicken, or seize when exposed to too much heat. Slow, gentle melting helps the cocoa butter soften evenly and keeps the finished texture smooth, glossy, and easy to use.
What are some tips for melting chocolate without burning it?
Use good-quality chocolate, chop it into even pieces, keep your tools completely dry, use low heat, and stir frequently. Remove the chocolate from heat before every piece has fully melted, then let residual warmth finish the process.
Can you fix chocolate that has seized?
You can often turn seized chocolate into a sauce or ganache by stirring in a small amount of warm liquid, one teaspoon at a time. However, seized chocolate usually will not work well for tempering, dipping, or firm coatings.
Can you remelt chocolate after it hardens?
Yes. Remelt hardened chocolate slowly with a double boiler or microwave at reduced power. Stir often and avoid adding water unless you are intentionally turning it into a sauce or ganache.
Sources
- Exploratorium: Chocolate Tempering — explains why careful temperature control affects chocolate texture and shine.
- King Arthur Baking: How to Melt Chocolate — supports low-heat melting, microwave intervals, and stirring technique.
- Ghirardelli: Tempering Chocolate — explains tempering basics and chocolate handling.

