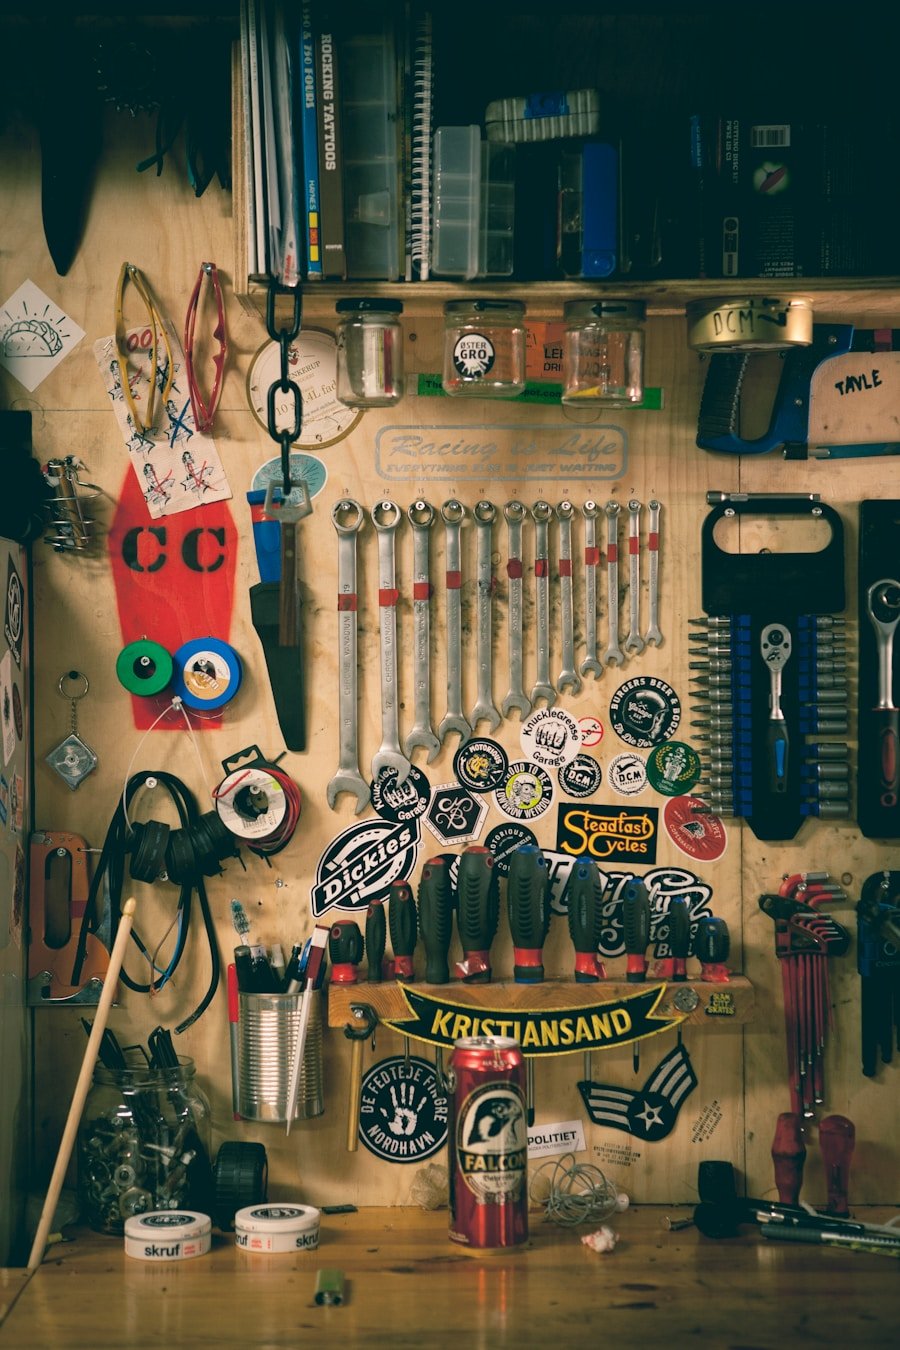
Pegboards are one of the easiest ways to turn a messy wall into useful storage. You can use them in a garage, workshop, craft room, kitchen, laundry room, office, or utility closet. With the right board, hooks, shelves, bins, and layout, a pegboard keeps your tools and supplies visible, easy to reach, and simple to put back after each use.
The best pegboard setup starts with your space and the items you need to organize. A small craft board may only need light hooks and baskets, while a garage tool wall needs stronger material, secure mounting, and heavier-duty accessories. This guide walks you through choosing a pegboard, arranging tools, using accessories, and keeping the system useful over time.
Quick Answer
To organize tools with a pegboard, choose a board strong enough for your items, mount it securely to wall studs or proper anchors, group similar tools together, keep daily-use tools at eye level, and add hooks, shelves, bins, labels, or outlines so every item has a clear home.
Key Takeaways
- Pegboards are versatile and customizable organization systems that work in garages, workshops, craft rooms, kitchens, offices, and laundry spaces.
- Choose the size, material, thickness, and mounting method based on your wall space and the weight of the items you plan to store.
- Essential pegboard accessories include hooks, bins, shelves, baskets, magnetic strips, holders, and labels.
- Arrange tools by type, task, and frequency of use so the items you grab most often stay at eye level and within easy reach.
- Review your pegboard regularly, remove items you no longer use, and update accessories as your storage needs change.
At a Glance
| Best For | Tools, craft supplies, kitchen items, gardening gear, office supplies, and small workshop accessories |
| Difficulty | Easy to moderate, depending on board size and wall type |
| Tools Needed | Tape measure, level, pencil, drill, screws, wall anchors or studs, pegboard spacers, hooks, bins, and shelves |
| Setup Tip | Lay out your tools on the floor first, then copy that layout onto the pegboard before hanging everything. |
Choosing the Right Pegboard for Your Space
Selecting the right pegboard starts with three basic questions: where will it go, what will it hold, and how often will you use those items? The dimensions of the pegboard should match your available wall space and the volume of tools or supplies you want to store. For instance, a small pegboard measuring about 2 feet by 4 feet may work well in a compact kitchen, laundry area, or craft corner. A larger board or multiple panels may be better for a garage, workshop, or tool-heavy storage wall.
The thickness and strength of the board matter as much as the size. Thicker boards can support more weight and are less likely to bend, bow, or crack when loaded with tools. If you plan to hang heavier items, avoid choosing a board based on appearance alone. Think about the total weight of the items you want to hang, the strength of the hooks, and how securely the board will attach to the wall.
Material choice is another important factor. Wooden pegboards offer a classic look and can be painted or stained to match your room. They are a good fit for craft supplies, small tools, kitchen items, and light household storage. Metal pegboards are more durable and often better for garages or workshops because they can support heavier tools and resist wear. Plastic pegboards are lightweight and moisture-resistant, which makes them useful in basements, laundry rooms, utility areas, and other spaces where humidity may be a concern.
Note: A pegboard needs space behind the panel so hooks can slide into the holes properly. Use spacers, furring strips, or a pegboard mounting kit instead of attaching the board flat against the wall.
Best Pegboard Materials and When to Use Them
Each pegboard material has strengths and trade-offs. Matching the material to the room helps your setup last longer and work better.
| Pegboard Material | Best Use | Main Benefit | Watch Out For |
|---|---|---|---|
| Wood or hardboard | Craft rooms, offices, kitchens, light workshop storage | Affordable, easy to paint, and simple to customize | May not hold heavy tools without strong mounting and support |
| Metal | Garages, workshops, tool walls, heavy-duty storage | Strong, durable, and better for heavier items | Usually costs more and may need matching accessories |
| Plastic | Laundry rooms, basements, utility closets, light storage areas | Lightweight and resistant to moisture | Can flex under heavier loads |
Essential Tools for Pegboard Organization

To use a pegboard well, you need more than the board itself. Hooks are the most basic part of any pegboard setup. They come in different lengths, shapes, and strengths, so choose them based on what each hook needs to hold. Small straight hooks can hold scissors, measuring tapes, or light hand tools. Longer hooks can hold rolls of tape, extension cords, or small bundles. Heavier tools may need double hooks, locking hooks, or brackets made for extra support.
Shelves can make your pegboard much more useful. They give you a place for items that cannot hang well, such as small containers, jars, paint cans, glue bottles, cleaning supplies, or decorative pieces. Shelves also help break up the wall visually, so your pegboard does not look like a crowded field of hooks.
Magnetic strips are useful for small metal tools such as drill bits, scissors, tweezers, wrenches, or screwdrivers. Bins and baskets work well for screws, nails, craft beads, sanding pads, zip ties, batteries, glue sticks, and other small items that would otherwise disappear in a drawer. Labels can make the whole system easier to maintain because they show exactly where each item belongs.
How to Plan Your Pegboard Layout Before You Hang Tools
A good pegboard layout saves time every time you work. Before you start hanging hooks, gather everything you want to store and sort it into groups. Put screwdrivers with screwdrivers, pliers with pliers, painting tools with painting tools, and craft supplies with similar supplies. This simple step helps you see how much space each group needs.
Next, decide which items deserve the easiest spots. Tools you use every week should sit near eye level or between shoulder and waist height. Items you only use once in a while can go higher, lower, or toward the edge of the board. If more than one person will use the pegboard, keep sharp or heavy tools away from areas where children can reach them.
You can also trace tool outlines on the pegboard or add labels below each hook. This makes cleanup faster because you can see what is missing and where each item goes. In a garage or shared workshop, outlines and labels also help everyone follow the same system.
Pro Tip: Arrange the pegboard on the floor before mounting accessories. Place each tool where you want it, take a photo, then use that photo as your map when you build the wall layout.
Tips for Arranging Tools on a Pegboard
| Tool | Recommended Arrangement |
|---|---|
| Screwdrivers | Hang vertically with handles facing down so you can grab the right size quickly. |
| Pliers | Hang horizontally or on angled hooks with handles facing the same direction. |
| Wrenches | Group by size and hang vertically with the smallest and largest ends easy to compare. |
| Hammer | Hang with the head facing up or supported by a double hook. |
| Tape Measure | Hang on a dedicated hook near pencils, levels, and layout tools. |
| Drill Bits and Small Parts | Store in labeled bins, small jars, or divided containers attached to the board. |
| Extension Cords | Coil loosely and hang on longer hooks to prevent tangles. |
Arranging tools on a pegboard requires thoughtful planning to maximize efficiency and accessibility. One effective strategy is to group similar items together based on function or usage. For example, gardening tools can occupy one section of the board, painting supplies can sit in another, and basic repair tools can stay near the center. This makes it easier to find what you need and creates a cleaner, more organized look.
Height matters too. Frequently used items should sit at eye level or within easy arm’s reach. Less commonly used tools can go higher or lower on the board. Heavy tools should sit lower when possible, especially in a garage or family space. That way, they are easier to lift safely and less likely to fall from a high position.
Color-coded hooks, labels, and outlines can further streamline organization. You might use one color for woodworking tools, another for gardening tools, and another for craft supplies. You can also label shelves and bins by task, such as “sanding,” “painting,” “fasteners,” or “measuring.” These small details make the system easier to use and easier to reset after a project.
Warning: Do not overload a pegboard or hang heavy power tools from weak hooks. Check the board, wall anchors, and accessory weight limits before storing heavy items.
Maximizing Space with Pegboard Accessories
To get the most from your pegboard setup, use accessories that match the items you store. Hooks handle basic tools, but shelves, bins, cups, baskets, and specialty holders turn the board into a complete storage system. A pegboard can hold more than hammers and screwdrivers when you use vertical space wisely.
One simple way to maximize space is to use multiple pegboard panels side by side or stacked vertically. This creates an expanded organization zone without taking up floor space. It works especially well in small garages, craft rooms, laundry rooms, and home offices where every inch matters.
Tiered shelves can also help you use vertical space without burying small items behind larger ones. Clear containers are useful because you can see screws, nails, beads, clips, or craft supplies at a glance. Baskets work well for bulkier items such as gloves, sanding blocks, tape rolls, cleaning cloths, and small bottles.
Magnetic strips and tool holders can free up hooks for other items. For example, a magnetic strip can hold small metal tools while bins hold loose hardware below. A cup or pencil holder can keep markers, pencils, paintbrushes, or utility knives upright and easy to grab. By combining different accessories, you can build a pegboard system that stores more while still looking neat.
Smart Pegboard Zones for Different Rooms
A pegboard works best when it reflects the room around it. A garage pegboard should not look the same as a kitchen pegboard or craft-room pegboard. Think in zones, then assign each zone a clear purpose.
Garage or Workshop Pegboard
In a garage, use the strongest board and accessories your budget allows. Group tools by task, such as measuring, cutting, fastening, sanding, electrical work, and gardening. Keep safety gear such as gloves, goggles, and ear protection where you can grab them before starting a project.
Craft Room Pegboard
In a craft room, focus on visibility and small-item storage. Use cups, baskets, small shelves, ribbon rods, and labeled bins. Group supplies by type or color so the board feels inspiring instead of cluttered.
Kitchen Pegboard
In a kitchen, a pegboard can hold pans, utensils, measuring cups, mugs, small baskets, or towels. Choose a finish that fits your decor and avoid overloading the board with items that are hard to clean around.
Laundry Room or Utility Pegboard
In a laundry room, use moisture-resistant materials when possible. Store lint rollers, brushes, small cleaning tools, reusable bags, clothespins, and spray bottles. Keep heavier bottles on shelves instead of hanging them from light hooks.
DIY Pegboard Projects for Custom Organization

For hands-on organizers, a custom pegboard project can be both useful and fun. One popular project involves building a personalized tool organizer tailored to your exact tool collection. Start by measuring your tools, then plan the hook spacing, shelf size, and bin placement around those items. This gives you a setup that fits your real habits instead of forcing your tools into a generic layout.
You can also turn a pegboard into wall art that doubles as storage. Paint the board a bold color, frame it with wood trim, or add decorative shelves and baskets. In a craft room or office, you can combine framed art, inspirational quotes, small plants, and functional hooks to create a pegboard that looks intentional rather than purely utilitarian.
Another simple DIY idea is a mobile pegboard station. Mount a pegboard panel to a rolling cart or sturdy frame, then use it for tools, craft supplies, or cleaning items. This works well when you need storage that can move from one work area to another.
You can also make mini pegboards for small spaces. A small panel inside a cabinet door can hold measuring spoons, scissors, keys, cords, or small cleaning tools. A narrow strip near a desk can hold headphones, chargers, pens, and office supplies without taking up desktop space.
Maintaining and Updating Your Pegboard System
Once your pegboard organization system is in place, regular maintenance keeps it useful. As your tools, hobbies, or household needs change, your layout may need to change too. A pegboard that worked last year may feel crowded today if you have added new tools or stopped using old ones.
Set a simple review schedule. Every few months, remove items you no longer use, return misplaced tools, tighten loose hooks, and check whether bins or shelves are still in the right spots. If a section always becomes messy, that is a sign the layout does not match how you actually use the space.
Updating your pegboard can also improve its appearance. Wooden boards may benefit from fresh paint or stain. Metal boards may need dusting or cleaning. Plastic bins can crack or discolor over time, so replace damaged accessories before they make the whole setup harder to use.
Labels, outlines, and zones should also change when your needs change. If you start a new hobby, buy new tools, or move supplies from another room, adjust the pegboard instead of squeezing everything into the old system. The goal is not to make the pegboard perfect once. The goal is to keep it practical.
Common Pegboard Mistakes to Avoid
One common mistake is choosing a pegboard that looks good but cannot handle the weight of the items you want to store. A lightweight board may be fine for scissors, ribbon, or kitchen utensils, but it may not be right for hammers, clamps, power tools, or heavy hardware.
Another mistake is skipping layout planning. If you hang tools randomly, the board can become messy within a few days. Grouping tools by task and frequency of use makes the system easier to maintain.
Overcrowding is another problem. A packed pegboard may look efficient at first, but it can be frustrating when tools overlap or fall off. Leave enough space around each item so you can remove and return it without knocking down nearby tools.
Finally, many people forget to plan for growth. Leave a little open space for future tools, extra bins, or seasonal items. A pegboard should make storage easier, not become another overloaded wall.
Real-Life Examples of Effective Pegboard Organization
Many people use pegboards successfully in homes, garages, studios, and workplaces because the system can adapt to different needs. Crafters often use pegboards in studios to keep scissors, ribbons, paints, rulers, and small supplies neatly organized. By grouping materials by type or color, they create an inspiring workspace that supports creativity while reducing clutter.
In garages, homeowners can transform chaotic tool collections into streamlined work zones. One effective setup uses a large metal pegboard for power tools, hand tools, clamps, and safety gear. Labeled bins below the board hold screws, nails, wall anchors, and drill bits. This setup improves workflow because the tools and small parts needed for common projects stay within reach.
A kitchen pegboard can also work well in small homes or apartments. Pots, pans, utensils, measuring cups, and towels can hang on the wall instead of filling drawers and cabinets. With a painted board and matching hooks, the storage can look decorative while still saving space.
In a home office, a pegboard can hold headphones, cords, notebooks, calendars, pens, and small shelves. This keeps the desk surface clear while keeping important items visible. The same idea works in a child’s homework area, as long as sharp or heavy objects are not stored within easy reach.
If you are looking to organize your tools effectively, you may also be interested in learning about the best smart home hubs for beginners. These hubs can help streamline your home automation system and make your life easier. Check out this article to find out more about how you can incorporate smart technology into your home.
Related Guides
Frequently Asked Questions
What is a tool pegboard?
A tool pegboard is a storage system made from a board with evenly spaced holes. You insert hooks, shelves, bins, baskets, and holders into those holes to hang and organize tools, supplies, and equipment.
What are the benefits of using a tool pegboard?
A tool pegboard keeps tools organized, visible, and easy to reach. It can save drawer space, reduce clutter, improve workflow, and help you return each item to the right spot after every project.
How do you effectively use a tool pegboard?
To use a tool pegboard effectively, plan your layout before hanging tools, group similar items together, use the right hooks and accessories, place frequent-use items at eye level, and update the layout as your needs change.
What types of tools can be stored on a tool pegboard?
Most hand tools can be stored on a tool pegboard, including hammers, screwdrivers, pliers, wrenches, tape measures, clamps, scissors, and small saws. Some power tools and accessories can also be stored if the board, wall mounting, and hooks are strong enough.
Are there any tips for maximizing the effectiveness of a tool pegboard?
Yes. Group similar tools together, label or outline tool placements, use shelves and bins for smaller items, avoid overcrowding the board, keep heavy tools secure, and declutter the setup regularly.
What should I not hang on a pegboard?
Avoid hanging items that exceed the board, hook, or wall-mounting weight capacity. Very heavy power tools, large containers of liquid, and sharp tools placed within a child’s reach may be unsafe unless the setup is designed for them.
How do I keep pegboard hooks from falling out?
Use locking pegboard hooks, hook clips, zip ties, or pegboard accessories designed to stay in place. Also make sure the hook size matches the hole size and that the board has enough space behind it for hooks to seat correctly.

4 thoughts on “Maximizing Tool Organization with a Pegboard”