ND8, ND16, and ND32 are fixed neutral-density filters that reduce incoming light by 3, 4, and 5 stops respectively. ND8 is useful when you need modest light control, ND16 provides one additional stop for brighter conditions, and ND32 gives the strongest reduction of the three. The correct filter depends on the actual exposure you need—not simply whether the day looks cloudy or sunny.
Quick Answer
Choose ND8 for 3 stops of light reduction, ND16 for 4 stops, and ND32 for 5 stops. ND16 is a useful middle strength, but no single filter fits every scene. Set the shutter speed, aperture, and ISO you want first, then choose the ND strength that brings the exposure back into range.
Key Takeaways
- ND8: 3 stops, 12.5% transmission, useful when only moderate light reduction is required.
- ND16: 4 stops, 6.25% transmission, giving one stop more control than ND8.
- ND32: 5 stops, 3.125% transmission, useful when stronger reduction is needed in bright conditions.
- For video, choose shutter speed from the frame rate first, then use ND to achieve the desired exposure.
- A plain ND filter controls brightness; use a circular polarizer or ND/PL filter when reflection and glare control is also required.
Which ND Filter Should You Choose?
The easiest way to compare ND8 vs ND16 vs ND32 is by their filter factors and stop reductions. Tiffen lists ND8, ND16, and ND32 as 3-stop, 4-stop, and 5-stop filters.
| Filter | Stops | Light Transmitted | Light Blocked | Typical Starting Point |
|---|---|---|---|---|
| ND8 | 3 stops | 12.5% | 87.5% | Softer daylight or modest exposure reduction |
| ND16 | 4 stops | 6.25% | 93.75% | Bright daylight or when ND8 is one stop too weak |
| ND32 | 5 stops | 3.125% | 96.875% | Strong daylight or when four stops are insufficient |
The lighting descriptions are starting points rather than fixed rules. Lens aperture, ISO, shutter speed, frame rate, subject movement, clouds, reflected light, and the creative result you want can all change which filter is appropriate. Freewell likewise describes lower ND strengths for softer daylight and stronger filters for brighter conditions while noting that camera settings affect the final choice.
ND8 transmits 1/8 of the incoming light, ND16 transmits 1/16, and ND32 transmits 1/32. Every doubling of the filter factor adds one stop of light reduction.
ND8: Best ND Filter for Mild Light
An ND8 filter reduces exposure by 3 stops and transmits 12.5% of the light that would otherwise reach the sensor. It is useful when you need some light reduction but ND16 or ND32 would force the exposure too dark.
| Application | Benefit |
|---|---|
| Landscape photography | Allows a slower shutter without changing the scene brightness excessively |
| Moving water or clouds | Makes longer exposures easier in daylight |
| Wide apertures | Helps maintain shallow depth of field in bright conditions |
| Video | Can help maintain a chosen shutter speed when the unfiltered image is too bright |
The effect of three stops is predictable. If an unfiltered exposure is correct at 1/125 second, adding ND8 while keeping ISO and aperture unchanged would require approximately 1/15 second to maintain equivalent exposure. That is eight times longer—not automatically one second.
This is why ND8 works well when you need a relatively small adjustment. Nikon notes that neutral-density filters can make longer shutter speeds and wider apertures practical in bright light.
ND16: A Useful Middle Strength
ND16 reduces exposure by 4 stops. It transmits 6.25% of incoming light and blocks 93.75%.
That makes ND16 exactly one stop stronger than ND8 and one stop weaker than ND32. For many daylight situations, this middle position makes it useful when three stops are not enough but five stops would be excessive.
Balanced Light Reduction
Four stops of reduction gives photographers and videographers more freedom to use slower shutter speeds or wider apertures without immediately overexposing the image.
For example, if your meter indicates 1/1000 second without a filter, an ND16 filter gives an equivalent exposure around 1/60 second when aperture and ISO remain unchanged:
- 1/1000 → 1/500 = 1 stop
- 1/500 → 1/250 = 2 stops
- 1/250 → 1/125 = 3 stops
- 1/125 → about 1/60 = 4 stops
This is particularly useful when the desired shutter speed or aperture is more important than simply letting the camera choose a faster exposure.
Note: A standard ND16 filter reduces overall light but does not specifically remove reflections from water or glass. For reflection control, use a circular polarizer or an ND/PL filter. Nikon identifies polarizing filters as the filter type designed to reduce reflections from water and glass.
Versatile for Many Scenes
ND16 can work for landscapes, outdoor portraits, video, and other daylight shooting when four stops match the exposure problem in front of you.
For portraits, the filter can help you keep a wide aperture for a shallow depth of field even when the available light would otherwise force you to stop the lens down. Nikon specifically recommends neutral-density filtration when bright sunlight prevents the wider aperture needed for shallow-depth-of-field video.
It should not automatically be considered the correct filter for every sunny day, however. Always check the exposure meter or histogram after mounting it.
ND32: Best When You Need Five Stops
An ND32 filter reduces incoming light by 5 stops. It transmits 1/32 of the original light, or approximately 3.125%, while blocking about 96.875%.
The extra stop over ND16 can be valuable in strong daylight, on highly illuminated open landscapes, or whenever the shutter speed or aperture you want still produces overexposure with a four-stop filter.
For still photography, five stops can extend shutter speed enough to increase motion blur in water, clouds, traffic, or other moving subjects. For portraits, it can allow a wider aperture than would otherwise be possible at the camera’s minimum ISO.
For video, ND32 can help maintain a selected cinematic shutter speed in bright conditions without forcing the aperture closed simply to control exposure.
A good filter should minimize unwanted color cast and loss of detail, but no ND strength automatically guarantees better color, contrast, or sharpness. Those characteristics depend heavily on the quality of the glass, coatings, manufacturing, and shooting conditions.
ND8 vs ND16 vs ND32 for Video
For video, choose the frame rate and intended shutter behavior first. Then select the ND filter that produces the correct exposure at that shutter speed, aperture, and ISO.
The commonly used 180-degree shutter guideline sets exposure time at approximately twice the frame rate. RED’s camera documentation gives the 180-degree calculation as shutter speed = 1/(frame rate × 360/shutter angle).
| Frame Rate | Approx. 180° Shutter |
|---|---|
| 24 fps | 1/48 sec; 1/50 is commonly used when 1/48 is unavailable |
| 25 fps | 1/50 sec |
| 30 fps | 1/60 sec |
| 60 fps | 1/120 sec; 1/125 may be the nearest available setting |
Nikon similarly gives examples of roughly 1/50 second at 24 fps and 1/60 second at 30 fps when seeking natural-looking motion blur.
| Filter | Light Reduction | When It May Fit |
|---|---|---|
| ND8 | 3 stops | The target video exposure is about three stops too bright |
| ND16 | 4 stops | The target exposure is about four stops too bright |
| ND32 | 5 stops | The target exposure is about five stops too bright |
Pro Tip: For video, lock your frame rate, shutter speed, and preferred aperture before choosing the ND. If the meter says the image is four stops overexposed, ND16 is the logical starting point. If it is five stops over, start with ND32.
Choose the Right ND for How You Shoot
Instead of choosing an ND filter only from weather descriptions, use your desired exposure as the guide.
1. Set Your Creative Settings First
Choose the settings that matter to the image:
- Photography: Decide whether shutter speed or aperture is the priority.
- Portraits: Choose the aperture needed for the desired depth of field.
- Long exposures: Choose the shutter time needed for the amount of motion blur you want.
- Video: Set frame rate and shutter speed first, then choose aperture and ISO.
2. Check How Far the Exposure Is Off
Take a meter reading without the filter. If your preferred settings make the scene three stops too bright, use ND8. Four stops points to ND16, while five stops points to ND32.
3. Recheck the Histogram After Mounting the Filter
Real light changes continuously. Clouds, reflections, camera direction, and the position of the sun can alter exposure even when the filter remains unchanged. Check the meter and histogram rather than relying only on a weather label.
When ND32 Is Not Strong Enough
ND32 is only a five-stop filter. Very long daytime exposures may require much greater reduction, such as ND64, ND1000, or another stronger fixed ND. Nikon notes that stronger neutral-density filters are commonly used when very slow shutter speeds are needed in daylight.
Fixed ND vs Variable ND
ND8, ND16, and ND32 are normally discussed as fixed-density filters. Each supplies one predictable amount of light reduction.
A variable ND lets you adjust density across a range, which is convenient when light changes quickly or when you want to avoid repeatedly swapping filters. Nikon notes that variable ND filters can cover several stops of adjustment.
Fixed filters remain useful when you want predictable density, simple operation, and no variable-ND cross-pattern behavior at extreme settings. Variable filters are convenient for changing conditions, especially video.
[Amazon Products Picked for You]

【Import Optical Glass】Crafted from premium AGC optical glass with 8 multi-layer coatings, this ND filter reduces reflections and glare, ensuring superior image quality.
【Import Optical Glass】Crafted from premium AGC optical glass with 8 multi-layer coatings, this ND filter reduces reflections and glare, ensuring superior image quality.
【Import Optical Glass】Crafted from premium AGC optical glass with 8 multi-layer coatings, this ND filter reduces reflections and glare, ensuring superior image quality.
ND Filters vs CPL and ND/PL Filters
A plain ND filter and a polarizing filter solve different problems.
- ND: reduces the total amount of light entering the lens.
- CPL: controls polarized light and can reduce reflections from non-metallic surfaces such as water and glass.
- ND/PL: combines neutral-density reduction with polarization.
This distinction matters when photographing reflective water, vehicles, windows, snow, or wet foliage. If controlling reflections is part of the goal, an ND/PL or separate CPL may be more appropriate than a plain ND.
[Amazon Products Picked for You]

【Shoot Like DSLR】This clip-on CPL filter kit from K&F CONCEPT includes a K&F CONCEPT Nano-K series CPL filter and a clip for phone, it is fit for travel shots, street photography, outdoor landscape, and time-lapse photography, Instagram, weddings, vacations, and other fun shooting, etc. For reflection reduction, keep the lens at 30–40° to the surface. For sky enhancement, shoot sideways (90°) to the sun. Adjust as needed. NOTE:Not compatible with iPhone 18 Pro & 18 Pro Max.

Circular polarizer--one of the most popular special-effect filters

Enhance Color & Contrast: CPL filter can enhance the color and contrast, and remove non-metallic reflections such as water, and glass to show the true color, especially used in white cloud and blue sky photography.
Best ND8, ND16, and ND32 Filters to Buy: What to Look For
The correct density is only part of the buying decision. A filter should also fit the camera or lens correctly and maintain good optical performance.
Tiffen and Freewell currently sell products using the conventional ND8 = 3-stop, ND16 = 4-stop, and ND32 = 5-stop labeling. Rather than choosing only by brand name, compare the following:
- Correct size or mount: For threaded lenses, match the filter to the lens’s filter diameter. Drone and action-camera filters must match the exact camera model.
- Optical neutrality: A good ND filter should minimize unwanted color shifts.
- Coatings: Multi-coated surfaces can help manage reflections and make cleaning easier.
- Frame thickness: Very thick filter rings may cause mechanical vignetting on some ultra-wide lenses.
- Image sharpness: Poor optical surfaces can reduce detail regardless of whether the filter is ND8, ND16, or ND32.
- Polarization: Decide whether you need plain ND or combined ND/PL functionality.
Freewell’s current guidance also lists ND8, ND16, and ND32 as 3-, 4-, and 5-stop strengths, providing another manufacturer reference for the standard labeling.
[Amazon Products Picked for You]
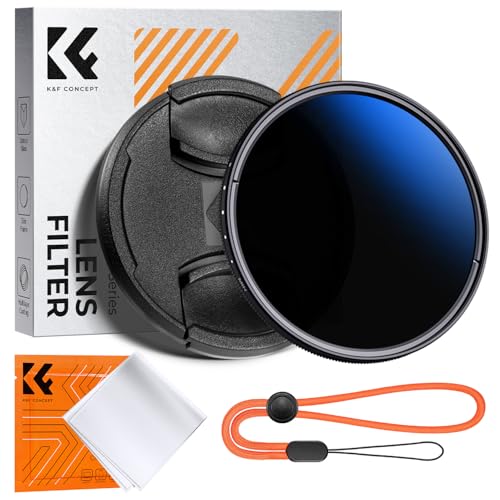
Import Optical Glass: Crafted from premium AGC optical glass with an astonishing 18 multi-layer coatings, this ND filter reduces reflections and glare, ensuring superior image quality.

【Essential Camera Filter Set】 This content creator essential camera lens filter set includes a UV, CPL, and variable ND filter to improve your shots. Made of multicoated glass to resist water, fingerprints, and scratches

【Designed for Mini 5 Pro】 Compatible with DJI Mini 5 Pro Drone, Mini 5 Pro Camera Drone Fly More Combo, and Combo Plus Accessories for professional aerial photography and video recording as content creator essential and influencer must have gear
Frequently Asked Questions
When should I use ND16 instead of ND32?
Use ND16 when you need about four stops of reduction and ND32 when you need about five. ND32 is exactly one stop stronger, so it transmits half as much light as ND16. Check the exposure at your desired shutter speed, aperture, and ISO rather than choosing only from the weather.
Is an ND8 filter enough?
ND8 is enough when three stops of reduction puts the exposure where you want it. If the image remains one stop too bright, ND16 is a better fit; if it remains two stops too bright, ND32 provides five stops total.
How do I know which ND filter to buy?
Start with the shutter speed, aperture, and ISO you want. Measure how many stops too bright the image is without filtration. Choose ND8 for three stops, ND16 for four, or ND32 for five, then confirm that the filter size or camera-specific mount is compatible with your equipment.
What is the difference between ND8 and ND16?
ND8 reduces exposure by three stops and transmits 12.5% of incoming light. ND16 reduces exposure by four stops and transmits 6.25%. ND16 is therefore one stop stronger and passes half as much light as ND8.
Does an ND filter reduce glare and reflections?
A plain ND filter primarily reduces overall brightness. A circular polarizer is the filter designed to control polarized reflections from surfaces such as water and glass. An ND/PL filter combines both functions.
What shutter speed should I use for video with an ND filter?
If you follow the conventional 180-degree shutter guideline, use approximately 1/48 or 1/50 second at 24 fps, 1/50 at 25 fps, 1/60 at 30 fps, and 1/120 or the nearest available 1/125 at 60 fps. Choose the ND filter afterward to obtain correct exposure at that shutter speed.
Conclusion
In the ND8 vs ND16 vs ND32 comparison, the difference is straightforward: ND8 cuts 3 stops, ND16 cuts 4, and ND32 cuts 5. That means 12.5%, 6.25%, and 3.125% light transmission respectively.
ND8 is useful when modest reduction is enough, ND16 provides one additional stop of control, and ND32 is the strongest of these three. For the most reliable choice, set the shutter speed, aperture, ISO, and frame rate you actually want and then select the filter that corrects the remaining overexposure. Matching filter strength to the measured exposure helps you achieve controlled motion blur, usable apertures, and consistent results without relying on vague weather labels.
Sources
- Tiffen — GoPro HERO ND Filter Kit — confirms ND8 as 3 stops, ND16 as 4 stops, and ND32 as 5 stops.
- Nikon — Guide to Lens Filters — explains using ND filters for slower shutter speeds and wider apertures.
- Nikon — Time-Lapse Tips and Tricks — provides practical frame-rate and shutter-speed examples and explains ND use in bright light.
- RED — Exposure and Shutter Documentation — documents shutter-angle calculations and the 180-degree relationship.
- Nikon — Polarizing Filters — explains the use of polarizers for glare and reflection control.
- Freewell — ND Filter Guidance — current manufacturer guidance for ND8, ND16, and ND32 strengths and lighting conditions.
