Toyota Camry Brake Lights Not Working: Start Here
Last updated: September 22, 2026 · Author: [VERIFY: add real author/byline and relevant automotive credentials]
When a Toyota Camry’s brake lights stop working, start by checking the failure pattern. One failed outer lamp usually points to that bulb, LED assembly, socket, connector, or local wiring. If all three brake lights are out, focus first on the correct stop-lamp fuse, the brake pedal switch, its power supply, and shared circuit wiring. Because Camry designs vary by model year and trim, confirm the exact fuse, lamp type, and service procedure in the Toyota owner’s manual for your vehicle.
If you mean the red or yellow warning on the instrument panel rather than the exterior rear stop lamps, see the Toyota Camry brake-system warning-light guide. The dashboard warning system and the exterior brake lamps are different systems and require different diagnosis.
Quick Answer
Check which brake lights fail, then inspect the correct fuse and the affected bulb, LED assembly, socket, and connector. If all brake lights are out, test the brake light switch and circuit voltage. If the tail lights work but the brake lights do not, do not assume the rear lamp circuit is healthy because the stop-light function may use a separate filament or circuit. Do not “reset” the lights by disconnecting the battery; exterior brake lights have no normal reset procedure.
2009 Camry recall check: Certain model-year 2009 Camrys manufactured from July 1, 2008 through February 28, 2009 were included in NHTSA Campaign 12V-091 for a stop-lamp-switch defect. The condition could make the brake lights inoperative and could also be associated with warning lamps, a no-start condition, or a shift lever that will not move from Park. This does not mean every 2009 Camry is affected. Check the vehicle’s VIN with the Toyota recall lookup and NHTSA recall lookup. The official campaign acknowledgement is available from NHTSA Campaign 12V-091.
Key Takeaways
- Use the failure pattern—one lamp, both outer lamps, the center lamp, all lamps, tail lights working without brake lights, or lights stuck on—to narrow the fault.
- Fuse names, locations, bulb numbers, switch circuits, and LED designs vary by Camry model year and trim.
- Certain 2009 Camrys were recalled for a stop-lamp-switch defect under NHTSA Campaign 12V-091; verify eligibility by VIN.
- Test continuity only on a de-energized, isolated component; use DC-voltage testing when checking a powered circuit.
- Replace a fuse only with the same amperage. A replacement fuse that blows again indicates a fault that must be found.
- Do not drive on public roads when the brake lights cannot reliably warn traffic behind you.
At a Glance
| Time Required | About 10–30 minutes for basic checks; longer for circuit diagnosis or wiring repair |
| Difficulty | Beginner for inspection and replaceable bulbs; intermediate for electrical testing |
| Tools Needed | Owner’s manual, helper or phone camera, fuse puller, correct bulb if serviceable, gloves, trim tool or screwdriver, and a digital multimeter or automotive test light |
| Cost | Usually low for a fuse or replaceable bulb; potentially much higher for a switch, harness repair, or sealed LED lamp assembly |
Warning: Do not drive on public roads with inoperative brake lights. Park securely, set the parking brake, keep the transmission in Park, and prevent the vehicle from moving while another person operates the pedal. Never use a jumper wire as a permanent repair or drive with the brake light switch bypassed.
First-hand evidence: [VERIFY: add a real diagnostic observation from a specific Camry that was actually inspected or tested, including model year, which lamps failed, what voltage/fuse/switch check was performed, and the confirmed repair. Do not publish a fabricated testing claim.]
How Do You Diagnose Toyota Camry Brake Lights That Are Not Working?
Start with a complete lamp check before removing parts. Ask a helper to watch the rear of the car while you press the brake pedal, or position a phone camera where it can record all three stop lamps. Check the left outer lamp, right outer lamp, and center high-mounted stop lamp separately.
Use the Failure Pattern to Narrow the Cause
| Symptom | Most Useful First Checks |
|---|---|
| One outer brake light is out | Bulb or LED assembly, socket, connector, moisture, and local wiring |
| Both outer lamps are out, but the center lamp works | Outer bulbs or LED assemblies, shared rear-lamp connector, splice, ground, or model-specific rear lighting circuit |
| Center lamp is out, but outer lamps work | Center lamp, LED unit, connector, or branch wiring |
| Tail lights work, but brake lights do not | STOP/brake-light fuse, brake light switch, stop-lamp circuit, brake filament on dual-filament bulbs, or model-specific control wiring |
| All brake lights are out | Correct stop-lamp fuse, brake light switch, switch power, connector, shared circuit wiring, and recall status if the vehicle is an affected 2009 Camry |
| Brake lights stay on | Pedal return, switch position or adjustment, switch plunger, pedal contact pad where equipped, and a shorted switch circuit |
| Brake light fuse blows again | Shorted socket, crushed harness, water intrusion, wrong bulb, trailer wiring, or aftermarket accessory wiring |
| Older Camry has a rear-lamp warning plus multiple lamp faults | Check whether the model-specific wiring diagram includes a light-failure sensor, then test that circuit only after the fuse, lamps, switch, power, and ground checks |
Follow This Diagnostic Order
- Confirm the exact model year and lamp design. Look up the owner’s manual by year or VIN. Some Camrys use replaceable bulbs, while others use LED lamp assemblies that are serviced differently.
- Check recall status when relevant. If you have a 2009 Camry, check the VIN for NHTSA Campaign 12V-091 rather than assuming the stop-lamp-switch recall applies to every car from that model year.
- Check every brake lamp. Record which lamps work, which fail, whether the tail lamps still work, and whether the brake lamps stay on after the pedal is released.
- Inspect the correct fuse. Use the fuse chart for your exact vehicle; do not assume every Camry uses the same label or location.
- Inspect the affected lamp. On a bulb-equipped car, check the correct filament, socket, and terminals. On an LED-equipped car, inspect the connector and follow the model-specific service procedure.
- Inspect the brake light switch and pedal contact. Confirm that the switch is secure and its plunger changes position as the pedal moves.
- Test for power and ground. Use a multimeter set to DC volts or an appropriate test light. Follow the wiring diagram because connector pins and circuit control vary by year.
- Inspect wiring and connectors. Look for corrosion, water, pin damage, rubbed insulation, previous repairs, trailer wiring, or accessories tied into the stop-lamp circuit.
- Verify the repair. Test all brake lamps several times, with the exterior lights both off and on, before returning the car to service.
Pro Tip: A dual-filament bulb can still illuminate as a tail light while its brighter brake-light filament has failed. Do not assume the brake circuit is good just because the rear lamp glows when the headlights are on.
What Causes Toyota Camry Brake Lights to Stop Working?
There is no single cause that is most common for every Camry generation. The failure pattern usually points to the most useful area to test first:
- Failed replaceable bulb: More likely when one outer lamp is out on a bulb-equipped model.
- Failed or damaged LED lamp assembly: Possible on models that do not use a serviceable stop-lamp bulb.
- Blown fuse: More likely when every stop lamp on the protected circuit is out. A fuse is a result as well as a fault indicator; repeated failure means the underlying short or overload remains.
- Brake light switch fault or misadjustment: Can cause all lamps to stay off or remain on, depending on the failure.
- Socket or connector corrosion: Often produces an intermittent lamp, heat damage, discoloration, or a lamp that changes when the connector is moved.
- Open, shorted, or damaged wiring: Useful places to inspect include trunk-lid flex points, rear body harness routes, collision-repair areas, and locations modified for trailer or accessory wiring.
- Poor ground: Can cause dim lamps, backfeeding, unusual interaction with turn signals or tail lights, or intermittent operation.
- Light-failure sensor on some older configurations: Older Camry wiring diagrams may route the rear stop-lamp monitoring circuit through a light-failure sensor. Check this only when the wiring diagram for the exact model shows that component.
- Control-module or network issue: Possible on some model years, but it should be considered only after basic power, ground, fuse, switch, lamp, and wiring checks are completed using the correct wiring diagram.
How Does the Brake Light Switch Affect Camry Brake Lights?
The brake light switch is mounted at or near the brake pedal and changes electrical state when the pedal moves. Its exact circuit design varies by model year. In addition to commanding or supplying stop-lamp information, one or more switch circuits may provide brake-pedal information to other vehicle systems. That is why a switch or related circuit problem can sometimes appear together with shift-interlock, cruise-control, stability-control, or diagnostic-code symptoms.
Do not replace the switch solely because all lamps are out. First confirm that the correct fuse has power, the switch connector is secure, and the switch receives and sends the expected signal according to the wiring diagram. For certain 2009 Camrys, also check whether NHTSA Campaign 12V-091 applies before paying for a stop-lamp-switch repair.
How to Test the Brake Light Switch Safely
- Inspect the switch body, bracket, connector, and the point where the switch contacts the pedal.
- Confirm that the pedal returns fully and that the switch plunger moves normally.
- With the circuit configured as the service information specifies, use a multimeter on DC volts to check the input and switched output while the pedal is released and pressed.
- If the switch is removed for a continuity test, de-energize and isolate it first. Compare the readings in both plunger positions with the model-specific specification.
- If the lights stay on, check switch installation or adjustment and the pedal contact pad where that design is used.
A temporary jumper can create misleading results, damage a module or connector, defeat other switch functions, or leave the brake lights on continuously. Voltage or continuity testing with the correct diagram is safer and more informative.
How Do You Replace a Toyota Camry Brake Light Bulb?
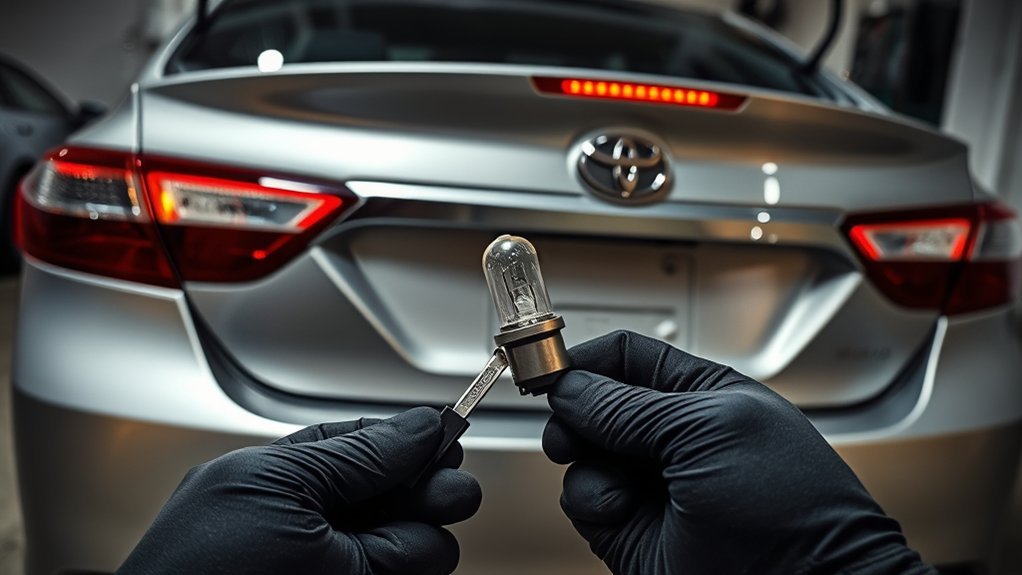
Use this procedure only if the owner’s manual identifies a replaceable stop-lamp bulb. If the stop lamp uses a sealed or integrated LED assembly, do not force the housing apart; follow Toyota’s model-specific service information or have the assembly diagnosed professionally.
Tools Needed for Replacement
- The exact replacement bulb listed for the model year, trim, and lamp position
- Gloves or a clean cloth to keep the bulb and socket clean
- A plastic trim tool, screwdriver, or small socket set if required by the access-panel design
- A flashlight
- Optional digital multimeter for checking socket voltage and ground
Toyota advises owners to select the exact vehicle when using its manuals and parts resources. A bulb that physically fits is not automatically the correct wattage or circuit load.
Step-by-Step Replacement Process
- Park the car, set the parking brake, turn off the ignition and exterior lights, and open the trunk.
- Locate the access panel or trunk trim behind the failed lamp. Remove only the fasteners required by the owner’s manual.
- Identify the correct socket. Do not pull on the wires.
- Release the socket as directed—many twist counterclockwise, but the design varies.
- Remove the old bulb and inspect the socket for green or white corrosion, darkened terminals, melted plastic, moisture, or weak terminal tension.
- Install the exact replacement bulb without forcing it. Refit the socket and make sure its seal seats correctly.
- Test the brake lamp before reinstalling all trim.
- Reassemble the access panel and perform a final three-lamp check.
| Step | Action | Check |
|---|---|---|
| 1 | Open the trunk and access the lamp | Use the model-specific trim procedure |
| 2 | Remove the correct socket and bulb | Inspect the socket and seal |
| 3 | Install the exact replacement and test | Verify all three brake lamps |
Note: If a new bulb does not work, do not keep replacing bulbs. Check for voltage at the socket with the pedal pressed, then verify the ground and terminal condition.
Which Fuse Should You Check When Camry Brake Lights Stop Working?
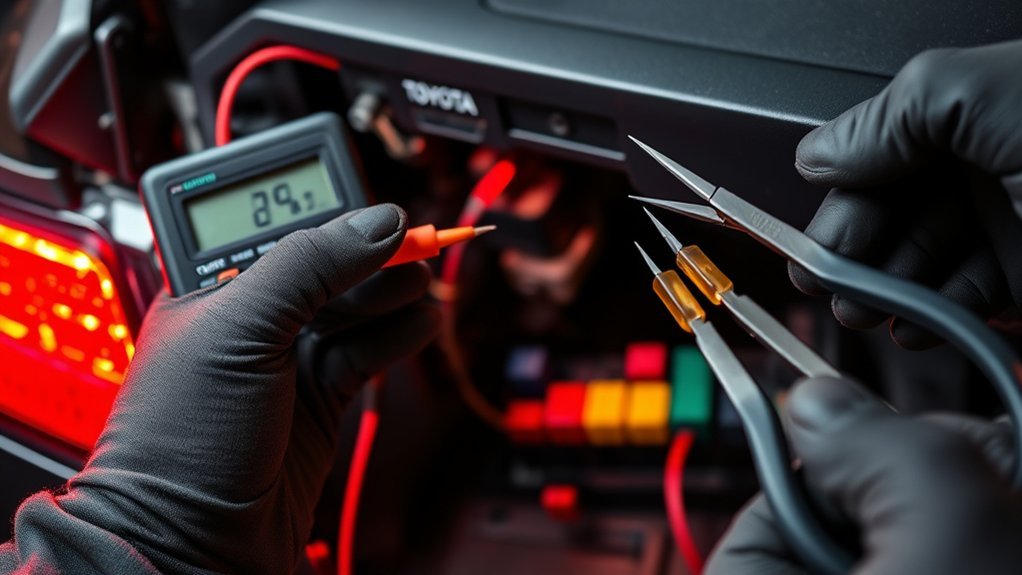
Use the owner’s manual fuse chart for the exact Camry. Some years may use a label such as STOP or STOP LP, while circuit names, fuse ratings, and fuse-box locations can differ. Do not assume the TAIL fuse controls the brake lamps; tail and stop functions are separate on many designs even when they share a housing or bulb. For help identifying the panels, see the Toyota Camry fuse-box diagram guide.
Verified 2003 example: Toyota’s owner’s manual for the 2003 Camry from January 2003 production lists fuse No. 48, labeled STOP, at 15A for the stop lights, high-mounted stoplight, anti-lock brake system, and cruise-control system. Use the official Toyota 2003 Camry owner’s manual and confirm that it matches your vehicle’s production/market configuration before relying on that number.
How to Check a Fuse
- Visual check: Remove the fuse with the vehicle switched off and inspect the element. A visual check can miss a hairline break, so test it if uncertain.
- Continuity check: With the fuse removed and the circuit de-energized, set the multimeter to continuity or low resistance. A good fuse provides continuity; an open fuse does not. Fluke’s continuity-testing guide states that the circuit should be de-energized and the component isolated for this test.
- Powered voltage check: If the fuse has accessible test tabs and the service procedure calls for a live check, use the meter’s DC-voltage setting. Both sides of a good energized fuse should show the supply; power on only one side indicates an open fuse. Follow safe probe placement described in Fluke’s DC-voltage guide.
Replace a blown fuse only with the same amperage listed by Toyota. If you need the basic removal and replacement procedure, see how to replace a fuse in a Toyota Camry.
Warning: If the replacement fuse opens again, stop replacing it. A repeated fuse failure points to a short circuit, damaged component, incorrect bulb, water intrusion, or modified wiring that requires diagnosis.
How Do You Check Camry Brake-Light Wiring and Grounds?
After the fuse, lamp, and switch checks, inspect the circuit from front to rear. Start with connectors because loose pins, moisture, corrosion, heat damage, and incomplete locking are easier to find than a hidden break inside the harness.
Inspect Connectors and Harness Routes
- Look behind the rear lamp for water tracks, green corrosion, burned terminals, or melted plastic.
- Inspect trunk hinges and any harness section that bends when the trunk opens.
- Check areas disturbed by body repair, audio installation, remote-start installation, trailer wiring, or other accessories.
- Confirm that grounds are tight on clean metal and that the wire is not broken beneath the insulation.
- On a hybrid Camry, stay away from orange high-voltage cables and components. Stop-lamp diagnosis belongs to the low-voltage circuit, but hybrid safety procedures still apply.
Older Camrys May Use a Light-Failure Sensor
Some older Camry wiring diagrams include a light-failure sensor in the rear-light monitoring circuit. If an older car has multiple rear-lamp faults or a rear-lamp warning and the basic bulb, fuse, switch, power, and ground checks do not explain the symptom, check the Toyota wiring diagram for that exact model year to see whether a light-failure sensor is present. Do not bypass the module based on a generic online procedure; terminal assignments and circuit layouts can differ.
Use Voltage Testing Before Replacing Parts
With the brake pedal pressed and the circuit energized, check for the expected DC voltage at the lamp connector. If supply voltage is present but the lamp does not work, test the ground path and connector terminal tension. If voltage is missing, move upstream through the circuit using the wiring diagram.
A voltage-drop test under load can reveal corrosion or a weak connection that still passes a simple continuity test. Measure across the suspected connection while the brake lamp is commanded on; an unexpected voltage reading across that connection indicates resistance. Use the service-manual specification rather than assuming one universal limit applies to every circuit.
Continuity testing is useful only after the circuit is de-energized and the wire or component is isolated. Otherwise, parallel paths through modules or other lamps can produce misleading results.
The correct diagnosis follows the circuit: verify the symptom, confirm the fuse and lamp type, test power and ground, then trace the wiring. Replacing parts before testing often adds cost without finding the fault.
What Do Different Toyota Camry Brake-Light Symptoms Mean?
Brake Lights Stay On
If the brake lights remain illuminated with the pedal released, check that the pedal returns fully and that nothing blocks its movement. Inspect the switch mounting, switch plunger, adjustment, and the pedal contact surface or stopper pad where equipped. A shorted switch circuit or damaged wiring can also hold the lamps on. Continuous operation can discharge the 12-volt battery, so correct the fault promptly.
Tail Lights Work but Brake Lights Do Not
The tail-light function and stop-light function are not necessarily the same circuit even when they share a lamp housing. On a dual-filament bulb, the dimmer tail filament may still work after the brighter stop filament fails. If both outer stop lamps and the center stop lamp are out while the tail lights still illuminate, move beyond the bulbs and check the model-specific STOP/brake-light fuse, brake light switch, switch power, and shared stop-lamp wiring.
Brake Lights Work Intermittently
Intermittent operation often points to a loose connector, weak socket terminal, cracked filament, corroded ground, trunk-harness break, or switch that changes when the pedal or wiring moves. Reproduce the symptom gently while watching the lamps, but do not tug on wires or create a short.
Brake Lights Fail After Trailer or Accessory Wiring Was Added
Inspect every splice, converter module, tap connector, and ground added to the rear lighting circuit. Disconnecting an aftermarket device for diagnosis may be appropriate if it can be done without cutting the factory harness. Repair altered wiring with an automotive-grade method that protects the connection from strain and moisture.
Shift Lever Is Stuck in Park and Brake Lights Are Out
Some Camry systems use brake-pedal switch information for the shift interlock. When both symptoms appear together, the fuse, brake light switch, switch connector, or shared signal circuit deserves early attention. On a 2009 Camry, also check the VIN for NHTSA Campaign 12V-091 because the recalled stop-lamp-switch condition could include both inoperative stop lamps and inability to shift from Park. Do not assume the switch is defective without testing it, and follow the emergency shift-release instructions in the owner’s manual only to move the vehicle to a safe repair location.
When Should You Call a Pro for Brake Light Problems?
Professional diagnosis is appropriate when basic inspection does not identify the fault, when the car uses a non-serviceable LED assembly, or when safe testing requires access to a wiring diagram, scan tool, connector terminal kit, or module data.
Persistent Issues After Troubleshooting
Arrange professional service when any of these conditions remain:
- You replaced the correct bulb or verified the LED assembly connection, but the lamp still fails.
- The same fuse blows more than once.
- The switch has the expected input but not the expected output, or the circuit behavior does not match the wiring diagram.
- Wiggle testing reveals an intermittent fault inside a harness.
- There is water intrusion, melted wiring, collision damage, or extensive aftermarket wiring.
- A light-failure-sensor, control-module, diagnostic-code, or network problem is suspected after basic circuit checks.
A qualified technician can use Toyota’s Technical Information System, model-specific wiring diagrams, scan data, and terminal test tools to locate faults that a visual inspection cannot find.
Unfamiliarity With Electrical Systems
Call a professional if you are not comfortable selecting the correct multimeter mode, identifying connector pins, back-probing without damage, or separating a low-voltage lighting circuit from hybrid high-voltage components. Incorrect testing can short terminals, damage a connector or module, or create a new intermittent fault.
Before authorizing a large repair, ask the shop to explain which lamp, fuse, switch input, switch output, power feed, ground, or wiring section failed its test. A measured diagnosis is more reliable than replacing several parts by trial and error.
Is There a Toyota Camry Brake-Light Recall?
Yes, for certain 2009 Camrys. NHTSA Campaign 12V-091 covers certain model-year 2009 Camry vehicles manufactured from July 1, 2008 through February 28, 2009. NHTSA says contamination of the contact-type stop-lamp switch could increase electrical resistance and lead to warning lamps, a no-start condition, a shift lever that will not move from Park, or inoperative brake lights. Toyota’s recall remedy was replacement of the stop-lamp switch.
Recall eligibility is vehicle-specific, so do not assume that every 2009 Camry is included. Check the VIN with the Toyota recall and service-campaign lookup and the NHTSA recall lookup. NHTSA notes that its VIN tool shows unrepaired recalls for supported manufacturers and may not display every older or already-completed recall, so retain service records and contact Toyota if the vehicle’s history is unclear.
How Can You Prevent Future Camry Brake-Light Problems?
- Check all three brake lamps regularly and before a long trip.
- Keep trunk seals, lamp seals, and access panels correctly installed to reduce moisture intrusion.
- Use only the bulb type and fuse amperage specified for the exact model.
- Do not pierce factory wires with unsealed test probes or low-quality accessory taps.
- Correct a loose socket, discolored terminal, or water leak before it becomes an intermittent open or short.
- After body, audio, alarm, trailer, or remote-start work, confirm that every rear lighting function still operates.
- Check open recalls by VIN and keep records of electrical repairs.
Federal Motor Vehicle Safety Standard No. 108 establishes U.S. requirements for vehicle lamps and related signaling equipment. The current rule is published at 49 CFR 571.108. State and local rules govern operation of a vehicle with defective lighting, so repair inoperative brake lamps before normal road use.
Frequently Asked Questions
What is the most likely cause when Toyota Camry brake lights are not working?
It depends on the failure pattern. One failed lamp usually points to that bulb, LED assembly, socket, connector, or local wiring. If all brake lights are out, check the correct stop-lamp fuse, brake light switch, switch power, and shared circuit wiring first. On an affected 2009 Camry, also check recall status for NHTSA Campaign 12V-091.
How do you reset Toyota Camry brake lights?
Exterior brake lights do not have a normal reset procedure. Disconnecting the battery does not repair a failed bulb, LED assembly, fuse, switch, connector, ground, or wire. Diagnose and repair the circuit instead. A dashboard BRAKE warning light is a different system and requires separate diagnosis.
Why do the tail lights work but the brake lights do not?
The tail-light and stop-light functions can use separate circuits or separate filaments in the same bulb. A dual-filament bulb can therefore glow with the headlights on even when its brake filament has failed. If all stop lamps are out while the tail lights work, check the STOP/brake-light fuse, brake light switch, switch power, and shared stop-lamp wiring for the exact model year.
What is the most common brake-light problem on a Toyota Camry?
There is no verified single “most common” fault across every Camry generation. Replaceable bulbs are a frequent cause of one-lamp failures on bulb-equipped designs, while an all-lamp failure directs testing toward the stop-lamp fuse, brake light switch, power supply, or shared wiring.
Why are the brake lights not working on a 2003 Toyota Camry?
First check which of the three stop lamps fail. In Toyota’s 2003 Camry owner’s manual for January 2003 production, fuse No. 48 is the 15A STOP fuse for the stop lights and high-mounted stoplight, with the circuit also serving ABS and cruise-control functions. Confirm that manual matches your car’s production and market, then inspect the brake light switch and connector, rear stop/tail bulbs, center lamp, sockets, grounds, and wiring.
Is there a Toyota Camry brake-light recall?
Yes. NHTSA Campaign 12V-091 covers certain 2009 Camrys manufactured from July 1, 2008 through February 28, 2009 for a stop-lamp-switch defect that could make the brake lights inoperative and could also cause warning lamps, a no-start condition, or difficulty shifting from Park. Recall eligibility is VIN-specific, so check Toyota and NHTSA rather than assuming every 2009 Camry is included.
Why do my Camry brake lights stay on?
The pedal may not return fully, the brake light switch may be loose or misadjusted, the switch plunger may not contact the pedal correctly, a pedal stopper pad may be damaged where equipped, or the switch circuit may be shorted.
Why does the brake-light fuse keep blowing?
A repeated fuse failure indicates an unresolved short or overload. Inspect sockets, lamp assemblies, crushed or rubbed wiring, water intrusion, incorrect bulbs, trailer wiring, and aftermarket electrical splices. Never install a higher-amperage fuse.
Can I drive if one or more brake lights are out?
Do not continue normal public-road driving when the brake lights cannot reliably signal drivers behind you. Repair the fault before normal use or arrange safe transport to a repair facility.
Conclusion
Diagnosing Toyota Camry brake lights is easier when you start with the symptom instead of guessing at a part. Check all three stop lamps, note whether the tail lights still work, confirm the model-year-specific fuse and lamp design, inspect the brake light switch and connectors, then test power and ground with the correct method. Owners of certain 2009 Camrys should also check VIN eligibility for NHTSA Campaign 12V-091. Replace only the component that fails its test, verify every brake lamp afterward, and seek professional help when a fuse repeatedly blows, wiring is damaged, or an LED, light-failure-sensor, or control-module fault is suspected.
Sources
- Toyota Manuals and Warranties — model-year-specific owner information, fuse charts, bulb details, and procedures
- Toyota 2003 Camry Owner’s Manual (OM33593U) — verified 2003 STOP-fuse information for the manual’s stated production coverage
- Toyota Technical Information System — official repair information and model-specific wiring diagrams
- NHTSA Campaign 12V-091 — official acknowledgement of the stop-lamp-switch recall affecting certain 2009 Camrys
- Toyota Recall and Service Campaign Lookup — VIN-specific Toyota campaign status
- NHTSA Recall Lookup — U.S. safety-recall searches by VIN
- 49 CFR 571.108, Federal Motor Vehicle Safety Standard No. 108 — federal vehicle-lighting and signaling requirements
- Fluke continuity-testing guide and Fluke DC-voltage guide — multimeter setup and test principles
