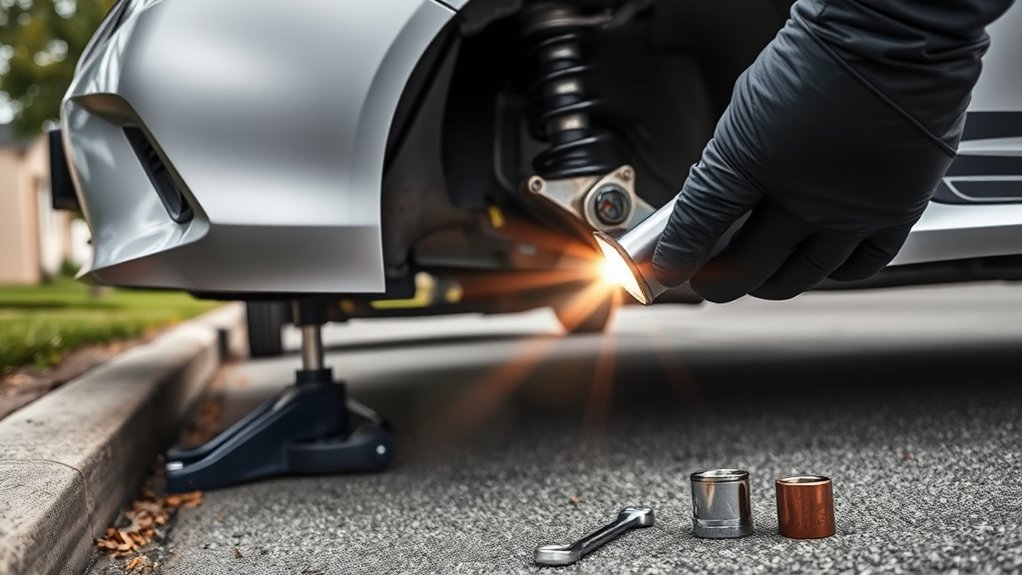
A clunk from your Toyota Camry when it crosses a bump usually means that a suspension, steering, brake, wheel, or body-mounted component is moving farther than it should. Worn sway bar links, control arm bushings, strut mounts, and ball joints are common suspects, but a loose wheel fastener, brake part, exhaust bracket, splash panel, or item in the trunk can produce a similar sound. Diagnose the noise before replacing parts.
Quick Answer
A Toyota Camry that clunks over bumps may have worn sway bar links or bushings, a damaged strut mount, loose control arm bushings, a worn ball joint, a broken spring, or loose brake or wheel hardware. Check the vehicle’s exact model year and VIN, inspect it safely, and stop driving if steering or wheel stability changes.
Key Takeaways
- A clunk is a symptom, not proof that the struts or sway bar links have failed.
- Note whether the sound comes from the front or rear and whether it changes during turning, braking, acceleration, or a one-wheel bump.
- Check simple causes such as trunk cargo, the spare tire, splash panels, brake hardware, and wheel nuts before buying suspension parts.
- Suspension layouts, torque values, service bulletins, and inspection methods vary by Camry model year, trim, and drivetrain.
- Do not work under a vehicle supported only by a hydraulic jack, and do not continue driving with loose steering, wheel movement, severe vibration, or unstable handling.
At a Glance
| Time Required | About 10–20 minutes for basic observations; approximately 30–60 minutes for a careful visual inspection |
| Difficulty | Beginner for noise observations; intermediate to advanced for any lifted inspection |
| Tools Needed | Flashlight, gloves, wheel chocks, tire-pressure gauge, floor jack, correctly rated jack stands, basic sockets, pry bar, torque wrench, and service information for the exact vehicle |
| Cost | Basic observations cost nothing; professional diagnosis and repair vary by model year, location, corrosion, access, and the failed component |
Warning: Stop driving and arrange an inspection if the clunk is accompanied by loose or wandering steering, visible wheel movement, severe vibration, tire rubbing, a broken spring, a wheel that sits at an abnormal angle, or a sudden change in braking or handling. Never crawl beneath a Camry supported only by its jack.
Common Causes of Clunking Noises in Your Toyota Camry

When you hear a clunk while driving your Toyota Camry, identify when it happens before assuming a particular part has failed. The Camry name covers many generations, and the suspension design, component access, torque specifications, and service information can differ by model year, trim, drivetrain, and production source.
Use the vehicle identification number and the exact year when consulting Toyota owner and maintenance manuals. A symptom that applies to one generation may not apply to another.
| When the clunk occurs | Parts worth checking |
|---|---|
| One wheel crosses a small bump or driveway edge | Sway bar links, stabilizer bushings, control arm bushings, strut mount, or brake hardware |
| Both wheels cross a full-width speed bump | Strut or shock mounts, spring seats, bump stops, subframe mounts, exhaust contact, or loose body panels |
| Turning and crossing a bump | Strut bearing or mount, tie-rod end, ball joint, sway bar link, spring seat, or steering linkage |
| Braking or releasing the brake | Brake pads, caliper hardware, control arm bushings, wheel fasteners, or engine and transmission mounts |
| Shifting between Drive and Reverse or changing throttle | Engine or transmission mounts, driveline clearance, exhaust contact, or a loose underbody component |
| Noise began immediately after repair | Mounting hardware, spring orientation, brake hardware, wheel torque, incorrectly loaded bushings, or a part contacting the body |
Worn sway bar links and stabilizer bushings are common noise sources because looseness lets the bar or link shift as the left and right wheels move by different amounts. The noise is often easiest to reproduce on broken pavement, angled driveway entrances, or small alternating bumps.
Strut mounts, bearings, insulators, spring seats, and mounting hardware can also clunk. A damper may be worn and cause excessive bouncing without being the source of a metallic impact noise. Conversely, a mount or loose fastener can make noise even when the damper still controls body movement.
Control arm bushings and ball joints can develop excessive clearance or rubber separation. Their movement may be most obvious when the wheel changes direction under braking, acceleration, steering, or an abrupt bump.
Tie-rod ends and steering linkage should be included when the clunk changes with steering input or is accompanied by vague steering, toe change, or tire wear.
Coil springs, isolators, and bump stops deserve attention. A broken spring end, shifted isolator, incorrectly seated spring, damaged jounce bumper, or contact mark on the spring seat can create a sharp clunk.
Brake hardware can imitate suspension noise. Loose caliper fasteners, worn pad clips, or excess pad movement may clunk when a bump changes wheel direction or when the brake pedal is applied and released.
Wheel and hub problems must be ruled out early. Confirm that the correct wheel fasteners are present and that no wheel appears loose or damaged. Do not guess at a torque value; use the specification for the exact Camry and wheel combination.
Note: Certain 2023 Camry and Camry Hybrid vehicles were included in Toyota Safety Recall 23TA05 for potentially under-tightened wheel nuts. The campaign covered a limited VIN population, not every 2023 Camry. Check your VIN through the NHTSA recall lookup and follow any stop-driving instruction shown for your vehicle.
Engine or transmission mounts are possible but less characteristic when the noise occurs only over road bumps. Mount problems more often produce a thud during gear engagement, acceleration, deceleration, or abrupt braking because those events shift the powertrain in its mounts.
Finally, inspect non-suspension items. A loose exhaust hanger, heat shield, engine under-cover, splash panel, hood stop, spare tire, jack, license plate, or object in the trunk can sound surprisingly similar to a suspension clunk.
How to Diagnose a Camry Clunk Over Bumps
Start with observations that do not require lifting the car. Record the exact location, road condition, speed, temperature, steering angle, brake use, and throttle position that reproduce the sound. This evidence is more useful than replacing the part that seems most common online.
Record When and Where the Noise Occurs
- Empty the cabin and trunk. Secure the spare tire, jack, tools, cargo, rear seatbacks, and anything in the door pockets.
- Check the tires and visible wheels. Look for low pressure, damage, missing fasteners, or a wheel that sits differently from the others.
- Use a short, low-speed route. Compare a small one-wheel bump, a full-width speed bump, a gentle turn, and a light brake application.
- Listen for changes. Note whether the noise becomes louder while turning left or right, applying the brake, releasing the brake, accelerating, or coasting.
- Consider recent work. If the sound began after tire, brake, strut, control-arm, subframe, or collision repair, return to the installer with the timing and conditions documented.
Pro Tip: Record the sound from inside the cabin while a passenger notes the road condition and vehicle speed. Do not hold or operate a phone while driving. A recording and a repeatable route can help a technician reproduce an intermittent clunk.
Inspect Suspension Components Thoroughly
With the vehicle parked on a solid, level surface, use a flashlight to compare the left and right sides. Look for a part that is cracked, displaced, polished by contact, wet with fluid, missing hardware, or sitting at a different angle.
Inspect the sway bar links and stabilizer bushings for torn boots, displaced bushings, rust trails, shiny contact marks, or a link that can be moved by hand when it should be loaded securely.
Examine the control arm bushings for major cracks, rubber separation, metal-to-metal contact, or a sleeve that has shifted. Surface checking in rubber does not automatically prove failure; compare both sides and look for abnormal movement under load.
Check the ball-joint and tie-rod boots for tearing, leakage, contamination, or separation. A damaged boot increases the chance that dirt and water have entered the joint, but boot damage alone does not measure internal looseness.
Inspect strut mounts, springs, spring seats, dust boots, and bump stops. Look for oil running down the strut body, a broken coil end, a spring that is not seated correctly, torn rubber, loose upper hardware, or marks showing that one part has struck another.
Also examine the brakes, exhaust, wheel-well liners, under-covers, and splash shields. A loose part may move only when a bump loads the body.
Check for Loose Parts
Do not judge every component by shaking it with the suspension hanging. Some joints must be checked with the suspension loaded, while others require a specific unloading position. Use the Toyota repair procedure for the exact year and configuration.
If you have the correct equipment and experience, inspect for movement at the sway links, control arms, ball joints, tie rods, strut mounts, brake calipers, and wheel bearings while an assistant moves the steering or suspension in a controlled manner.
Do not randomly retighten subframe, control-arm, strut, or engine-cradle fasteners. The specification, tightening sequence, replacement-fastener requirement, and vehicle load position may differ. Rubber-bushed fasteners tightened in the wrong suspension position can preload and damage the bushing.
The most efficient diagnosis confirms the location and movement that produce the noise before any part is ordered.
What Tools Do You Need for a Suspension Inspection?
A basic observation requires only a flashlight and a place to reproduce the noise safely. A lifted inspection requires proper support equipment, service information, and enough experience to recognize designed movement versus dangerous looseness.
Essential Inspection Tools
| Tool | Purpose | Important limitation |
|---|---|---|
| Flashlight and inspection mirror | Find damaged boots, cracked rubber, contact marks, leaks, and missing hardware | A part can be loose even when it looks normal |
| Wheel chocks, floor jack, and rated jack stands | Raise and support the vehicle at approved points | The jack must never be the only support |
| Socket set | Remove covers or wheels when the service procedure requires it | Do not loosen structural fasteners merely to test them |
| Pry bar | Apply controlled force during a specified bushing or joint check | Incorrect placement can damage a boot or create misleading movement |
| Torque wrench | Tighten approved fasteners to the exact service specification | A universal Camry suspension torque does not exist |
| Electronic chassis microphones | Help a professional compare noise at several components during a controlled road test | Placement and interpretation require experience |
Penetrating oil may be useful during an actual repair involving corroded hardware, but it is not a diagnostic substitute. A rotary cutting tool such as a Dremel may occasionally be used by an experienced technician to remove seized hardware; it is not needed for an ordinary inspection and should not be used until replacement parts and fasteners are available.
Safety Gear and Lifting Requirements
Wear safety glasses, work gloves, and closed-toe footwear. Set the parking brake, place the transmission in Park, chock the wheels that remain on the ground, and work only on a solid, level surface.
Use the lift and support points specified for the exact Camry. Confirm that the jack and stands are correctly rated and undamaged. After raising the vehicle, lower it securely onto the stands and verify stability before approaching the underside.
Warning: A hydraulic jack is a lifting device, not a working support. Secure the raised vehicle immediately with appropriate stands or approved lifting equipment. OSHA’s jack-safety guidance likewise requires a raised load to be blocked, cribbed, or otherwise secured.
How Sway Bar Links Cause Clunking Noises
Sway bar links connect the stabilizer bar to the suspension. When the left and right wheels move by different amounts, the links transfer force through the bar to control body roll.
A worn link joint, damaged bushing, loose fastener, or worn stabilizer-bar mounting bushing can let the assembly shift and strike nearby parts. The resulting clunk is often most noticeable on small alternating bumps, pothole edges, rough pavement, and angled driveway entrances.
Look for torn link boots, displaced rubber, corrosion around the joint, a loose stud, or polished areas where the bar or link has contacted another part. Do not rely only on appearance; some worn joints remain visually intact.
Some 2014–2017 Camry and Camry Hybrid vehicles were covered by Toyota bulletin T-SB-0128-18 for a squeak from the front stabilizer bushings over rough roads or speed bumps. That bulletin is a useful model-specific lead when the year and sound match, but it does not establish the cause of every clunk.
Replace sway bar links or bushings only after the noise or excess movement has been confirmed. A new link will not correct a worn strut mount, control arm bushing, brake part, or loose body panel.
How Worn Shocks and Mounting Parts Affect the Noise
Shocks and struts control spring movement and help keep the tires in contact with the road. As damping decreases, the body may continue bouncing after a bump, dive more during braking, sway more during direction changes, or feel less settled on uneven pavement.
Those symptoms do not necessarily mean the damper is producing the clunk. Metallic knocking is frequently caused by a worn upper mount, damaged bushing, loose attaching hardware, broken spring, deteriorated bump stop, or another suspension part moving against its mounting point.
Symptoms of Worn Shocks or Struts
- Excessive body movement after bumps or dips
- More nose dive during braking or squat during acceleration
- Increased body roll or a floating sensation
- Fluid running down the damper body rather than a light surface film
- Damaged, bent, or corroded mounting areas
- Cupped or irregular tire wear that remains after tire and alignment causes are investigated
- Knocking combined with evidence of a failed mount, loose hardware, or internal damage
A bounce test can reveal a severely underdamped corner, but it is only a screening check. Vehicle weight, suspension tuning, spring rate, and how the force is applied can change the result. A Camry that settles quickly can still have a noisy mount, and a car that moves more than expected may have another suspension problem.
Impact on Ride Quality
Reduced damping can make the Camry feel less controlled on broken pavement, during lane changes, and under braking. The tires may spend less time firmly following the road surface, and other suspension components can be subjected to larger repeated movements.
Damaged bushings or mounting points can add a clunk even when damping remains acceptable. The repair should therefore address the confirmed failed part rather than automatically replacing every shock or strut.
How to Check Your Struts for Issues
Start with a visual comparison between the left and right sides. Inspect the strut body for significant leakage, impact damage, corrosion near a mounting point, or a bent tube or rod. Examine the spring for a broken end, incorrect seating, or shiny contact marks.
Check the upper mount and visible rubber for separation, cracking, or displacement. Listen while an assistant turns the steering wheel slowly with the vehicle stationary. Binding, spring wind-up, a pop, or movement at the upper mount can indicate a mount or bearing issue, but confirmation may require the suspension to be loaded.
Perform a gentle bounce check only as an initial screen. Excessive repeated movement suggests poor damping, but the test does not identify the source of a clunk and does not replace a road test or lifted inspection.
Inspect the dust boot and bump stop where visible. A missing or deteriorated bump stop can allow harsh bottoming, while an incorrectly assembled spring seat can produce noise after strut replacement.
Some 2007–2014 Camry and Camry Hybrid vehicles were included in Toyota bulletin T-SB-0032-14 for front strut-insulator noise while turning or driving over uneven roads. Confirm the exact applicability and symptom before using the bulletin as a repair guide.
An alignment reading does not prove that a strut has failed. Alignment can be affected by tires, ride height, impact damage, tie rods, control arms, bushings, subframe position, and other parts. Have alignment checked after relevant suspension repairs when required by Toyota’s service procedure or when the vehicle pulls, the steering wheel is off-center, or tire wear is abnormal.
How Bad Ball Joints Cause Clunking Noises

Ball joints let the steering knuckle move with the suspension while the wheels turn. As a joint wears, excessive clearance between the stud and socket can let the parts shift when road load changes. That movement may create an intermittent clunk on bumps, dips, turns, braking, or acceleration.
Other warning signs can include loose steering, wandering, uneven tire wear, a damaged dust boot, or visible movement at the joint. These symptoms require prompt attention because severe joint wear can affect wheel control.
Do not diagnose a ball joint by pulling on the wheel in only one direction. The correct support position and test method depend on the suspension design. Toyota’s 2025 Camry maintenance guide instructs technicians to check suspension and steering ball joints for looseness or damage and says a qualified technician should perform the operation. Review the Toyota Camry Warranty and Maintenance Guide and the repair information for the exact model year.
Warning: Do not continue driving if a wheel has visible looseness, the steering suddenly becomes vague, or the vehicle cannot hold a stable path. Have it transported for inspection instead of attempting another road test.
How Engine Mounts Contribute to Clunking Sounds
Engine and transmission mounts secure the powertrain while isolating vibration. When a mount tears, collapses, or separates, the engine or transmission can move farther than intended and contact a stop, bracket, exhaust part, or nearby structure.
A failed mount can contribute to a thud that seems to come from the front suspension. However, mount-related noise is usually more closely tied to shifting between Drive and Reverse, accelerating, releasing the accelerator, or applying the brakes than to an isolated road bump.
Look for excessive powertrain movement, collapsed rubber, leaking fluid from a hydraulic mount, torn material, or fresh contact marks. Keep hands, clothing, and tools away from belts, fans, and other moving parts whenever the engine is running.
Inspect the exhaust at the same time. A weakened mount can change exhaust clearance, causing the pipe or heat shield to strike the body when the powertrain moves.
A Step-by-Step Guide to Inspecting Control Arms
Control arms position the wheel while allowing suspension travel. Their bushings and ball joints can create a clunk when rubber separates, a sleeve shifts, a joint develops excessive clearance, or the arm contacts the subframe.
- Identify the exact vehicle. Record the model year, trim, drivetrain, and VIN before obtaining service information or replacement parts.
- Inspect with the vehicle on the ground first. Compare ride height and wheel position from side to side. Look for a wheel that appears pushed backward, forward, inward, or outward.
- Use approved lifting points. Chock the wheels and support the vehicle with correctly rated stands before removing a wheel or approaching the underside.
- Inspect the arm and bushings. Look for bends, cracks, severe corrosion, rubber separation, shifted sleeves, and polished contact marks.
- Inspect the ball-joint boot. Check for tearing, grease loss, contamination, or separation from its sealing surfaces.
- Check movement using the specified loading method. Apply controlled force only at the points described in the repair information. Do not pry against a boot, sensor wire, brake hose, or thin metal shield.
- Examine mounting hardware without disturbing it. Rust trails, shifted washers, missing fasteners, or fresh movement marks require attention. Do not apply an assumed torque value.
- Plan the follow-up work. Relevant control-arm or ball-joint replacement may require new fasteners, tightening at a specified suspension position, and an alignment check.
Note: A cracked-looking rubber surface is not automatically proof that a bushing has failed. Separation, abnormal displacement, metal contact, excessive movement, and a matching noise are stronger evidence.
When to Seek Professional Help for Suspension Repairs
Seek professional help when the noise cannot be reproduced safely, the source is hidden, or the inspection requires loaded-suspension measurements, spring compression, subframe support, electronic microphones, or manufacturer-specific service data.
Arrange prompt inspection when:
- The clunk is getting louder or occurs on increasingly small bumps.
- Steering feels loose, delayed, heavy, or unstable.
- The Camry pulls, wanders, or sits lower on one corner.
- A tire rubs, wears unevenly, or appears tilted.
- A wheel, ball joint, tie rod, control arm, or strut mount shows visible movement.
- A spring is broken, displaced, or contacting the tire or body.
- The noise began after hitting a curb, pothole, or road debris.
- The clunk began after brake, suspension, wheel, subframe, or collision repair.
- The vehicle is included in an open recall or service campaign.
- Several parts have already been replaced without changing the noise.
A professional can place microphones at suspected components, observe movement on a drive-on lift, measure joint clearance, inspect fastener witness marks, and compare the findings with Toyota repair procedures and technical bulletins.
Diagnostic charges and repair prices vary. Access difficulty, corrosion, model year, part quality, alignment requirements, and whether fasteners or mounts must be replaced can affect the total. Ask the shop to identify the failed component and explain how the noise was confirmed before authorizing a group of unrelated parts.
Frequently Asked Questions
What can cause a clunking noise when going over bumps?
Common causes include worn sway bar links or bushings, damaged strut mounts, separated control arm bushings, loose ball joints or tie rods, broken springs, loose brake hardware, wheel fasteners, exhaust contact, splash panels, and unsecured items in the trunk. The sound must be reproduced and inspected before a part is condemned.
Why does my Camry make a sound when I go over bumps?
A bump quickly changes the load on the wheel, spring, control arm, stabilizer bar, strut, brakes, and body. A worn joint, separated bushing, loose fastener, or part with insufficient clearance may shift and strike its mounting point during that load change.
How do you diagnose a suspension clunk?
First remove loose cargo and record when the sound occurs. Compare one-wheel and full-width bumps, turning, braking, and acceleration. Then inspect tires, wheels, brake hardware, sway links, bushings, joints, springs, mounts, exhaust, and body panels. Confirm abnormal movement using the service procedure for the exact model year.
What is the most common suspension problem on a Toyota Camry?
There is no single most common suspension failure for every Camry generation. Sway bar links, stabilizer bushings, strut mounts, control arm bushings, and ball joints are frequent inspection targets, but age, mileage, climate, road conditions, model year, and prior repairs determine what is most likely on a particular car.
Is it safe to drive a Camry that clunks over bumps?
A mild noise with normal steering may allow a careful trip to an inspection appointment, but the cause is unknown. Stop driving if steering changes, a wheel feels loose, the car wanders, vibration is severe, a spring is broken, a tire rubs, or braking and handling become unstable.
Can loose wheel nuts cause a clunk over bumps?
Yes. A loose wheel can shift and create noise, vibration, abnormal steering, and a serious loss-of-control risk. Do not continue driving if a wheel is visibly loose or the vehicle has sudden vibration. Check the VIN for recalls and use the exact Toyota wheel-fastener specification.
Does the bounce test prove that a strut is bad?
No. It can reveal severe loss of damping, but it does not identify a noisy mount, loose fastener, broken spring, sway bar link, or control arm bushing. Use it only as one observation alongside a road test and complete inspection.
How much does it cost to repair a suspension clunk?
The cost depends on the confirmed cause. Securing cargo or a panel may be inexpensive, while replacing a strut assembly, control arm, subframe component, or several corroded fasteners may require more labor and an alignment. Request a diagnosis and itemized estimate rather than replacing several suspected parts at once.
Conclusion
A Toyota Camry clunk over bumps should be diagnosed by condition and confirmed movement, not by replacing the most frequently mentioned part. Start with the wheels, brakes, loose cargo, body panels, and recent repair history. Then inspect sway bar links, bushings, strut mounts, springs, control arms, ball joints, tie rods, and powertrain mounts using the procedure for the exact model year.
Arrange immediate help when the noise is accompanied by steering looseness, wheel movement, severe vibration, a broken spring, or unstable handling. For a noise without those warning signs, document when it occurs and give the technician a repeatable route and clear description. That approach is safer and far more likely to produce the correct repair.
Sources
- Toyota Manuals and Warranties — exact model-year owner, warranty, and maintenance information
- 2025 Toyota Camry Warranty and Maintenance Guide — suspension ball-joint, dust-cover, steering, and chassis inspection guidance
- NHTSA Recall Lookup — VIN-based open-recall and manufacturer-communication searches
- Toyota T-SB-0032-14: Front Strut Insulator Noise — model-specific guidance for listed 2007–2014 Camry vehicles
- Toyota T-SB-0128-18: Squeak Noise Over Rough Roads/Speed Bumps — model-specific stabilizer-bushing guidance for listed 2014–2017 Camry vehicles
- KYB Shock and Strut Diagnostic Guide — road-test and visual symptoms of reduced damping
