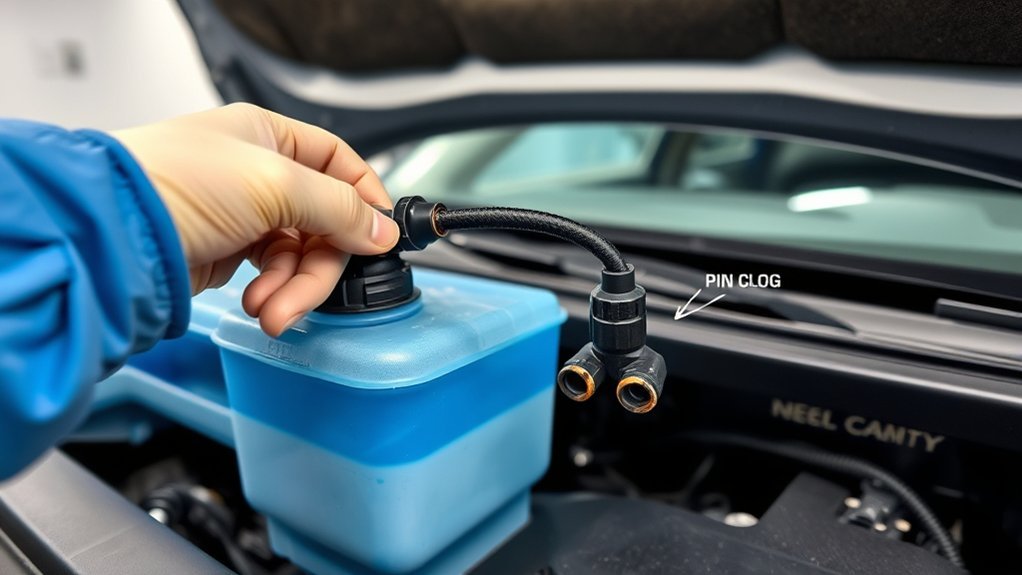
If your Toyota Camry’s washer fluid is not spraying, start with a few observations before replacing parts. Check the reservoir, listen for the washer pump, look for fluid leaking under the hood, and note whether one nozzle or both nozzles have stopped working. Those clues usually reveal whether the problem is fluid-related, a blockage, a loose hose, an electrical fault, or a failed pump.
Quick Answer
Toyota Camry washer fluid usually stops spraying because the reservoir is empty or frozen, a nozzle or hose is blocked, a hose has come loose, the washer fuse or wiring has failed, or the pump is worn out. Listen for the pump first: its sound quickly separates fluid-flow problems from electrical problems.
Key Takeaways
- If the pump hums but nothing sprays, inspect the fluid level, nozzles, hoses, branch joint, leaks, freezing, and pump output.
- If the pump is silent, check the correct model-year fuse, pump connector, power, ground, wiring, and washer-switch command before replacing the pump.
- If only one nozzle fails, the pump is usually working; focus on that nozzle and its branch hose.
- Replace a pump only after confirming that it receives the correct electrical supply but cannot run or move fluid.
- Fuse locations, circuit designs, pump access, and nozzle types vary by Camry model year and trim.
At a Glance
| Time Required | 15–45 minutes for basic diagnosis; longer if trim or the reservoir must be removed |
| Difficulty | Easy for fluid, fuse, hose, and nozzle checks; moderate for electrical testing or pump access |
| Tools Needed | Flashlight, gloves, eye protection, clean rag, correct washer fluid, fuse puller, and optionally a digital multimeter and low-pressure air or a syringe |
| Cost | Often little or no cost for cleaning and reconnection; more if a nozzle, hose, grommet, reservoir, pump, wiring, or professional labor is needed |
Warning: Park on a level surface, switch the ignition off before handling fuses or disconnecting wiring, and keep your hands away from wiper arms that could move. Wear eye protection when opening hoses. Some washer fluids contain toxic and flammable alcohols such as methanol, so follow the product label, avoid skin and eye contact, keep the fluid away from children and pets, and never work near sparks or flames. See the CDC/NIOSH methanol guidance for chemical-hazard information.
Symptoms of Washer Fluid Problems in Your Toyota Camry
A washer-system problem can appear in several ways. Pay attention to what happens when you briefly operate the washer control, because each symptom points to a different part of the system.
| Symptom | Most Likely Area to Check |
|---|---|
| Pump hums, but neither nozzle sprays | Empty or frozen reservoir, blocked main hose, disconnected hose, leaking reservoir or pump seal, restricted branch joint, or weak pump |
| No pump sound | Fuse, connector, power, ground, wiring, switch input, control circuit, frozen pump, or failed pump motor |
| Only one nozzle sprays | Blocked nozzle, pinched branch hose, loose connection, or restriction near that nozzle |
| Weak or uneven spray | Low fluid, partial clog, kinked hose, small leak, restricted joint, incorrect fluid for the temperature, or worn pump |
| Fluid leaks under the hood or vehicle | Split hose, disconnected fitting, cracked reservoir, damaged pump grommet, or leaking pump body |
| Sprays once, then stops | Very low fluid, intermittent electrical supply, freezing, loose hose, restricted pickup, or pump failure as the motor warms |
If the pump runs but no fluid appears, the fault is usually on the fluid-delivery side. If the pump stays silent, begin with the electrical checks. If only one nozzle fails, the pump and main supply hose are probably functioning, so concentrate on the affected nozzle and branch hose.
The sound of the washer pump is the fastest diagnostic clue: a hum points toward a flow problem, while silence points toward the pump or its electrical supply.
Common Reasons Your Toyota Camry Washer Fluid Isn’t Spraying
Several common problems can stop a Toyota Camry windshield washer from spraying:
- Low or empty reservoir: The pump cannot deliver fluid if its inlet is uncovered. If the reservoir becomes empty again soon after filling, inspect for a leak instead of repeatedly topping it off.
- Frozen or incorrect fluid: Water or warm-weather fluid may freeze in the reservoir, pump, hoses, or nozzles. Move the vehicle to a heated space and allow the system to thaw naturally. Do not use an open flame, heat gun, or boiling water.
- Clogged washer nozzle: Wax, dirt, mineral deposits, or dried washer-fluid residue can restrict the outlet.
- Kinked, split, or disconnected hose: Fluid may leak inside the engine compartment instead of reaching the windshield.
- Restricted branch joint or check valve: Some model years use hose joints or one-way valves that can clog or stick.
- Blown fuse or electrical fault: A fuse may open because of age, a short circuit, damaged wiring, a seized pump, or another fault in the circuit.
- Failed washer pump: The pump motor can stop running, leak, or spin without producing enough flow.
- Switch or control-circuit problem: Depending on model year, the washer request may pass through a combination switch, wiring, relays, or electronic control logic.
Note: Toyota Camry fuse assignments, connector locations, pump access, hose routing, and control circuits vary by model year and trim. Use the Toyota Manuals and Warranties portal for your exact year. Do not rely on a fuse number, wire color, or disassembly method from a different Camry generation.
Step-by-Step Troubleshooting Guide for Wiper Fluid Problems
Work through these checks in order. Stop once you find a clear failure rather than replacing several parts at once.
1. Check the Washer Fluid Level and Condition
Open the hood and locate the washer-fluid reservoir. Verify that it contains fluid and that the fluid is not slushy or frozen. Add a commercially prepared windshield washer fluid rated for the expected temperature. Do not substitute engine coolant, dish soap, or an untested homemade mixture.
If the reservoir was empty, add enough fluid to cover the pump inlet and briefly operate the washer. Watch for fluid escaping from the reservoir, pump area, hoses, or under the vehicle.
2. Listen for the Washer Pump
With the hood open, have a helper operate the washer control for one or two seconds while you listen near the reservoir. Do not hold the control continuously, especially if the reservoir is empty.
- You hear a hum or buzz: Continue with hose, leak, freezing, nozzle, and pump-output checks.
- You hear nothing: Continue with the fuse and electrical checks.
- You hear a strained or intermittent sound: The pump may be frozen, mechanically restricted, receiving poor voltage, or failing internally.
3. Inspect for Leaks and Disconnected Hoses
Follow the visible hose from the reservoir toward the hood or cowl. Ask a helper to operate the washer briefly while you look for a wet fitting, spraying hose, fluid beneath the reservoir, or fluid running inside the engine compartment.
Check these common leak points:
- The pump where it enters the reservoir.
- The pump’s rubber seal or grommet.
- The main hose connection at the pump.
- Hose bends and areas near clips or hinges.
- The branch joint that feeds the two nozzles.
- The short hose beneath each nozzle.
- The reservoir seam or filler neck.
Reconnect a loose hose fully. Replace a hose that is hard, split, swollen, kinked, or too loose to stay on its fitting.
4. Test Each Nozzle
If one nozzle sprays and the other does not, disconnect the hose beneath the nonworking nozzle when access allows. Briefly operate the washer while directing the hose into a container.
- Fluid exits the hose strongly: The nozzle is clogged or damaged.
- No fluid exits the hose: Inspect the branch hose, joint, kink, or restriction upstream.
- Flow is weak from both branches: Check the main hose, reservoir, pump inlet, freezing, leaks, and pump output.
Try backflushing the nozzle with clean water or gently applying low-pressure air from the hose side. Do not force high-pressure air toward the reservoir.
Pro Tip: Before cleaning a nozzle, mark or photograph its spray direction. Some Camry nozzles produce a fan pattern and are not meant to be adjusted with a pin. If a very fine needle is used to loosen surface debris, do not push it deeply or enlarge the opening.
5. Check the Correct Washer Fuse
Use the fuse chart in the owner’s manual for your exact Camry model year. The washer may share a circuit or be controlled differently from the wiper motor, so do not assume that a working wiper proves the washer fuse is good.
Switch the ignition off and remove the identified fuse with a fuse puller. Inspect the fuse element and, when needed, test it with a digital multimeter:
- Near-zero resistance or a continuity tone: The removed fuse is generally intact.
- OL, open circuit, infinite resistance, or no continuity tone: The fuse is blown.
Replace a blown fuse only with the same type and amperage. Never install a higher-amperage fuse. If the replacement blows again, stop testing the washer and have the circuit checked for a short, damaged wiring, or a seized component.
6. Check Power and Ground at the Pump
If the pump is silent and the fuse is good, inspect the pump connector for looseness, corrosion, water intrusion, damaged terminals, or broken wiring. Connector access varies by model year and may require removal of a wheel-well liner, splash shield, or other trim.
A trained DIYer can use a digital multimeter and the correct wiring diagram to check the pump circuit while a helper briefly operates the washer control. Do not allow meter probes to bridge connector terminals or touch body metal.
- Correct power and ground are present, but the pump does not run: The pump is likely faulty.
- Power or ground is missing: The fault is upstream in the fuse, connector, wiring, ground point, washer switch input, relay, or control system.
- Voltage is much lower than battery voltage under load: Look for excessive resistance in a connector, wire, ground, or control path.
For exact connector pins and test conditions, consult Toyota’s model-specific repair information through the Toyota Technical Information System.
7. Check Washer Pump Output
If the pump runs, disconnect its outlet hose when safely accessible and direct the outlet into a container. Briefly operate the washer.
- Strong flow from the pump: The restriction or leak is farther downstream.
- Little or no flow with a full, thawed reservoir: Check the pump inlet, reservoir contamination, pump seal, and pump itself.
- The pump leaks around its body or grommet: Replace the failed seal, grommet, or pump as appropriate.
Draining the reservoir may be necessary before pump or grommet removal, but draining the reservoir does not by itself prove the pump is defective.
8. Retest the Complete System
Reconnect every hose and electrical connector, refill the reservoir, and operate the washer in short pulses. Confirm that both nozzles spray the windshield, the pattern reaches the wiper path, no fluid leaks, and the wipers clear the glass normally.
DIY Fixes for Common Washer Fluid Issues
Many washer-fluid problems can be corrected without replacing the entire system. Match the repair to the confirmed fault.
| Issue | Confirmed Cause | Appropriate Fix |
|---|---|---|
| No fluid spray | Empty reservoir | Refill with temperature-appropriate washer fluid and inspect for leaks |
| One nozzle does not spray | Clogged nozzle | Backflush gently or replace the nozzle if it remains restricted |
| Fluid leaks under the hood | Loose or cracked hose | Reconnect the hose or replace the damaged section |
| Leak at the reservoir | Failed pump grommet, pump seal, or cracked reservoir | Replace the confirmed leaking component |
| Pump is silent | Blown fuse | Replace with the same amperage and investigate if it blows again |
| Pump receives correct power and ground but does not run | Failed pump motor | Replace the pump using the model-specific procedure |
| Pump runs but flow is weak at its outlet | Restricted inlet or worn pump | Clean the reservoir and inlet or replace the pump after confirmation |
| System is frozen | Fluid is not rated for the temperature | Thaw naturally in a warm location, drain or dilute as directed, and refill with suitable fluid |
Clearing a Clogged Nozzle or Hose
Remove the hose from the nozzle when accessible. Use clean water, a small syringe, or gentle low-pressure air to backflush the nozzle. For a hose restriction, disconnect both ends where practical and flush away from the reservoir and pump. Replace a hose that remains restricted or has deteriorated internally.
Repairing a Loose or Damaged Hose
Push a loose hose fully onto its fitting. If the end has stretched, hardened, or split, replace the affected hose rather than relying on glue. Route the replacement away from sharp edges, hot surfaces, moving hinges, and places where it can be pinched.
Replacing a Failed Washer Pump
Replace the pump only after confirming that the reservoir contains thawed fluid, the pump inlet is not blocked, and the connector supplies the correct power and ground when commanded. Pump access differs among Camry generations, so follow the repair procedure for the exact model year. Replace a hardened or leaking pump grommet at the same time when necessary.
How Regular Maintenance for Your Toyota Camry Prevents Washer Fluid Issues
Simple inspections can prevent an empty reservoir, frozen fluid, clogged nozzles, and deteriorated hoses from becoming roadside visibility problems. A functioning windshield washing system is safety-related equipment; U.S. passenger-car requirements are addressed by Federal Motor Vehicle Safety Standard No. 104.
Monthly Fluid Level Checks
Checking the reservoir about once a month is a practical owner routine, although it is not a universal Toyota service interval for every model year. Check more often during winter, long highway trips, dusty conditions, insect season, or periods of frequent washer use.
If the level falls faster than expected, inspect the reservoir, pump seal, grommet, and hoses. Repeatedly refilling a leaking system can allow fluid to reach electrical connectors or leave you without washer fluid when visibility is poor.
Use a fluid rated below the lowest temperature you expect to encounter. Read the label before mixing concentrated products because dilution requirements vary.
Nozzle Cleaning Routine
Wipe wax, dirt, and debris from the nozzle surfaces when washing the vehicle. Test the washers after waxing or detailing because residue can cover the nozzle openings.
If the pattern becomes weak or uneven, inspect the hose first and then backflush the nozzle gently. Avoid repeatedly pushing debris deeper into the opening. Also inspect hose clips and bends so the hose does not rub, kink, or separate when the hood opens and closes.
How the Washer Pump, Hoses, and Branch Joint Work
The washer pump is a small electric pump mounted in or near the washer-fluid reservoir. When the system receives a washer command, the pump draws fluid from the reservoir and sends it through the supply hose toward the windshield nozzles.
The front supply hose generally divides so that both nozzles spray together. Depending on the Camry model year, the division may use a simple tee, a molded hose connector, or a joint that includes a check valve. Do not assume that the vehicle has a driver-selectable splitter valve for choosing the left or right nozzle.
A check valve, when fitted, helps keep fluid in the line and may reduce the delay before spraying. A restricted valve or branch joint can weaken both nozzles or prevent flow through one branch. A disconnected branch can release fluid under the hood while the other nozzle continues to spray.
This layout explains several useful diagnostic clues:
- If both nozzles fail and the pump runs, check components before the hose divides.
- If only one nozzle fails, check that nozzle and the branch leading to it.
- If the pump runs and fluid leaks at the branch, repair the joint or hose.
- If correct power and ground reach a silent pump, the pump itself is the likely fault.
When to Replace Washer Nozzles and Hoses
Cleaning is appropriate for light surface debris, but replacement is the better choice when a component is physically damaged or cannot hold pressure.
- Replace a nozzle if it remains blocked after gentle backflushing, its spray opening has been damaged, its mounting tabs are broken, or it leaks around the body.
- Replace a hose if it is cracked, brittle, swollen, permanently kinked, internally restricted, or too loose to stay attached.
- Replace a branch joint or check valve if it leaks, is visibly damaged, or remains restricted after cleaning.
- Replace the pump grommet if fluid leaks where the pump enters the reservoir and the reservoir itself is intact.
- Replace the reservoir if it is cracked or damaged and the leak is not limited to a removable seal.
Use parts specified for the exact Toyota Camry year and trim. Nozzle mounting, hose diameter, electrical connectors, and pump design can differ even when the parts look similar.
Five Practical Tips for Keeping Your Washer Fluid Flowing
- Keep suitable fluid in the reservoir. Do not wait for the pump to run dry, and use fluid rated for the season.
- Test both nozzles periodically. A weak pattern can reveal a partial clog or small leak before the system stops working completely.
- Clean the nozzle surfaces after washing or waxing. Wax and detailing residue can cover small outlets.
- Inspect hoses and connectors whenever the hood is open. Look for rubbing, loose fittings, kinks, wet spots, or brittle tubing.
- Flush contaminated fluid when necessary. If the reservoir contains sediment, mixed chemicals, or unsuitable fluid, clean it according to the model-specific procedure rather than forcing debris through the pump and nozzles.
Avoid operating the pump for long periods when no fluid is moving. Short test pulses provide enough information and reduce unnecessary pump heating.
Seeking Professional Help for Persistent Washer Fluid Issues
Professional diagnosis is appropriate when the basic checks do not identify the fault, access requires significant trim removal, or the electrical circuit behaves inconsistently.
When Professional Inspection Is the Better Choice
Arrange an in-person inspection when:
- A replacement fuse blows again.
- The pump circuit has no power or ground and the wiring path is unclear.
- The pump or reservoir cannot be reached safely without removing liners, shields, or body trim.
- Wiring is damaged, corroded, or modified.
- Fluid leaks into an area containing electrical connectors.
- The system stopped working after collision repair, windshield work, hood repair, or rodent damage.
- The vehicle has additional wiper, body-control, or electrical symptoms.
Remote automotive advice may help interpret symptoms, but it cannot confirm a leak, connector condition, voltage drop, or damaged component as reliably as hands-on testing.
Advanced Diagnostic Techniques
A technician may use the model-specific wiring diagram and repair manual to perform:
- A loaded voltage and ground test at the pump.
- Voltage-drop testing across connectors, wiring, and grounds.
- Pump current-draw testing.
- Continuity and short-to-ground checks with the circuit safely de-energized.
- Direct pump-flow testing.
- Inspection of switch inputs or control-module data where applicable.
- Reservoir removal to inspect the pickup, grommet, pump inlet, and hidden cracks.
These tests distinguish a failed pump from a control, wiring, connector, or mechanical-flow problem and reduce unnecessary parts replacement.
Long-Term Solution Options
A durable repair addresses the confirmed cause rather than only the visible symptom. For example, replacing a blown fuse without repairing a short is temporary, and repeatedly clearing a nozzle will not solve contamination inside the reservoir.
Ask the repair facility to identify the failed component, explain the test result that confirmed it, and state whether the replacement part and labor include a warranty. Warranty terms vary by part and repair provider.
Related Guides
Frequently Asked Questions
Why is my Toyota Camry washer-fluid reservoir full but not spraying?
Listen for the pump. If it runs, look for frozen fluid, a disconnected or blocked hose, clogged nozzles, a restricted branch joint, a leaking pump seal, or weak pump output. If it is silent, check the correct fuse, connector, power, ground, wiring, switch input, and pump motor.
Why is my windshield washer fluid not coming through?
The system may have low or frozen fluid, a blocked nozzle, a kinked or disconnected hose, a leaking reservoir or pump grommet, a blown fuse, damaged wiring, or a failed pump. Whether the pump makes a sound is the best first clue.
How do I unblock the washer jets on a Toyota Camry?
Disconnect the hose beneath the nozzle when accessible and gently backflush the nozzle with clean water or low-pressure air. Avoid forcing a large pin into the opening because it can damage a fan-style nozzle or change its spray pattern. Replace the nozzle if it remains restricted.
How can I tell if the washer fuse is blown?
Switch the ignition off, remove the correct fuse, and inspect or test it. An intact fuse generally shows near-zero resistance or activates the multimeter’s continuity tone. A blown fuse shows OL, open circuit, infinite resistance, or no continuity tone. Replace it only with the same amperage.
Can the wipers work even if the washer pump does not?
Yes. The wiper motor and washer pump are separate components, and their fuse or control arrangements can differ by model year. Working wipers therefore do not prove that the washer pump, its fuse, or its wiring is good.
How do I know whether the Toyota Camry washer pump is bad?
A pump is a strong replacement candidate when the reservoir contains thawed fluid, the inlet is clear, the correct power and ground reach the connector during a washer command, and the pump remains silent or produces little or no outlet flow. Do not condemn the pump solely because it makes no sound.
What should I do if the washer fuse blows again?
Stop operating the system and do not install a larger fuse. A repeat failure may indicate a shorted wire, wet connector, seized pump, incorrect replacement component, or another circuit fault. Use the model-specific wiring diagram or have the vehicle professionally diagnosed.
Conclusion
When a Toyota Camry’s washer fluid does not spray, diagnose the system instead of guessing at parts. Check the reservoir and temperature first, listen for the pump, inspect for leaks, and determine whether one nozzle or both are affected. A running pump usually points to a fluid-flow problem, while a silent pump requires fuse, power, ground, wiring, and control checks.
Use the owner’s manual and model-specific Toyota service information for fuse assignments, connector tests, and component access. Replace the washer pump only after confirming that it receives the correct electrical supply but cannot run or produce adequate flow. A properly repaired washer system restores the clear windshield visibility needed for safer driving.
Sources
- Toyota Manuals and Warranties — model-year owner manuals, operating information, fuse charts, and vehicle-specific guidance.
- Toyota Technical Information System — Toyota repair manuals, wiring diagrams, service bulletins, and diagnostic information for North American vehicles.
- 49 CFR 571.104: Windshield Wiping and Washing Systems — federal passenger-vehicle windshield washing system requirements.
- CDC/NIOSH: Methanol—Systemic Agent — methanol toxicity, exposure routes, flammability, and first-aid information.
- OSHA Occupational Chemical Database: Methanol — physical properties, exposure information, and flammability data.

