
Last updated: September 19, 2026. This guide was updated for the redesigned 2026 Toyota RAV4, current Toyota blackout-emblem part-number examples, Toyota’s emblem-overlay installation procedure, and current adhesive-preparation guidance.
To install Toyota RAV4 blackout emblem overlays, first confirm the kit for your exact model year, trim, powertrain, and factory badge layout. Clean and dry the emblems, verify the installation temperature, dry-fit every piece, remove the adhesive liner without touching it, lower the overlay into position, and press firmly from the center toward the edges. Do not assume a 2019–2025 kit fits the redesigned 2026 RAV4, and never cover a radar-sensor or sensor-cover area unless Toyota specifically permits the accessory for that vehicle.
Quick Answer
Verify the overlay kit against your RAV4’s model year, trim, powertrain, VIN, and badge layout. Toyota’s general emblem-overlay instructions for various 2018-and-newer applications call for clean surfaces and an emblem-cap/surface temperature of 70–110°F (21–43°C), followed by a dry fit, careful liner removal, centered placement, and firm pressure from the center outward. The 2026 RAV4 begins a redesigned sixth generation, so earlier kits should not be assumed to fit it.
Key Takeaways
- Confirm the exact model year, trim, powertrain, VIN, and badge layout before ordering or installing an overlay.
- The redesigned 2026 RAV4 uses new accessory catalog entries; do not assume a 2019–2025 overlay fits.
- Toyota’s general emblem-overlay procedure specifies a 70–110°F installation-surface range for the applications covered by that instruction document.
- Dry-fit first, avoid touching the adhesive, align before full contact, and press from the center toward the edges.
- Avoid permanent glue and do not cover a radar sensor, sensor cover, front emblem, or surrounding area contrary to your year-specific owner’s manual.
At a Glance
| Installation Style | Overlay caps fit over compatible factory emblems; the original badges normally remain installed |
| Difficulty | DIY-friendly when the kit is correct; alignment and surface preparation are the main risks |
| Tools Needed | Clean lint-free or microfiber cloths, approved cleaner, painter’s tape if useful for alignment, and a safe heat source only when the instructions call for warming |
| Toyota Installation Temperature | 70–110°F (21–43°C) in Toyota’s general emblem-overlay instructions for the applications covered by that document; kit-specific instructions take priority |
| Current Price Example | Toyota’s 2026 U.S. accessory portfolio lists Blackout Emblem Overlays at an $89 MSRP, but part numbers, dealer prices, included pieces, and trim compatibility vary |
Disclosure: This page may contain affiliate links. If you buy through them, we may earn a commission at no extra cost to you.
How Do You Check RAV4 Blackout Emblem Fitment Before Installation?
Do not rely on the words “fits RAV4” or on a broad year range alone. Toyota changes badge shapes, trim names, powertrain labels, and accessory part numbers. The all-new 2026 RAV4 begins the sixth generation, so a kit sold only for an earlier RAV4 should not be assumed to fit the new body and badge layout.
Compare the seller’s piece list with every badge on your vehicle. For an OEM kit, use the VIN or have a Toyota parts department confirm the exact application. For 2016–2018 vehicles, verify the application independently instead of extrapolating a later-generation part number.
Verified Toyota Part-Number Examples
The examples below show why one RAV4 blackout-emblem part number cannot be treated as universal:
| Verified Toyota Listing or Application | Part Number | What It Shows |
|---|---|---|
| RAV4 Hybrid XSE blackout overlays | PT948-4219B-02 | Toyota identifies this as a trim-specific XSE Hybrid application; it is not a universal RAV4 number |
| 2026 Toyota accessory-portfolio blackout-emblem entry | PT948-42262-02 | The redesigned 2026 model has new accessory catalog entries |
| Current Toyota RAV4 HV XLE blackout-overlay listing | PT948-42263-02 | Even closely related RAV4 configurations can use different part numbers |
These are examples, not a complete fitment chart. Verify your exact vehicle before buying or removing an adhesive liner.
Warning: Check the owner’s manual for your exact model year before altering the front Toyota emblem or surrounding grille. Toyota manuals for multiple earlier RAV4 model years warn against attaching accessories or stickers to the radar sensor, front grille emblem, radar-sensor cover, or surrounding area. The 2026 RAV4 is redesigned, so do not assume its sensor layout is identical to an earlier model.
Why Use a Toyota RAV4 Blackout Emblem Overlay?

An overlay changes the visible finish of compatible factory badges without requiring you to debadge the tailgate. Genuine Toyota descriptions characterize blackout emblem overlays as molded pieces designed to fit over existing badging.
The main advantage is installation simplicity: the original badge position and spacing remain intact. The tradeoff is that molded overlays are highly shape-specific. Correct fitment matters more than whether the finish is gloss, matte, or satin.
If you are still choosing between OEM, aftermarket, overlay, or replacement-emblem options, use the dedicated RAV4 blackout emblem kit buying guide. This page focuses on installation and troubleshooting.
What’s Included in a RAV4 Blackout Emblem Kit?
The contents depend on the exact kit. Toyota’s application information shows that some configurations use multiple covers for model lettering, trim, AWD, Hybrid or Plug-in Hybrid identification, Toyota logos, or side emblems. Other kits contain fewer pieces.
Before exposing any adhesive, place every overlay beside the matching factory badge. Confirm the shape, orientation, position, and quantity. A missing trim badge or a cap that rocks during a dry fit is a reason to stop rather than force the installation.
Kit Contents Overview
A complete package should identify its compatible vehicle configuration and show which overlays are included. It may also include cleaning material or other installation supplies, but do not assume those items are present unless the package says so.
Toyota’s current parts catalog confirms PT948-4219B-02 as a genuine “Blackout Emblem Overlays – XSE Hybrid” part number. Toyota’s installation matrix also associates that number with a RAV4 Hybrid XSE application. Treat it as a configuration-specific example rather than the correct number for every RAV4.
Installation Components Explained
The molded cap creates the visible black finish. Pre-applied pressure-sensitive adhesive holds the cap over the compatible factory badge, while the removable liner protects the adhesive before installation.
Inspect the back of every piece before installation. Stop if the overlay is warped, damaged, contaminated, or missing adhesive. Do not add unidentified household glue to compensate for a defective part.
Genuine Toyota vs. Aftermarket Blackout Overlays
Genuine Toyota overlays provide Toyota-specific part identification and installation documentation. Aftermarket kits may offer different finishes or prices, but their plastic thickness, adhesive system, fitment information, warranty, and installation requirements vary.
For either type, prioritize exact fitment, documented installation instructions, and a clear return policy. Do not buy an overlay simply because the vehicle name matches.
How Should You Prepare a RAV4 for Blackout Emblem Installation?
Surface preparation determines whether the adhesive can make full contact. Work in a clean, dry area and remove dirt, wax, oil, moisture, and other residue from the factory emblem before fitting the cover.
For genuine Toyota emblem caps covered by Toyota’s general installation procedure, both the cap and the vehicle installation surface should be between 70°F and 110°F (21°C and 43°C) at the time of installation. If the instructions supplied with your exact kit specify a different range, follow the kit-specific requirement.
Gather Necessary Tools
For a normal molded overlay installation, useful supplies include:
- Clean lint-free or microfiber cloths
- The cleaner specified by the emblem-kit instructions
- Clean water when required by the cleaning procedure
- Painter’s tape for optional temporary alignment references
- A safe heat source only when the instructions permit warming a cold installation surface
Knives, screwdrivers, and metal pry tools are not required for installing a normal cap over an existing emblem. Keep sharp tools away from the paint and factory badge.
How Should You Clean the Factory Emblem?
Follow the cleaner instructions supplied with the kit. Toyota’s general emblem-overlay procedure directs the installer to clean the installation surfaces thoroughly, apply approved cleaner to the cloth rather than spraying it directly on the vehicle, and wipe the surface dry immediately with a new clean cloth.
For aftermarket applications whose instructions specifically permit IPA preparation, 3M’s current VHB surface-preparation guidance generally recommends a 50:50 mixture of isopropyl alcohol and water for many substrates while noting that some materials require different preparation. Do not substitute a strong solvent merely because it removes residue quickly.
What Temperature Should You Install RAV4 Emblem Overlays At?
Toyota’s general emblem-overlay installation document for various 2018-and-newer applications states that the emblem cap and vehicle installation surface should be between 70°F and 110°F (21–43°C) during installation. The same document says a heat source may be used to reach the minimum temperature when necessary.
That does not mean every aftermarket adhesive uses the same range. Follow the instructions that came with the exact product whenever they are more specific.
Pro Tip: Complete the dry fit before removing any liner. Toyota’s instructions also note that some emblem caps are front/rear or side-specific, so check any markings or pull-tab identifiers before committing the adhesive.
How Do You Install Toyota RAV4 Blackout Emblem Overlays?
- Verify the vehicle and kit. Match every overlay to the exact factory badge and confirm that the product is approved for the model year, trim, powertrain, and location.
- Inspect the pieces. Check for damage, missing adhesive, incorrect shapes, and any front/rear or side-specific markings.
- Clean the installation surface. Use the cleaner specified by the product instructions and a clean lint-free cloth. Remove dirt, wax, oil, moisture, and cleaner residue.
- Check temperature. For Toyota applications covered by the general OEM emblem-overlay procedure, the cap and vehicle surface should be 70–110°F (21–43°C).
- Dry-fit the overlay. Place it over the factory badge with the liner still installed. It should sit naturally without bending, rocking, or leaving an obviously incorrect gap.
- Remove the adhesive liner. Use the pull tabs when provided and avoid touching the adhesive.
- Position the cap. Toyota’s procedure directs installers to start at the top edge and lower the cap downward while keeping it centered over the original emblem.
- Confirm alignment before full pressure. Make sure coverage and edge spacing are correct, then press lightly enough to hold the position.
- Press from the center outward. Use a clean lint-free cloth and firm pressure from the center toward the edges to maximize adhesive contact.
- Inspect the finished piece. Look for a lifted edge, visible gap, rocking, trapped debris, incomplete badge coverage, or a piece that appears reversed.
Install one badge at a time. If an overlay does not sit naturally during the dry fit, do not use extra force or glue to make it conform.
How Do You Get Better Adhesion From an Emblem Overlay?
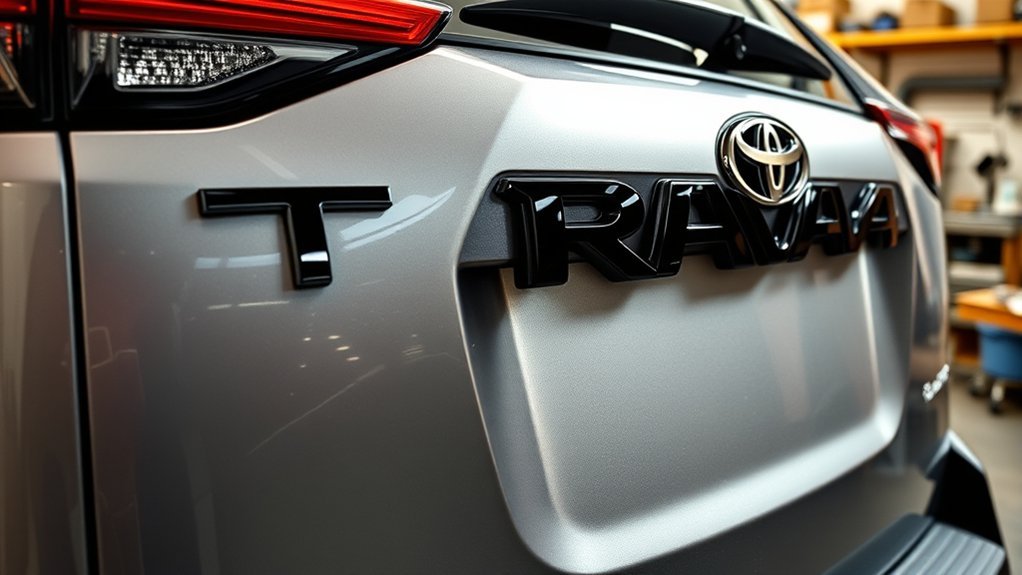
Cleanliness, temperature, full adhesive contact, and application pressure matter more than pulling on the part afterward to “test” it. Avoid touching the exposed adhesive because fingerprints and skin oils can contaminate the bonding surface.
Press thin letter ends, corners, and the perimeter as well as the broad center areas. Toyota’s general procedure specifically instructs the installer to press firmly from the center outward toward the edges.
If the product uses an adhesive system covered by 3M’s VHB guidance, 3M says bond strength at room temperature typically builds to about 50% after 20 minutes, 90% after 24 hours, and 100% after 72 hours. Do not apply those figures to an unidentified adhesive; the instructions for the actual kit control.
Note: Do not repeatedly pull on a newly installed overlay to check whether it is secure. Pressure-sensitive adhesive gains strength after application, and the appropriate waiting period depends on the actual adhesive system.
How Do You Troubleshoot RAV4 Emblem Overlay Problems?
If a cover rocks, sits high, leaves an unusual gap, or springs back at an edge, identify the cause before adding pressure. Common causes include incorrect fitment, front/rear pieces being mixed up, contamination, installation below the required temperature, a damaged adhesive liner, or a warped part.
Do not use household super glue as a routine repair. It can make future service or removal more difficult and can damage the factory badge or surrounding finish.
Check the Installation Temperature
For genuine Toyota emblem caps covered by Toyota’s general procedure, verify that the cap and installation surface are within the specified 70–110°F range. If the surface is below the minimum, use only the warming method permitted by the instructions.
Use Adhesion Promoter Only When Specified
If the kit supplies or explicitly requires a primer or adhesion promoter, apply it only to the surfaces and in the quantity directed by the manufacturer. Do not treat an unidentified chemical as a universal fix for lifting.
Do Not Reuse Contaminated Adhesive
If the adhesive has touched dirt, folded onto itself, or lost tack, follow the manufacturer’s replacement procedure. Do not stack new tape over failed tape unless the product maker specifically instructs you to do so; added thickness can prevent the molded cap from sitting flush.
Common Problems and Fixes
| Problem | Likely Cause | Best Response |
|---|---|---|
| Overlay rocks or will not seat | Wrong cap, reversed front/rear piece, debris, or warped part | Stop before full bonding and recheck fitment |
| One corner lifts | Contamination, inadequate pressure, incorrect temperature, or damaged adhesive | Follow the product maker’s approved repair or replacement procedure |
| Piece is crooked | Full adhesive contact occurred before alignment was confirmed | Do not force or twist the cap; follow the manufacturer’s removal/replacement procedure |
| Incomplete chrome coverage | Incorrect orientation or wrong front/rear/trim-specific overlay | Verify markings, part number, trim, and badge shape before continuing |
Can You Remove RAV4 Blackout Emblem Overlays?
Removal may be possible, but do not assume a genuine molded overlay is intended to be repeatedly installed and removed. Toyota describes its blackout emblem overlays as designed to fit permanently over the existing badging.
If you need to return to the original appearance, follow removal guidance from the manufacturer of the exact kit. Avoid metal pry tools, excessive heat, and strong solvents near painted surfaces. If the cap is firmly bonded and the removal procedure is unclear, a Toyota dealer, body shop, or experienced automotive-detailing professional is a safer option than forcing it off.
An overlay that has been removed after full adhesive contact should not automatically be reused. The adhesive may no longer provide the intended fit or bond.
How Should You Care for RAV4 Blackout Emblems?
Wash the overlays with mild automotive soap and clean water. Rinse away grit before touching the surface and use a soft microfiber cloth instead of an abrasive pad or stiff brush.
Inspect the edges during normal washes. A lifting corner, unexpected gap, movement, or incomplete coverage is a reason to inspect the adhesive and fitment rather than continuing to expose the piece to high-pressure water.
| Maintenance Task | When to Do It | Method |
|---|---|---|
| Gentle cleaning | During regular vehicle washes | Mild automotive soap, water, and microfiber |
| Edge inspection | During washing and before long trips | Look for gaps, movement, lifting, or incomplete coverage |
| Finish protection | Only when approved by the product maker | Use only a compatible product specified as safe for the overlay finish |
Do not aim a high-pressure spray directly under a lifting edge. Repair or remove a loose piece according to the manufacturer’s instructions before it can detach further.
What Are the Alternatives to Blackout Emblem Overlays?

Molded caps are not the only way to change the appearance of RAV4 badging. Other methods include replacement emblems, vehicle-specific vinyl, removable automotive coatings, or selective debadging.
Each alternative has different removal, alignment, durability, and sensor considerations. In particular, do not place vinyl, paint, a molded cover, or another accessory over a radar-sensor or sensor-cover area unless Toyota’s instructions for your exact model year permit it.
For a more detailed comparison of OEM, aftermarket, and other kit choices, see the RAV4 blackout emblem kit buying guide.
What Can Owner Reviews Tell You About RAV4 Emblem Overlays?
Owner reports are most useful when they identify the exact model year, trim, powertrain, part number, installation date, and how the vehicle was washed afterward. Photos taken months after installation can reveal edge lift, fading, incomplete coverage, or a cap that never sat flush.
Owner anecdotes should not override Toyota’s fitment instructions, part catalog, installation procedure, or safety warnings. Statements such as “it worked on my RAV4” are not enough when the model year or trim is different.
Where Should You Buy a RAV4 Blackout Emblem Kit?
Use Toyota’s parts/accessory channels for genuine kits or a retailer that clearly identifies the manufacturer, part number, model year, trim, powertrain, included pieces, attachment method, and return policy. Toyota’s current U.S. RAV4 accessory information lists Blackout Emblem Overlays, but the exact accessory shown and pricing can vary with vehicle configuration and catalog updates.
Toyota’s 2026 U.S. accessory portfolio lists a Blackout Emblem Overlays entry at $89 MSRP with part number PT948-42262-02. That is a current reference point, not a promise that every RAV4 trim uses that part or that every dealer will charge the same amount.
Before paying, confirm:
- The exact model year and trim
- Hybrid or Plug-in Hybrid configuration where applicable
- The VIN when the seller or dealer provides VIN-based fitment
- The manufacturer part number
- The exact number and names of included overlays
- The finish and attachment method
- The warranty and return policy
For product-selection detail rather than installation steps, use the RAV4 blackout emblem kit buying guide.
Related Guides
Frequently Asked Questions
Will a 2019–2025 RAV4 blackout emblem kit fit a 2026 RAV4?
Do not assume it will. Toyota identifies the 2026 RAV4 as an all-new sixth-generation model, and its 2026 accessory catalog uses new blackout-emblem entries. Buy an earlier kit for a 2026 vehicle only when Toyota or the product manufacturer explicitly confirms that exact application.
Will the blackout emblems fade over time?
They can. UV exposure, heat, road chemicals, washing methods, material quality, and finish quality all affect appearance. Use mild automotive cleaners and follow the care instructions and warranty supplied with the exact product.
Are RAV4 blackout emblem overlays weather-resistant?
A vehicle-specific exterior overlay should be made for normal outdoor exposure, but durability varies by product, adhesive, installation quality, and care. Confirm the manufacturer’s specifications and warranty instead of assuming all overlays have the same weather resistance.
Can RAV4 blackout emblem overlays be removed later?
Removal may be possible, but Toyota describes genuine blackout overlays as designed to fit permanently over existing badging. Follow the removal instructions for the exact product and avoid metal pry tools, excessive heat, or strong solvents near painted surfaces.
What tools are needed for installation?
A normal molded-overlay installation generally requires clean lint-free or microfiber cloths, the cleaner specified by the kit, and optional painter’s tape for alignment references. Use a heat source only when the installation instructions permit it. Sharp tools are not needed for applying a cap over an existing emblem.
Do blackout emblems void the vehicle warranty?
An aftermarket accessory does not automatically cancel the entire vehicle warranty. The Federal Trade Commission explains that coverage may be denied for damage caused by a defective aftermarket part or improper installation, but the manufacturer or dealer must show that the aftermarket part caused the damage.
How long should I wait before washing the RAV4?
Follow the waiting period specified for the exact kit and adhesive. As a general reference only, 3M says many VHB systems build to about 90% of ultimate bond strength after 24 hours at room temperature and about 100% after 72 hours. Do not apply those numbers to an unidentified adhesive system.
Can I install a blackout cover over the front Toyota emblem?
Only when the accessory is approved for the exact model year and location. Toyota manuals for multiple earlier RAV4 model years warn against attaching accessories or stickers to the radar sensor, front grille emblem, radar-sensor cover, or surrounding area. Check the Toyota owner’s manual for your vehicle before changing the front emblem area.
Conclusion
A Toyota RAV4 blackout emblem overlay is straightforward to install only after fitment is confirmed. Verify the exact vehicle and part, inspect and dry-fit every cap, clean the surface correctly, check the required installation temperature, remove the liner without touching the adhesive, align the overlay from the top edge, and press firmly from the center outward.
The biggest mistake is treating every RAV4 as interchangeable. The redesigned 2026 model has new accessory catalog entries, while earlier trim-specific kits use different part numbers. If a cover does not fit naturally, stop and verify it instead of using extra heat, force, or permanent glue.
Sources
- Toyota: Exterior Emblem Installation Instructions — provides Toyota’s cleaning, 70–110°F temperature, fitment, liner-removal, positioning, and center-outward pressure procedure and identifies trim-specific RAV4 overlay part numbers.
- Toyota Genuine Parts: PT948-4219B-02 — confirms PT948-4219B-02 as a genuine XSE Hybrid blackout-emblem overlay part number.
- Toyota 2026 Accessory Portfolio — lists a 2026 RAV4 Blackout Emblem Overlays accessory entry, part number PT948-42262-02, with an $89 MSRP at publication.
- Toyota Genuine Parts: PT948-42263-02 — confirms another current RAV4 blackout-overlay part number for the RAV4 HV XLE configuration.
- 3M: Surface Preparation for VHB Tape Applications — supports clean, dry surfaces, firm application pressure, general 50:50 IPA/water preparation guidance, and typical VHB bond-strength development over time.
- Federal Trade Commission: Auto Warranties and Auto Service Contracts — explains how aftermarket parts relate to warranty coverage.
- Toyota Manuals and Warranties — provides model-specific owner-manual and warranty information for checking driver-assistance sensor precautions.
